Entwodiksyon
Thank you for choosing the suptek Single Monitor Wall Mount. This manual provides detailed instructions for the safe and efficient installation, operation, and maintenance of your new monitor arm. Please read this manual thoroughly before installation and keep it for future reference.
This wall mount is designed to securely hold a single monitor, freeing up desk space and allowing for ergonomic adjustments to enhance your viewing comfort and productivity.
Enfòmasyon sou Sekirite
AVÈTISMAN: Improper installation may result in property damage or personal injury. If you do not understand these instructions, or have doubts about the safety of the installation, please contact a qualified installer.
- Pa depase kapasite chaj maksimòm lan ki se 19.8 liv (9 kg).
- Ensure the mounting surface (wall) can safely support the combined weight of the mount and the monitor.
- Always use a stud finder to locate wood studs for secure mounting. For concrete or brick walls, use appropriate anchors (included). Do not mount into drywall alone.
- Kenbe timoun yo lwen pati k ap deplase yo.
- Tcheke tout koneksyon yo regilyèman pou asire yo rete an sekirite.
- Pwodwi sa a fèt pou itilize andedan kay la sèlman.
Kontni pake
Please verify that all components are present and undamaged before installation. If any parts are missing or defective, contact customer support.
- Asanble Bra Monitè a
- Plak mi
- VESA Plak
- Hardware Kit (screws, washers, spacers, wall anchors)
- Kle Egzagòn
- Manyèl Enstriksyon
Espesifikasyon
| Karakteristik | Detay |
|---|---|
| Mak | suptek |
| Modèl | B0FHVH6PLY |
| Gwosè ekran konpatib | 17 a 32 pous |
| Kapasite pwa | 4.4 - 19.8 liv (2 - 9 kg) |
| VESA konpatibilite | 75x75mm, 100x100mm |
| Panche Angle | ± 80° |
| Swivel Angle | ± 90° |
| Wotasyon | 360° |
| Maksimòm Ekstansyon | 20.47 pous (52 cm) |
| Ranje Ajisteman Wotè | 12.59 pous (32 cm) |
| Materyèl | Alloy Steel |
| Koulè | Blan |

Image: Compatibility details including VESA 75x75mm and 100x100mm, max load 19.8 lbs, monitor size 13-32 inches, and compatible wall types (Wood Stud, Concrete Wall, Brick Wall).
Enstalasyon ak Enstalasyon
Follow these steps carefully to install your monitor wall mount.
Step 1: Choose Mounting Location and Wall Type
Select a location on your wall that is structurally sound and can support the weight of the mount and your monitor. Use a stud finder to locate a wood stud for optimal security. For concrete or brick walls, ensure you use the appropriate wall anchors provided.

Image: Wall mount installation compatibility with Wood Stud (requires specific method), Concrete Wall, and Brick Wall.
Etap 2: Konekte plak VESA a sou monitè a
- Mete monitè a ak anpil atansyon fas anba sou yon sifas mou epi pwòp pou evite li reyur.
- Identify the VESA mounting holes on the back of your monitor (75x75mm or 100x100mm).
- Select the correct screws (M4 or M5) and washers from the hardware kit that fit your monitor's VESA holes. If the screws are too long, use the provided spacers.
- Attach the VESA plate to the back of your monitor using the selected screws and washers. Do not overtighten.
Etap 3: Monte plak miray la sou miray la
- Hold the wall plate against the wall at your desired mounting height. Use a level to ensure it is straight.
- Make kote pou perçage yo nan twou yo sou plak miray la.
- Pou poto an bwa: Drill pilot holes (recommended size in manual) into the center of the stud. Secure the wall plate using the lag bolts provided.
- Pou miray beton/brik: Drill pilot holes (recommended size in manual) and insert the plastic wall anchors. Then secure the wall plate using the lag bolts.
- Asire w plak miray la byen tache ak miray la.
Step 4: Attach Monitor Arm to Wall Plate
Slide the monitor arm assembly onto the wall plate. Ensure it clicks securely into place. There may be a locking screw or mechanism to further secure it; refer to the detailed diagram in the included printed manual.
Step 5: Attach Monitor to Arm
Carefully slide the monitor (with the attached VESA plate) onto the VESA head of the monitor arm. Secure it with the locking screw or mechanism, typically located on the top or side of the VESA head.
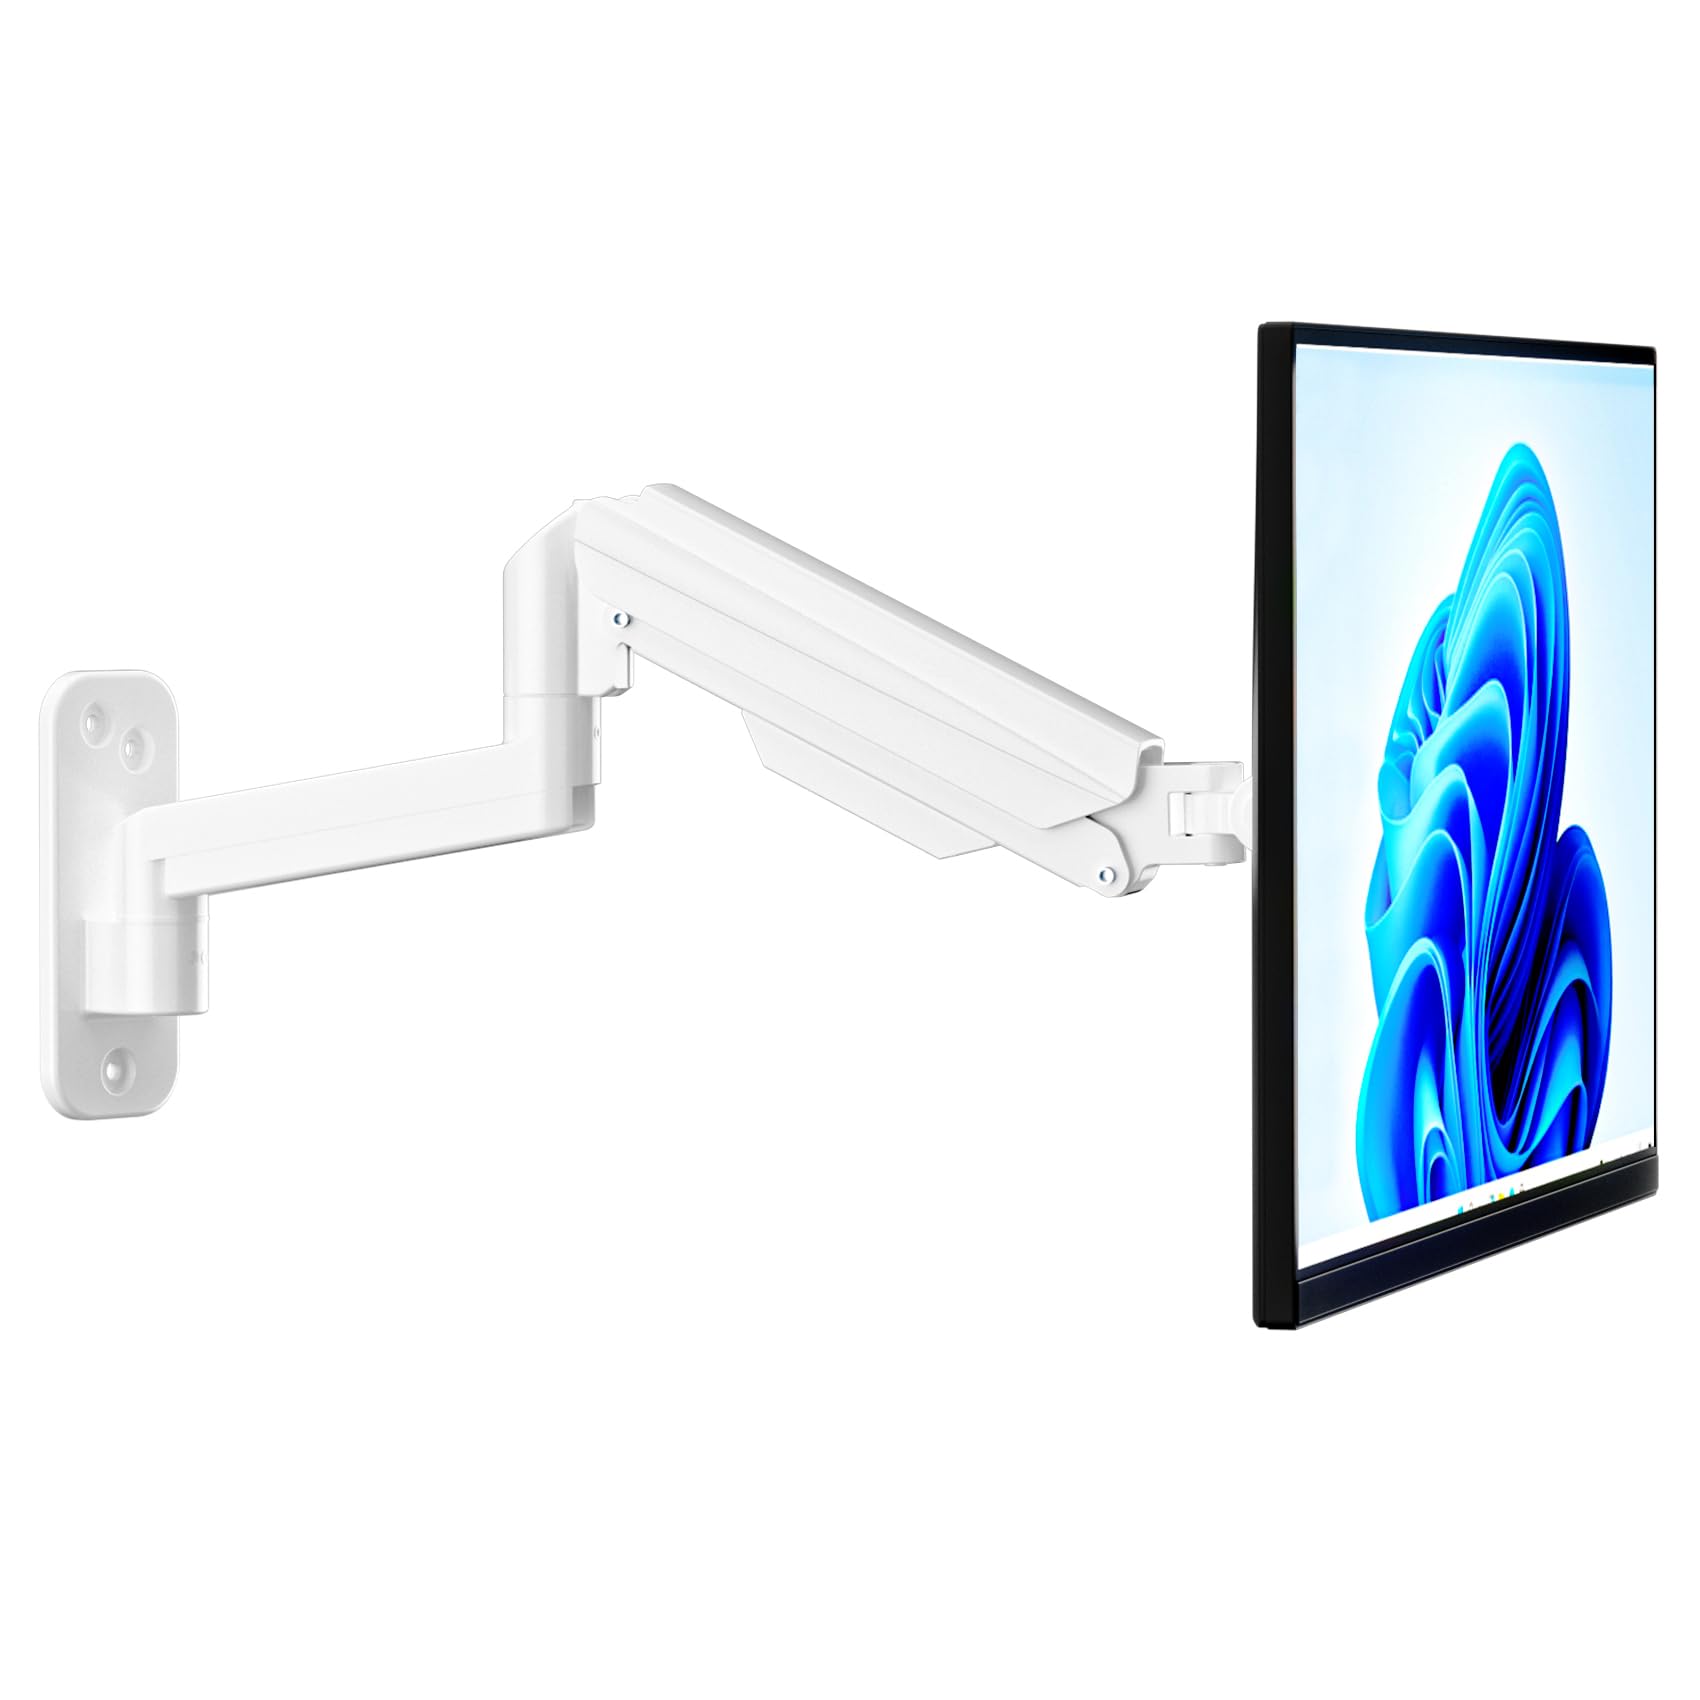
Image: Fully installed suptek Single Monitor Wall Mount with a monitor attached.
Enstriksyon Operasyon
Ajiste gaz Spring tansyon
The gas spring mechanism allows for smooth height adjustment. The tension needs to be adjusted to match your monitor's weight for optimal performance. Use the provided hex key to adjust the tension screw located on the arm.
- Turn Clockwise (+): For lighter monitors, to increase tension and prevent the monitor from dropping.
- Turn Counter-Clockwise (-): For heavier monitors, to decrease tension and allow the monitor to move down easily.
Adjust until the monitor stays at any desired height when released.

Image: Gas spring tension adjustment points and directions for lighter/heavier monitors.
Full Motion Adjustments
The monitor arm offers a wide range of motion for ergonomic positioning:
- Enklinezon: Adjust the monitor screen ±80° up or down to reduce glare and optimize viewang ing.
- Swivel: Rotate the monitor ±90° left or right to share your screen or change viewing direksyon.
- Wotasyon: Vire monitè a 360° soti nan oryantasyon peyizaj pou rive nan oryantasyon pòtrè.
- Ekstansyon/Retrè: The arm extends up to 20.47 inches (52 cm) and retracts to save space.
- Ajisteman wotè: The gas spring allows for smooth vertical movement within a 12.59-inch (32 cm) range.
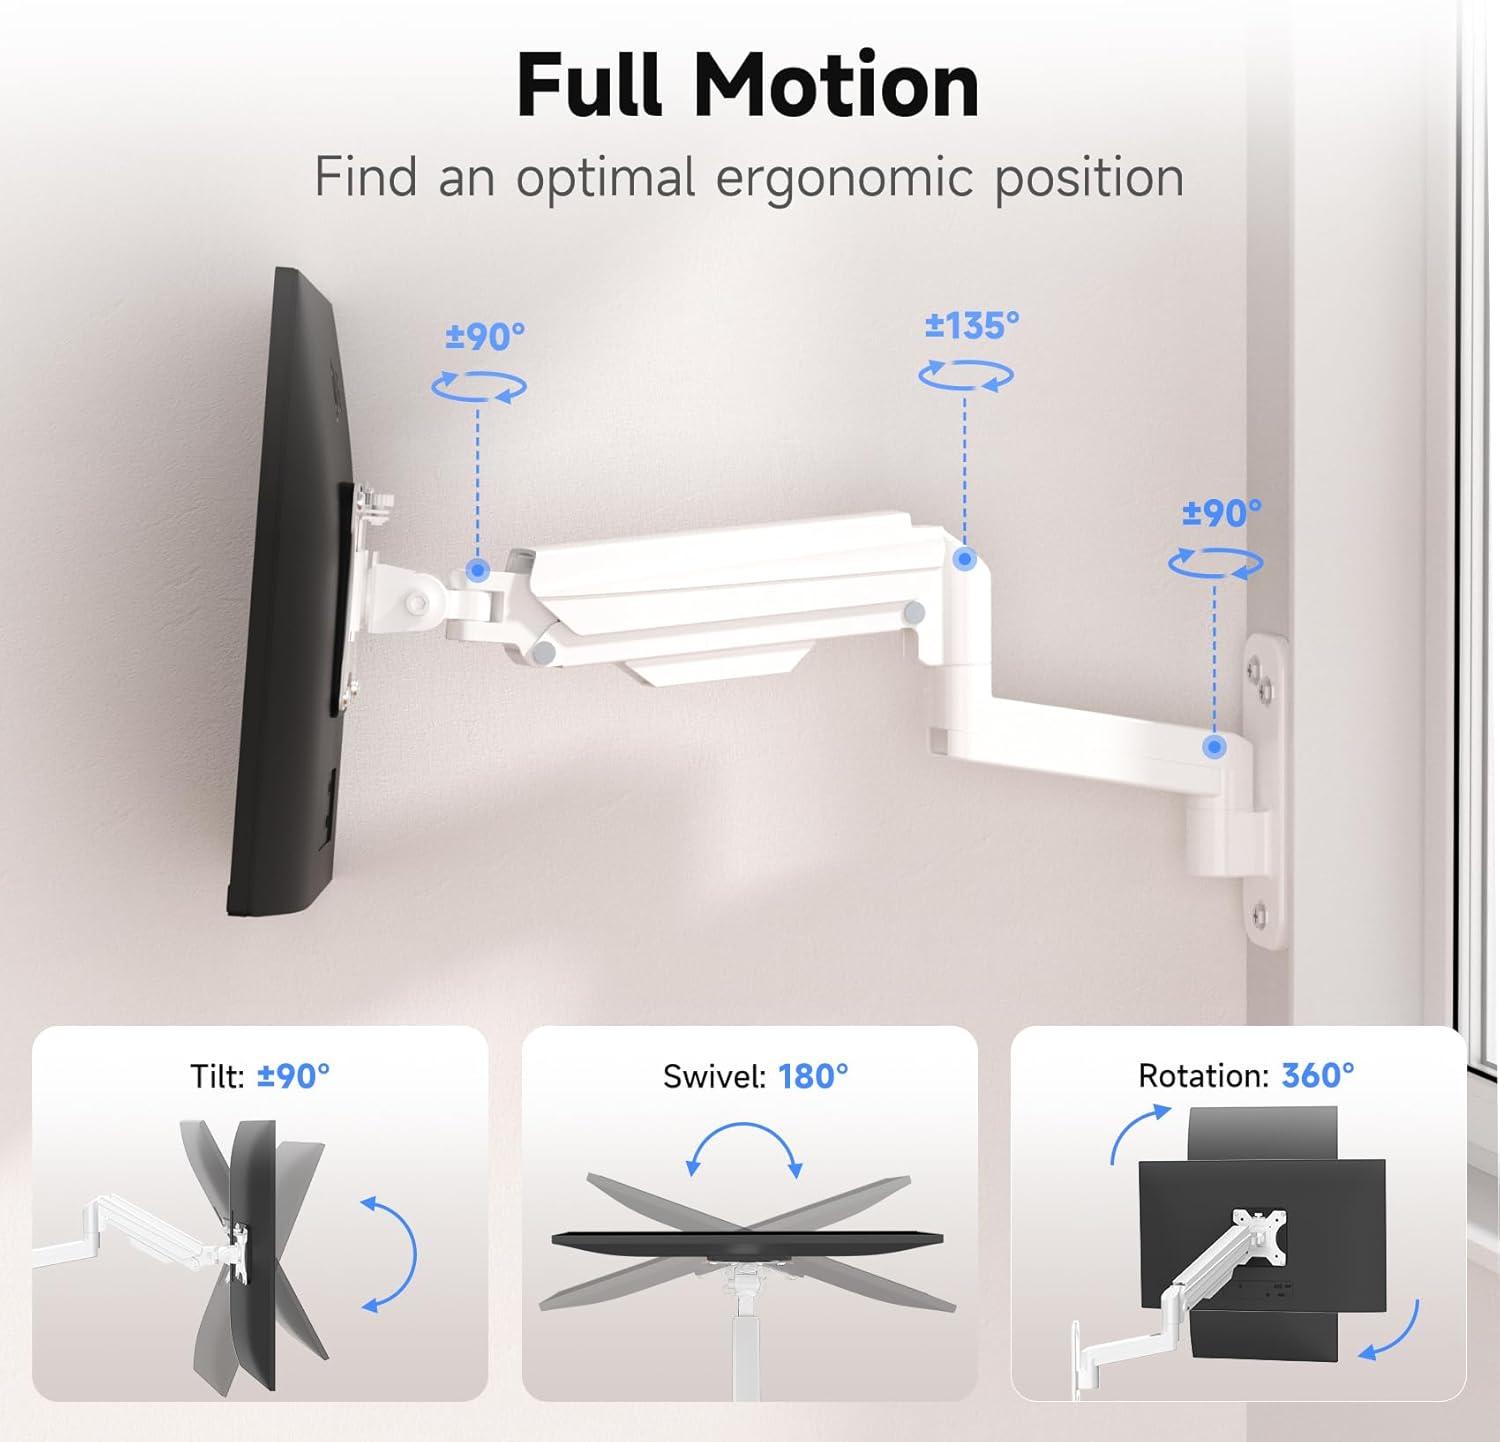
Image: Full motion capabilities including tilt, swivel, and 360° rotation.
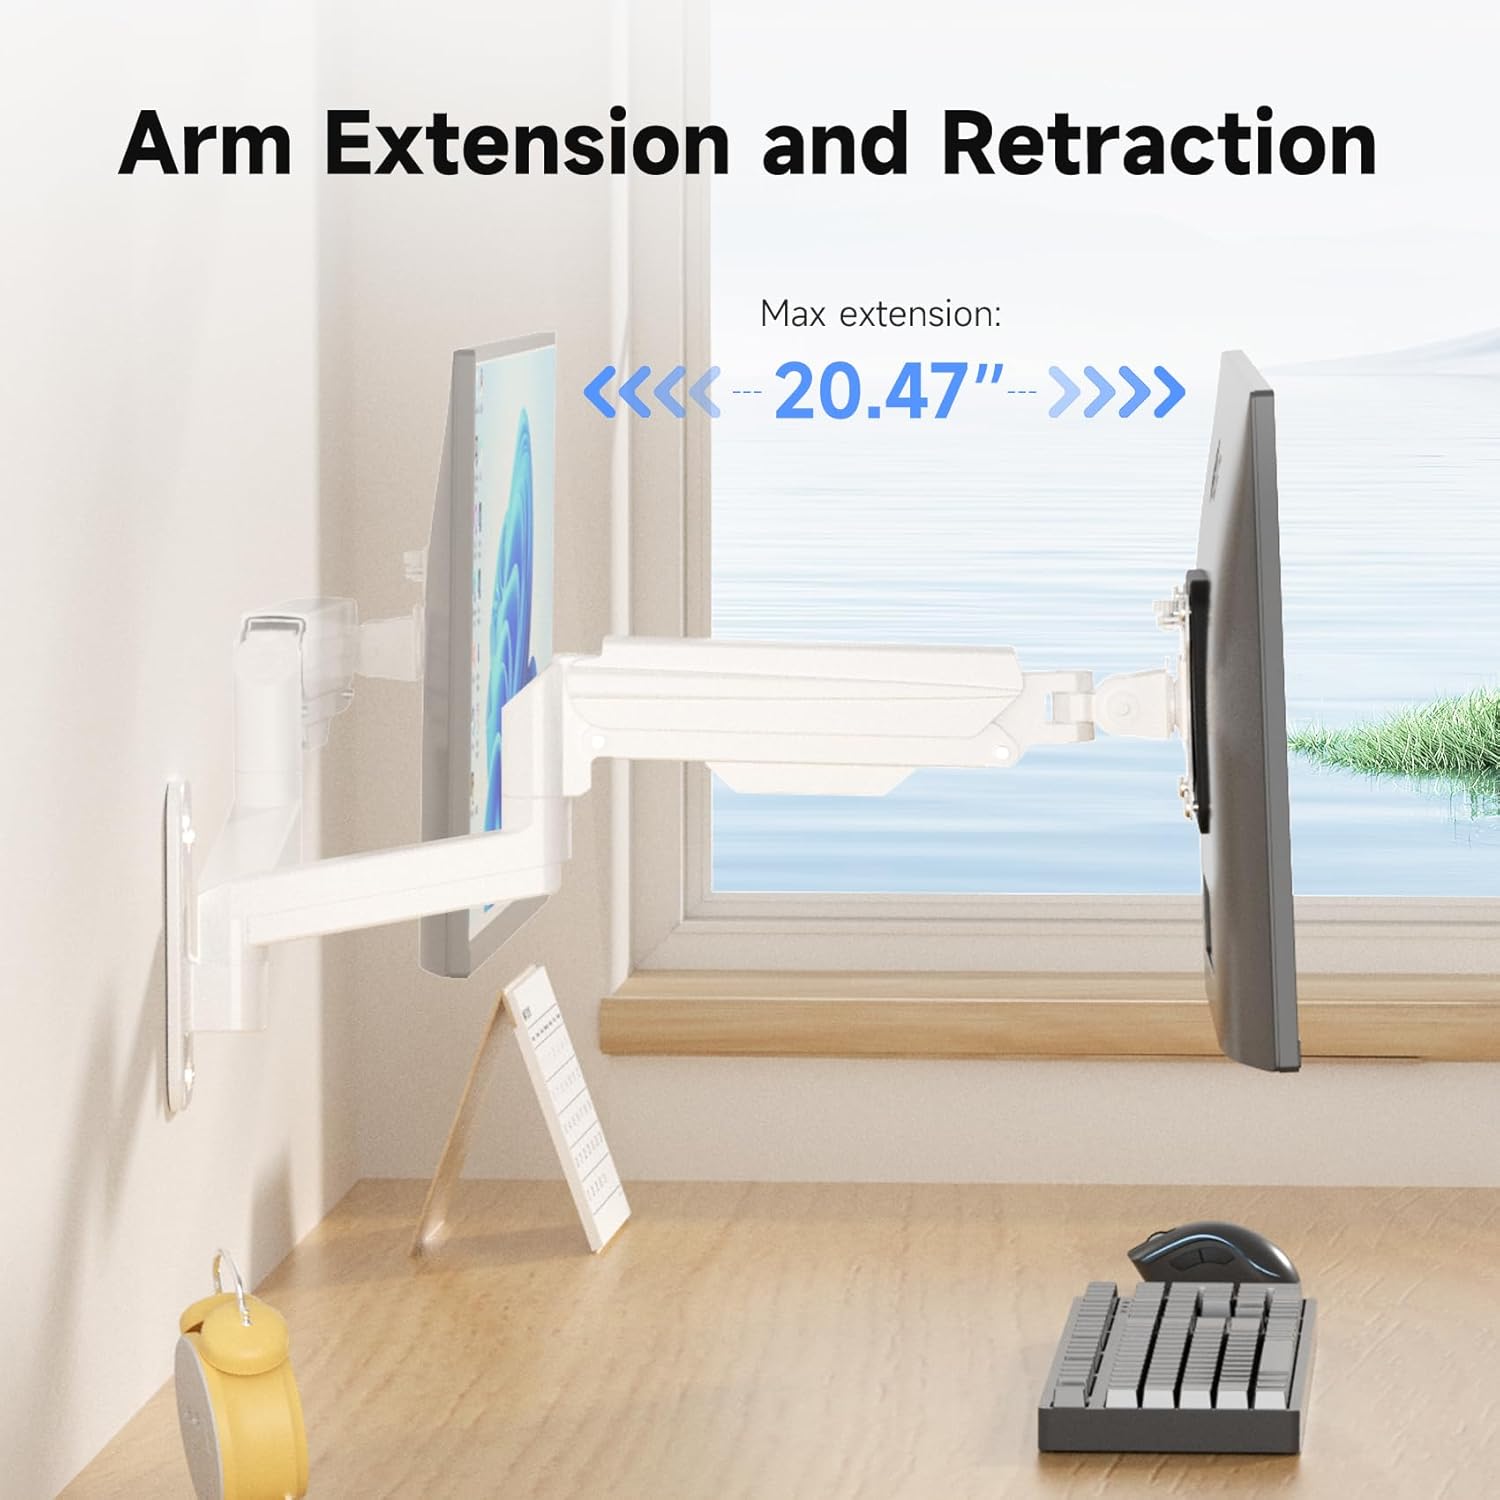
Image: Arm extension and retraction, showing a maximum extension of 20.47 inches.

Image: Height adjustment range of 12.59 inches for eye-level comfort.
Jesyon kab
The monitor arm features integrated cable management clips or channels to keep your cables organized and out of sight. Route your monitor's power and video cables through these channels for a clean and tidy workspace.
Antretyen
- Tcheke tout vis ak koneksyon yo detanzantan pou asire yo sere epi byen fèm.
- Netwaye montaj la ak yon twal mou.amp twal. Evite pwodui netwayaj abrazif oswa solvan.
- Do not attempt to disassemble the gas spring mechanism.
Depanaj
| Pwoblèm | Kòz posib | Solisyon |
|---|---|---|
| Monitor sags or drops | Tansyon resò gaz la twò ba pou pwa monitè a. | Ogmante tansyon resò gaz la lè w vire vis ajisteman an nan sans zegwi mont lan. |
| Monitor is difficult to push down or stays too high | Tansyon resò gaz la twò wo pou pwa monitè a. | Diminye tansyon resort gaz la lè w vire vis ajisteman an nan sans kontrè ak zegwi mont lan. |
| Mòn nan santi l enstab | Wall plate not securely fastened; screws loose. | Re-check all mounting screws on the wall plate and tighten them. Ensure proper wall type and anchors were used. |
| Monitor does not fit VESA plate | Modèl VESA oswa gwosè vis ki pa kòrèk. | Verify your monitor's VESA pattern (75x75mm or 100x100mm). Ensure you are using the correct M4 or M5 screws and spacers. |
Garanti ak sipò
For warranty information or technical support, please refer to the warranty card included with your product or visit the official suptek website. If you have any questions or require assistance, do not hesitate to contact suptek customer service.
Enfòmasyon pou kontakte: Please refer to the packaging or suptek's official websit la pou jwenn enfòmasyon kontak ki pi resan yo.


