Entwodiksyon
This manual provides comprehensive instructions for the setup, operation, and maintenance of your Comfort Direct Bradbury Ceiling Fan Remote Control (Model CDTR214D). Please read this manual thoroughly before use to ensure proper functionality and safety. This remote is designed for use with specific Harbor Breeze Bradbury Ceiling Fan models, including BRD48MBK6LR, BRD48BNK6LR, BRD48OSB6LR, BRD48MWW6LR, BRD60MBK6LR, BRD60BNK6LRS, and BRD60OSB6LR.
Enfòmasyon sou Sekirite
Always ensure the power to the ceiling fan is turned off at the circuit breaker before performing any installation or maintenance. Do not expose the remote control to water or excessive moisture. Keep batteries out of reach of children. Dispose of used batteries responsibly.
Kontni pake
- 1 x Comfort Direct Bradbury Ceiling Fan Remote Control
- 1 x Sipò pou miray
- 2 x aliye vis

Image: The remote control, its wall mount holder, and two mounting screws, illustrating the complete package contents.
Espesifikasyon
| Nimewo Modèl | CDTR214D |
| Dimansyon pwodwi | 2 x 1 x 4 pous |
| Pwa atik | 6 ons |
| Kondisyon pou batri | 1 x 23A 12V battery (not included) |
| Karakteristik espesyal | Radiofrequency (RF) control |
| Aparèy konpatib | Harbor Breeze Bradbury Ceiling Fans (BRD48MBK6LR, BRD48BNK6LR, BRD48OSB6LR, BRD48MWW6LR, BRD60MBK6LR, BRD60BNK6LRS, BRD60OSB6LR) |
Enstalasyon
1. Enstalasyon batri
- Jwenn lòj batri a sou do a nan kontwòl remote la.
- Slide the battery cover downwards to open.
- Insert one 23A 12V battery, ensuring the polarity (+/-) matches the diagram inside the compartment.
- Glise kouvèti batri a tounen nan plas li jiskaske li klike byen.

Imaj: Dèyè a view of the remote control with the battery cover removed, revealing the battery compartment for a 23A 12V battery.
2. Pairing the Remote Control with Your Ceiling Fan
Enpòtan: Only one remote can be programmed per fan. You cannot use two separate remotes to control the same fan.
- Turn Power Off To Fan: Ensure the power supply to your ceiling fan is completely off at the wall switch or circuit breaker.
- Turn Power Back On To Fan: Retabli kouran an nan vantilatè plafon an.
- Press and Hold "0" Key: Within 30 seconds of restoring power, press and hold the "0" button on your remote control for 5 seconds. The fan light should blink or the fan should briefly turn on to indicate successful pairing.

Image: Visual guide for the remote pairing process, showing the three key steps.
3. Enstalasyon miray mòn
The included wall mount holder allows for convenient storage of your remote control.
- Chwazi yon bon kote sou miray la, lwen limyè solèy dirèk oswa sous chalè.
- Use the two provided screws to securely attach the wall mount holder to the wall.
- Place the remote control into the holder for easy access.

Image: The remote control securely placed in its wall mount holder, demonstrating its convenient placement on a wall.
Enstriksyon Operasyon
Once paired, your remote control provides full control over your compatible ceiling fan and its light.
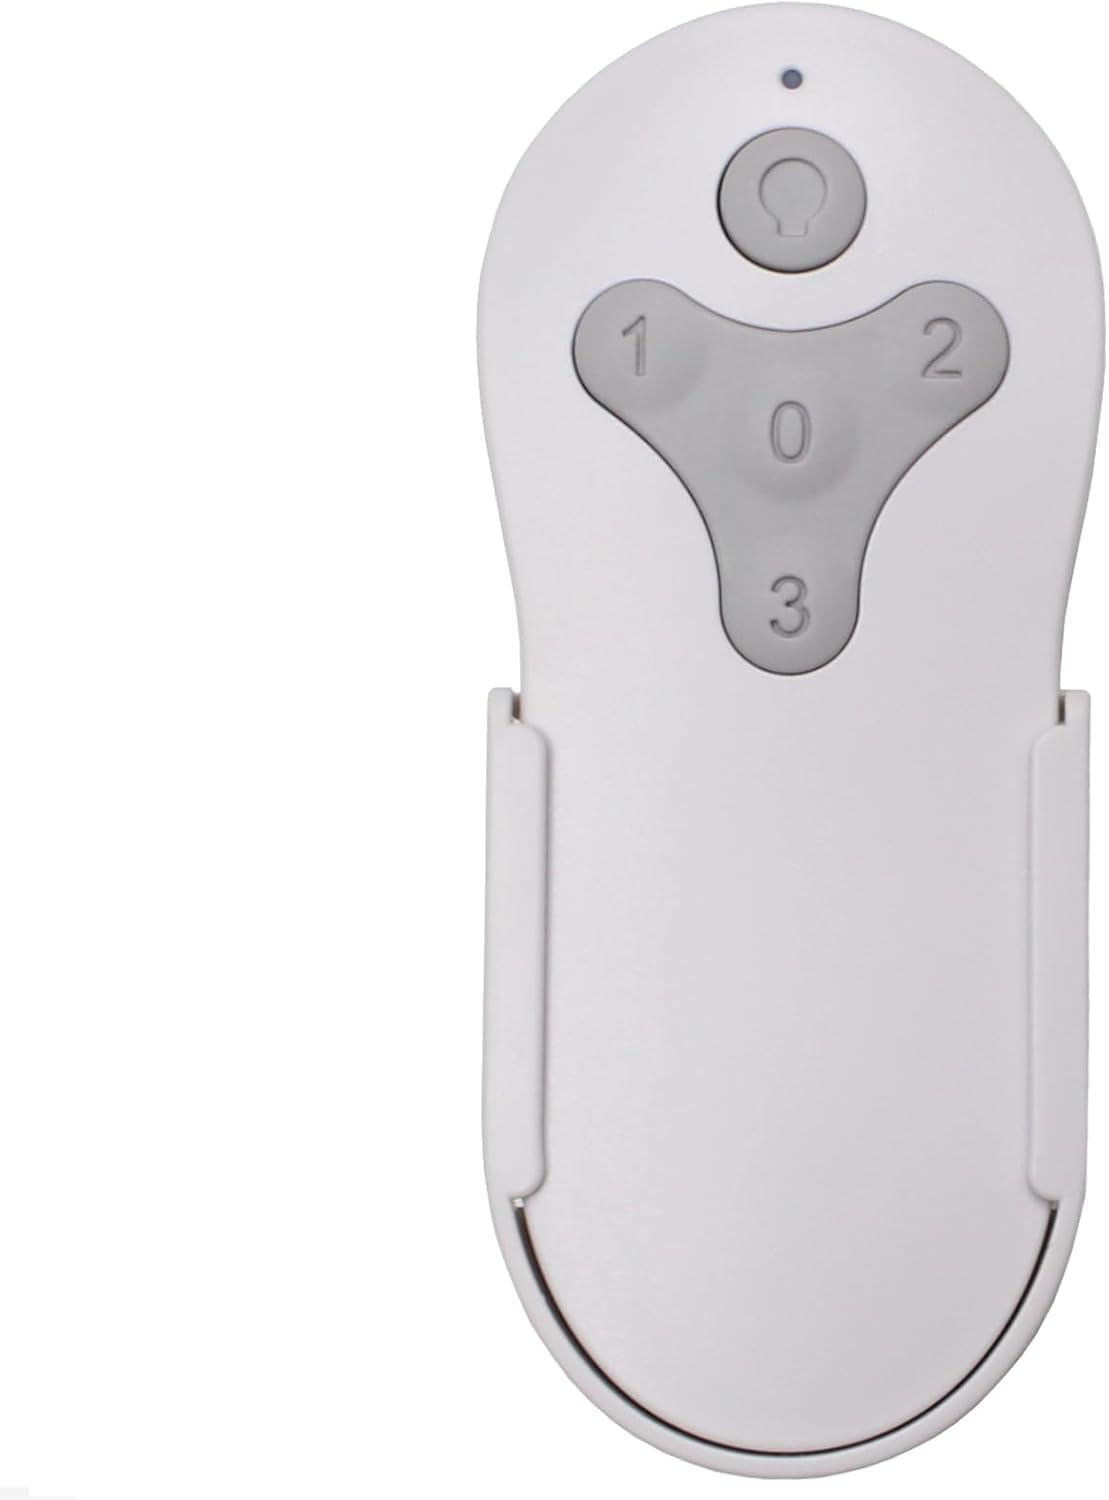
Imaj: Devan view of the remote control, showing the fan speed buttons (1, 2, 3, 0) and the light control button.
Kontwòl vitès fanatik
- Peze "1" pou vitès fanatik ki ba.
- Peze "2" pou vitès fanatik mwayen.
- Peze "3" pou gwo vitès fanatik.
- Peze "0" pou fèmen fanatik la.
Light Control with Dimming
- Peze a Limyè bouton (usually depicted as a light bulb icon) to turn the fan light On or Off.
- Pou diminye limyè a, peze epi kenbe bouton an Limyè bouton. Release the button when the desired brightness level is reached.
Antretyen
Ranplasman batri
When the remote control's range decreases or it becomes unresponsive, it is likely time to replace the battery. Follow the battery installation steps outlined in the "Setup" section to replace the 23A 12V battery. Ensure proper disposal of the old battery according to local regulations.
Netwayaj
Wipe the remote control with a soft, dry cloth. Do not use abrasive cleaners or solvents, as these may damage the surface or internal components.
Depanaj
- Remote pa reponn:
- Tcheke si batri a byen enstale epi li gen ase chaj. Ranplase batri a si sa nesesè.
- Ensure the remote is within range of the fan's receiver.
- Re-attempt the pairing process as described in the "Setup" section.
- Fan or light not responding after pairing:
- Verify that the power to the fan is on at the wall switch or circuit breaker.
- Confirm that the remote was successfully paired (fan light blink or brief fan operation). If not, repeat the pairing steps carefully.
- Ensure no other remote is attempting to control the same fan, as only one remote can be paired per fan.
Garanti
This Comfort Direct Bradbury Ceiling Fan Remote Control comes with a 1 Ane Manifakti Garanti from the date of purchase. This warranty covers defects in materials and workmanship under normal use. Please retain your proof of purchase for warranty claims. For warranty service, please contact Comfort Direct customer support.
Sipò
For further assistance, technical support, or inquiries regarding your Comfort Direct Bradbury Ceiling Fan Remote Control, please visit the Comfort Direct website or contact their customer service department. Contact information can typically be found on the product packaging or the official Comfort Direct websit.


