1. Entwodiksyon
The Yottamaster 5-Bay Hard Drive Docking Station KB500 is a versatile device designed for efficient data management, offering both high-speed data transfer and offline cloning capabilities. It supports up to five 2.5-inch or 3.5-inch SATA SSD/HDD drives, with a total capacity of up to 90TB. This manual provides detailed instructions for setup, operation, maintenance, and troubleshooting to ensure optimal performance and longevity of your device.
- 5-Bay Offline Cloning: Simultaneously clone up to four hard drives from a single source without a PC connection.
- 90TB Large Capacity: Supports five 2.5" or 3.5" SATA I/II/III SSD/HDD drives, with a single disk capacity up to 18TB.
- 5Gbps High-Speed Transfer: Features USB 3.2 Gen 1 Type-C output and UASP acceleration protocol for fast data transfer.
- Konpatibilite: Compatible with Windows and Mac OS, offering tool-free installation, plug-and-play, and hot-swappable capability.
- Konsepsyon dirab: Constructed from high-quality plastic and aluminum alloy for protection and enhanced heat dissipation.
2. Pwodwi souview

The Yottamaster 5-Bay Hard Drive Docking Station facilitates efficient file backup and data transfer, safeguarding your valuable data.
Official product video demonstrating the features and usage of the Yottamaster 5-Bay Hard Drive Docking Station KB500, including drive installation and connectivity.
3. Enstalasyon ak Enstalasyon
3.1 Enstalasyon kondwi
The Yottamaster docking station features tool-free installation for both 2.5-inch and 3.5-inch SATA SSD/HDD drives. Ensure the device is powered off before inserting or removing drives.
- Gently open the drive bay flap.
- Align your 2.5-inch or 3.5-inch SATA drive with the connector inside the bay.
- Carefully push the drive down until it is securely seated. The flap will close around the drive.
- Repeat for additional drives as needed.

Image illustrating the tool-free installation process for 2.5-inch and 3.5-inch SATA SSD/HDD drives.
3.2 Konekte sou yon òdinatè
The docking station supports both USB-C and USB-A connections for broad compatibility.
- Connect the power adapter to the DC 12V port on the back of the docking station and plug it into a power outlet.
- Connect the included USB 3.2 Gen 1 Type-C cable to the docking station's Type-C port.
- Connect the other end of the USB cable to an available USB-C or USB-A port on your computer. For optimal performance, use a USB 3.0 or higher port.
- Flip the power switch on the back of the docking station to the 'ON' position. The power indicator LED will illuminate.
- Your computer should automatically detect the connected drives.

Diagram illustrating the universal compatibility of the docking station with various USB-C and USB-A devices and operating systems.
4. Operasyon Enstriksyon
4.1 Mòd Transfè Done
Once connected to your computer and powered on, the installed drives will appear as individual storage devices. You can drag and drop files, perform backups, or access data directly from any of the five bays. The USB 3.2 Gen 1 interface, combined with UASP, ensures transfer speeds of up to 5Gbps.

Image demonstrating high-speed 5Gbps data transfer from the docking station to a laptop.
4.2 Offline Cloning Mode
The offline cloning function allows you to duplicate a source drive to up to four target drives without needing a computer connection. Ensure the target drives have equal or greater capacity than the source drive.
- Asire w ke estasyon docking la etenn.
- Mete la Sous Drive into the designated 'Source' bay (usually the first bay).
- Mete la Target Drives into the 'Target' bays (up to four drives).
- Konekte adaptè kouran an epi limen estasyon ancrage a.
- Press and hold the 'CLONE' button for approximately 3-5 seconds until the cloning indicator lights begin to flash.
- Release the button, then press it again within 5 seconds to confirm and start the cloning process.
- The progress indicator LEDs (25%, 50%, 75%, 100%) will illuminate sequentially to show the cloning status.
- Once all indicator LEDs are solid, the cloning process is complete. Power off the device before removing drives.

Diagram showing the offline cloning process from a source drive to multiple target drives.

Step-by-step visual instructions for initiating the offline cloning function.
Video demonstrating the offline cloning process on a similar multi-bay hard drive duplicator.
Prezantasyon videyoasing the offline cloning and drive docking features of an M.2 NVMe and SATA SSD/HDD dock.
5. Antretyen
To ensure the longevity and optimal performance of your Yottamaster docking station, follow these maintenance guidelines:
- Netwayaj: Sèvi ak yon twal mou epi sèk pou netwaye deyò aparèy la. Evite pwodui netwayaj likid oswa materyèl abrazif.
- Depo: Sere aparèy la nan yon kote ki fre epi sèk, lwen limyè solèy dirèk ak tanperati ekstrèm.
- Manyen: Manyen aparèy la avèk prekosyon. Evite lage l oswa sibi gwo chòk.
- Dissipasyon chalè: Ensure proper ventilation around the device. The aluminum alloy design aids in heat dissipation, but do not block ventilation holes.
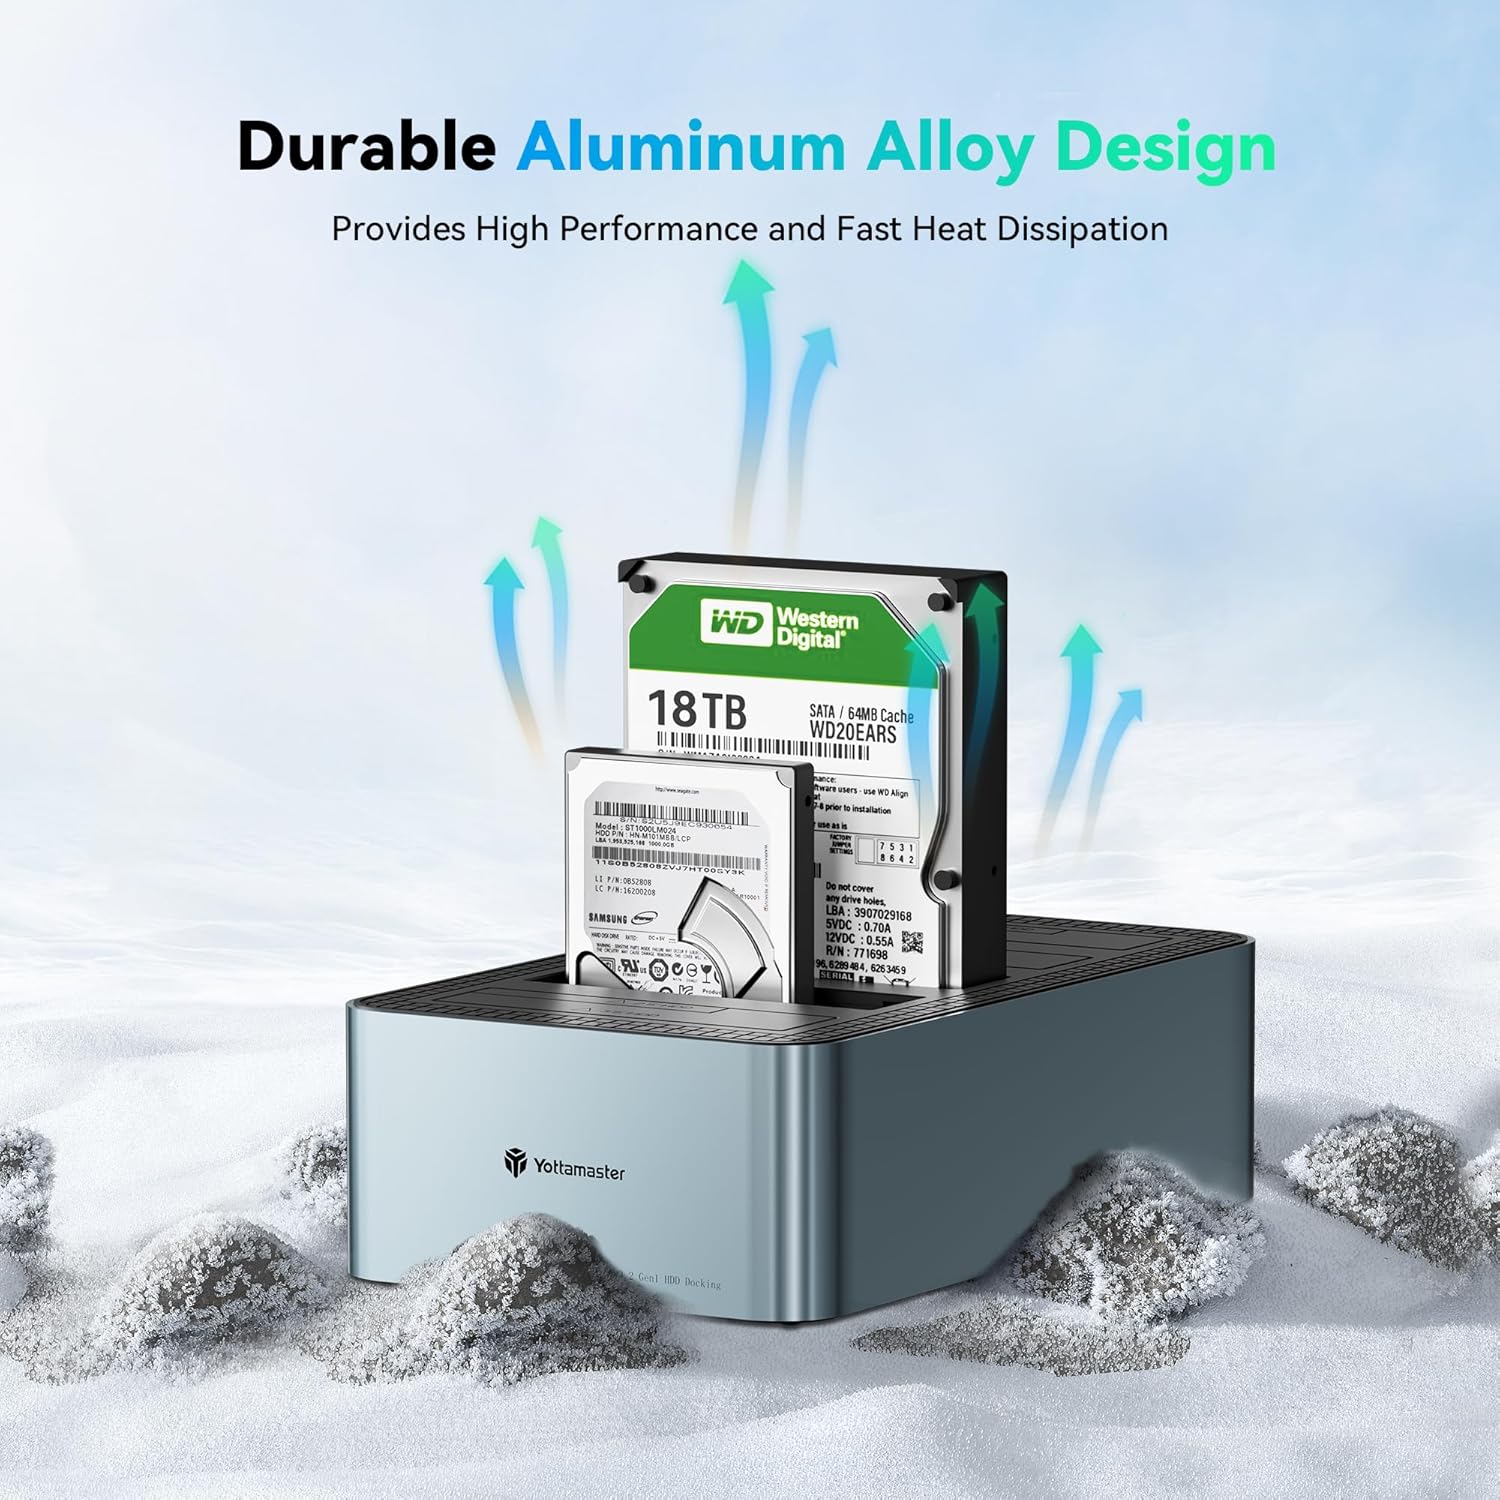
Image highlighting the durable aluminum alloy design, which contributes to effective heat dissipation.
NAN. Depanaj
If you encounter issues with your Yottamaster docking station, please refer to the following common troubleshooting steps:
- Kondwi pa detekte:
- Asire w adaptè kouran an byen konekte epi aparèy la limen.
- Verify that the USB cable is properly connected to both the docking station and your computer.
- Eseye yon pò USB diferan sou òdinatè w lan.
- Ensure the drive is correctly seated in its bay. Remove and reinsert the drive.
- Check your computer's Disk Management (Windows) or Disk Utility (Mac OS) to see if the drive is recognized but uninitialized or unformatted.
- Vitès transfè ki ba:
- Asire w ou konekte ak yon pò USB 3.0 (oswa pi wo) sou òdinatè w la. Pò USB 2.0 yo ap lakòz vitès koneksyon an pi dousman.
- Verify that your operating system supports UASP (USB Attached SCSI Protocol) for enhanced performance.
- The performance of the drives themselves can affect transfer speeds. Older HDDs will be slower than modern SSDs.
- Offline Cloning Failure:
- Ensure the target drive(s) capacity is equal to or larger than the source drive's capacity.
- Confirm that the source and target drives are correctly inserted into their respective bays.
- Follow the offline cloning steps precisely, especially the timing for pressing the 'CLONE' button.
7. Espesifikasyon
| Karakteristik | Detay |
|---|---|
| Mak | Yottamaster |
| Modèl | KB500 |
| Kondwi Bays | 5 |
| Kondwi konpatib | 2.5"/3.5" SATA I/II/III SSD/HDD |
| Kapasite Maksimòm yon Disk | 18TB |
| Kapasite Maksimòm Total | 90TB (5x18TB) |
| Entèfas | USB 3.2 Gen 1 Kalite-C |
| Transfè vitès | Jiska 5 Gbps |
| Sipò UASP | Wi |
| Offline Klonaj | 1-to-4 Cloning |
| Materyèl | Plastic and Aluminum Alloy |
| Koulè | Nwa |
| OS konpatib | Windows, Mac OS |
| Pwa atik | 2.92 liv |
| Dimansyon pake | 3.94 x 1.97 x 1.18 pous |
8. Garanti ak sipò
Yottamaster products are designed for reliability and performance. This product comes with a standard manufacturer's warranty against defects in materials and workmanship. For specific warranty terms and conditions, please refer to the documentation included with your product or visit the official Yottamaster websit.
For technical support, troubleshooting assistance, or any inquiries regarding your Yottamaster 5-Bay Hard Drive Docking Station KB500, please contact Yottamaster customer service through their official websit oswa revandè kote yo te achte pwodwi a.


