1. Entwodiksyon
This manual provides detailed instructions for the safe and effective use of your OLIGHT RN 400 LED Bike Headlight and SEEMEE 30 C Bicycle Taillight Set. Please read this manual thoroughly before operation and retain it for future reference.

Image 1.1: Comparison of RN 400 Headlight and SEEMEE 30 C Taillight, showing their respective maximum output, runtime, and throw distances.
2. Enfòmasyon sou Sekirite
- Pa gade dirèkteman nan reyon limyè a pou evite pwoblèm vizyon tanporè.
- Ensure lights are securely mounted before riding.
- Kenbe soti nan atenn timoun yo.
- Do not disassemble or modify the lights, as this may void the warranty and create safety hazards.
- Jete pil yo selon règleman lokal yo.
3. Pake kontni
Verifye ke tout atik yo prezan nan pakè ou a:
- RN 400 Headlight x 1
- Seemee 30 C Taillight x 1
- Handlebar mount x 1
- Silicon strap x 4
- USB-C kab x 1
- Manyèl itilizatè

Image 3.1: The complete package contents for the OLIGHT RN 400 Headlight and SEEMEE 30 C Taillight, including mounts, straps, and charging cable.
4. Enstalasyon
4.1 Unlocking the Lights (First Use)
Before initial use, both the RN 400 and SEEMEE 30 C are in a locked state to prevent accidental activation during shipping. To unlock:
- Peze epi kenbe bouton pouvwa a pou apeprè 3 segonn.
- The indicator light will flash red and then turn green, indicating the light is unlocked and ready for use. If the button flashes red and the light does not turn on, it is still locked.

Image 4.1: Visual guide for unlocking the bike light by holding the power button for 3 seconds until the indicator turns green.
4.2 RN 400 Headlight Installation
The RN 400 can be installed on a handlebar, helmet, or under a camera using the provided mount.
- Attach the handlebar mount to your bicycle handlebar using the appropriate silicon strap. Ensure it is tight and secure.
- Slide the RN 400 headlight onto the mount until it clicks into place.
- Adjust the angle of the headlight to ensure optimal illumination without blinding oncoming traffic. The anti-glare lens design directs light downwards.
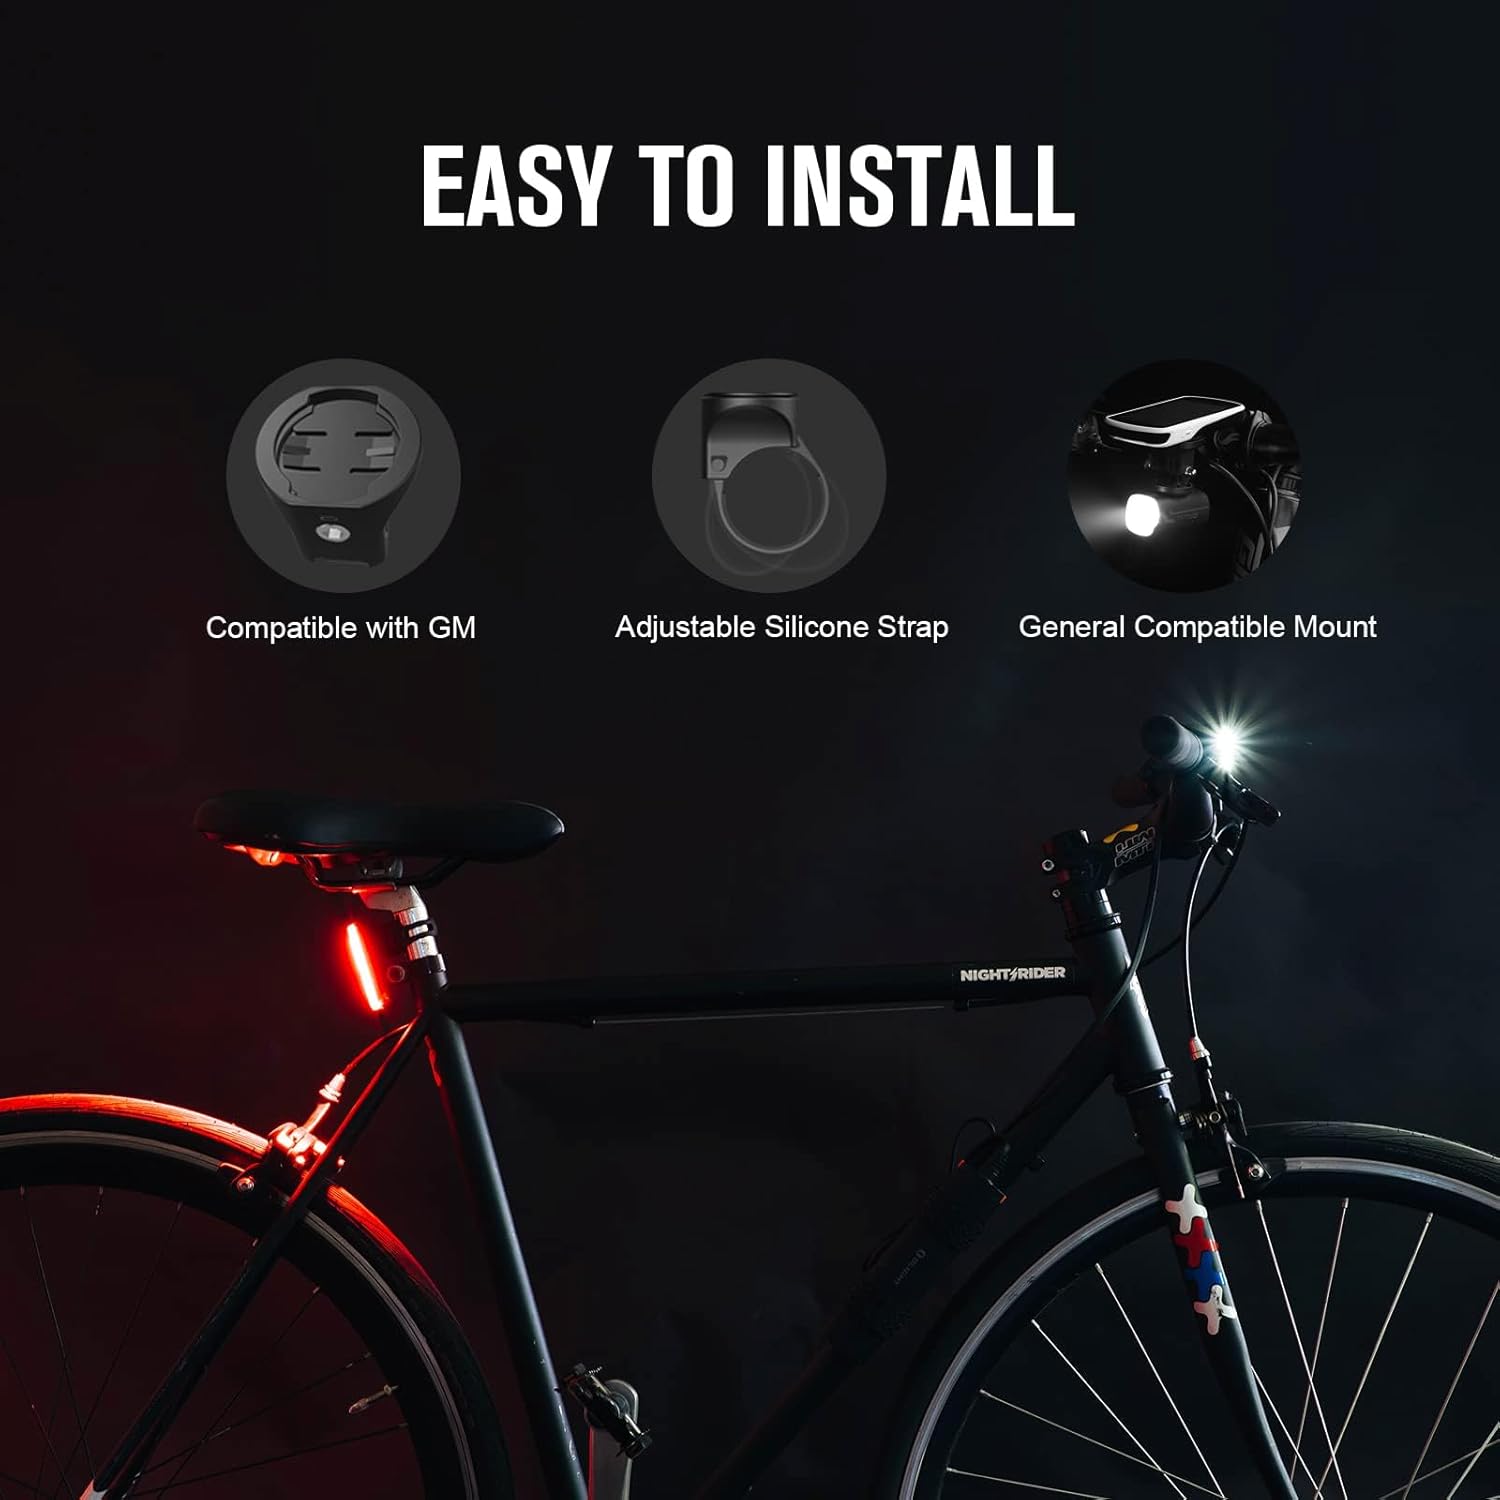
Image 4.2: Diagram showing the easy installation process for the RN 400 headlight on a handlebar, compatible with various mounts.
4.3 SEEMEE 30 C Taillight Installation
The SEEMEE 30 C taillight attaches to your seat post using a silicon strap.
- Select a suitable silicon strap for your seat post diameter.
- Hook one end of the strap to the taillight.
- Wrap the strap around the seat post and secure the other end to the taillight. Ensure the taillight is facing directly backward.

Image 4.3: Step-by-step guide illustrating how to install the SEEMEE 30 C taillight using the silicon strap on a bicycle seat post.
5. Operasyon Enstriksyon
5.1 Power On/Off
- Pou limen: Peze epi kenbe bouton pouvwa a pou 1 segonn.
- Pou etenn: Peze epi kenbe bouton pouvwa a pou 1 segonn.
5.2 Seleksyon mòd
- RN 400 Headlight: Short press the power button to cycle through different brightness modes (e.g., Low, Mid, High, Flash 1, Flash 2).
- SEEMEE 30 C Taillight: Short press the power button to cycle through various lighting modes (e.g., Constant, Flash, Smart modes).
5.3 Battery Indicator (RN 400)
When the RN 400 is in standby mode, a short press of the power button will display the battery status for three seconds:
- Vèt: 21%-100% battery remaining.
- Wouj: 11%-20% battery remaining.
- Wouj (Kliye): 1%-10% battery remaining.

Image 5.1: Visual representation of the RN 400's battery indicator colors (Green, Red, Flashing Red) corresponding to different charge levels.
5.4 Ambient Light Sensor (SEEMEE 30 C)
The SEEMEE 30 C features an ambient light sensor that automatically adjusts the light mode and output based on surrounding conditions, optimizing visibility and battery life. It also has a low battery mode to extend runtime.
6. Chaje
Both the RN 400 and SEEMEE 30 C are equipped with USB-C charging ports for convenient and fast recharging.
- Connect the provided USB-C cable to the charging port on the light.
- Konekte lòt bout kab la nan yon sous pouvwa USB (pa egzanp, òdinatè, adaptè miray la).
- RN 400: The indicator light will show a red 'breathing' light during charging and turn green when fully charged.
- SEEMEE 30 C: Endikatè lamp will be on during charging and turn off when fully charged.

Image 6.1: Illustration of the USB-C fast charging ports on both the RN 400 and SEEMEE 30 C, showing charging indicators.
7. Antretyen
- Netwayaj: Siye limyè yo ak yon twal mou,amp twal. Pa sèvi ak pwodui netwayaj abrazif oswa solvang.
- Depo: Store the lights in a cool, dry place when not in use. For long-term storage, charge the batteries every 3-6 months to maintain battery health.
- Rezistans dlo: The RN 400 has an IPX7 rating, and the SEEMEE 30 C has an IPX6 rating, making them suitable for use in rainy conditions. Ensure charging port covers are securely closed to maintain water resistance.

Image 7.1: Visual representation of the superior waterproof ratings for the RN 400 (IPX7) and SEEMEE 30 C (IPX6), demonstrating their reliability in wet conditions.
NAN. Depanaj
| Pwoblèm | Kòz posib | Solisyon |
|---|---|---|
| Limyè pa limen. | Light is locked. | Hold the power button for 3 seconds to unlock (refer to Section 4.1). |
| Limyè pa limen. | Batri ap vide. | Charge the light using the USB-C cable (refer to Section 6). |
| Pwodiksyon limyè se dim. | Batri ki ba. | Chaje limyè a. |
| Limyè a tranble oswa li etenn sanzatann. | Loose connection or low battery. | Ensure the light is securely mounted. Charge the light. |
9. Espesifikasyon
RN 400 Headlight
- Pwodiksyon maksimòm: 400 Lumen
- Max Runtime: 7 èdtan
- Max Throw: 89 mèt
- Rezistans dlo: IPX7
- Kalite montaj: Handlebar Mount (Garmin compatible)
- Materyèl: Aliminyòm, polikarbonat
SEEMEE 30 C Taillight
- Pwodiksyon maksimòm: 30 Lumen
- Max Runtime: 90 èdtan
- Visibility Angle: 260°
- Max Throw: 6 Meters (visible from 800 meters)
- Rezistans dlo: IPX6
- Pwa: 22 g
- Dimansyon: 65.5 x 25 x 22.5 mm
Jeneral
- Sous pouvwa: Mache ak pil (Rechargeable via USB-C)
- Koulè: Nwa
10. Garanti
OLIGHT provides a lifetime warranty for products purchased after January 1st, 2023. Please refer to the official OLIGHT websit la oubyen kontakte sèvis kliyan pou jwenn detay sou tèm ak kondisyon garanti a.
11. Sipò
For further assistance, technical support, or warranty claims, please visit the official OLIGHT website or contact their customer service department. You can find contact information on the OLIGHT websit la oubyen nan anbalaj pwodwi w la.


