1. Entwodiksyon
This manual provides detailed instructions for the installation, operation, and maintenance of your ASRock B860M Live Mixer WiFi motherboard. Designed for content creators, this motherboard offers robust connectivity and reliable performance for demanding tasks. Please read this manual thoroughly before proceeding with installation or operation.

Figi 1: Devan view of the ASRock B860M Live Mixer WiFi motherboard. This image highlights the CPU socket, RAM slots, and various heatsinks.
2. Karakteristik kle
The ASRock B860M Live Mixer WiFi motherboard is equipped with advanced features to support high-performance computing and content creation:
- Power Phase Design: Features a 10+1+1+1+1 power phase design with Dr.MOS for VCore+GT+SA, ensuring stable power delivery to the CPU.
- Sipò pou memwa DDR5: Supports 4 x DDR5 DIMMs in dual channel configuration, with speeds up to 8666+ (OC) MHz.
- Graphics Output: Multiple display options including 1 HDMI, 1 DisplayPort, and 1 Thunderbolt 4 Type-C port.
- Kalite Audio: Integrated Realtek ALC1220 7.1 CH HD Audio Codec with Nahimic Audio for immersive sound.
- Kondansateur amelyore: Utilizes exclusive 20K Capacitors with 1000uF capacitance for improved durability and stability.
- Koneksyon gwo vitès: Includes WiFi 6E and 2.5G LAN for fast and reliable network connections.
Videyo 1: Finiview of ASRock Intel B860 Series Motherboards. This video highlights key features and design aspects of the B860 motherboard series, including power delivery and connectivity options.
3. Enstalasyon ak Enstalasyon
Swiv etap sa yo pou byen enstale kat manman w lan ak konpozan yo.
3.1 Debale ak Enspeksyon
Carefully remove the motherboard and all accessories from the packaging. Inspect for any visible damage.
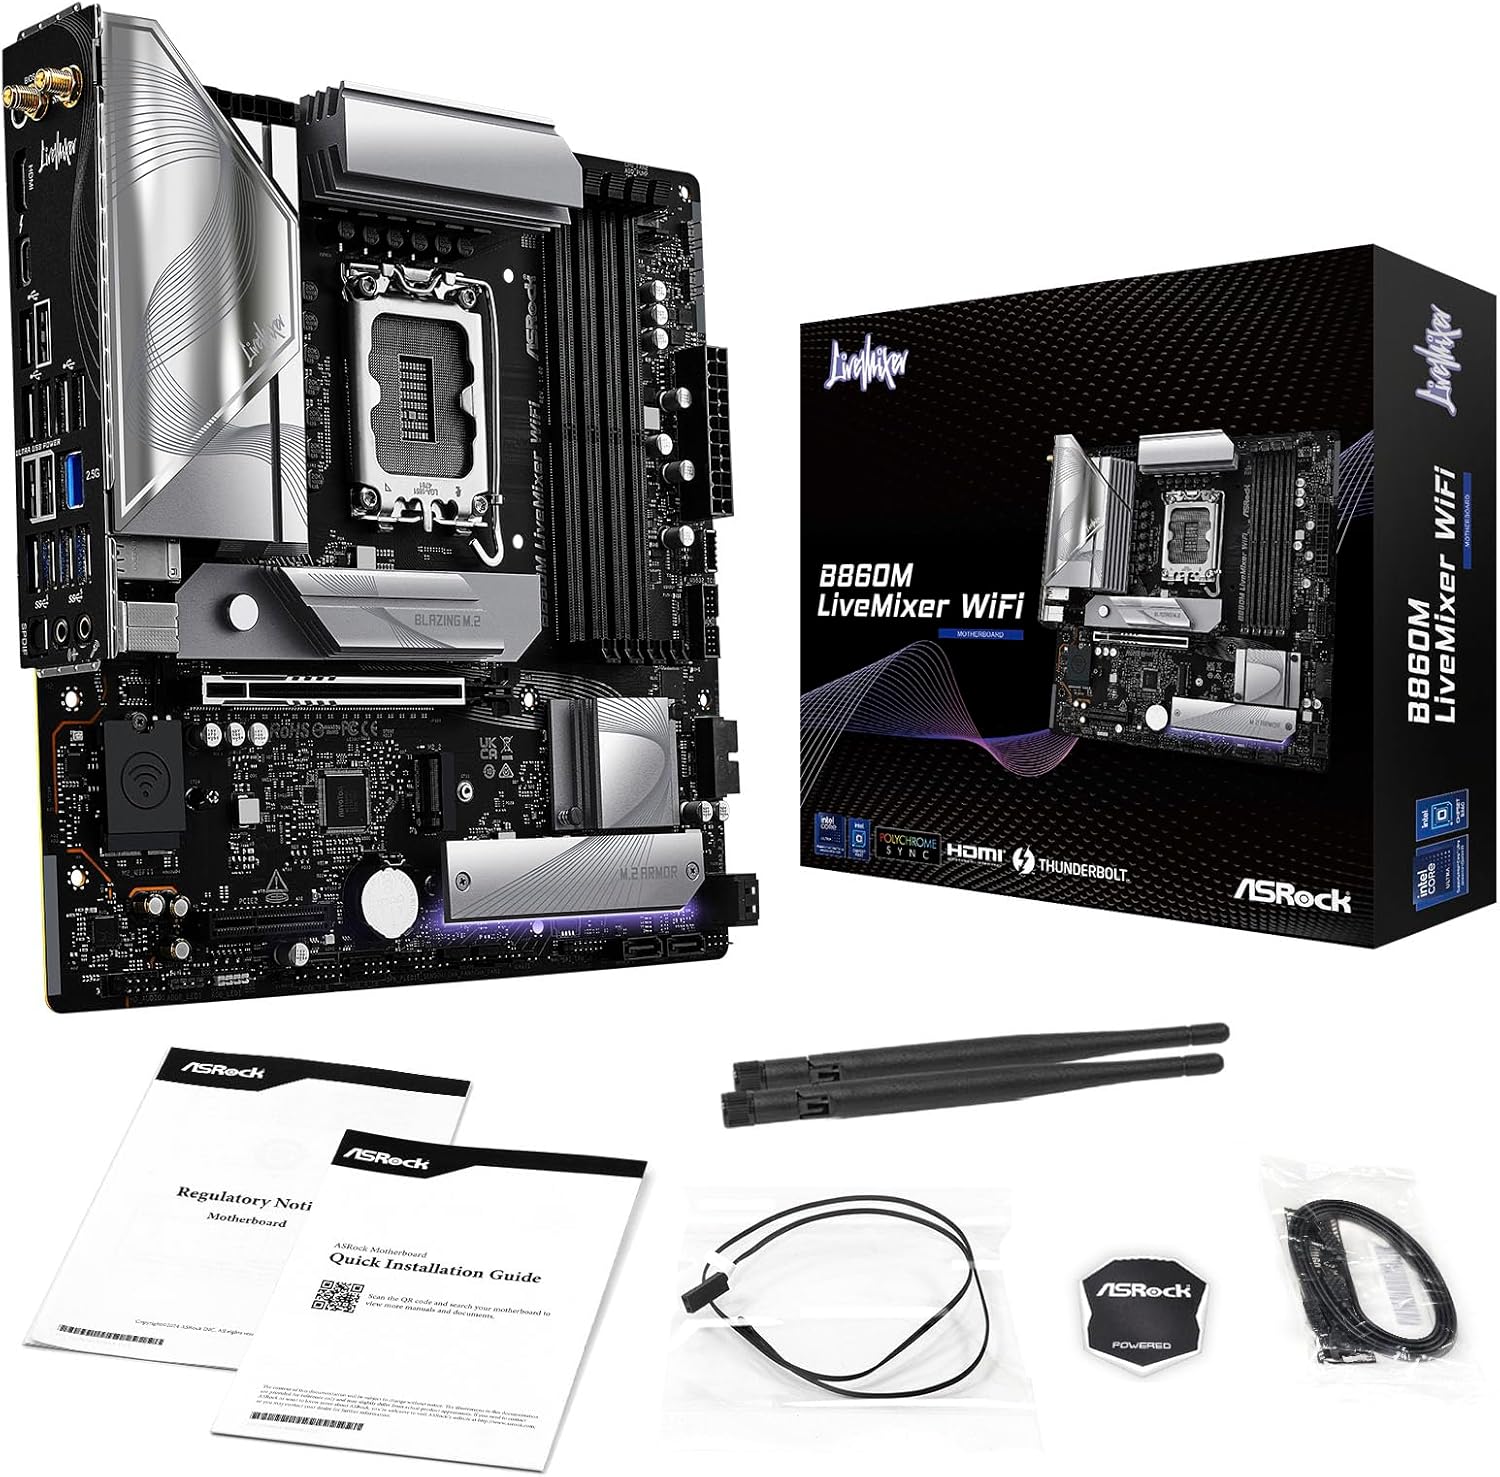
Figure 2: Contents of the ASRock B860M Live Mixer WiFi motherboard package. This image displays the motherboard, documentation, Wi-Fi antennas, and other accessories included.
3.2 Enstalasyon CPU (LGA1851)
- Jwenn priz CPU LGA1851 la sou kat manman an.
- Louvri levye priz CPU a epi retire kouvèti pwoteksyon an.
- Align your Intel Core Ultra processor with the socket, ensuring the notches on the CPU match the keys on the socket. Gently place the CPU into the socket without forcing it.
- Fèmen levye priz CPU a pou byen sere processeur a.
3.3 Memory (DDR5) Installation
- Jwenn kat fant DDR5 DIMM yo.
- Louvri klip yo nan tou de bout fant DIMM lan.
- Aliyen modil memwa a ak fant lan, asire w ke dan ki sou modil la koresponn ak kle ki nan fant lan.
- Peze byen fèm sou tou de bout modil memwa a jiskaske klip yo kase nan plas yo.
3.4 Storage Installation (M.2 and SATA)
The motherboard supports multiple M.2 slots and SATA3 6.0 Gb/s ports.
- M.2 SSD: Locate the M.2 slots (e.g., Blazing M.2, M.2 Armor). Insert the M.2 SSD into the slot at an angle, then push it down and secure it with the provided screw or tool-less mechanism.
- Disques SATA yo: Connect SATA data cables from your storage drives (HDDs/SSDs) to the SATA3 6.0 Gb/s ports on the motherboard. Connect power cables from your power supply to the drives.

Figi 3: Angle view of the ASRock B860M Live Mixer WiFi motherboard, highlighting the M.2 slots and their heatsinks for high-speed storage.
3.5 Expansion Cards (PCIe 5.0)
Insert your graphics card or other PCIe expansion cards into the appropriate PCIe 5.0 slot. Ensure it is seated firmly and secured with a screw to your chassis.
3.6 Koneksyon pouvwa
Konekte konektè pouvwa ATX 24-pin lan ak konektè pouvwa CPU 8-pin (oswa 4+4-pin) ki soti nan ekipman pouvwa ou a nan pò ki koresponn yo sou kat manman an.
3.7 Rear I/O Connections
Connect your peripherals to the rear I/O panel. This includes USB devices, display cables (HDMI, DisplayPort, Thunderbolt 4 Type-C), Ethernet cable, and audio devices.

Figi 4: Detaye view of the rear I/O panel on the ASRock B860M Live Mixer WiFi motherboard, showing various USB ports, display outputs, Ethernet, and audio jacks.
Video 2: Demonstrates the ultimate connectivity features for creators on ASRock motherboards, including Thunderbolt and high-speed networking.
4. Operasyon Enstriksyon
After successful installation, power on your system. The motherboard will perform a Power-On Self-Test (POST). You can access the BIOS/UEFI setup utility by pressing the Efase or F2 key during POST.
4.1 Enstalasyon BIOS/UEFI
The BIOS/UEFI interface allows you to configure system settings, including boot order, memory profiles (XMP), fan speeds, and overclocking options. Refer to the on-screen instructions within the BIOS for navigation and adjustments.
4.2 BIOS Update Procedure
Updating your BIOS can improve system stability, compatibility, and performance. ASRock provides tools like USB BIOS Flashback and Instant Flash for this purpose.
Video 3: A detailed tutorial on how to update the motherboard BIOS using ASRock's USB BIOS Flashback and Instant Flash methods. This is crucial for maintaining system compatibility and performance.
For detailed steps on using USB BIOS Flashback or Instant Flash, please refer to the video tutorial above or the dedicated section in the full user manual available on the ASRock support websit.
5. Antretyen
Antretyen regilye asire lonjevite ak pèfòmans optimal kat manman ou an.
- Retire pousyè: Periodically clean dust from inside your PC case, especially from heatsinks and fans, using compressed air.
- Mizajou BIOS: Keep your BIOS updated to the latest version to ensure compatibility with new hardware and software, and to benefit from performance improvements and bug fixes.
- Mizajou chofè: Install the latest drivers for your motherboard chipset, audio, network, and other components from the ASRock websit.
- Jesyon kab: Ensure proper cable management to maintain good airflow within the case, preventing overheating.
NAN. Depanaj
Si ou rankontre pwoblèm, konsidere etap depanaj komen sa yo:
- Pa gen pouvwa: Check all power connections (24-pin ATX, 8-pin CPU, GPU power). Ensure your power supply is switched on.
- Pa gen ekspozisyon: Verify that your monitor is connected to the correct graphics output port (motherboard or discrete GPU). Reseat your graphics card and RAM modules.
- Enstabilite/Pwoblèm Sistèm: Check RAM seating and try running with one stick of RAM at a time. Ensure CPU cooler is properly installed. Update BIOS and drivers.
- Pwoblèm bòt: Check boot order in BIOS/UEFI. Ensure your storage drive is detected.
- Periferik pa detekte: Try different USB ports. Install necessary drivers for the peripheral.
For more advanced troubleshooting, consult the full user manual or ASRock's online support resources.
7. Espesifikasyon
| Karakteristik | Detay |
|---|---|
| Mak | ASRock |
| Non modèl | B860M LIVEMIXER WIFI |
| CPU Socket | LGA 1851 |
| Procesè konpatib yo | Intel Core Ultra |
| Kalite Chipset | Intel B860 |
| Teknoloji memwa RAM | DDR5 |
| Vitès revèy memwa | 8666 MHz (OC) |
| Kapasite Depo memwa | Jiska 256 GB |
| Graphics Output Options | 1 HDMI, 1 DisplayPort, 1 Thunderbolt 4 Type-C |
| Odyo Codec | Realtek ALC1220 7.1 CH HD Audio Codec, Nahimic Audio |
| LAN | 2.5G LAN |
| Koneksyon san fil | WiFi 6E |
| Power Phase | 10+1+1+1+1 Power Phase, Dr.MOS for VCore+GT+SA |
| Kondansateur | Exclusive 20K Cap with 1000uF Capacitance |
| Faktè fòm | Mikwo ATX |
| Dimansyon pake | 11.73 x 10.51 x 2.4 pous |
| Pwa atik | 3.25 liv |
8. Garanti ak sipò
Pou enfòmasyon sou garanti, sipò teknik, ak telechajman chofè, tanpri vizite sit ofisyèl ASRock la. websit:
You can also find additional support and FAQs on the ASRock store page: ASRock America Store
Protection plans are available for purchase separately to extend coverage for your product.


