1. Entwodiksyon
Thank you for choosing the Homary 71" Electric Fireplace TV Stand. This media console is designed to accommodate TVs up to 75+ inches, featuring a 57.1'' electric fireplace insert with remote control and touch panel operation. Crafted from engineered wood with a marble veneer finish, it offers both elegant design and practical functionality, including heating capabilities and ample storage. This manual provides essential information for safe assembly, operation, and maintenance of your new TV stand.
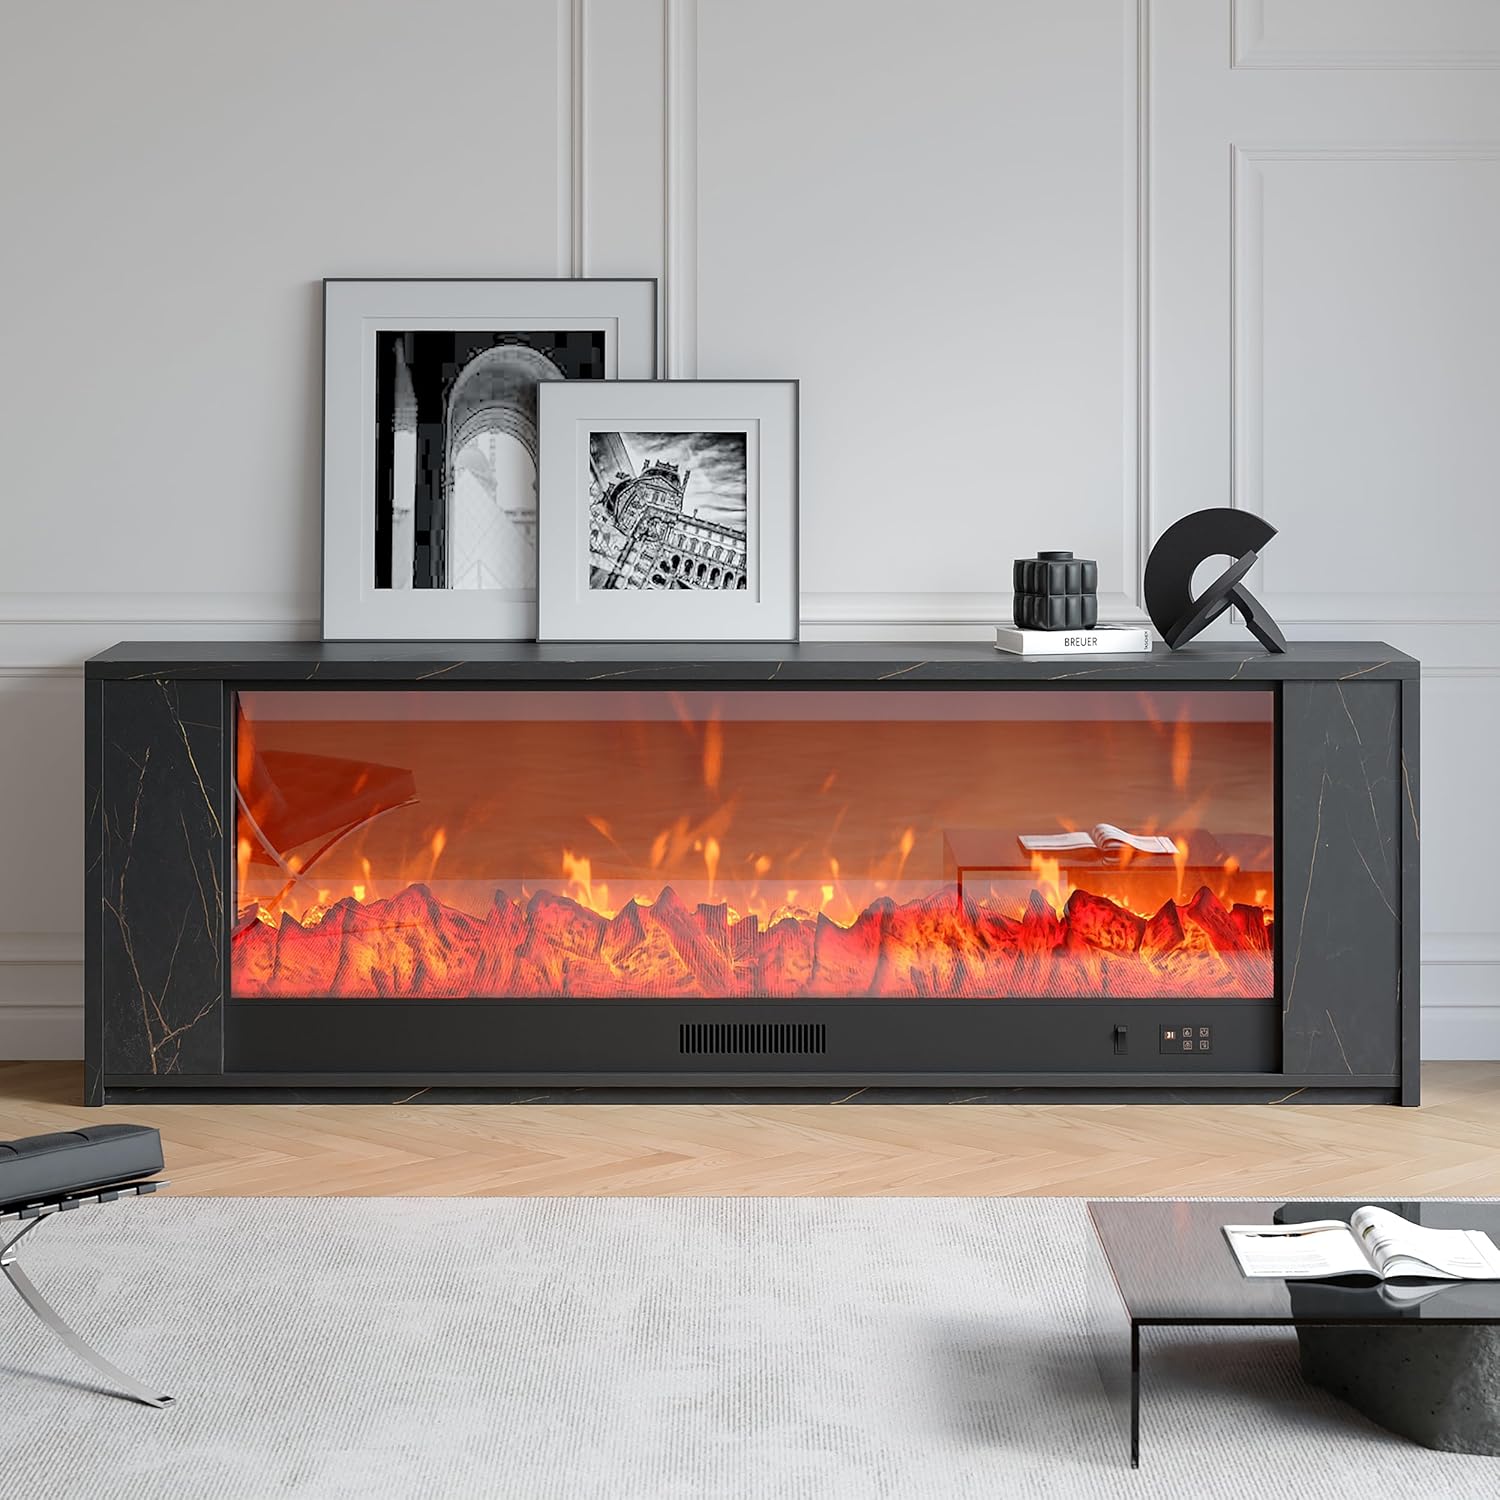
Figure 1: Homary 71" Electric Fireplace TV Stand with realistic flames.
2. Enfòmasyon sou Sekirite
- Li tout enstriksyon yo anvan w sèvi ak aparèy sa a.
- Do not operate any fireplace with a damaged cord or plug, or if the heater has malfunctioned or been dropped/damaged in any manner.
- Kenbe materyèl ki ka pran dife, tankou mèb, zòrye, dra, papye, rad, ak rido omwen 3 pye (0.9 m) lwen devan aparèy chofaj la.
- Toujou deploge chemine a lè li pa itilize.
- Pa mete oswa kite objè etranje antre nan nenpòt vantilasyon oswa ouvèti tiyo echapman paske sa ka lakòz yon chòk elektrik oswa dife, oswa domaje aparèy chofaj la.
- Toujou sèvi ak priz ki byen chita, fusion, ak polarize.
- Ensure the TV stand is placed on a stable, level surface.
- Keep children and pets away from the fireplace and heating vents.
3. Pake kontni
Your Homary Electric Fireplace TV Stand will be delivered in two cartons. Please ensure all parts are present before beginning assembly. Refer to the parts list image below for identification.

Figi 2: Plis paseview nan tout pati ki enkli nan pake a.
4. Enstriksyon Asanble
Follow these step-by-step instructions carefully. All screws and parts are labeled for easy identification. It is recommended to have two people for assembly.
Step 1: Prepare the Base Panels
Attach the LED strip to the designated top plate (Part 8) and secure the LED power cord using the provided clips and screws.

Etap 2: Rasanble Panno Side
Connect the side panels (Part 2 and 8) using screws (A) and wooden dowels (E) as shown. Ensure the LED cable passes through the designated hole.

Etap 3: Mete panèl anwo a
Secure the top panel (Part 4) to the assembled side panels using screws (A) and wooden dowels (D).

Step 4: Complete the Side Structure
Repeat steps 1-3 for the other side of the TV stand, ensuring symmetry and proper alignment.

Step 5: Connect the Main Body
Connect the two side structures to the main central panel (Part 14) using screws (A) and wooden dowels (D).

Step 6: Install Support Legs
Attach the support legs (Part 15 and 17) to the bottom of the main central panel using screws (J) and wooden dowels (D).

Step 7: Attach Back Panels
Secure the back panels (Part 10) to the rear of the side structures using screws (F).

Step 8: Install the Top Shelf
Place the top shelf (Part 1) onto the assembled structure and secure it with screws (A).

Step 9: Connect LED Wires
Connect the LED wires from the side panels to the main power source, ensuring all connections are secure.

Step 10: Insert Fireplace Unit
Carefully slide the electric fireplace unit into the central opening of the TV stand. Secure it with screws (S).

Step 11: Place Decorative Crystals
Open the bag of decorative crystals and carefully place them along the bottom of the fireplace insert.

Step 12: Attach Fireplace Front Panel
Secure the fireplace front panel to the unit using screws (S).

Step 13: Install Cabinet Doors
Attach the hinges (N) to the cabinet doors (Part 11) and then secure the doors to the side cabinets using screws (G).

Step 14: Adjust Door Alignment
Adjust the hinges to ensure proper door alignment (left/right and front/back) for a seamless look.

Etap 15: Final Koneksyon
Connect the main power cord of the fireplace to a suitable electrical outlet. Ensure all cables are neatly managed through the cable management holes.

Videyo Asanble
Video 1: Detailed assembly instructions for the TV stand with fireplace.
5. Operasyon Enstriksyon
Your electric fireplace TV stand can be operated using the included remote control or the touch panel located on the fireplace unit.
5.1. Remote & Touch Control
The remote control and touch panel allow you to adjust various settings of the electric fireplace.

Figure 3: Remote control and touch panel interface.
- Pouvwa: Turn the fireplace unit ON or OFF.
- Klate flanm dife: Adjust the intensity of the flame effect. There are 5 types of flame brightness settings.
- Chofaj: Activate the heating function. The heater can warm areas up to 400 square feet.
- Tanperati: Adjust the desired room temperature. The temperature can be set between 15°C - 45°C (62°F - 82°F).
- Revèy: Set an automatic shut-off timer for the fireplace, ranging from 1 to 9 hours.
5.2. Flame Effects
The fireplace features realistic flame effects that can be customized. You can enjoy the flame effect independently without activating the heating function.

Figure 4: Remote control with flame brightness options.
5.3. Fonksyon Chofaj
The electric fireplace provides supplemental heating for rooms up to 400 square feet. The heat is emitted from the vent located above the flame display.

Figure 5: Heat output from the fireplace vent.
6. Antretyen
- Netwayaj: Toujou debranche aparèy la anvan w netwaye. Sèvi ak yon mou, damp cloth to wipe surfaces. Do not use abrasive cleaners or solvents.
- Époussetage: Regularly dust the TV stand and fireplace unit to prevent dust buildup, especially around air vents.
- Swen kòd: Periodically inspect the power cord for any signs of damage. If damaged, discontinue use and contact customer service.
NAN. Depanaj
- Pa gen pouvwa: Ensure the power cord is securely plugged into a grounded outlet. Check your household circuit breaker.
- Pa gen chalè: Verify the heater function is activated and the temperature setting is above the current room temperature. Ensure air vents are not obstructed.
- Kontwòl Remote pa travay: Check the batteries in the remote control and replace if necessary. Ensure there are no obstructions between the remote and the fireplace unit.
- Efè flanm dife pa travay: Ensure the unit is powered on. If the flame effect is still not visible, contact customer support.
8. Espesifikasyon
| Karakteristik | Spesifikasyon |
|---|---|
| Mak | Omary |
| Non modèl | Fireplace TV Stand (GY-44568931) |
| Dimansyon pwodwi | 12.6"D x 70.8"W x 23.6"H |
| Gwosè chemine | 57.1'' Electric Fireplace |
| Materyèl | Engineered Wood (FSC-Certified) |
| Fini Kalite | Painted (Marble Veneer) |
| Koulè | Nwa |
| Sous pouvwa | Fil elektrik |
| Kouvèti chofaj | Jiska 400 pye kare |
| Ranje Tanperati | 15°C - 45°C (62°F - 82°F) |
| Anviwònman revèy | 1 am-9pm |
| Pwa atik | 140 liv |
| Max TV Size | Up to 75+ Inch |
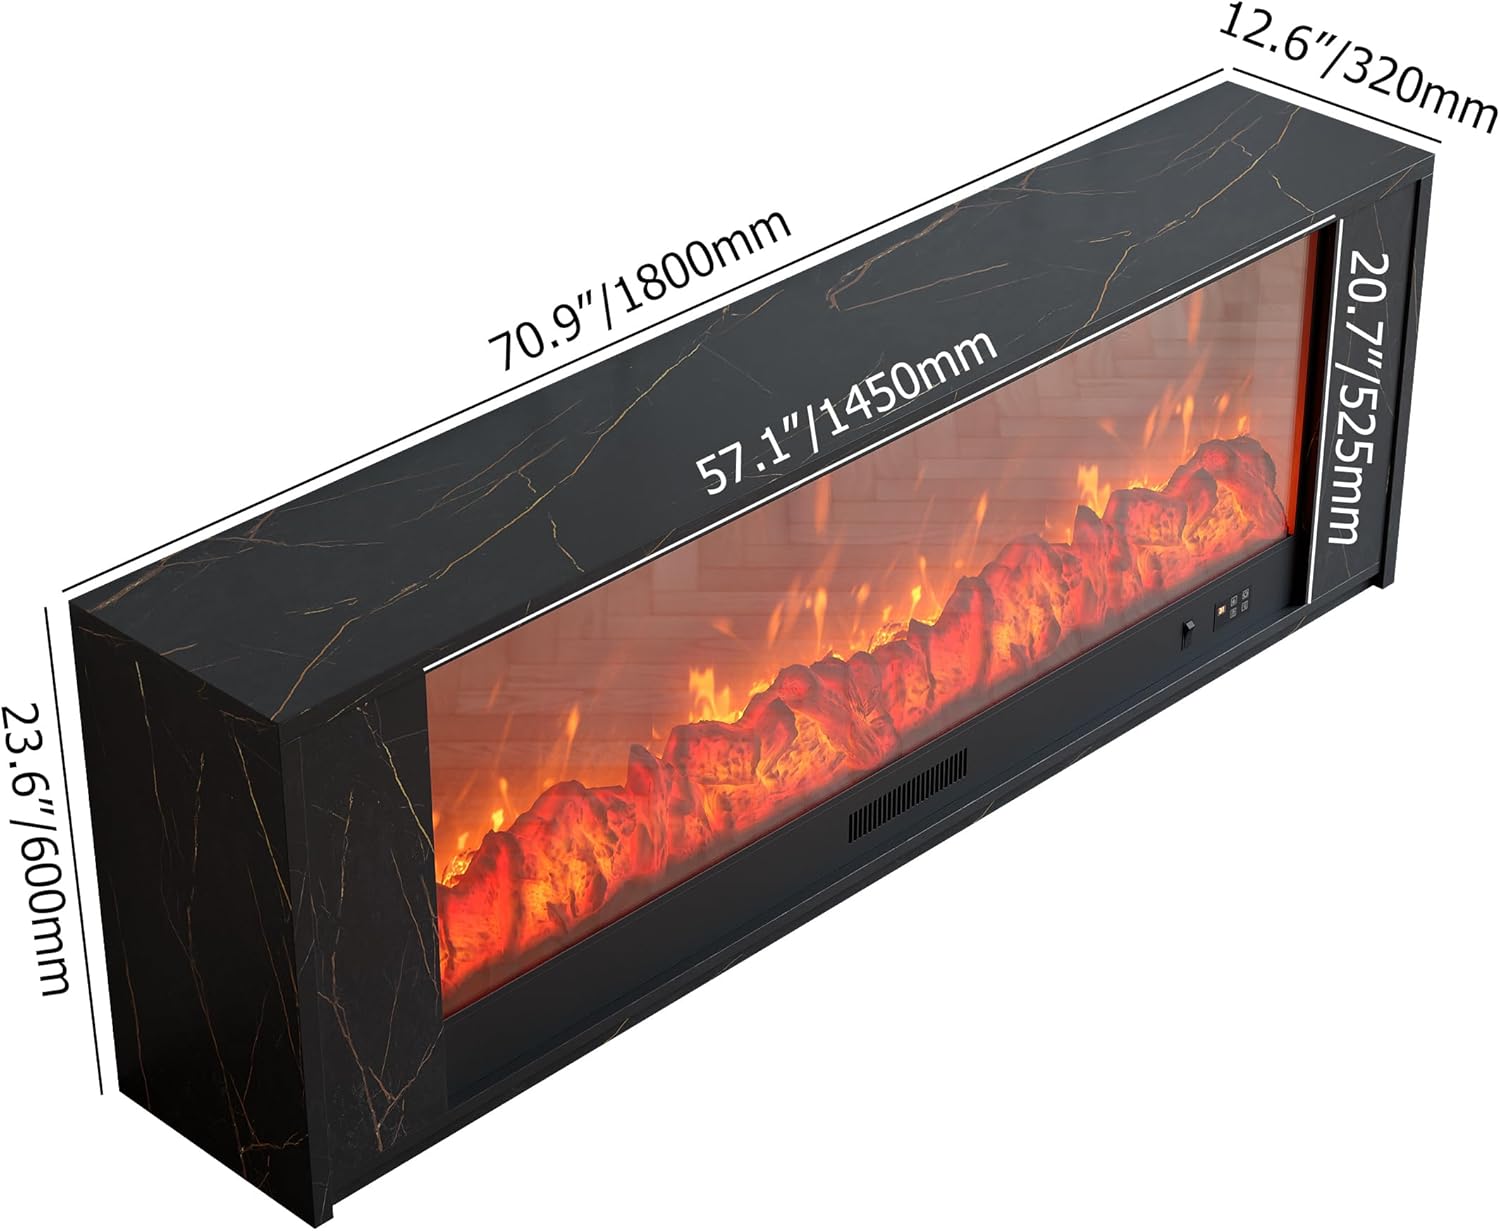
Figi 6: Dimansyon pwodwi a.

Figure 7: TV size compatibility.
9. Garanti ak Sipò Kliyan
All Homary products come with comprehensive product support. For any inquiries or assistance, please do not hesitate to reach out to our customer service team. We aim to respond within 12 hours.
- Kalite garanti: Limite
- Kontakte: For support, please refer to the contact information provided with your purchase or visit the official Homary websit.


