1. Enstriksyon Sekirite Enpòtan
Please read and save these instructions before operating your humidifier. Failure to follow these instructions may result in electric shock, fire, or serious injury.
- Toujou mete imidifikatè a sou yon sifas ki plat, solid, epi ki reziste dlo, omwen 12 pous (30 cm) lwen mi yo ak aparèy yo.
- Pa plonje baz imidifikatè a nan dlo oswa lòt likid.
- Unplug the appliance during filling, cleaning, and when not in use.
- Pa opere imidite a ak yon kòd oswa ploge ki domaje.
- Use only clean, cool tap water, or preferably distilled/filtered water. Do not use hot water.
- Do not add essential oils directly into the water tank. Use the dedicated essential oil tray.
- Kenbe lwen timoun ak bèt kay.
- Pa bloke antre oswa priz lè.
2. Pwodwi souview
Familiarize yourself with the components and controls of your Midea SCK-3Q60B Humidifier.

Figi 2.1: Devan view of the Midea SCK-3Q60B Humidifier, highlighting the digital control panel and water tank. The display shows the current humidity level.

Figi 2.2: Detaye view of the humidifier's intuitive touch control panel, displaying all function icons and the digital humidity readout.
2.1 Eleman
- Tank dlo: Tank transparan pou konsève dlo.
- Inite debaz: Contains the ultrasonic transducer, fan, and control electronics.
- Bouch bwouya: Dirije pwodiksyon bwouya a.
- Kontwòl Panel: Touch-sensitive interface with digital display.
- Plato lwil esansyèl: Small compartment for adding essential oils.
- Netwayaj bwòs: Enkli pou antretyen.
2.2 Fonksyon Panel Kontwòl
- Bouton revèy: Sets operating time (0/1/2/4/8 hours).
- Bouton Auto: Activates Smart Humidity Control to maintain a set humidity level.
- Bouton imidite: Adjusts target humidity level in Auto Mode.
- Bouton gradyasyon: Controls the brightness of the display and night light.
- Bouton On/Off: Limen oswa etenn inite a.
- Warm Mist Button: Toggles warm mist function.
- Ekspozisyon dijital: Shows current humidity, timer settings, and other indicators.
3. Enstalasyon
Follow these steps for initial setup of your humidifier.

Figi 3.1: The Midea SCK-3Q60B Humidifier in operation, releasing a fine mist. This image illustrates the unit's compact size and how it appears in a typical home setting.
- Dekonpoze: Carefully remove the humidifier from its packaging. Retain packaging for future storage.
- Plasman: Place the humidifier on a flat, stable, water-resistant surface. Ensure it is at least 12 inches (30 cm) away from walls, furniture, and electronic devices. Do not place it on carpet or near heat sources.
- Ranpli tank dlo:
- Retire kouvèti anwo imidifikatè a.
- Pour clean, cool tap water into the tank. For best performance and to reduce mineral buildup, distilled or filtered water is recommended. Do not exceed the maximum fill line.
- Ranplase kouvèti anwo a byen.

Figi 3.2: Illustration of the easy top-fill design, showing water being poured directly into the humidifier's water tank from above.
- Konekte pouvwa: Plug the power cord into a standard 120V~ 60Hz electrical outlet. The unit will beep once, and the display will briefly illuminate.
4. Operasyon Enstriksyon
Learn how to use the various functions of your Midea humidifier.
4.1 Power On/Off and Mist Level
- Peze a Sou / Off button to turn the humidifier on. It will start operating at the default mist level.
- Peze a Sou / Off button repeatedly to cycle through 3 mist levels (Low, Medium, High).
- Peze epi kenbe la Sou / Off button for 2 seconds to turn the humidifier off.
4.2 Warm Mist Function
- Peze a Vapè cho button to activate the warm mist function. The warm mist indicator will illuminate on the display.
- Peze a Vapè cho button again to turn off the warm mist function.
- Note: It may take several minutes for the warm mist to reach its full temperature.

Figi 4.1: A visual representation highlighting the dual warm and cool mist capabilities of the humidifier, indicating its suitability for different seasonal needs.
4.3 Smart Humidity Control (Auto Mode)
- Peze a Oto button to activate Auto Mode. The humidifier will automatically adjust mist output to maintain a comfortable humidity level (default 55% RH).
- To set a target humidity, press the Imidite button while in Auto Mode. Each press will increase the target humidity by 5% (from 40% to 90% RH). The humidifier will stop misting once the target humidity is reached and resume when it drops below the target.
- Peze a Oto button again to exit Auto Mode.
4.4 Fonksyon revèy
- Peze a Revèy button to set an operating duration. Each press cycles through 0, 1, 2, 4, and 8 hours.
- The humidifier will automatically turn off once the set time has elapsed.
- To cancel the timer, cycle through the options until '0' hours is displayed.
4.5 limyè lannwit
- Peze a Dimmer bouton pou limen limyè lannwit lan.
- Peze a Dimmer button repeatedly to cycle through 3 color options (e.g., blue, green, red) or turn it off.
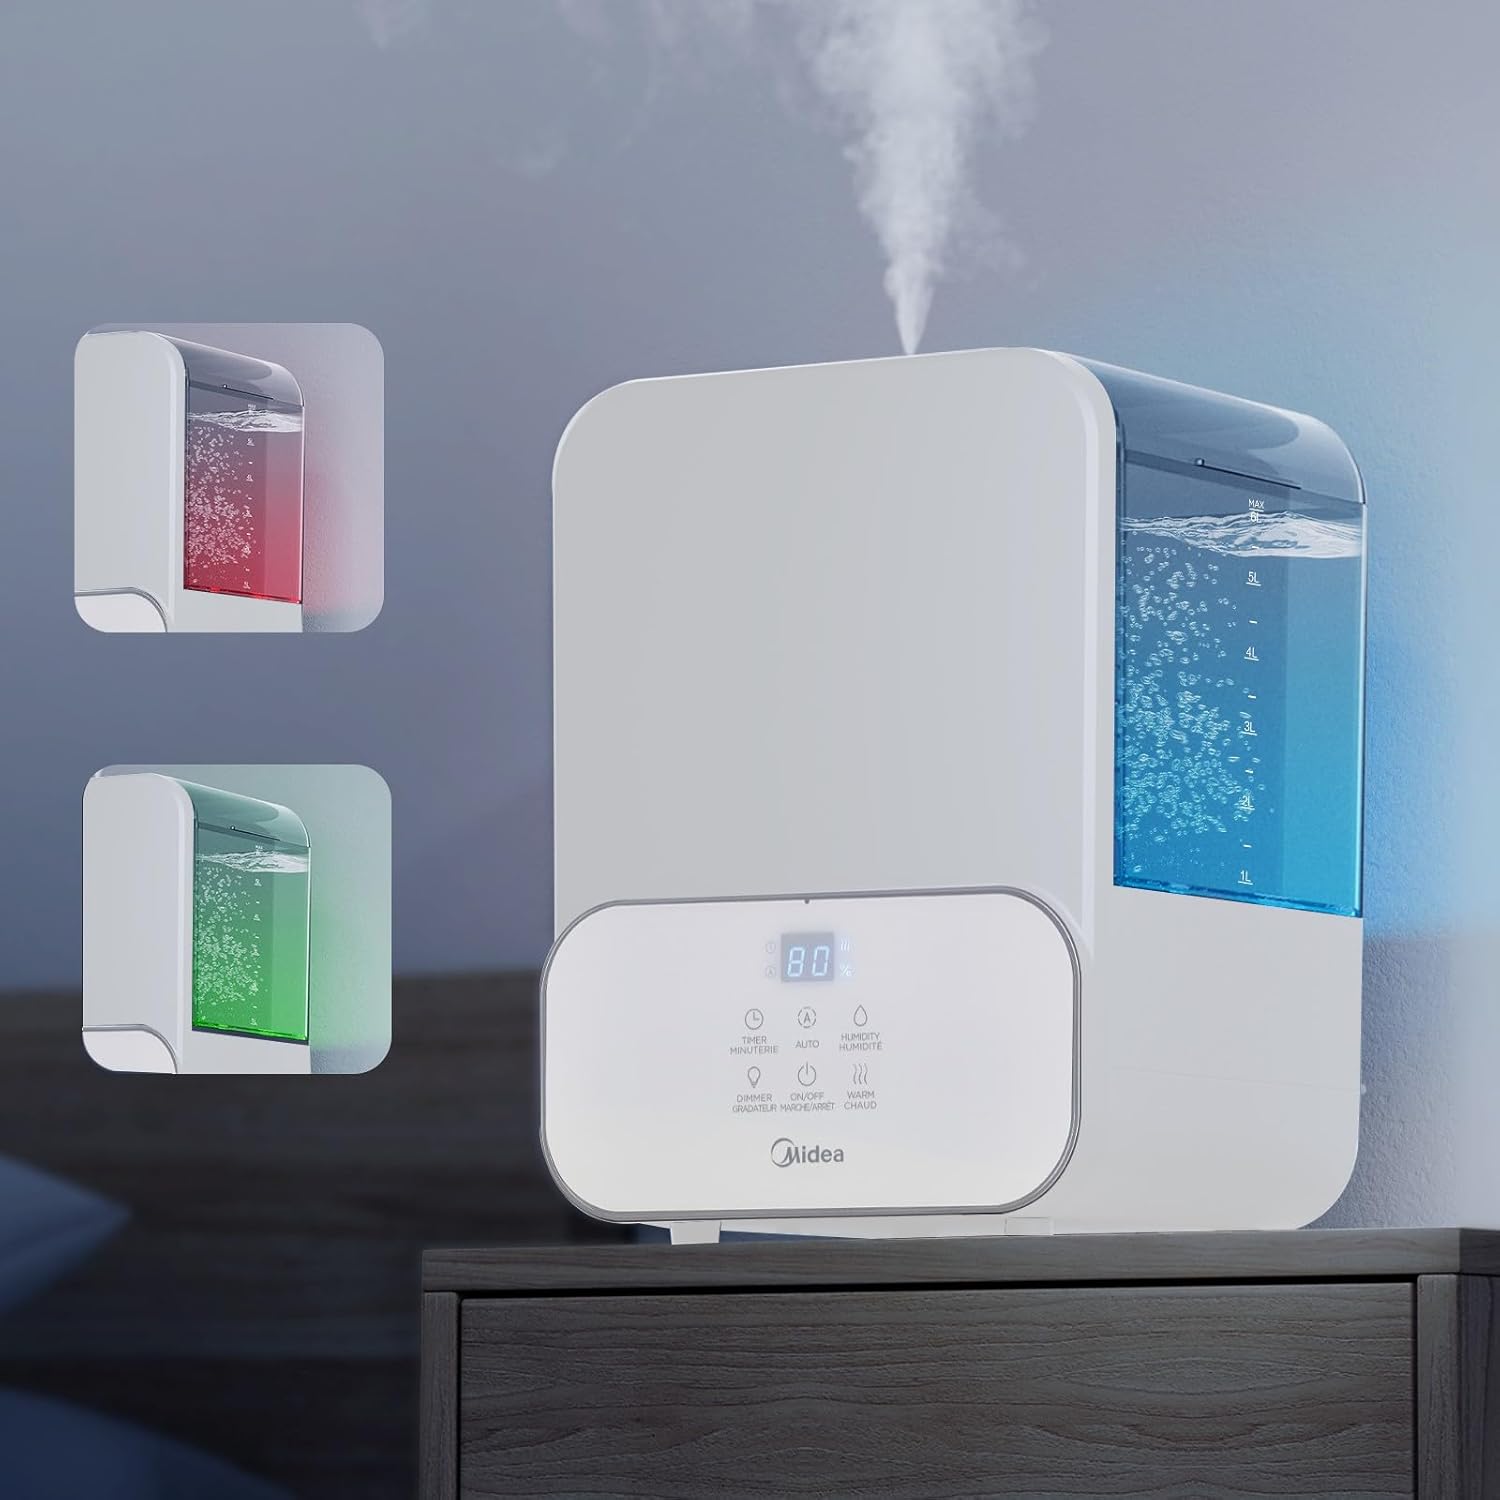
Figi 4.2: This image demonstrates the humidifier's integrated 3-color night light feature, showing the unit illuminated with blue and red ambient lighting.
4.6 Plato lwil esansyèl
- Locate the essential oil tray on the side or back of the humidifier base.
- Rale plato a epi ajoute kèk gout nan lwil esansyèl ou pi renmen an sou kousinen aroma a.
- Slide the tray back into place. The mist will carry the fragrance into the air.
- Caution: Do not add essential oils directly into the water tank, as this can damage the unit and void the warranty.
5. Antretyen
Netwayaj regilye esansyèl pou pèfòmans ak ijyèn optimal.
5.1 Antretyen chak jou
- Debranche imidifikatè a anvan ou ranpli li.
- Vide tout dlo ki rete nan tank la ak nan baz la.
- Siye tank la ak baz la avèk yon twal pwòp.
5.2 Netwayaj chak semèn
- Deploge inite a.
- Netwaye tank dlo a: Remove the top cover and tank. Wipe the inside of the tank with a soft cloth. For mineral buildup, fill the tank with a mixture of 1 teaspoon of white vinegar and 1 gallon of water. Let it stand for 30 minutes, then rinse thoroughly.
- Netwaye inite baz la: Carefully pour out any water from the base. Add 1/2 cup of white vinegar to the base and let it soak for 30 minutes. Use the included cleaning brush to gently clean the ultrasonic transducer (the small disc) and heating element (for warm mist). Do not scrub aggressively. Rinse the base thoroughly under tap water, ensuring no water enters the air outlet.
- Clean the Essential Oil Tray: Remove the aroma pad and wash it with mild soap and water. Rinse and dry completely before reinserting.
- Seche tout pati yo nèt anvan ou remonte.
5.3 Depo
- Before storing, perform a thorough cleaning as described in Section 5.2.
- Asire tout pati yo konplètman sèk.
- Sere imidifikatè a nan anbalaj orijinal li nan yon kote ki fre epi sèk.
NAN. Depanaj
Gade seksyon sa a pou pwoblèm komen ak solisyon yo.
| Pwoblèm | Kòz posib | Solisyon |
|---|---|---|
| Pa gen vapè oswa vapè fèb | Low water level; Water tank not properly seated; Transducer dirty; Air inlet/outlet blocked. | Refill water tank; Ensure tank is seated correctly; Clean transducer (see Maintenance); Check for obstructions. |
| Pousyè blan otou imidifikatè a | Dlo difisil yo itilize. | Use distilled or filtered water. Clean the unit regularly to remove mineral buildup. |
| Bri etranj | Humidifier not on a flat surface; Water tank not seated correctly; Foreign object in base. | Place on a flat surface; Reseat water tank; Check and remove any foreign objects (unplug first). |
| Warm mist not warm | Insufficient time for heating; Heating element malfunction. | Allow several minutes for the heating element to warm up. If issue persists, contact customer support. |
| Lekti imidite ki pa egzak | Sensor obstructed or dirty; Placement too close to mist output. | Ensure the sensor area is clean and unobstructed. Reposition the humidifier if it's too close to the mist output. Note that internal sensors may vary slightly from external hygrometers. |
7. Espesifikasyon
| Modèl | SCK-3Q60B |
| Kapasite | 6 lit (1.6 galon) |
| Pouvwa | 105W |
| Voltage / Frekans | 120V ~ 60Hz |
| Maksimòm pwodiksyon vapè dlo | 330 ml/h |
| Dimansyon (L×W×H) | 9.25 × 8.07 × 12.80 pous |
| Pwa nèt | 5.07 liv |
| Zòn Chanm Rekòmande | Jiska 400 pye kare |
8. Garanti ak sipò
Pwodui sa a kouvri pa yon garanti manifakti. Tanpri gade kat garanti ki vini ak acha ou a pou tèm ak kondisyon espesifik yo.
For technical assistance, troubleshooting beyond this manual, or warranty claims, please contact Midea Customer Support. Contact information can typically be found on the Midea official websit la oubyen sou anbalaj pwodwi ou a.


