1. Pwodwi souview
The Tenveo PTZ Camera Controller is designed for precise control of various PTZ (Pan-Tilt-Zoom) cameras. It features a 4D joystick for intuitive camera movement and zoom, multiple interface options, and support for common control protocols. This manual provides instructions for setting up, operating, and maintaining your controller.
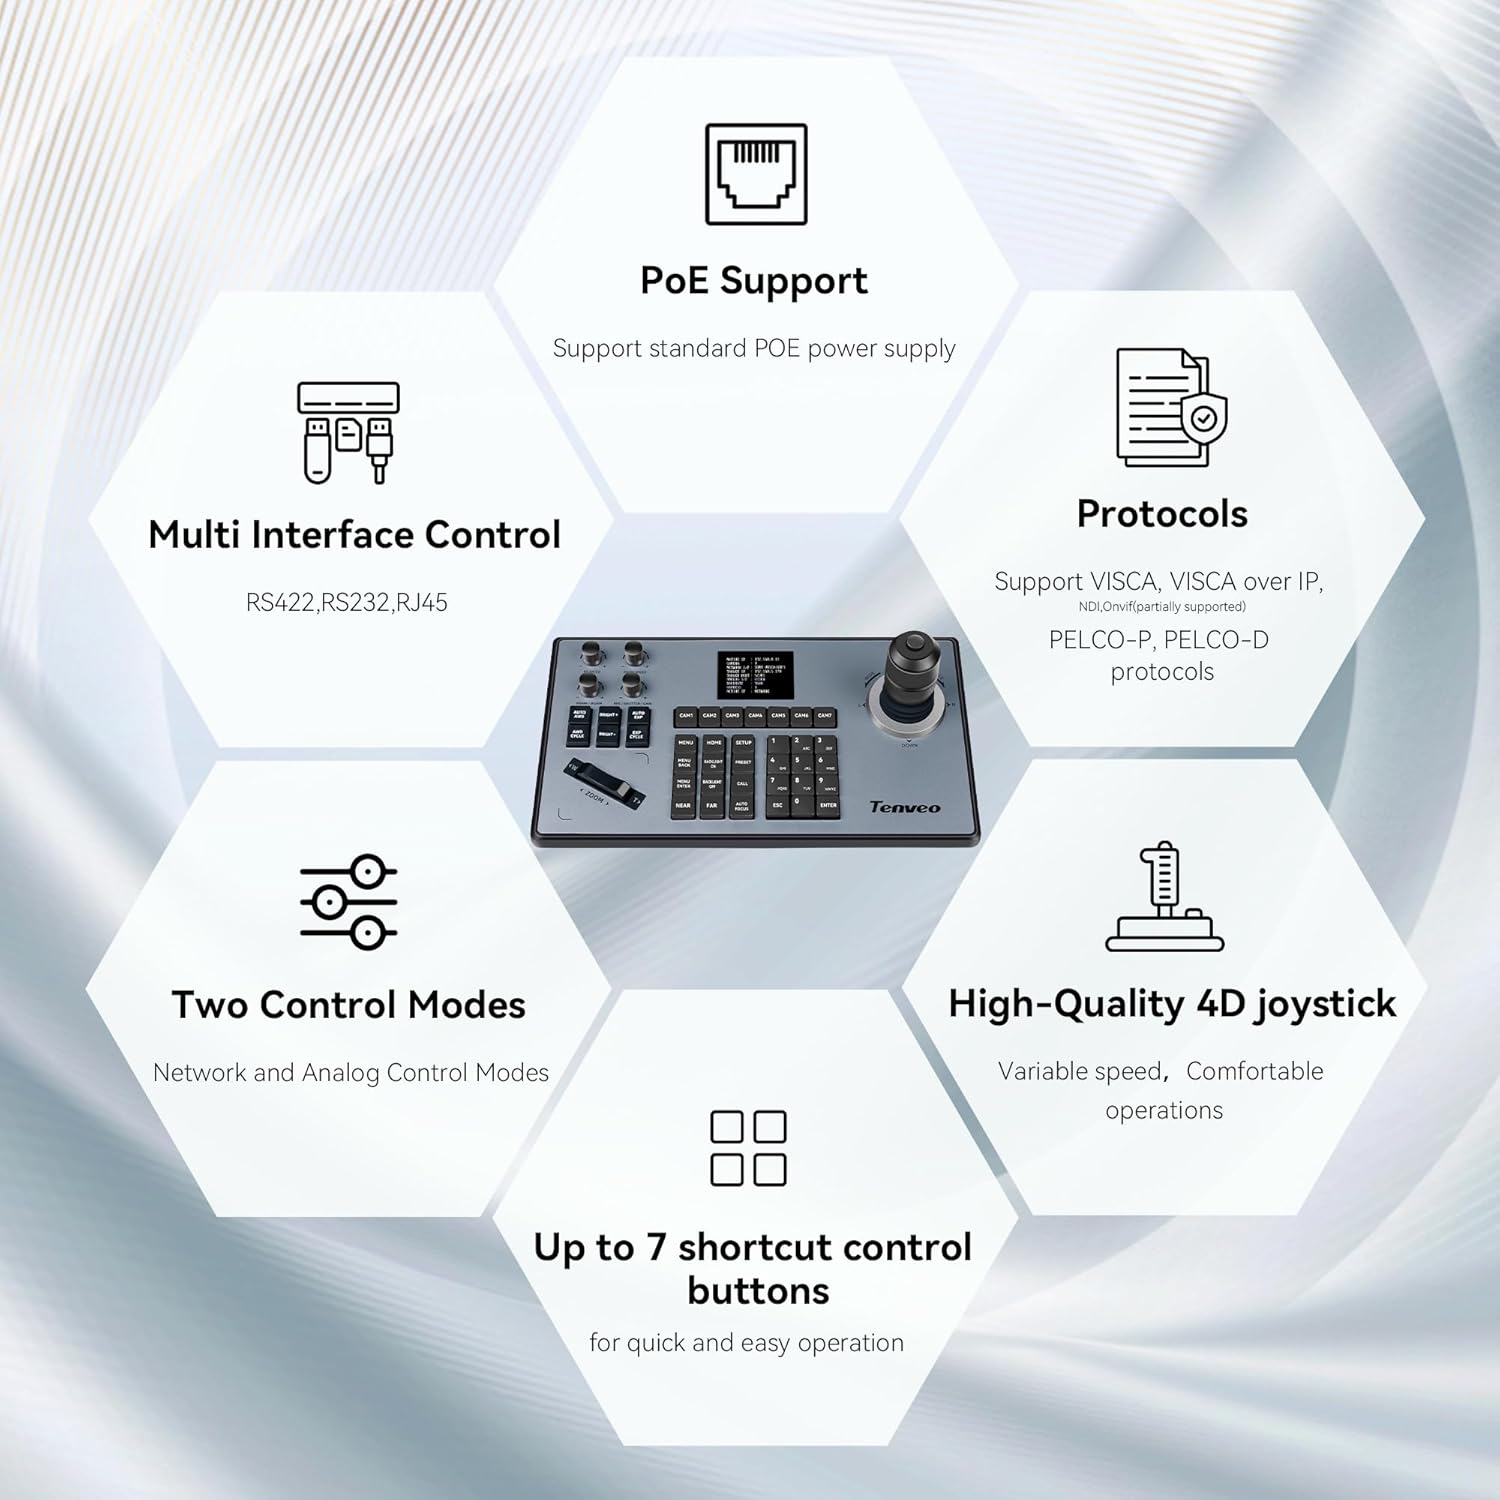
Imaj 1: Plis paseview of the Tenveo PTZ Camera Controller's key features, including PoE support, multi-interface control (RS422, RS232, RJ45), protocol compatibility (VISCA, PELCO-P, PELCO-D), two control modes, a high-quality 4D joystick, and up to 7 shortcut buttons.
Karakteristik kle:
- Joystick 4D: Provides variable speed control for pan, tilt, and zoom functions, ensuring smooth and precise camera adjustments.
- Multiple Control Interfaces: Supports RS232, RS422, and RJ45 (Ethernet) for versatile connectivity.
- Sipò PoE: Compatible with standard Power over Ethernet (PoE) power supply, simplifying installation.
- Pwotokòl konpatibilite: Supports VISCA, VISCA over IP, PELCO-P, and PELCO-D protocols for broad camera compatibility.
- Mòd Kontwòl Doub: Operates in both Network and Analog control modes.
- Bouton chemen kout: Up to 7 programmable shortcut buttons for quick access to frequently used functions.
2. Enstalasyon ak Enstalasyon
2.1 Debalaj ak enspeksyon
Carefully unpack the controller and inspect it for any signs of damage. Ensure all components are present according to the packing list.
2.2 Konekte kontwolè a
The controller offers various connection options to suit your setup. Refer to the rear panel diagram for port identification.
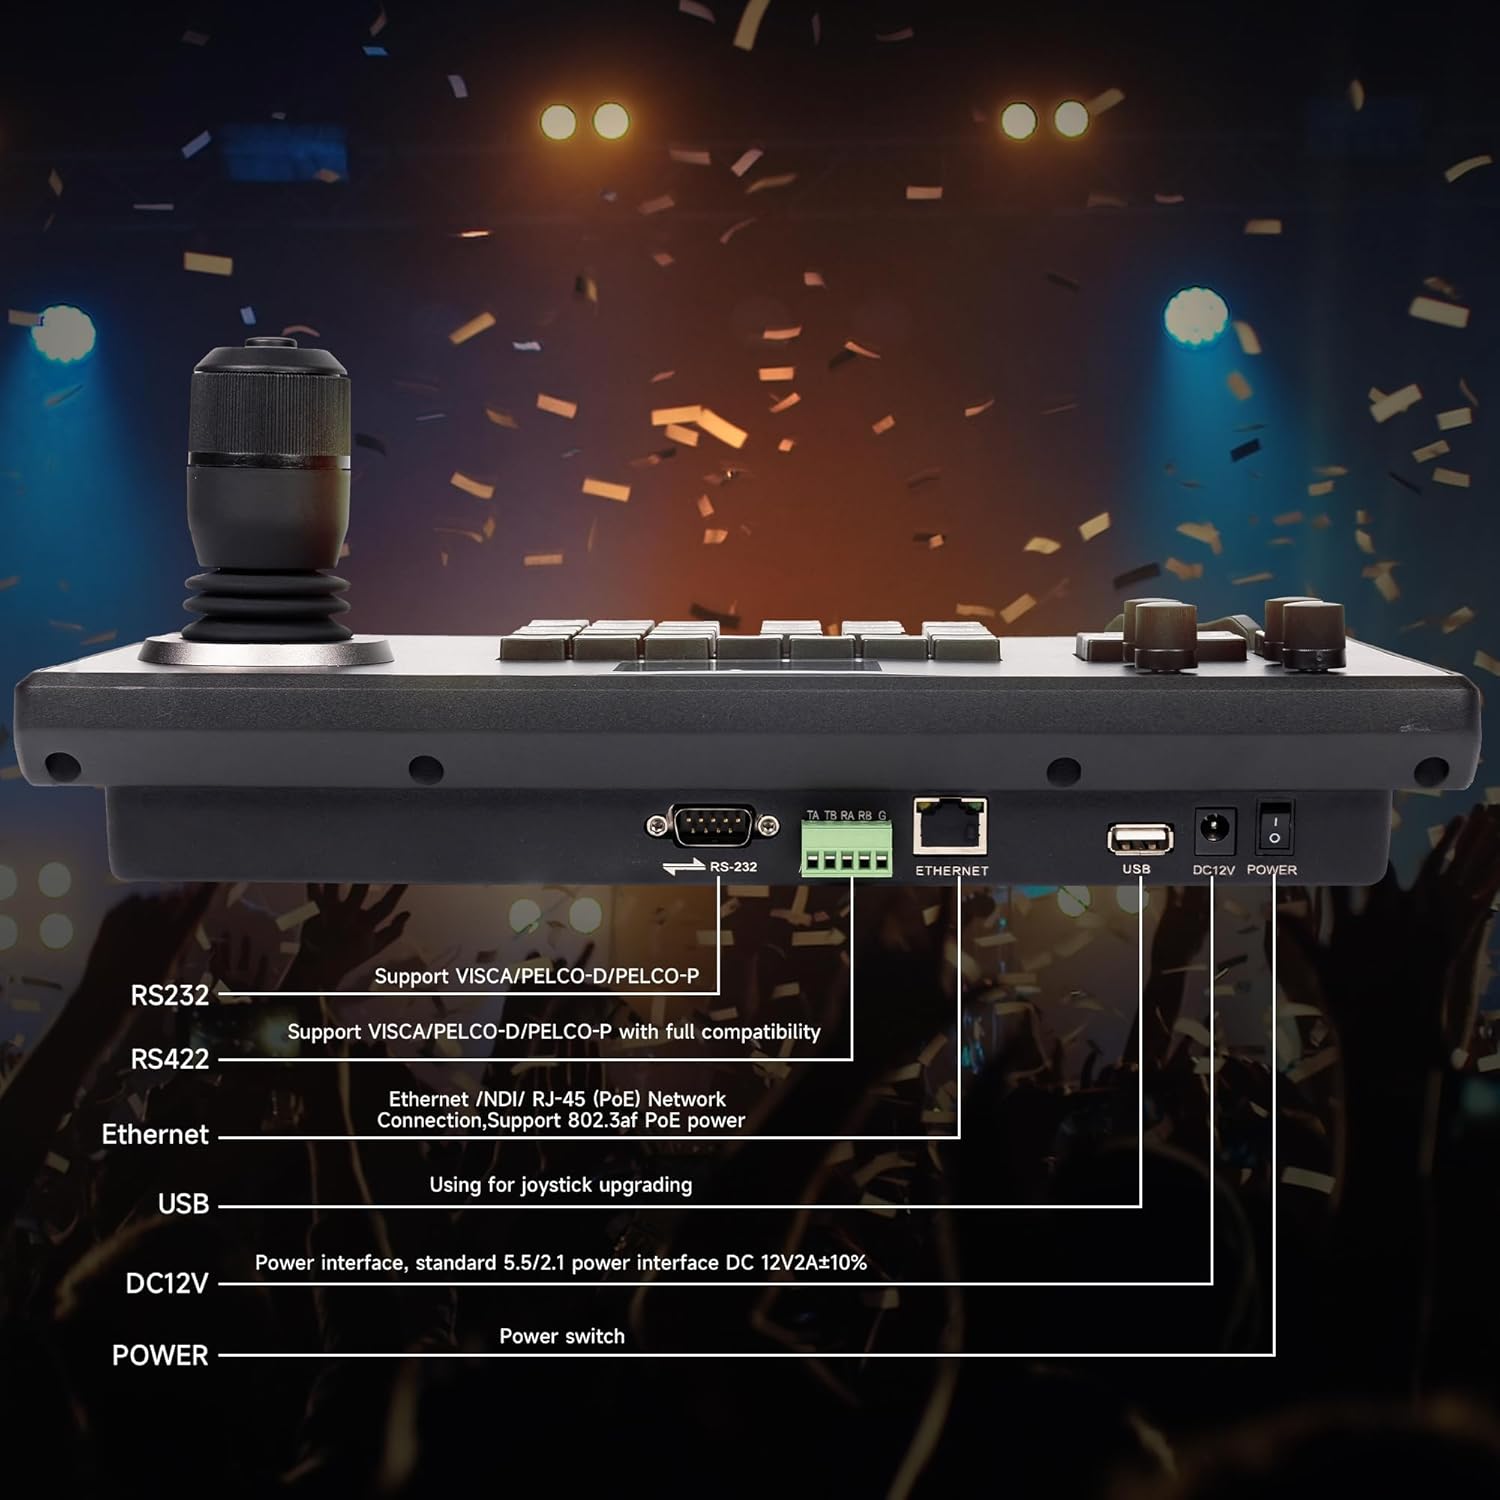
Image 2: Rear panel of the controller showing RS232, RS422, Ethernet (RJ-45), USB, DC12V Power input, and power switch.
- Koneksyon pouvwa: Connect the provided DC12V power adapter to the 'DC12V POWER' port. Alternatively, if using PoE, connect an Ethernet cable from a PoE-enabled switch to the 'ETHERNET' port.
- RS232/RS422 Connection: For serial control, connect your camera(s) to the 'RS232' or 'RS422' ports using appropriate cables. Ensure the correct wiring configuration for your camera model.
- Ethernet (IP) Connection: For IP control, connect an Ethernet cable from the 'ETHERNET' port to your network switch or directly to an IP camera.
- Pò USB: The USB port is primarily used for firmware upgrades.
2.3 Camera Connection Examples
The controller supports various camera types and connection methods.

Image 3: Close-up of the 4D joystick, highlighting its design for variable speed control and comfortable operation.

Image 4: Diagram illustrating how to connect conference cameras, dome cameras, and PTZ cameras via a network switch (with PoE) to the controller, supporting both network and analog control modes.

Imaj 5: Yon ansyenample setup showing the controller connected to a PoE switch, which in turn connects to multiple PTZ cameras, demonstrating an easy connection method.
2.4 Inisyal Konfigirasyon
After connecting, power on the controller. You may need to configure network settings (e.g., IP address) and select the appropriate control protocol for your cameras. Refer to your camera's manual for specific protocol and address settings.
3. Operasyon Enstriksyon
The controller's interface is designed for efficient camera management.

Imaj 6: Detaye view of the control panel, identifying the LCD Screen, Function Wheel, Function Keys, Joystick, Camera Select buttons, Zoom controls, and Number Keys.
3.1 Kontwòl Panel Layout
- Ekran LCD: Displays current camera status, settings, and menu options.
- Joysticks: Controls pan, tilt, and zoom (by twisting) with variable speed.
- Camera Select (CAM1-CAM7): Buttons to select which camera to control.
- Kontwòl Zoom: Dedicated 'ZOOM <' and '> ZOOM' buttons for fine-tuning zoom.
- Kle Fonksyon: Buttons for various camera functions such as MENU, HOME, SETUP, PRESET, CALL, BRIGHTNESS, FOCUS, etc.
- Nimewo Nimewo: Used for entering values, selecting presets, or navigating menus.
- Function Wheel: For adjusting specific parameters like iris or focus, depending on the selected function.
3.2 Operasyon debaz
- Pouvwa sou: Flip the power switch on the rear panel. The LCD screen will illuminate.
- Chwazi Kamera: Press the corresponding 'CAM' button (e.g., CAM1) to select the camera you wish to control.
- Pan / Panche: Move the joystick left, right, up, or down to pan and tilt the selected camera. The speed of movement is proportional to how far you push the joystick.
- Zoom: Twist the joystick clockwise for telephoto (zoom in) and counter-clockwise for wide-angle (zoom out). Alternatively, use the dedicated 'ZOOM <' and '> ZOOM' buttons.
- Konsantre: Use the 'AUTO FOCUS' button or the 'NEAR' and 'FAR' buttons to adjust focus. The Function Wheel may also be assigned for manual focus.
- Prereglaj: To save a preset, position the camera, then press 'PRESET' followed by a number key (0-9). To recall a preset, press 'CALL' followed by the saved number key.
- Navigasyon nan meni: Press the 'MENU' button to access the camera's OSD (On-Screen Display) menu. Use the joystick and number keys to navigate and select options. Press 'ESC' to exit.
4. Antretyen
Proper maintenance ensures the longevity and optimal performance of your controller.
- Netwayaj: Use a soft, dry cloth to clean the exterior of the controller. For stubborn dirt, a slightly damp cloth with mild detergent can be used, ensuring no liquid enters the device. Avoid abrasive cleaners or solvents.
- Depo: Sere kontwolè a nan yon kote ki fre epi sèk, lwen limyè solèy dirèk ak tanperati ekstrèm lè w pa ap itilize li.
- Mizajou mikrolojisyèl: Periodically check the Tenveo official website for available firmware updates to ensure optimal performance and compatibility. Use the USB port for updates as per instructions provided with the firmware.
NAN. Depanaj
Seksyon sa a adrese pwoblèm komen ou ka rankontre.
5.1 Pwoblèm komen ak solisyon
- Kontwolè pa reponn:
- Ensure the power adapter is securely connected and the power switch is on.
- If using PoE, verify the Ethernet cable is connected to a PoE-enabled switch and the switch is powered.
- Check all connection cables (RS232, RS422, Ethernet) between the controller and cameras.
- Verify the correct camera is selected using the 'CAM' buttons.
- Joystick Movement is Reversed (Pan/Tilt):
- Press the 'SETUP' key.
- Navigate the LED screen menu using the joystick until you reach 'Keyboard Settings'.
- Press the small button on top of the joystick to enter the Keyboard Settings.
- Adjust the settings for Left/Right movement and Tilt movement to match the desired joystick direction.
- Camera Not Switching or Delayed Response:
- Ensure all cameras are properly connected and powered.
- Verify that each camera has a unique address if using serial control, or a unique IP address if using IP control.
- Check for network congestion or interference if using IP control.
- Confirm that the selected protocol on the controller matches the protocol of the camera.
- Limited Functionality with Camera:
- Ensure the camera's control protocol (VISCA, PELCO-P, PELCO-D) is fully compatible with the controller's implementation. Some camera-specific functions may not be universally supported.
- Refer to your camera's manual for supported control commands.
5.2 Konpatibilite Inivèsèl
The controller is designed for broad compatibility with various PTZ camera protocols.

Image 7: The controller supports universal compatibility with major protocols including VISCA, VISCA over IP, PELCO-D, and PELCO-P.
6. Espesifikasyon
| Karakteristik | Detay |
|---|---|
| Nimewo Modèl | B0DK68XJF8 |
| Manifakti | Tenveo |
| Kontwòl interfaces | RS232, RS422, RJ45 (Ethernet) |
| Kontwòl pwotokòl | VISCA, VISCA over IP, PELCO-P, PELCO-D |
| Joystick | 4D, Variable Speed |
| Pwovizyon pou pouvwa | DC12V or PoE (Power over Ethernet) |
| Dat Premye Disponib | 11 jen 2024 |
| Kalite atik | Elektwonik |
7. Garanti ak sipò
For warranty information and technical support, please refer to the documentation included with your purchase or visit the official Tenveo websit. Tèm garanti espesifik yo ka varye selon rejyon an ak détayan an.
For further assistance, please contact Tenveo customer service through their official channels.


