Entwodiksyon
This manual provides comprehensive instructions for the safe and correct installation and use of your Flexson Wall Mount for SONOS ERA300 speakers. Please read all instructions carefully before installation and retain this manual for future reference.
The Flexson Wall Mount is precision-engineered to securely hold your Sonos Era 300 speaker. It features a unique mechanism allowing the speaker to be tilted downwards by 20 degrees and swiveled up to 60 degrees (30 degrees left and 30 degrees right). The mount also allows for inverted speaker placement, ensuring easy access to controls and microphones.
Enfòmasyon sou Sekirite
- Li tout enstriksyon yo: Ensure you understand all installation steps before proceeding.
- Kapasite pwa: This mount is designed specifically for the Sonos Era 300 speaker. Do not exceed the recommended weight capacity.
- Kalite mi: Ensure the wall structure can safely support the weight of the mount and the speaker. Use appropriate fixings for your wall type (brick, masonry, studwork).
- Enstalasyon pwofesyonèl: If you are unsure about the installation process or wall suitability, consult a qualified professional.
- Evite domaj: Do not overtighten screws, as this may cause damage to the mount or the speaker.
- Timoun ak bèt kay: Kenbe ti pyès ak materyèl anbalaj lwen timoun ak bèt kay pou evite risk toufe.
Ki sa ki nan bwat la
Depakete sa ki anndan pake a avèk atansyon epi asire w ke tout bagay yo la:
- 1 x Flexson Wall Mount
- 1 x Manyèl Enstriksyon (dokiman sa a)
- 1 x Fixings kit (screws, wall plugs for brick/masonry and studwork)
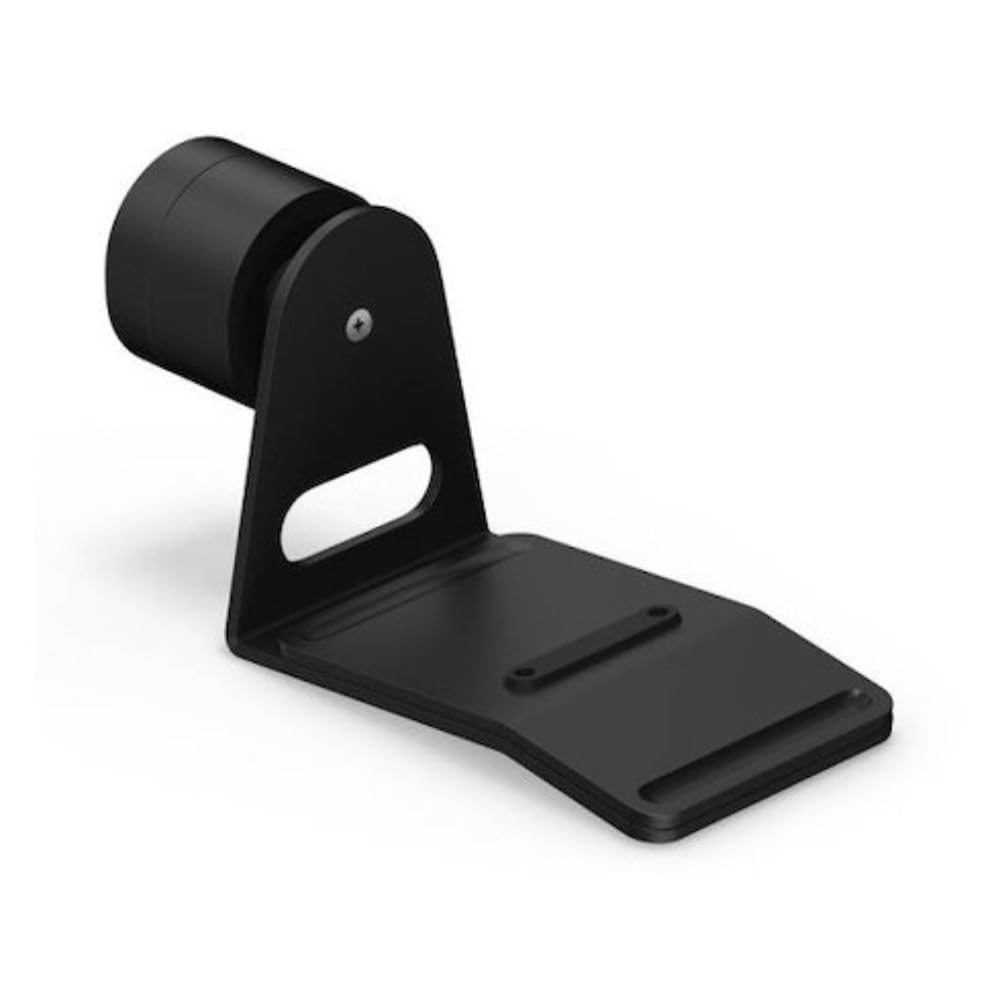
Image: The Flexson Wall Mount for SONOS ERA300, shown in white. This image displays the main components of the mount.
Gid enstalasyon
Zouti Obligatwa (Pa Founi)
- Kreyon
- Nivo Lespri Bondye
- Fè egzèsis
- Appropriate drill bits for your wall type
- tournevis (tèt Phillips)
- Stud finder (for studwork installation)
Etap-pa-etap Enstalasyon
- Chwazi Kote Montaj: Select a suitable wall location, considering speaker placement for optimal sound and power cable access. Ensure there are no hidden electrical wires or pipes behind the drilling area.
- Make pwen perçage yo: Hold the wall mount bracket against the wall at the desired height and use a spirit level to ensure it is perfectly horizontal. Mark the drilling points through the screw holes with a pencil.
Image description: A diagram showing the wall mount bracket held against a wall with drilling points marked.
- Fè twou pilòt: Drill pilot holes at the marked points. The size of the drill bit will depend on your wall type and the provided wall plugs. For brick/masonry, use the appropriate drill bit for the wall plugs. For studwork, drill pilot holes suitable for the wood screws.
- Insert Wall Plugs (if applicable): For brick or masonry walls, insert the provided wall plugs into the drilled holes until they are flush with the wall surface.
- Attach Wall Mount Bracket: Align the wall mount bracket with the drilled holes. Secure the bracket to the wall using the appropriate screws from the fixings kit. Ensure the bracket is firmly attached and stable.
Image description: The wall mount bracket securely fastened to the wall with screws.
- Prepare Speaker for Mounting: Carefully place your Sonos Era 300 speaker onto the mount. The mount is designed to cradle the speaker securely. Ensure the speaker is seated correctly. The mount can be inverted to hold the speaker upside down if desired, allowing easier access to controls.
Image description: The Sonos Era 300 speaker being placed onto the wall mount.
- Secure Speaker to Mount: Depending on the mount design, there may be a securing screw or clamp to hold the speaker in place. Follow the specific instructions provided with the mount to ensure the speaker is firmly secured and cannot accidentally fall.
Operating the Mount (Adjustments)
The Flexson Wall Mount allows for flexible positioning of your Sonos Era 300 speaker:
- Ajisteman enklinezon: The speaker can be tilted downwards by up to 20 degrees. To adjust, gently push or pull the speaker to the desired angle. The mechanism is designed to hold its position once set.
Image description: A side view of the mounted speaker, illustrating the downward tilt adjustment.
- Ajisteman Swivel: The speaker can be swiveled up to 60 degrees (30 degrees left and 30 degrees right). To adjust, gently rotate the speaker horizontally to the desired direction.
Image description: A top-down view of the mounted speaker, illustrating the left and right swivel adjustment.
- Montaj Envèse: The mount allows the speaker to be installed upside down. This can be useful for accessing controls or optimizing sound dispersion in certain setups. Ensure the speaker is securely fastened in this orientation.
Antretyen
To ensure the longevity and appearance of your Flexson Wall Mount:
- Netwayaj: Wipe the mount with a soft, dry cloth. Avoid using abrasive cleaners or solvents, as these may damage the finish.
- Tèks Peryodik: Periodically check all screws and fixings to ensure they remain tight and secure. Over time, vibrations or movement may cause them to loosen.
- Kondisyon anviwònman: Avoid exposing the mount to extreme temperatures or high humidity, which could affect its material integrity.
Depanaj
- Mòn nan santi l lach: Check all wall fixings and speaker securing screws. Tighten them if necessary. Ensure the wall material is suitable and the correct wall plugs/screws were used.
- Speaker not holding position: If the tilt or swivel mechanism does not hold the speaker in place, ensure the speaker is correctly seated and secured. Avoid excessive force when adjusting.
- Difikilte ak enstalasyon: Re-read the installation steps carefully. Ensure you have the correct tools and have identified the wall type correctly. If issues persist, consider consulting a professional installer.
Espesifikasyon
| Nimewo Modèl | FLXE300WM1021 |
| Dimansyon pwodwi | 7.56 x 3.62 x 6.77 pous (19.2 x 9.2 x 17.2 cm) |
| Pwa atik | 2.87 liv (1.3 kg) |
| Koulè | Blan |
| Kalite aliye | Mi mòn |
| Konpatib Oratè | Sonos Era 300 |
| Ajisteman enklinezon | Up to 20 degrees downwards |
| Ajisteman Swivel | Up to 60 degrees (30 degrees left, 30 degrees right) |
| Manifakti | Flexson |
Garanti ak sipò
For warranty information, please refer to the documentation included with your purchase or visit the official Flexson website. If you require technical support or have questions regarding your Flexson Wall Mount, please contact Flexson customer service through their official channels.