1. Entwodiksyon
This manual provides detailed instructions for the setup, operation, and maintenance of your LinknLink eTHS WiFi Smart Temperature and Humidity Monitor Sensor. Please read this manual thoroughly before using the device to ensure proper functionality and safety.
1.1 Enfòmasyon sou Sekirite
- Kenbe aparèy la lwen dlo ak anviwònman ki gen anpil imidite.
- Pa ekspoze aparèy la nan tanperati ekstrèm oswa limyè solèy la dirèk.
- Use only the specified power adapter (5V mini USB) to prevent damage.
- Evite jete oswa sibi aparèy la nan gwo enpak.
- Pa eseye demonte oswa repare aparèy la tèt ou. Kontakte sipò kliyan pou asistans.
2. Pwodwi souview
2.1 Karakteristik kle
- Accurate and Fast Reading: Equipped with a Swiss-made Sensirion sensor, providing temperature accuracy up to ±0.54°F/±0.3°C and humidity accuracy up to ±2%RH. Data refreshes every 2 seconds.
- Wi-Fi Connection Without Hub: Connects directly to 2.4G Wi-Fi, eliminating the need for a separate hub.
- App Real-Time Status and Alert: View current status and 24-hour data curves. Set customizable high and low limits for immediate alerts on your phone.
- FREE Data Storage and Export: Offers up to 3 years of free data storage. Export full data to Excel at any time.
- Works with Alexa/Google: Voice control compatibility with Amazon Alexa and Google Home for temperature and humidity inquiries. Supports Alexa Routines for advanced automation.
- TH2MQTT Home Assistant: Integrates with Home Assistant via MQTT protocol for advanced home automation based on real-time data.
2.2 Sa ki nan bwat la
- LinknLink eTHS Sensor Unit
- Sensor Cable (USB)
- Gid itilizatè
2.3 Dyagram pwodwi
Below is an image of the LinknLink eTHS sensor and its accompanying mobile application interface.
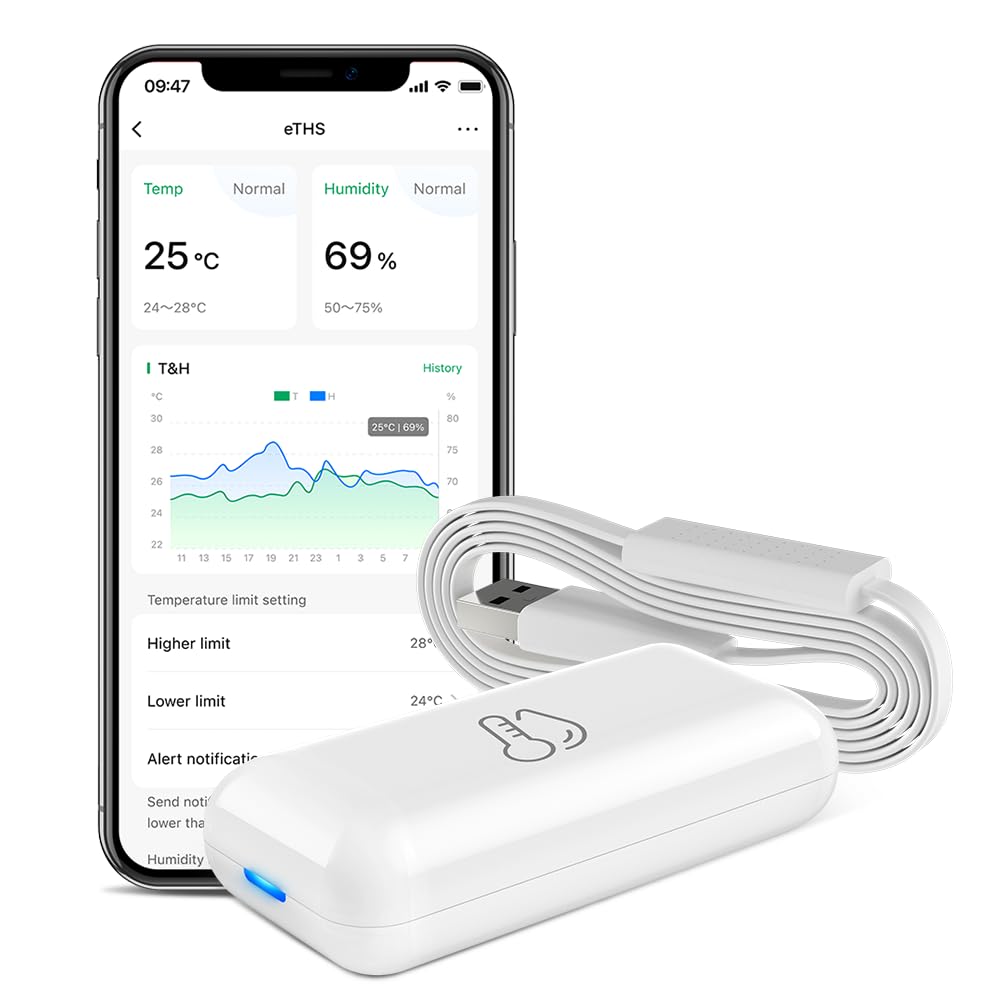
Figure 1: LinknLink eTHS Sensor and App Interface. The compact sensor unit is shown next to a smartphone displaying current temperature and humidity, along with historical data graphs and alert settings.
3. Espesifikasyon
| Spesifikasyon | Valè |
|---|---|
| Nimewo Modèl | eTHS |
| Dimansyon pake | 2.95 x 1.85 x 1.54 pous |
| Pwa atik | 1.76 ons |
| Mak | LinknLink |
| Karakteristik espesyal | Segondè Presizyon |
| Koulè | Blan |
| Materyèl Eksteryè | Plastik |
| Kalite ekspozisyon | Pa gen ekspozisyon |
| Koneksyon Teknoloji | Wi-Fi (2.4G) |
| Presizyon Tanperati | ± 0.54 ° F / ± 0.3 ° C |
| Presizyon imidite | ± 2% RH |
| To Rafrechisman Done | Chak 2 segonn |
4. Gid Enstalasyon
4.1 Enstalasyon App
- Chèche pou the "LinknLink" app in your smartphone's app store (Google Play Store for Android or Apple App Store for iOS).
- Telechaje epi enstale aplikasyon an.
- Enskri pou yon nouvo kont oubyen konekte si ou deja genyen youn.
4.2 Device Power-Up and Wi-Fi Connection
The LinknLink eTHS sensor is designed for convenient installation, powered by a 5V mini USB cable.
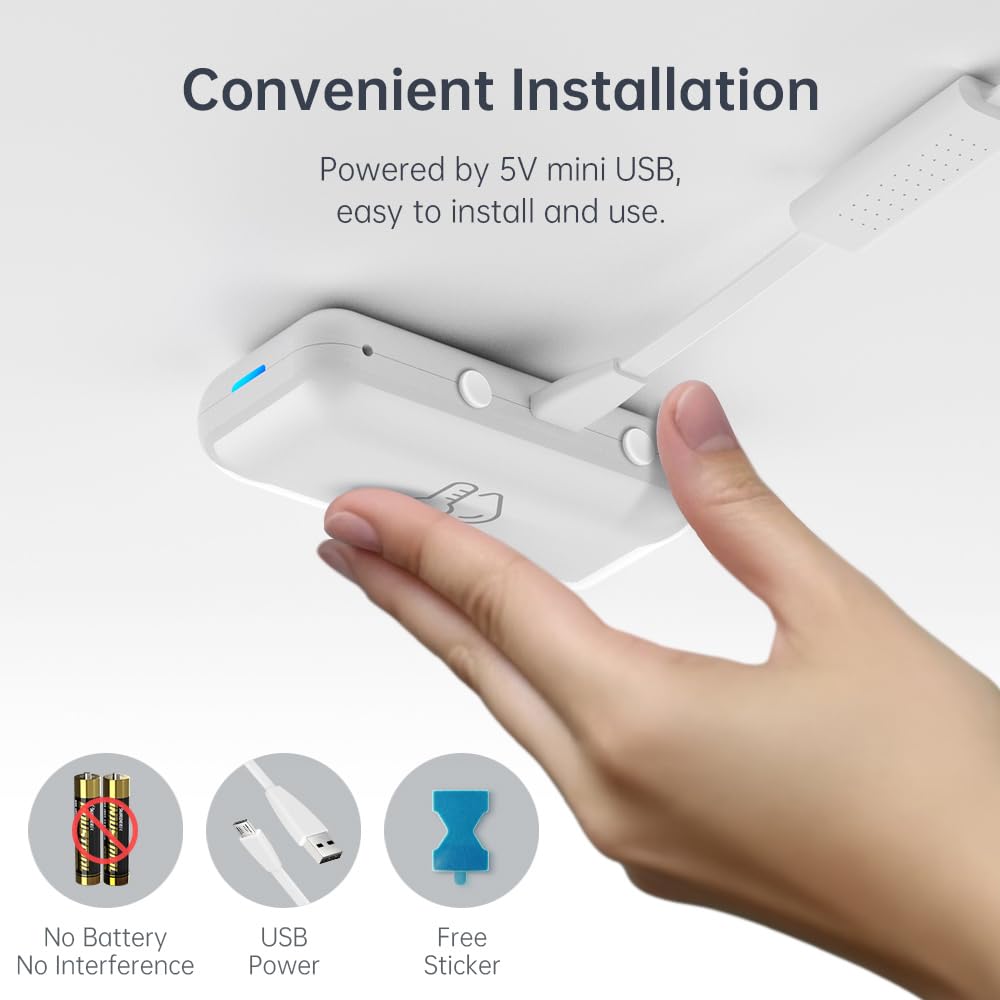
Figure 2: Convenient USB-powered installation of the eTHS sensor. The image shows a hand connecting a USB cable to the sensor, highlighting its battery-free operation and simple setup.
- Plug the provided USB sensor cable into the LinknLink eTHS sensor unit.
- Connect the other end of the USB cable to a 5V USB power source (e.g., a USB wall adapter, computer USB port).
- The device will power on, and an indicator light will show its status.
- Open the LinknLink app and follow the on-screen instructions to add a new device. Ensure your smartphone is connected to a 2.4G Wi-Fi network.
- The eTHS sensor connects directly to your Wi-Fi network, eliminating the need for a separate hub.
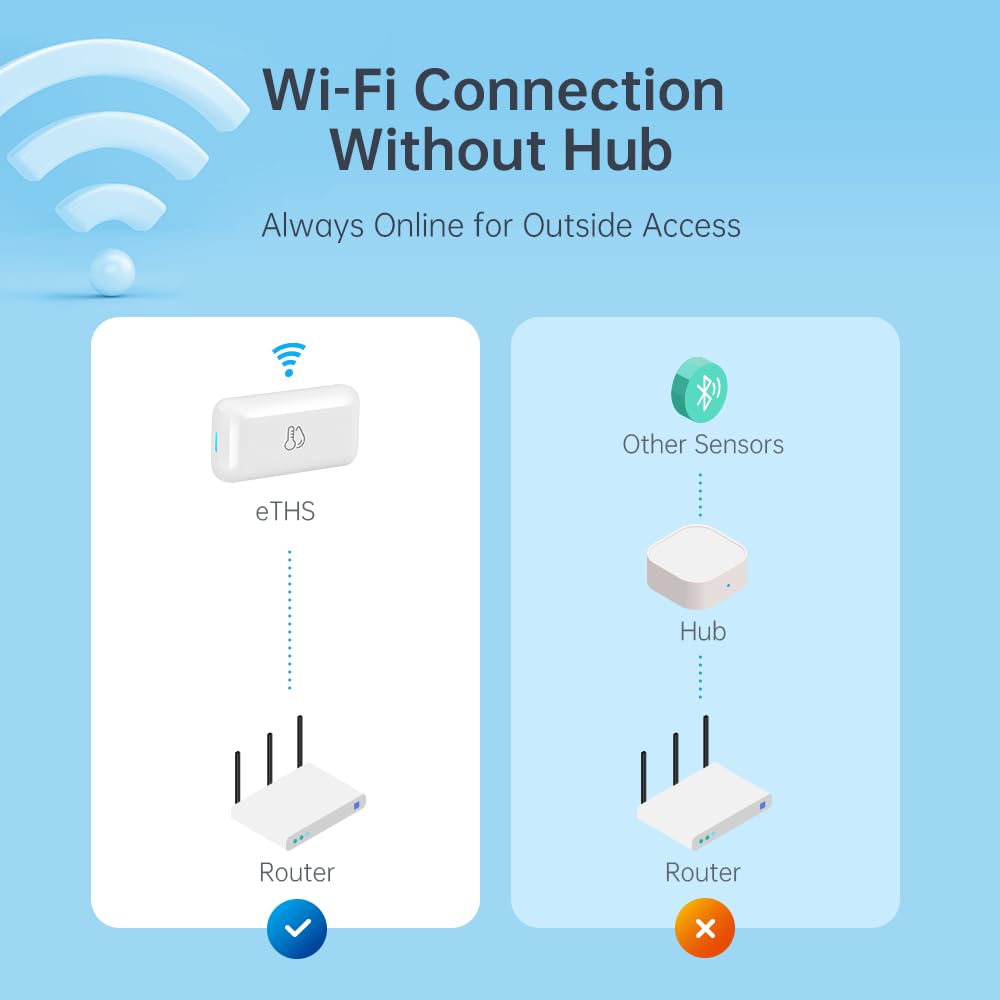
Figure 3: Direct Wi-Fi connection of the eTHS sensor, showing how it connects to a router without an intermediate hub, unlike other sensors.
5. Operasyon Enstriksyon
5.1 Real-Time Monitoring and Alerts
The LinknLink eTHS allows you to monitor environmental conditions remotely and receive alerts for significant changes.
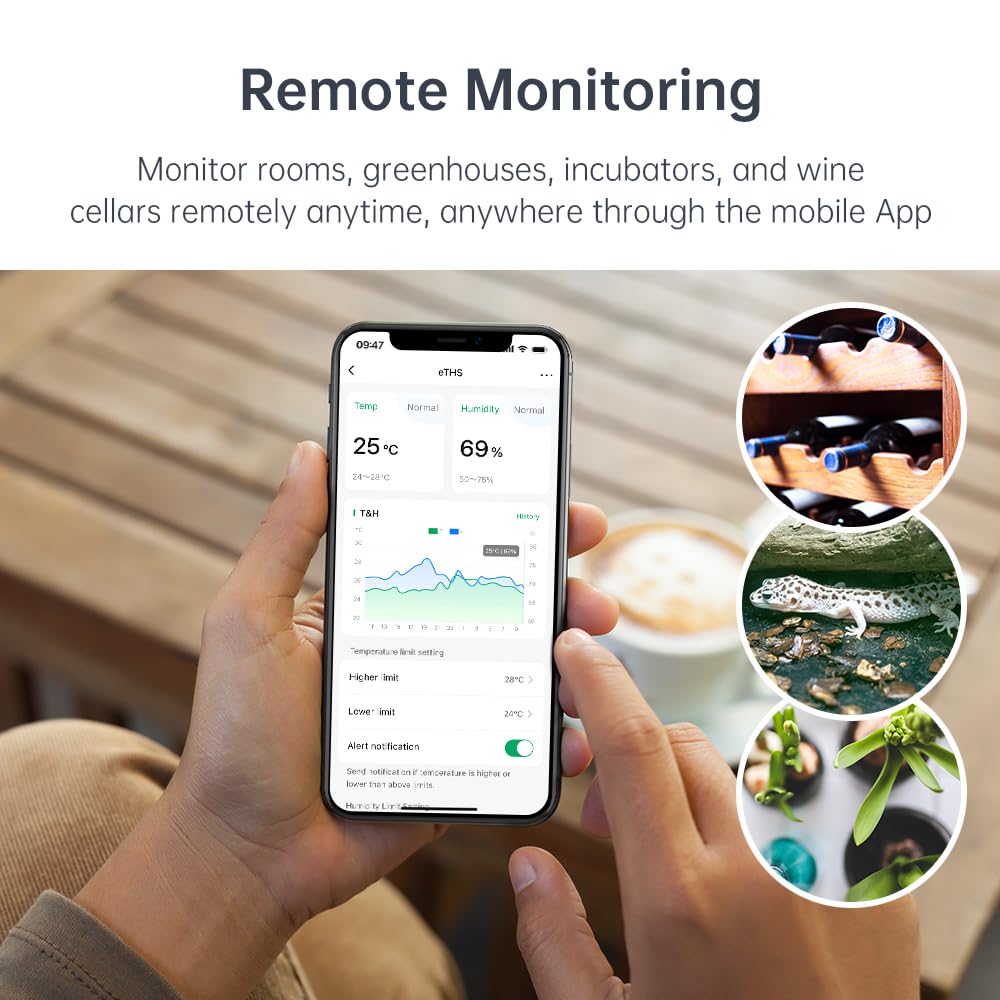
Figure 4: Remote monitoring capabilities of the eTHS sensor in diverse environments such as a greenhouse, wine cellar, and animal incubator.
- Open the LinknLink app to view done tanperati ak imidite an tan reyèl.
- The app displays a 24-hour data curve, allowing you to track trends.
- Set higher and lower temperature/humidity limits within the app.
- Receive immediate push notifications on your phone if readings exceed or fall below your set limits.
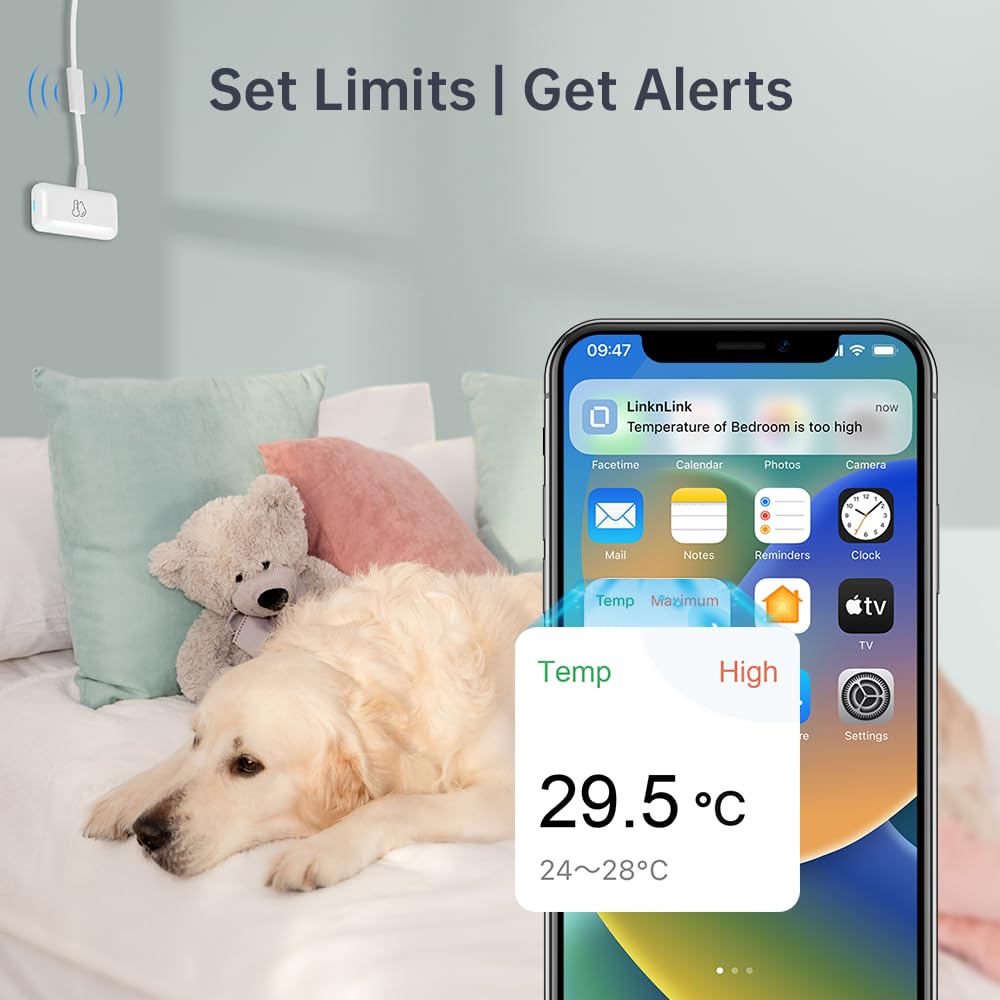
Figi 5: Egzample of a high-temperature alert notification received on a smartphone, demonstrating the sensor's ability to notify users of environmental changes.
5.2 Depo ak Ekspòtasyon Done
The eTHS sensor offers extensive data logging capabilities.
- Access detailed historical data within the LinknLink app.
- The device provides up to 3 years of free data storage.
- You can export the full data history to an Excel file for record-keeping or analysis at any time.
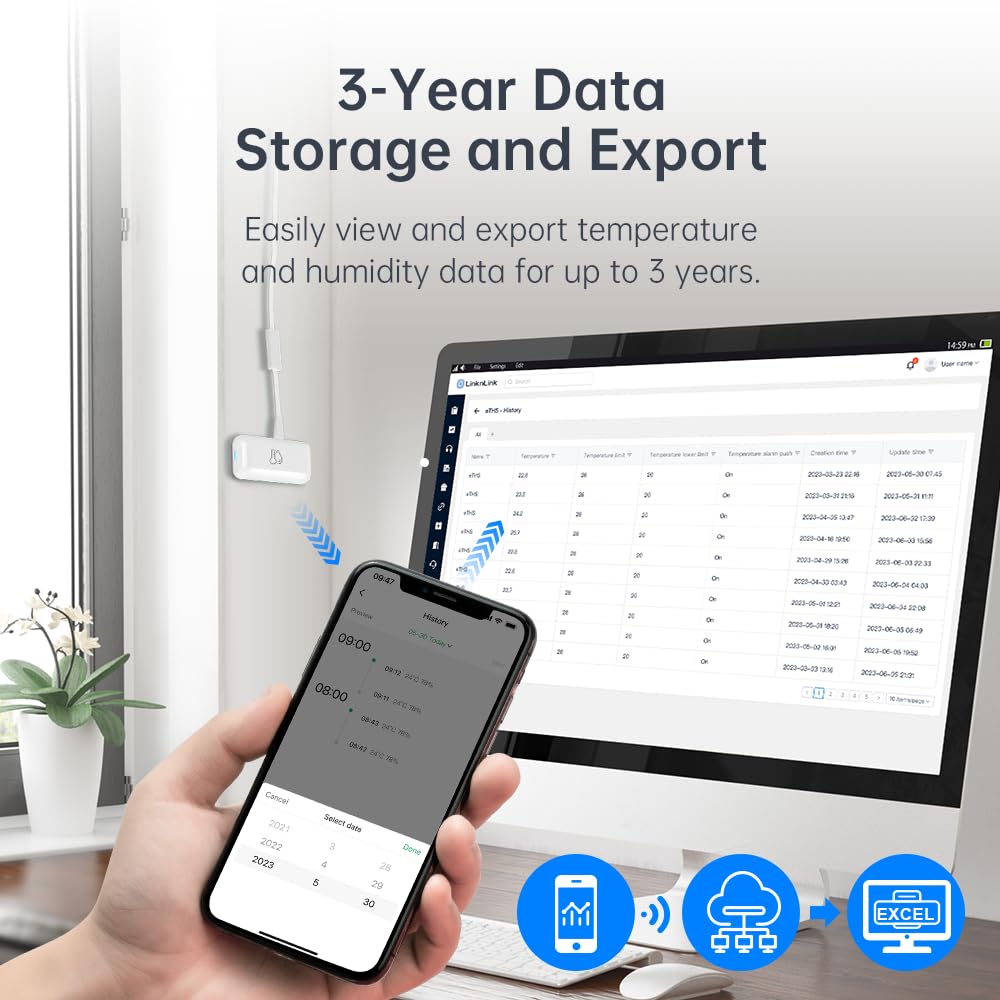
Figi 6: Viewing and exporting historical temperature and humidity data from the eTHS sensor to a computer, with a smartphone displaying data trends.
5.3 Entegrasyon Kontwòl Vwa
The LinknLink eTHS is compatible with popular voice assistants.
- Link your LinknLink account with Amazon Alexa or Google Home through their respective applications.
- Once linked, you can ask Alexa or Google Assistant for the current temperature or humidity in the room where the sensor is located.
- Example commands: "Alexa, what's the temperature in the living room?" or "Hey Google, what's the humidity in the basement?"
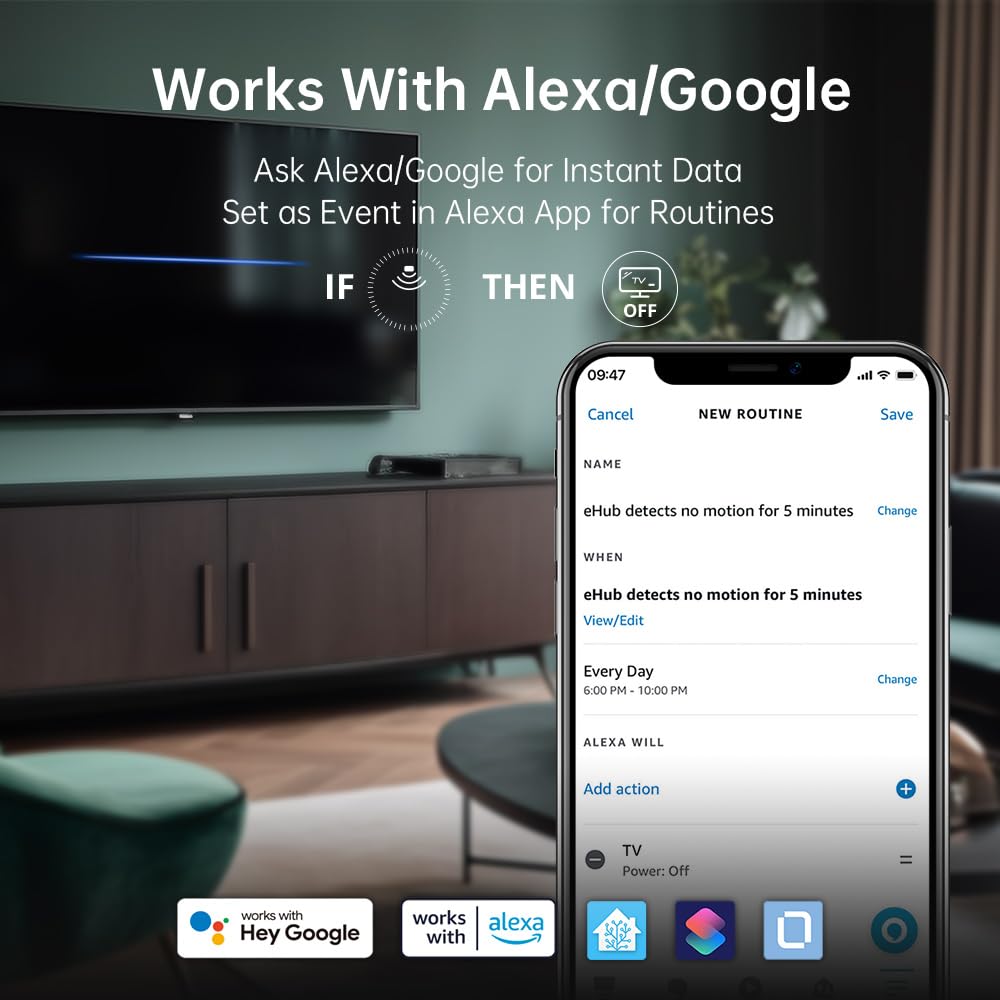
Figure 7: The eTHS sensor's compatibility with Alexa and Google Home, demonstrating how it can be used in routines to trigger actions based on motion detection.
6. Karakteristik avanse
6.1 TH2MQTT Home Assistant Integration
The eTHS sensor supports TH2MQTT, a bridge that connects the temperature and humidity sensor to Home Assistant using the MQTT protocol. This enables advanced automation scenarios.
- Monitor and react to changes in temperature and humidity within Home Assistant.
- Trigger actions such as turning on an air conditioner when the temperature is too high or activating a humidifier when humidity drops below a certain level.
- Automate your home environment based on real-time data.
6.2 Using Temperature/Humidity as Alexa Routine Triggers
While Alexa natively supports motion sensors as routine triggers, temperature and humidity sensors are not directly supported as events. However, LinknLink provides a smart workaround using a virtual "Toggle" device.
Video 1: Tutorial on how to use the LinknLink eTHS sensor to trigger Alexa Routines based on temperature or humidity changes. This video demonstrates the process of creating a virtual toggle device in the LinknLink app and linking it to Alexa to enable advanced automation.
- Create a Virtual Toggle Device: In the LinknLink app, navigate to "Smart Services" and create a "Toggle State" device. This virtual device has two states: "Triggered" and "Standby".
- Link to Alexa: The "Toggle" device will be discovered by Alexa as a motion sensor, which also has two states: "Motion Detected" and "No Motion Detected". These states will mirror the "Triggered" and "Standby" states of your virtual toggle.
- Create Routines in LinknLink App:
- Create a routine where the eTHS temperature rising above a certain threshold (e.g., 25°C) changes the "Toggle" device state to "Triggered".
- Create another routine where the eTHS temperature dropping below a certain threshold (e.g., 24°C) changes the "Toggle" device state to "Standby".
- Create Routines in Alexa App:
- Create an Alexa routine where "When Toggle detects motion" (i.e., temperature is high), Alexa performs a desired action (e.g., turns on a smart fan, sends a notification).
- Create another Alexa routine where "When Toggle detects no motion" (i.e., temperature is normal/low), Alexa performs another action (e.g., turns off the smart fan, sends a notification).
This method effectively uses the virtual toggle as an intermediary to allow temperature and humidity changes to trigger Alexa routines, expanding your home automation possibilities.

Figure 8: An illustrative diagram detailing the process of using a virtual toggle device within the LinknLink App to enable temperature-based triggers for Alexa Routines, allowing control over other smart home devices.
7. Antretyen
7.1 Netwayaj
- Wipe the device clean with a soft, dry cloth.
- Do not use liquid cleaners or aerosol sprays, as they may damage the sensor or electronic components.
7.2 Mizajou Firmware
Periodically check the LinknLink app for available firmware updates. Updates can improve performance, add new features, and enhance security. Follow the in-app instructions to perform any updates.
NAN. Depanaj
If you encounter issues with your LinknLink eTHS sensor, refer to the following common troubleshooting steps:
- Aparèy pa konekte ak Wi-Fi:
- Ensure your Wi-Fi network is 2.4Ghz. The device does not support 5Ghz networks.
- Tcheke si aparèy la nan zòn routeur Wi-Fi ou a.
- Verifye ke modpas Wi-Fi ou a byen antre nan aplikasyon an.
- Restart your router and the eTHS sensor.
- Lekti ki pa kòrèk:
- Ensure the sensor is not placed near heat sources (e.g., direct sunlight, heating vents) or cold drafts.
- Avoid placing the sensor in areas with high airflow or stagnan lè.
- Allow the sensor to stabilize for at least 30 minutes after placement for accurate readings.
- Aplikasyon an pa montre done:
- Tcheke koneksyon entènèt ou sou telefòn entelijan ou.
- Ensure the eTHS sensor is online and connected to Wi-Fi.
- Close and reopen the LinknLink app.
- Si pwoblèm nan pèsiste, eseye konekte aparèy la ankò.
- Alexa/Google Home Not Responding:
- Verify that the LinknLink skill/service is enabled in your Alexa or Google Home app.
- Ensure your eTHS sensor is discovered and listed in the Alexa/Google Home devices.
- Check your voice commands for accuracy.
9. Garanti ak sipò
9.1 Enfòmasyon sou Garanti
The LinknLink eTHS WiFi Smart Temperature and Humidity Monitor Sensor comes with a standard manufacturer's warranty. Please refer to the product packaging or the official LinknLink websit la pou wè tèm ak kondisyon garanti espesifik yo.
9.2 Sipò pou Kliyan
For further assistance, technical support, or warranty claims, please contact LinknLink customer service through the following channels:
- Imèl: [Mete Imèl Sipò Kliyan an Isit la]
- Websit: LinknLink Official Store
- Telefòn: [Mete nimewo telefòn sèvis kliyan an isit la]
Please have your product model number (eTHS) and purchase information ready when contacting support.


