1. Entwodiksyon
This manual provides detailed instructions for the operation and maintenance of your Jectse Smart RFID NFC Copier. This device is designed for reading, writing, and duplicating various RFID and NFC cards and keyfobs across multiple frequencies. Please read this manual thoroughly before use to ensure proper functionality and to prevent damage.
2. Pwodwi souview
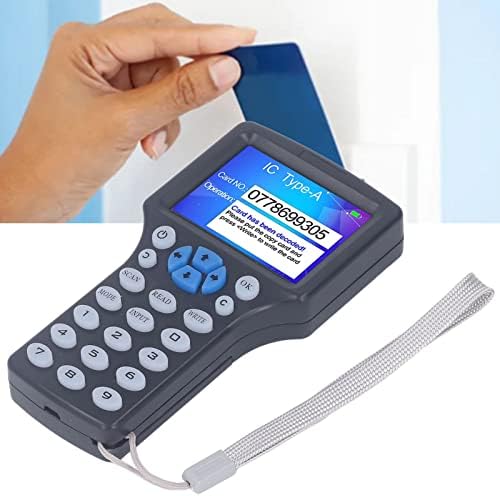
The Jectse Smart RFID NFC Copier is a handheld device featuring a color display and a numeric keypad for easy operation. It supports a wide range of card types and frequencies.
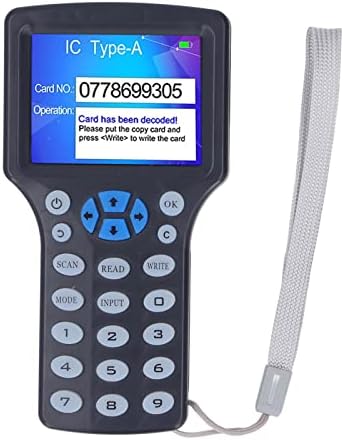
Figi 2.1: Jectse Smart RFID NFC Copier. This image shows the front view of the handheld copier with its color screen and keypad.
2.1 Konpozan ak Kontwòl
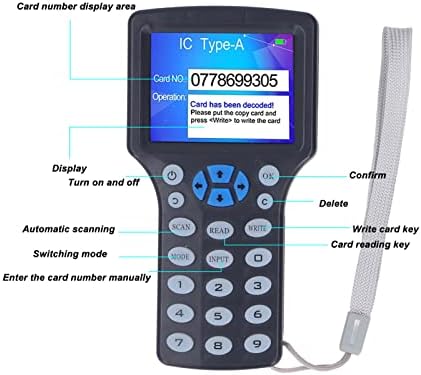
Figi 2.2: Labeled diagram of the copier's display and controls. Key elements include the display area, power button, OK button, delete button, scan button, read button, write button, mode switch, and input keys.
- Zòn ekspozisyon: Shows card number, operation status, and messages.
- Bouton pouvwa: Limen ak etenn aparèy la.
- OK bouton: Konfime seleksyon oswa aksyon.
- C bouton: Deletes input or cancels operations.
- Bouton SCAN: Initiates automatic scanning for card types.
- Bouton LI: Reads data from a card.
- WRITE Button: Writes data to a card.
- Bouton MODE: Chanje ant diferan mòd fonksyònman.
- Bouton INPUT: Allows manual entry of card numbers.
- Klavye nimerik (0-9): For entering data.
- Bouton direksyon: For navigation on the display.
2.2 Kontni pake a

Figi 2.3: Included accessories: USB data cable and two blue keyfobs. The package typically includes the copier unit, a USB data cable, and several writable keychains/cards.
- Jectse Smart RFID NFC Copier Unit
- USB done kab
- Writable Keychains (Quantity may vary)
- Writable Cards (Quantity may vary)
3. Enstalasyon
3.1 Pwovizyon pou pouvwa
Aparèy la ka mache nan de fason:
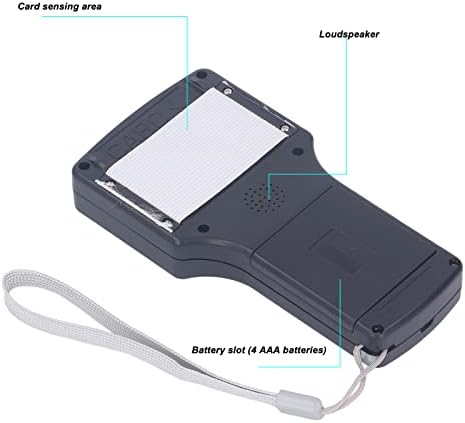
Figi 3.1: Dèyè view of the copier, highlighting the battery slot and card sensing area. The battery compartment is located on the back of the device.
- Batri AAA: Open the battery compartment on the back of the device and insert 4 AAA batteries (not included), ensuring correct polarity.
- Ekipman pou pouvwa USB: Connect the device to a computer or a USB power adapter using the provided USB data cable.
Press the power button to turn on the device. The display will light up.
3.2 Connecting to a Computer (for Decryption)
For decrypting certain 13.56MHz encrypted cards, the device must be connected to a computer.
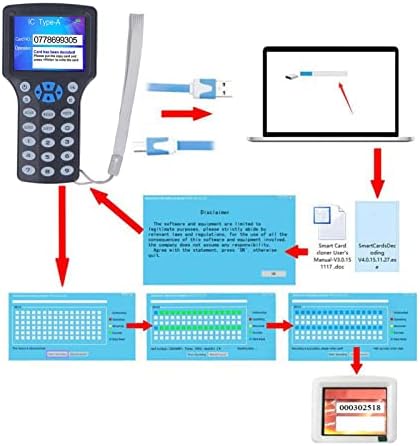
Figi 3.2: Connection diagram illustrating the copier connected to a computer via USB, with a representation of the software interface. The USB cable connects the copier to a computer for advanced functions like decryption and software interaction.
- Connect the USB data cable from the copier to an available USB port on your computer.
- The device may require specific software for decryption. Refer to the manufacturer's website or included documentation for software installation instructions.
4. Operasyon Enstriksyon
4.1 Reading a Card
- Limen aparèy la.
- Place the card or keyfob you wish to read on the card sensing area (located on the back of the device, refer to Figure 3.1).
- Peze a LI bouton.
- The display will show the card number and type if successful.
Figi 4.1: Demonstrating how to place a card on the copier for reading. The card is held flat against the back of the device.
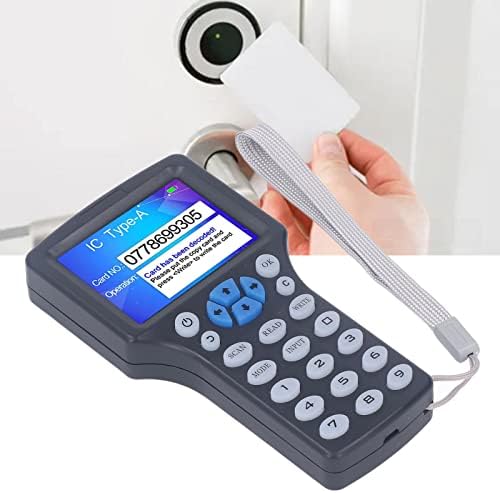
Figi 4.2: An alternative perspective of placing a card for reading. Ensure the card is positioned correctly over the sensing area.
4.2 Writing/Duplicating a Card
To duplicate a card, you must first read the source card, then write the data to a compatible writable card or keyfob.
- Follow the steps in Section 4.1 to read the source card. Ensure the card data is displayed on the screen.
- Remove the source card.
- Place a compatible writable card or keyfob (e.g., UID keychain, T5577 card) on the card sensing area.
- Peze a EKRI bouton.
- The display will indicate if the writing process was successful.
Nòt: For successful writing, ensure the target card is a writable type (e.g., UID cards for 13.56MHz, T5577 for 125KHz). Standard read-only cards cannot be written to.
4.3 Decrypting Encrypted 13.56MHz Cards
The device can decrypt most 13.56MHz encrypted cards when connected to a computer.
- Connect the copier to your computer via the USB cable (refer to Section 3.2).
- Launch the dedicated decryption software on your computer.
- Follow the software's instructions to initiate the decryption process. This typically involves placing the encrypted card on the copier's sensing area and allowing the software to analyze and decrypt the data.
- Once decrypted, the software will guide you through writing the decrypted data to a new writable card.
Enpòtan: Decryption capabilities may vary depending on the encryption complexity and the specific software version. Not all encrypted cards can be decrypted.
4.4 Frequency Support
The copier supports reading and writing across a broad range of frequencies:
- 125KHz
- 250KHz
- 375KHz
- 500KHz
- 625KHz
- 750KHz
- 875KHz
- 1000KHz
- 13.56MHz
It is compatible with various card types including ISO 14443 A cards, EM cards, T5577 cards, Ntag 213/215/216, and others.
5. Antretyen
- Netwayaj: Sèvi ak yon twal mou epi sèk pou netwaye aparèy la. Evite itilize pwodui netwayaj likid oswa materyèl abrazif.
- Depo: Sere aparèy la nan yon kote ki fre epi sèk, lwen limyè solèy dirèk ak tanperati ekstrèm.
- Ranplasman batri: If using AAA batteries, replace all four batteries simultaneously when the low battery indicator appears on the display.
- Mizajou lojisyèl: Tcheke manifakti a regilyèman website for any available software or firmware updates for enhanced functionality or compatibility.
NAN. Depanaj
| Pwoblèm | Kòz posib | Solisyon |
|---|---|---|
| Aparèy pa limen. | Low or depleted batteries; USB cable not connected properly. | Replace AAA batteries or ensure USB cable is securely connected to a power source. |
| Cannot read a card. | Card not placed correctly; card type not supported; card damaged. | Ensure the card is flat against the sensing area. Try another card. Verify card type compatibility. |
| Cannot write to a card. | Target card is not writable; data not read correctly from source card; target card damaged. | Ensure the target card is a compatible writable type (e.g., UID, T5577). Re-read the source card. Try a different writable card. |
| Decryption fails for 13.56MHz card. | Card encryption too complex; software not installed or updated; device not connected to PC. | Ensure the device is connected to a PC with the correct software. Update software. Note that some advanced encryption may not be supported. |
| Ekran an vid oswa li pa reponn. | Power issue; device malfunction. | Check power supply. Try restarting the device. If the problem persists, contact customer support. |
7. Espesifikasyon
| Karakteristik | Detay |
|---|---|
| Non modèl | Jectsegr19nkhvsb |
| Sipòte Frekans | 125KHz, 250KHz, 375KHz, 500KHz, 625KHz, 750KHz, 875KHz, 1000KHz, 13.56MHz |
| Ekspozisyon | HD 2.8 inch full color screen |
| Pwovizyon pou pouvwa | 4 x AAA batteries or USB power supply |
| Koneksyon | USB Kalite A |
| Sistèm operasyon konpatibilite | WinCE 5, Windows 98, Windows Vista (for PC connection/software) |
| Pwa atik | 11.6 ons |
| Dimansyon pake | 7.56 x 6.26 x 2.32 pous |
| Karakteristik espesyal | Konsepsyon kontra enfòmèl ant |
8. Garanti ak sipò
For warranty information and technical support, please refer to the official Jectse websit la oubyen kontakte machann ou an. Kenbe resi acha ou kòm prèv acha.
Manufacturer: Jectse