1. Entwodiksyon
The J-Tech Digital 4K USB KVM HDMI Extender (Model JTECH-KVE2) is designed to extend 4K@30Hz and 1080p HDMI signals, along with USB 2.0 KVM functionality, over a single CAT6/6a/7 Ethernet cable. This system supports transmission distances of up to 328 feet (100 meters) with near-zero latency for video. It features dual HDMI outputs on the receiver unit and 3.5mm audio extraction ports on both the transmitter and receiver units, providing flexible connectivity options for various audio-video setups.
2. Pake kontni
Verify that all items listed below are included in your package. If any items are missing or damaged, please contact J-Tech Digital customer support.
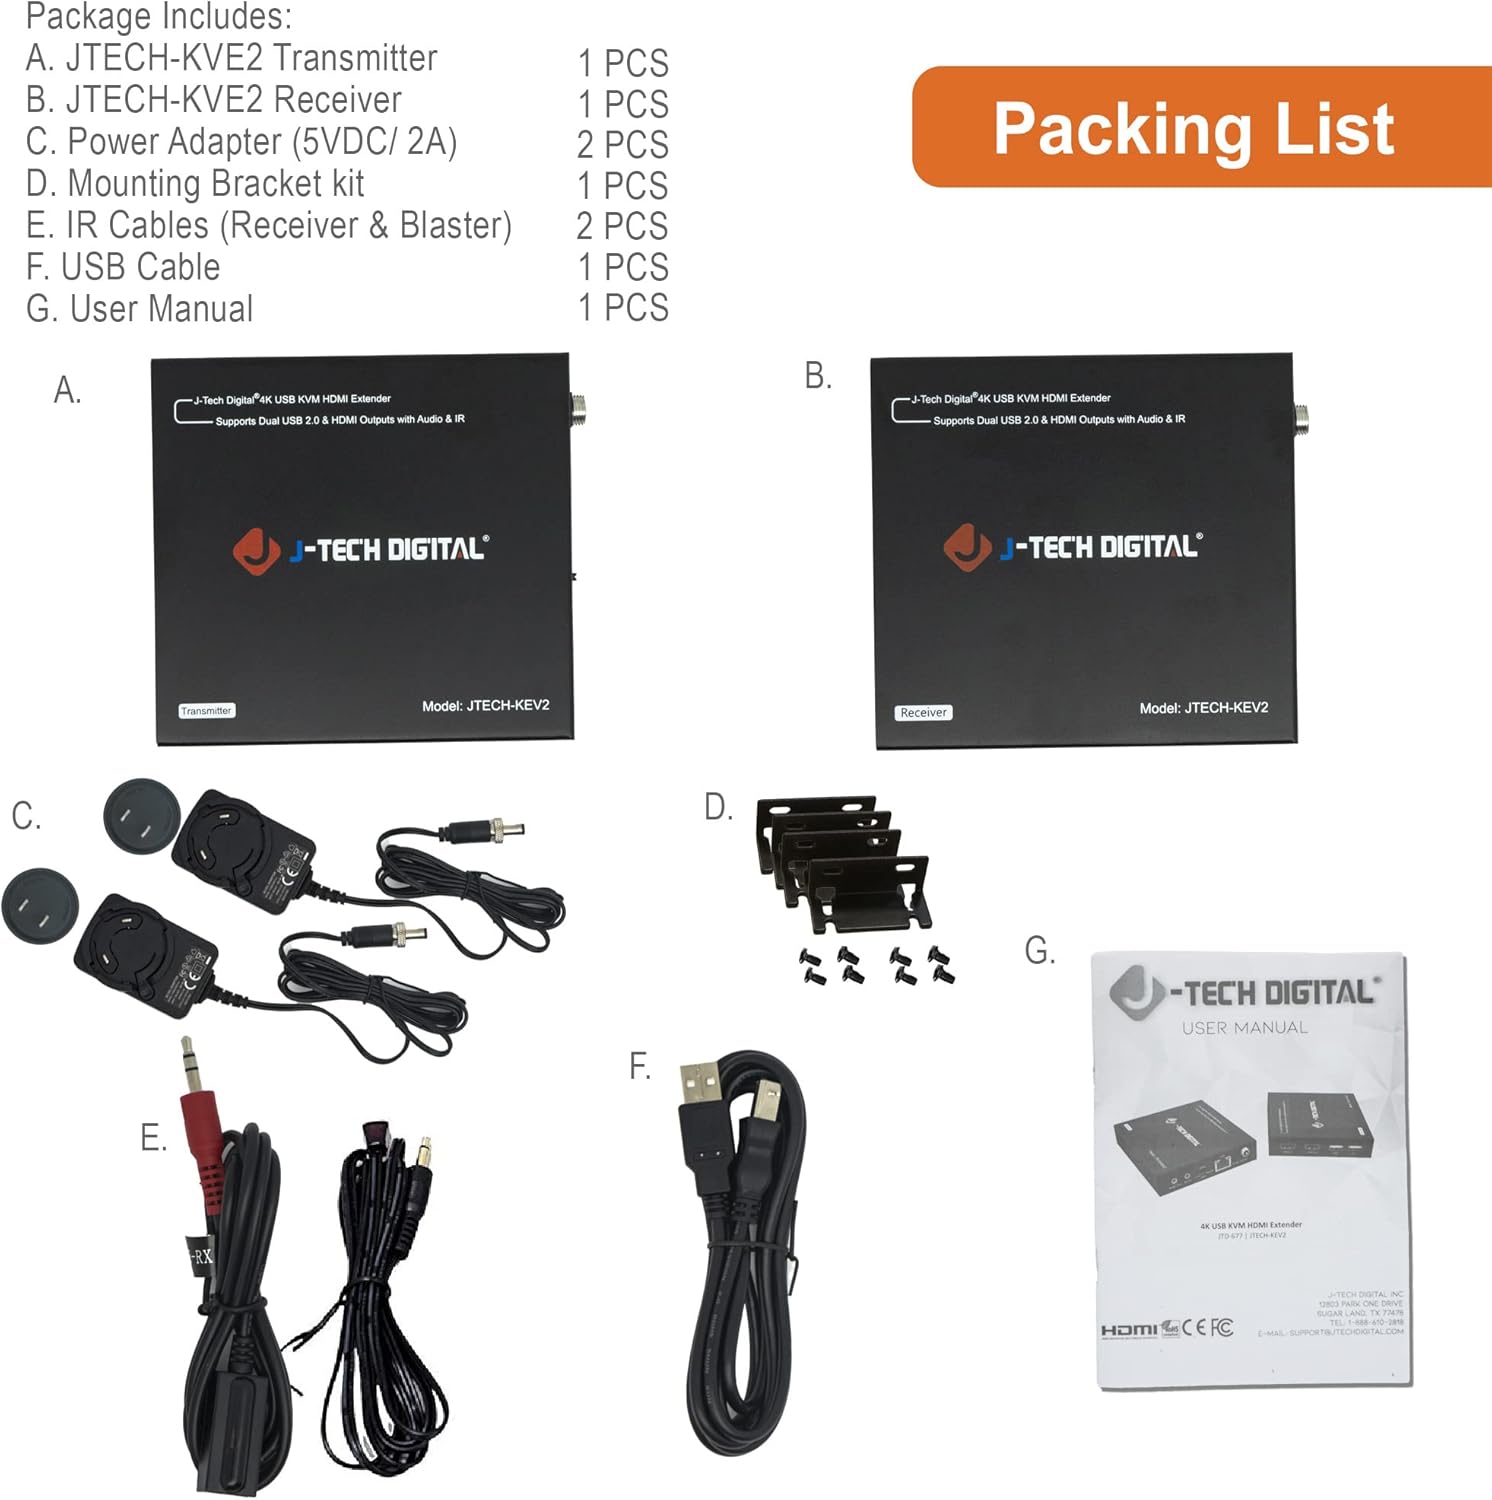
Figi 2.1: Package Contents of the JTECH-KVE2 Extender.
- 1 x JTECH-KVE2 Transmitter Unit
- 1 x JTECH-KVE2 Receiver Unit
- 2 x Power Adapters (5VDC/2A)
- 1 x Mounting Support Kit
- 2 x IR Cables (Receiver & Blaster)
- 1 x USB kab
- 1 x manyèl itilizatè
3. Pwodwi souview
3.1. Dimansyon
The JTECH-KVE2 units are compact, designed for easy integration into various setups. Refer to the diagram below for detailed dimensions.

Figi 3.1: JTECH-KVE2 Unit Dimensions.
3.2. Transmitter (TX) and Receiver (RX) Interfaces
Familiarize yourself with the ports and indicators on both the Transmitter and Receiver units for proper connection and operation.

Figi 3.2: Transmitter and Receiver Interface Layout.
Transmitter (TX) Unit Ports:
- HDMI Nan: Connects to the HDMI source device (e.g., PC, media player).
- HDMI Out (Loop): Connects to a local HDMI display for monitoring the source signal.
- USB Type-B (PC In): Connects to the USB port of the PC or source device for KVM functionality.
- 3.5mm odyo soti: Provides analog audio output from the source.
- IR Deyò: Connects to the IR Blaster cable to control the source device from the receiver location.
- EDID switch: Allows selection of EDID modes (Local, Remote, Default) for display compatibility.
- CAT (RJ-45): Connects to the Receiver unit via a single CAT6/6a/7 Ethernet cable.
- Power (DC/5V): Connects to the included 5VDC power adapter.
Receiver (RX) Unit Ports:
- HDMI Out 1 & 2: Connects to two HDMI display devices.
- USB 2.0 (Keyboard/Mouse): Two ports for connecting a USB keyboard and mouse for KVM control.
- Antre odyo 3.5mm: Allows for analog audio input at the receiver end.
- IR nan: Connects to the IR Receiver cable to receive IR signals from a remote control.
- CAT (RJ-45): Connects to the Transmitter unit via a single CAT6/6a/7 Ethernet cable.
- Power (DC/5V): Connects to the included 5VDC power adapter.
4. Enstriksyon Enstalasyon
Follow these steps to set up your JTECH-KVE2 Extender system. Ensure all devices are powered off before making connections.

Figi 4.1: Typical Connection Diagram.
- Connect Source to Transmitter: Use an HDMI cable to connect your HDMI source device (e.g., computer, game console) to the HDMI An pò sou inite transmetè a.
- (Optional) Local Display: If desired, connect a local HDMI display to the HDMI Out (Loop) port on the Transmitter unit for local monitoring.
- Connect PC for KVM: Use the provided USB cable to connect your PC's USB port to the USB Type-B (PC In) pò sou inite transmetè a.
- Koneksyon kab Ethernet: Connect a single CAT6, CAT6a, or CAT7 Ethernet cable between the CAT (RJ-45) port on the Transmitter unit and the CAT (RJ-45) port on the Receiver unit. Ensure the cable is of good quality and within the maximum recommended length of 328 feet (100 meters).
- Connect Displays to Receiver: Use HDMI cables to connect your display devices (e.g., monitors, TVs) to the HDMI soti 1 epi HDMI soti 2 ports on the Receiver unit.
- Connect KVM Devices: Konekte klavye USB ou ak sourit USB ou nan pò respektif yo. USB 2.0 ports on the Receiver unit. Note that these ports are primarily designed for keyboard and mouse devices.
- (Optional) Audio Connections: Connect external audio devices to the 3.5mm Audio Soti port on the Transmitter or the 3.5mm Audio In port on the Receiver as needed.
- (Optional) IR Control: Connect the IR Blaster cable to the IR Deyò port on the Transmitter and position the emitter near the IR sensor of your source device. Connect the IR Receiver cable to the IR An port on the Receiver and position the receiver in a location where it can pick up signals from your remote control.
- Pouvwa sou: Connect the two included 5VDC power adapters to the Power (DC/5V) ports on both the Transmitter and Receiver units. Plug the adapters into a power outlet. The units will power on automatically.
- Verifye Koneksyon: Once powered on, check for signal on your connected displays. The system should automatically detect and extend the signals.

Figi 4.2: Long Distance Signal Transmission Example.
5. Operasyon Enstriksyon
5.1. Video Extension
The extender automatically transmits HDMI video signals from the source connected to the Transmitter to the displays connected to the Receiver. It supports resolutions up to 4K@30Hz and 1080p. Ensure your source device and displays are configured to compatible resolutions.
5.2. KVM Control
With a USB keyboard and mouse connected to the Receiver unit, you can control the PC or source device connected to the Transmitter's USB Type-B port. This allows for remote operation of your computer system.

Figi 5.1: Dual USB 2.0 KVM Extension.
5.3. Audio Extraction and Input
The 3.5mm Audio Out port on the Transmitter allows you to extract analog audio from your HDMI source. The 3.5mm Audio In port on the Receiver allows for audio input at the remote location. This provides flexibility for integrating external audio systems.

Figi 5.2: 3.5mm Audio Extraction Ports.
5.4. Jesyon EDID
The EDID (Extended Display Identification Data) switch on the Transmitter unit helps ensure compatibility between the source and display devices. You can select from the following modes:
- Lokal: The Transmitter uses the EDID of the local display connected to its HDMI Out (Loop) port.
- Remote: The Transmitter uses the EDID of the display connected to the Receiver's HDMI Out 1 port.
- Default: The Transmitter uses a built-in default EDID.
If you encounter display issues (e.g., no picture, incorrect resolution), try adjusting the EDID switch to a different setting.
NAN. Depanaj
This section addresses common issues that may arise during the use of the JTECH-KVE2 Extender. If problems persist, please contact J-Tech Digital technical support.
| Pwoblèm | Kòz posib | Solisyon |
|---|---|---|
| Pa gen videyo oswa videyo a gen move kalite | Loose cable connections, incompatible resolution, incorrect EDID setting, poor quality Ethernet cable, excessive cable length. |
|
| No audio or distorted audio | Loose audio connections, source audio settings, faulty audio cable. |
|
| USB keyboard/mouse not responding | Incorrect USB port, incompatible USB device, loose USB cable. |
|
| Network degradation when using with a switch | Multicast protocol not handled by network switch. |
|
7. Espesifikasyon teknik
Below are the detailed technical specifications for the JTECH-KVE2 Extender.
| Karakteristik | Spesifikasyon |
|---|---|
| Dimansyon pwodwi | 12.45 x 10 x 2.4 pous |
| Pwa atik | 1 liv |
| Nimewo Modèl Atik | JTECH-KVE2 |
| Aparèy konpatib | PC |
| Kalite Connector | Auxiliary, HDMI |
| Koulè | Nwa |
| Mak | J-Tech Digital |
| Max Rezolisyon | 4K@30Hz, 1080p |
| Distans transmisyon | Up to 328 feet (100 meters) over CAT6/6a/7 |
| USB Creole | USB 2.0 (480 Mbps) |
| Konfòmite HDCP | HDCP 1.4 |
| Latansi | Near Zero Latency |
8. Garanti ak sipò
All J-Tech Digital products include a One-Year Manufacturer Replacement Warranty from the date of purchase. This warranty covers defects in materials and workmanship under normal use.
Additionally, J-Tech Digital provides free lifetime technical support from our customer support team. Our team is located in Stafford, TX, and is available to assist you with any questions or issues you may encounter. Support hours are 9 AM – 6 PM CST, Monday through Friday.
For technical assistance or warranty claims, please refer to the contact information available on the official J-Tech Digital seller page or websit.


