1. Entwodiksyon
This manual provides detailed instructions for the installation, operation, and troubleshooting of your MYPIN 1080P HDMI Extender Kit. This device allows you to extend HDMI signals up to 131 feet (40 meters) over a single Cat6, Cat7, or Cat8 Ethernet cable, supporting full HD 1080p resolution at 60Hz. It is designed for reliable point-to-point connections, making it suitable for various applications requiring long-distance HDMI transmission.
2. Pake kontni
Tanpri verifye sa ki nan pake a ak anpil atansyon. Si gen nenpòt atik ki manke oswa ki domaje, kontakte revandè ou a.
- 1x HDMI Extender Transmitter (TX Unit)
- 1x HDMI Extender Receiver (RX Unit)
- 2x USB Power Cables
- 1x Manyèl Itilizatè (dokiman sa a)
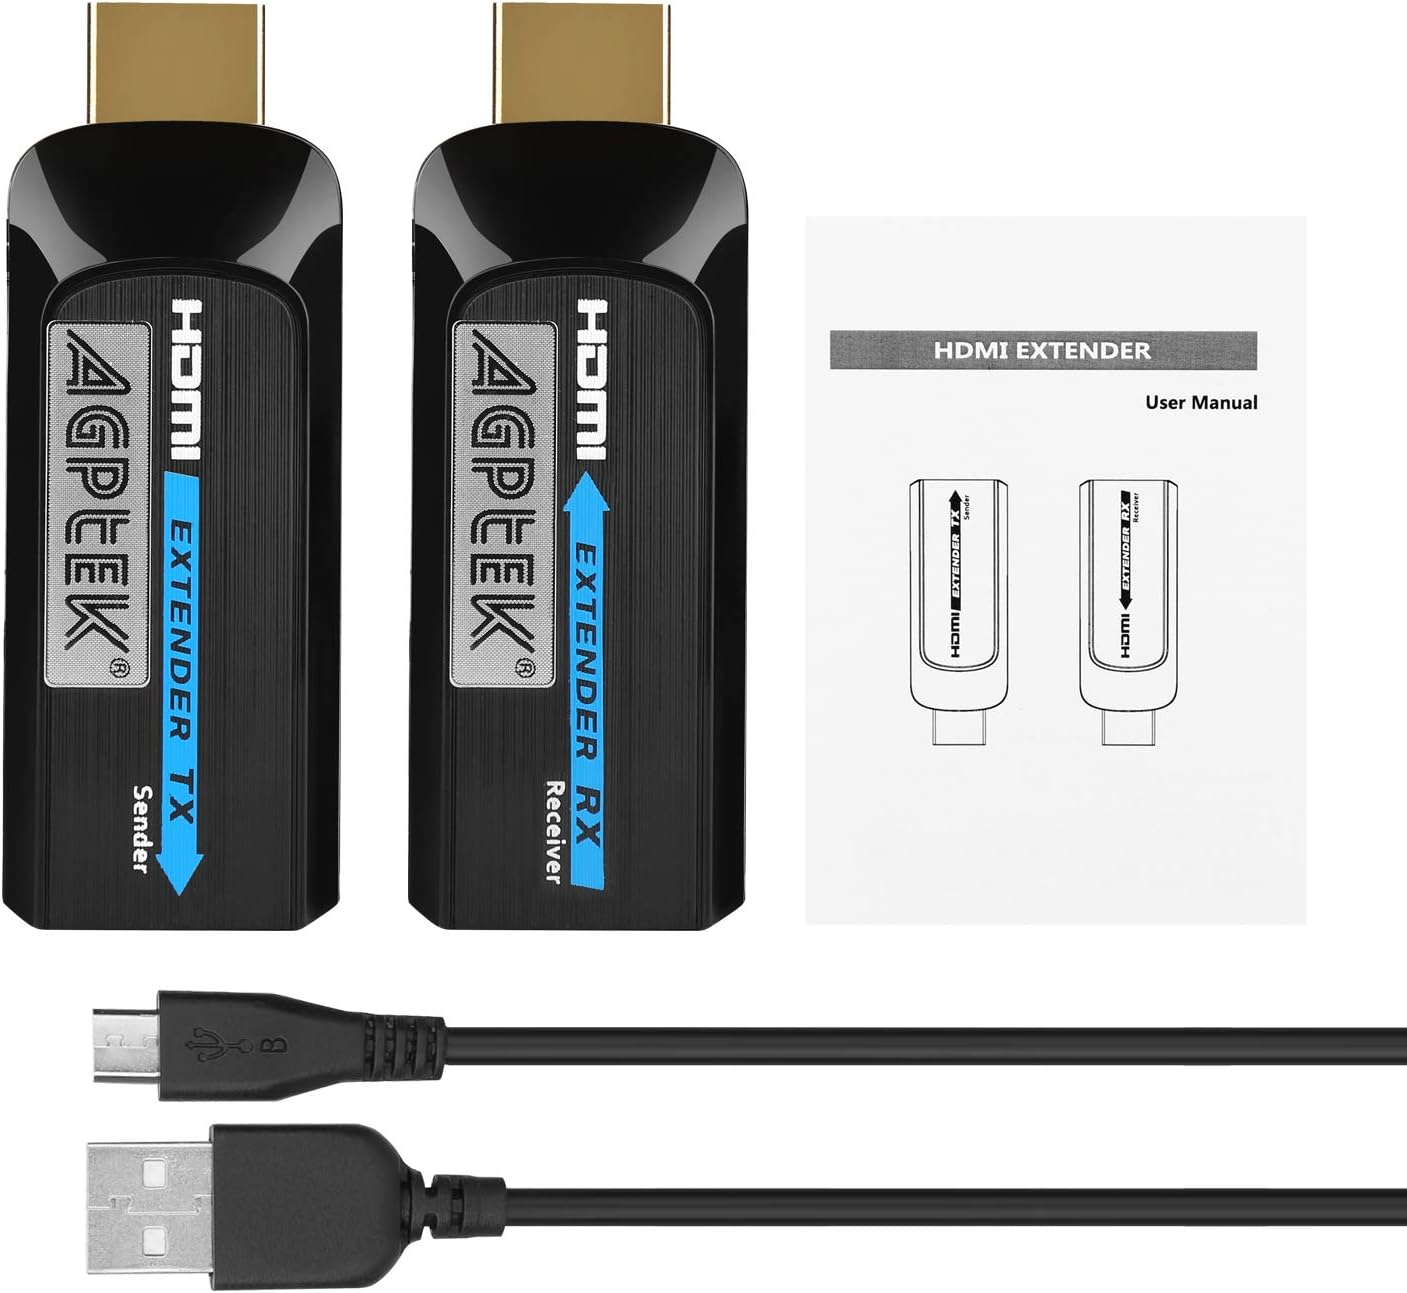
Image: Contents of the MYPIN HDMI Extender Kit, showing the transmitter and receiver units, two USB power cables, and the user manual.
3. Pwodwi Features
- Extended Transmission: Extends HDMI signals up to 131 feet (40 meters) using a single Cat6, Cat7, or Cat8 Ethernet cable.
- Full HD 1080P Support: Supports resolutions including 1080P, 1080i, 720P, 576P, 576i, 480P, and 480i at 60Hz.
- 3D Video Support: Compatible with 3D video formats.
- Ajisteman otomatik: Automatically adjusts specifications for various cable lengths (1-40m) to optimize display quality.
- Odyo san pèt: Supports uncompressed audio formats such as LPCM.
- Mini Konsepsyon: Compact and portable design for easy integration.
- Power Over Cable (POC) Support: For Cat6 cables longer than 10m, the RX unit can be powered directly via the Ethernet cable, requiring only one USB power cable for the TX unit.
- Lajè konpatibilite: Compatible with various HDMI source devices (e.g., computers, DVD players, gaming consoles) and HDMI display devices (e.g., HDTVs, projectors).

Image: The mini-sized design of the HDMI extender unit.
4. Espesifikasyon
| Paramèt | Valè |
|---|---|
| Mak | MYPIN |
| Modèl | B07PXMH11L |
| Kalite Connector | HDMI, RJ45 |
| Kalite kab | Ethernet (Cat6/7/8 recommended) |
| Distans transmisyon | Jiska 131 pye (40m) |
| Rezolisyon sipòte | 1080P / 1080i / 720P / 576P / 576i / 480P / 480i |
| Max Done Transfè To | 6.75 Gigabit pou chak segonn |
| Sipò odyo | Uncompressed audio (e.g., LPCM) |
| Pwovizyon pou pouvwa | USB 5V (2 USB cables included) |
| Karakteristik espesyal | Data Transfer, High Speed, POC (Power Over Cable) |
| Dimansyon (apeprè) | 2.75in x 0.98in x 0.59in (7cm x 2.5cm x 1.5cm) per unit |
| Pwa (apeprè) | 3.98 ons (pwa total atik la) |
5. Enstriksyon Enstalasyon
Follow these steps to properly set up your HDMI Extender Kit:
- Connect the TX (Transmitter) Unit: Plug the HDMI connector of the TX unit into the HDMI output port of your source device (e.g., laptop, PC, DVD player, gaming console).
- Connect the RX (Receiver) Unit: Plug the HDMI connector of the RX unit into the HDMI input port of your display device (e.g., TV, projector).
- Konekte kab Ethernet la: Connect a single Cat6, Cat7, or Cat8 Ethernet cable between the RJ45 port of the TX unit and the RJ45 port of the RX unit. Ensure the cable is wired according to the IEEE-568B standard for optimal performance. We recommend using high-performance pure Cat6/7/8 cables at least 1 meter in length.
- Power the Units: Connect the provided USB power cables to the DC 5V ports on both the TX and RX units. Plug the other end of the USB cables into a 5V USB power source (e.g., USB port on your TV, computer, or a USB power adapter).
Note on Power Over Cable (POC): If you are using a high-quality Cat6 cable longer than 10 meters, the RX unit may draw power directly from the Ethernet cable. In this scenario, only the TX unit requires a USB power connection.
- Pouvwa sou aparèy: Ensure all connected devices (source, display, and extender units) are powered on.
- Chwazi Antre: Chwazi opinyon HDMI ki kòrèk la sou aparèy ekspozisyon ou a.

Image: A visual guide demonstrating the simple plug-and-play connection of the HDMI extender between a source (laptop) and a display (TV) using a Cat6/7 cable.

Image: Cat6 network standard wiring diagram (IEEE-568B) showing the color sequence for proper cable termination.

Imaj: Egzample setup illustrating how MYPIN HDMI extenders facilitate longer connection distances for home entertainment or professional use.
6. Operasyon Enstriksyon
Once all connections are made and devices are powered on, the HDMI extender will automatically detect the signal and adjust for optimal display. No additional software or drivers are required.
- Ajisteman otomatik: The extender is designed to automatically adjust video and audio specifications based on the length of the Ethernet cable (1-40 meters) to ensure the best possible display quality.
- Length Button (if applicable): Some models may feature a "Length button" for 12-level automatic and manual adjustment of gears. If your unit has this button, you can press it to fine-tune the signal for specific cable lengths if automatic adjustment does not yield desired results. Refer to the markings on your specific unit for its location and function.
- Senkronizasyon Odyo ak Videyo: The extender ensures synchronized transmission of both audio and video signals.

Image: The HDMI extender supporting 1080P@60Hz resolution, displayed on a television screen.

Image: Demonstration of audio and video synchronization transmission through the HDMI extender, showing a display with speakers.
7. Antretyen
To ensure the longevity and optimal performance of your HDMI Extender Kit, follow these simple maintenance guidelines:
- Netwayaj: Use a soft, dry cloth to clean the units. Do not use liquid cleaners or aerosol sprays.
- Depo: Sere inite yo nan yon kote ki fre epi sèk, lwen limyè solèy dirèk ak tanperati ekstrèm.
- Manyen: Avoid dropping or subjecting the units to strong impacts. Do not attempt to disassemble the units, as this will void any warranty.
- Swen kab: Ensure Ethernet and HDMI cables are not bent sharply or pinched, which can damage the internal wires and affect signal quality.
NAN. Depanaj
If you encounter issues with your HDMI Extender Kit, please refer to the following common problems and solutions:
| Pwoblèm | Kòz posib / Solisyon |
|---|---|
| No picture or signal on display. |
|
| Poor picture quality, flickering, or distortion. |
|
| Pa gen odyo. |
|
| Units are hot to the touch. |
|
9. Garanti ak sipò
MYPIN products are designed for reliability and performance. For specific warranty information, please refer to the warranty card included with your product or visit the official MYPIN website. If you require technical assistance or have questions not covered in this manual, please contact MYPIN customer support through their official channels.
Official MYPIN Store: Visit the MYPIN Store on Amazon


