1. Entwodiksyon
This manual provides essential instructions for the safe and efficient operation of your Renkforce PRO3 3D Printer, model RF-4318370. Please read this manual thoroughly before using the device to ensure proper setup, operation, and maintenance. Retain this manual for future reference.
2. Enstriksyon Sekirite
Obsève prekosyon sekirite sa yo pou evite blesi oswa domaj nan enprimant lan:
- Tanperati segondè: The print nozzle and print bed reach high temperatures during operation. Avoid touching these components directly to prevent burns. Allow the printer to cool down before performing maintenance.
- Pati k ap deplase: The printer contains moving parts that can cause injury. Keep hands, hair, and loose clothing away from the print head and other moving components during operation.
- Sekirite elektrik: Connect the printer to a grounded power outlet. Do not operate the printer with damaged power cords or plugs. Disconnect power before cleaning or servicing.
- Vantilasyon: Operate the printer in a well-ventilated area, especially when printing with materials that may emit fumes.
- Timoun ak bèt kay: Kenbe enprimant lan soti nan atenn timoun ak bèt kay.
- Materyèl ki ka pran dife: Do not place flammable materials near the printer during operation.
3. Pake kontni
Lè w ap debale l, verifye si tout konpozan yo la epi yo pa domaje:
- Renkforce PRO3 3D Printer (1 unit)
- Pouvwa kab
- Filament Spool (starter)
- Kab USB (pou koneksyon PC)
- Tools and Accessories (e.g., spatula, pliers, spare nozzle, SD card)
- Manyèl Itilizatè (dokiman sa a)
Si gen nenpòt atik ki manke oswa ki domaje, kontakte machann ou imedyatman.
4. Pwodwi souview
Familiarize yourself with the main components of your Renkforce PRO3 3D Printer.

Figi 4.1: Devan view of the Renkforce PRO3 3D Printer. This image displays the printer's overall design, including the enclosed print chamber, the print head mechanism, the build plate, and the integrated control panel located at the base of the unit. The filament guide tube is visible at the top.

Figi 4.2: Angle view of the Renkforce PRO3 3D Printer. This perspective shows the printer's black front frame and white side panels, offering a clearer view of the internal structure, including the linear rails, print head, and heated build plate. The control panel is also visible.
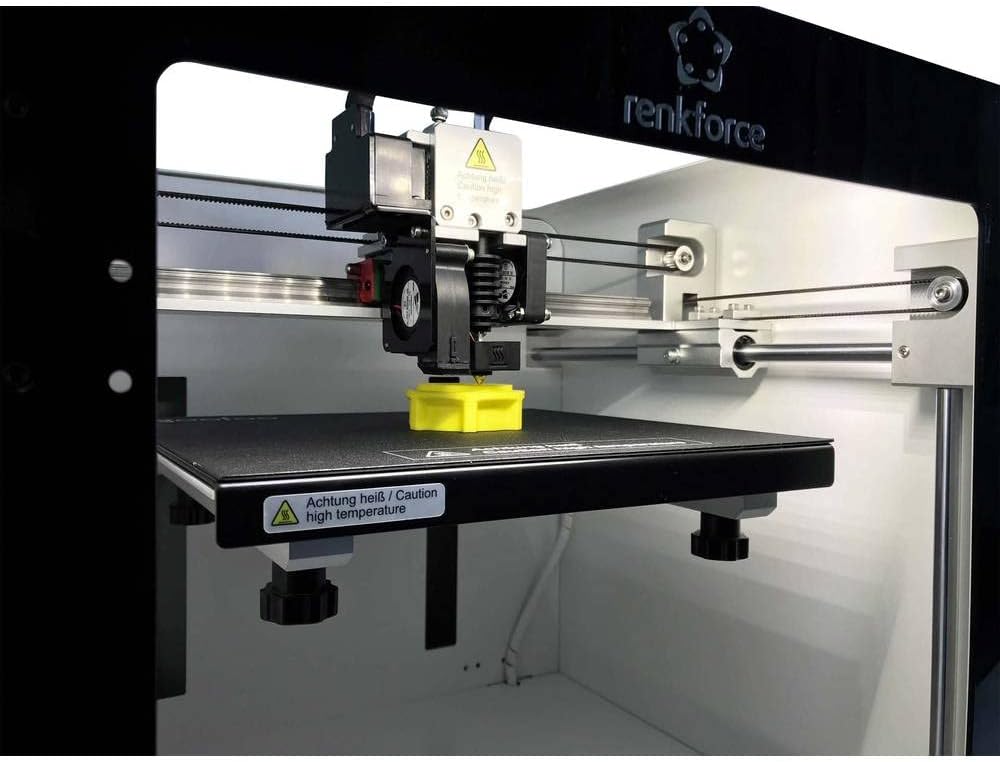
Figi 4.3: Close-up of the print head and build plate during operation. This image focuses on the extruder assembly, the heated build plate, and a small yellow 3D-printed object being created. A "Caution high temperature" warning label is visible on the build plate.
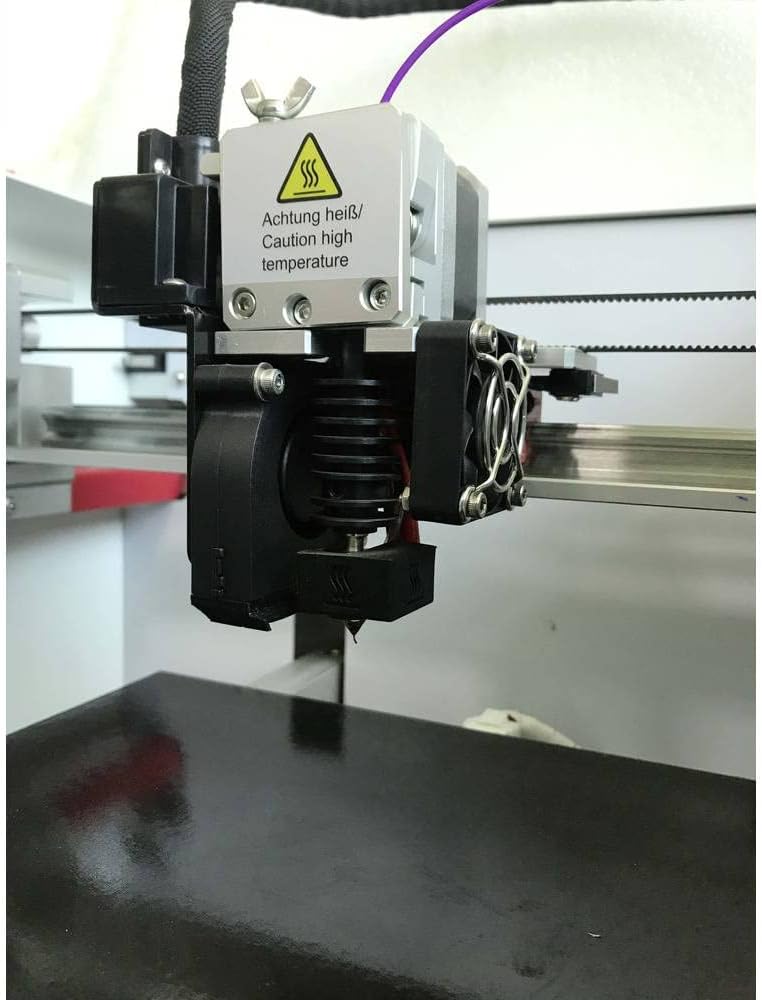
Figi 4.4: Detaye view of the extruder and hotend assembly. This close-up highlights the components responsible for melting and extruding filament, including the cooling fans, heat sink, and nozzle. A "Caution high temperature" warning is prominently displayed on the hotend.
5. Enstalasyon
Follow these steps to set up your Renkforce PRO3 3D Printer:
- Debake: Carefully remove the printer from its packaging. Remove all protective foam, tape, and ties.
- Plasman: Mete enprimant lan sou yon sifas ki estab e plat nan yon zòn ki byen ayere, lwen limyè solèy dirèk ak sous chalè.
- Koneksyon pouvwa: Connect the power cable to the printer and then to a grounded electrical outlet. Do not power on yet.
- Chajman filaman:
- Mount the filament spool onto the designated holder.
- Feed the filament through the guide tube and into the extruder mechanism.
- Follow the on-screen instructions or manual controls to preheat the nozzle and load the filament until it extrudes smoothly.
- Nivelman Plak Konstriksyon: Ensure the build plate is properly leveled. Refer to the printer's control panel menu for the auto-leveling function or manual leveling instructions. Proper leveling is crucial for successful prints.
- Enstalasyon lojisyèl: Install the necessary 3D printing software (slicer) on your personal computer (compatible with Windows operating systems). This software converts 3D models into printable instructions (G-code).
6. Operasyon Enstriksyon
Once set up, you can begin your first print:
- Prepare Modèl 3D a: Obtain or create a 3D model file (e.g., .STL, .OBJ).
- Slice the Model: Open the 3D model in your slicing software. Configure print settings such as layer height, infill, print speed, and support structures. The software will generate a G-code file.
- Transfer G-code: Sove kòd G la file to an SD card or transfer it directly to the printer via USB (if supported by your software and printer connection type, which is RF for this model).
- Kòmanse enprime: Insert the SD card into the printer. Navigate the printer's control panel to select the G-code file and start the print.
- Enpresyon Monitè: Observe the first few layers to ensure proper adhesion and extrusion. Monitor the print progress periodically.
- Retire Enprime: Once the print is complete and the build plate has cooled, carefully remove the printed object using the provided spatula.
7. Antretyen
Regular maintenance ensures optimal performance and longevity of your printer:
- Clean Build Plate: After each print, clean the build plate to remove any residue. Use isopropyl alcohol for best results.
- Netwayaj bouch: Periodically clean the nozzle to prevent clogs. A brass brush can be used for external cleaning, or a needle for internal clogs (when hot).
- Lubrifye pati k ap deplase: Apply a small amount of lubricant to the linear rods and lead screws every few months to ensure smooth movement.
- Check Belts: Ensure the timing belts are properly tensioned. They should be taut but not overly tight.
- Mizajou mikrolojisyèl: Tcheke manifakti a website for any available firmware updates to improve printer performance and add features.
NAN. Depanaj
Men kèk solisyon pou pwoblèm komen ou ka rankontre:
| Pwoblèm | Kòz posib | Solisyon |
|---|---|---|
| Filaman an pa soti deyò | Clogged nozzle, incorrect temperature, tangled filament. | Clean the nozzle, verify print temperature settings, ensure filament spool unwinds freely. |
| Pòv adezyon kabann | Unleveled bed, dirty build plate, incorrect bed temperature. | Re-level the build plate, clean the surface with isopropyl alcohol, adjust bed temperature in slicer settings. |
| Kouch déplacement | Loose belts, print head hitting print, excessive print speed. | Check and tension belts, ensure no obstructions, reduce print speed. |
| Stringing/Oozing | Paramèt retraksyon ki pa kòrèk, tanperati bouch la twò wo. | Adjust retraction distance and speed in slicer, slightly lower nozzle temperature. |
For further assistance, consult online resources or contact Renkforce customer support.
9. Espesifikasyon
Key technical specifications for the Renkforce PRO3 3D Printer (Model RF-4318370):
- Mak: Renkforce
- Nimewo Modèl: RF-4318370
- Koulè: Nwa/Blan
- Sistèm operasyon konpatib: Windows
- Koneksyon Teknoloji: RF (Radio Frequency, likely for wireless communication or specific interface)
- Aparèy konpatib: Odinatè pèsonèl
- Materyèl konpatib: Polylactic Acid (PLA), ABS (Acrylonitrile Butadiene Styrene)
- Dimansyon pwodwi (L x W x H): 54 cm x 54 cm x 58 cm
- Pwa atik: 22.2 Kilogram
10. Garanti ak sipò
Specific warranty information for the Renkforce PRO3 3D Printer is not available in this document. Please refer to the warranty card included with your product packaging or visit the official Renkforce websit la pou wè tèm ak kondisyon garanti detaye yo.
For technical support, troubleshooting beyond this manual, or spare parts inquiries, please contact Renkforce customer service through their official channels.


