Entwodiksyon
This manual provides comprehensive instructions for the assembly, operation, and maintenance of your RAIJINTEK NYX PRO Showcase Big-Tower chassis. Please read this manual thoroughly before beginning installation to ensure proper setup and safe usage. This chassis is designed for high-performance PC builds, offering extensive compatibility and a unique aesthetic.
Enfòmasyon sou Sekirite
Toujou obsève prekosyon sekirite sa yo:
- Ensure all power is disconnected from components before installation or maintenance.
- Handle tempered glass panels with care to prevent breakage.
- Wear anti-static wrist straps when handling sensitive electronic components.
- Kenbe ti pati ak zouti lwen timoun yo.
- Do not attempt to modify the chassis structure.
Kontni pake
Verifye ke tout konpozan yo prezan anvan ou kontinye ak asanblaj la:
- RAIJINTEK NYX PRO Showcase Big-Tower Chassis
- Bwat akseswa (vis, distansè, lyen kab, elatriye)
- Manyèl Itilizatè (dokiman sa a)

Image: The RAIJINTEK NYX PRO Showcase Big-Tower chassis in white, showcasing its unique open-frame design and tempered glass panels.
Espesifikasyon
| Karakteristik | Detay |
|---|---|
| Non modèl | NYX PRO (0R20B00183) |
| Kalite Ka | Big-Tower / Showcase |
| Materyèl | Vè apeze, Asye |
| Koulè | White (Blanc) |
| Dimansyon pwodwi (L x W x H) | 59.5 x 26.5 x 65.8 cm |
| Pwa atik | 14.17 kg |
| Mèr konpatibilite | ATX pwolonje, ATX, Mikwo-ATX, Mini-ITX |
| Metòd refwadisman | Water, Air (supports various fan sizes up to 120mm) |
| Itilizasyon Rekòmande | Gaming PC Builds |
Enstalasyon ak Enstalasyon
Follow these steps for proper assembly of your PC components within the NYX PRO chassis.
1. Prepare Chasi a
Carefully unbox the chassis and place it on a stable, flat surface. Identify the various access points and removable panels.
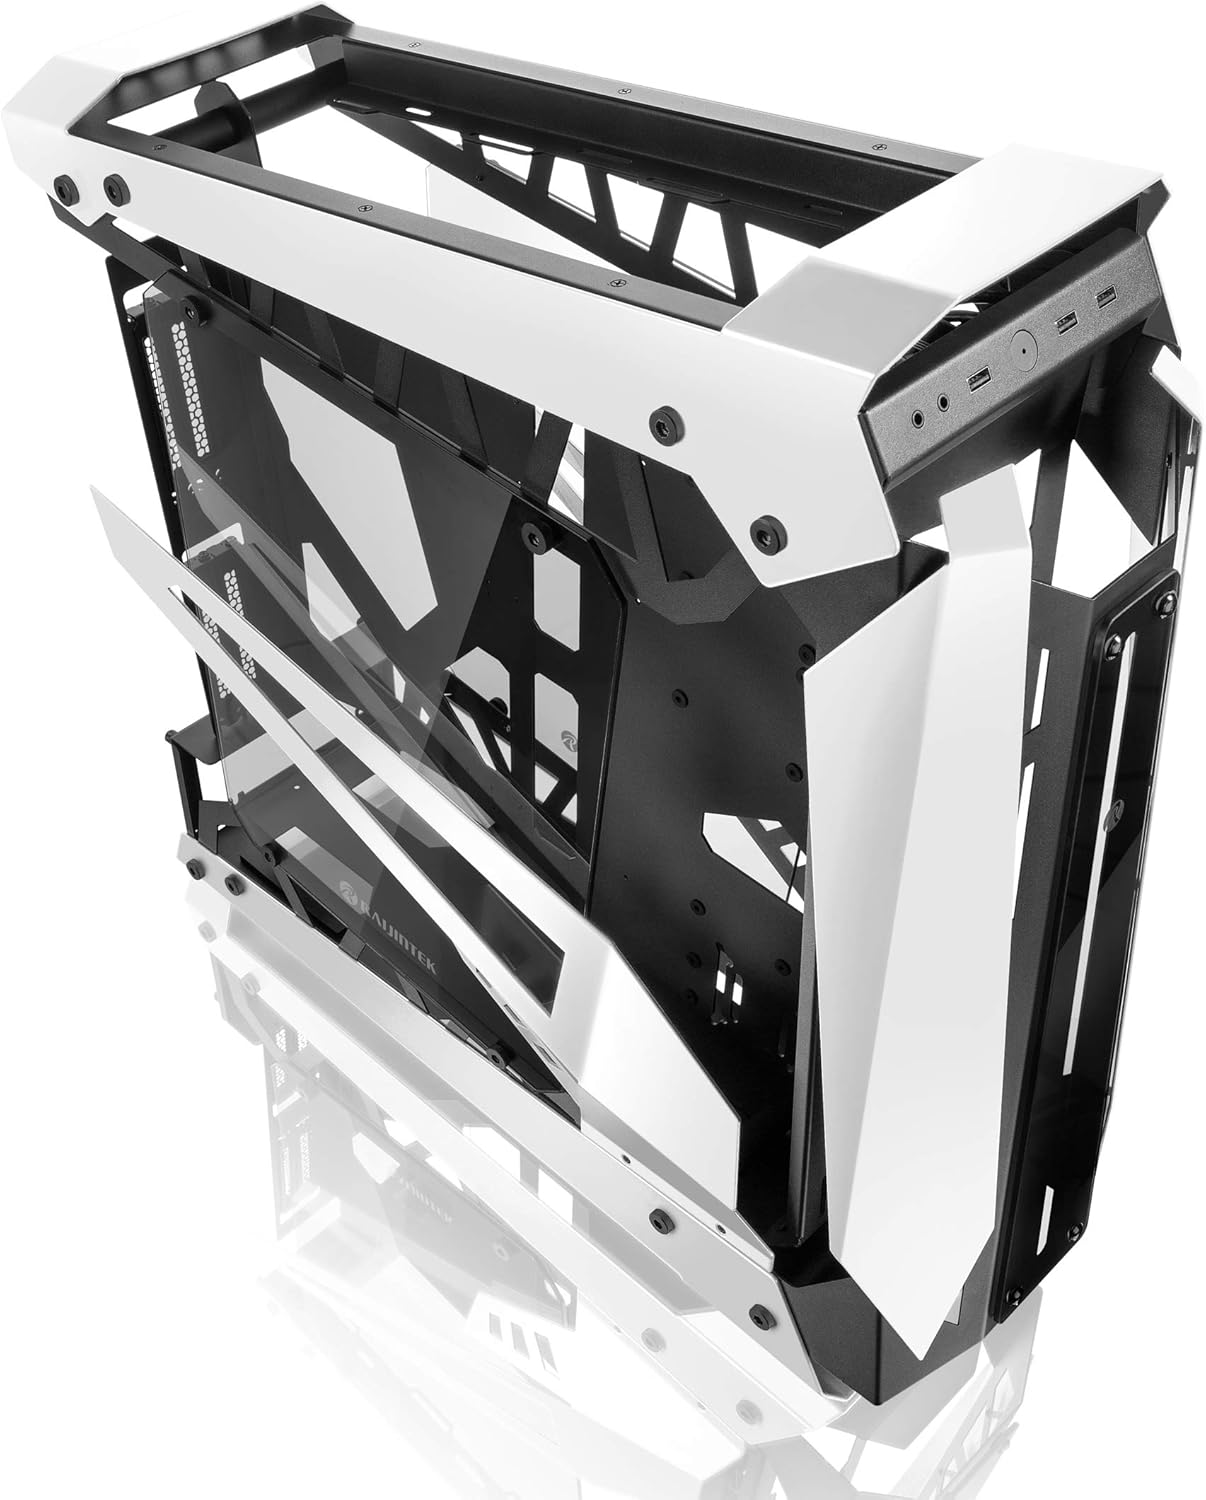
Image: The RAIJINTEK NYX PRO chassis with its top and front panels opened, revealing the internal structure and component mounting areas.
2. Enstalasyon mèr
- Install the necessary motherboard standoffs into the motherboard tray according to your motherboard's form factor (E-ATX, ATX, Micro-ATX, Mini-ITX).
- Mete kat manman an ak anpil atansyon sou distans yo, aliyen twou vis yo.
- Sere kat manman an byen sere ak vis yo bay yo.

Imaj: Yon entèn view of the RAIJINTEK NYX PRO chassis, showing the spacious interior for motherboard and component installation.
3. Enstalasyon Inite Alimantasyon (PSU)
Locate the PSU mounting area, typically at the rear or bottom of the chassis. Secure the PSU with screws.
4. Enstalasyon Disk Depo
The NYX PRO supports multiple storage drives. Identify the 2.5" and 3.5" drive bays and secure your SSDs/HDDs using the provided mounting hardware.
5. Enstalasyon Kat Grafik (GPU)
Insert your graphics card into the appropriate PCIe slot on the motherboard. Secure it with the retention mechanism and screws. Note the vertical GPU mounting option for showcase builds.

Image: The RAIJINTEK NYX PRO chassis showcasing installed components with RGB lighting, highlighting the open design and visibility of internal parts.
6. Cooling System Installation (Fans/Radiators)
Install case fans or liquid cooling radiators in the designated mounting points. Ensure proper airflow direction for optimal cooling.
7. Jesyon kab
Utilize the cable routing cutouts and tie-down points to manage cables neatly. This improves airflow and aesthetics.

Imaj: Yon bò view of the RAIJINTEK NYX PRO chassis, emphasizing its angular design and the large tempered glass side panel.
8. Devan I/O Koneksyon
Connect the front panel USB, audio, power, and reset headers to the corresponding pins on your motherboard.
Enstriksyon Operasyon
Once all components are installed and secured, and all cables are connected:
- Konekte monitè w, klavye w, sourit ou, ak lòt periferik yo nan pò ki apwopriye yo sou kat manman w ak kat grafik ou.
- Konekte kab kouran an nan PSU a ak nan yon priz miray.
- Flip the power switch on the PSU to the "ON" position.
- Press the power button on the front panel of the chassis to power on your system.

Imaj: Yon gwo plan view of the front I/O ports on the RAIJINTEK NYX PRO chassis, including USB and audio jacks.
Antretyen
Regular maintenance helps ensure the longevity and optimal performance of your PC and chassis.
- Netwayaj pousyè: Periodically clean dust filters and internal components using compressed air or a soft brush. Ensure the system is powered off and unplugged before cleaning.
- Swen vè apeze: Clean tempered glass panels with a soft, lint-free cloth and a non-abrasive glass cleaner. Avoid harsh chemicals.
- Verifikasyon Jesyon Kab: Detanzantan, tcheke chemen kab yo pou asire pa gen okenn kab k ap bloke sikilasyon lè a oswa lam vantilatè yo.
Depanaj
Si ou rankontre pwoblèm, konsidere etap depanaj komen sa yo:
- Sistèm nan pa limen:
- Check if the PSU switch is in the "ON" position.
- Asire w ke kab kouran an byen konekte ak tou de PSU a ak priz miray la.
- Verify that the front panel power button header is correctly connected to the motherboard.
- Confirm all internal power cables (24-pin ATX, CPU, GPU) are firmly seated.
- Pa gen okenn rezilta ekspozisyon:
- Ensure your monitor is connected to the graphics card (not the motherboard's integrated graphics, unless you are using integrated graphics).
- Remete kat grafik la nan plas PCIe li a.
- Tcheke seleksyon antre monitè a.
- Surchof:
- Ensure all case fans are spinning and oriented correctly for airflow.
- Clean dust from fans and radiators.
- Verifye ke radyatè CPU a byen chita epi li fè bon kontak ak CPU a.
Garanti ak sipò
For warranty information and technical support, please refer to the official Raijintek websit la oubyen kontakte depatman sèvis kliyan yo. Kenbe prèv acha ou pou reklamasyon garanti.
Official Raijintek Websit: www.rajintek.com


