1. Entwodiksyon
The Premier 1 PermaNet® Plus Electric Fence is a robust and versatile netting system designed for effective containment and control of various livestock, including chickens, ducks, sheep, goats, cattle, and guard dogs. This 48-inch high by 100-foot long fence features sturdy construction with extra line posts and double spikes for enhanced stability, minimizing sag. It is suitable for both temporary and semi-permanent applications, such as backyard, boundary, or subdivision fencing.
This manual provides essential information for the proper setup, operation, and maintenance of your PermaNet® Plus electric fence to ensure optimal performance and longevity.
2. Pwodwi konpozan
Your PermaNet® Plus electric fence package includes the netting with integrated posts. Additional accessories such as energizers, digital testers, and support posts are sold separately and are necessary for the fence's operation.

Image: Various electric netting accessories, including an energizer, digital tester, FiberTuff support posts, SagStopper, and Twist Butler. These items are sold separately.

Image: The PermaNet Plus electric fence netting, rolled and secured, highlighting its integrated posts and double spikes for stability.
3. Enstriksyon Enstalasyon
- Depale ak dewoule: Carefully unroll the PermaNet® Plus netting along your desired fence line. Ensure the integrated posts are upright and spaced evenly.
- Pòs Pozisyon: Drive the double-spike posts firmly into the ground. The double spikes provide added stability and help reduce sag, especially in uneven terrain.
- Connect Energizer: Connect a suitable electric fence energizer (sold separately) to the netting. Follow the energizer's specific instructions for proper grounding and connection to the fence.
- Test Fence: Once installed and connected to the energizer, use a digital fence tester (sold separately) to verify that the fence is properly electrified and delivering the expected voltage.
- Creating an Opening: To create a temporary opening without a gate, turn off the energizer, then pull the first post of the section you wish to open. For more convenient access, a dedicated PoultryNet Gate (sold separately) can be integrated.
The installation process is designed to be quick and straightforward, often taking less than 10 minutes from unpacking to a fully installed fence, even for new users.

Image: Chickens grazing peacefully within the confines of a properly installed Premier 1 electric fence.

Image: A solar-powered energizer connected to the electric fence, providing power to contain poultry.
4. Prensip Operasyon yo
The PermaNet® Plus electric fence operates by delivering a short, sharp, but harmless electric pulse to any animal that attempts to breach the fence. This creates a psychological barrier that deters animals from contact.
How Electric Netting Works:
- The energizer sends an electric pulse to the fence's horizontal conductors.
- The pulse travels through the fence until it contacts an animal.
- The pulse travels into the soil via the animal when it touches a conductor.
- The pulse travels through the soil, to the energizer's ground rod.
- The circuit is completed at the energizer, delivering a deterrent shock to the animal.

Image: A detailed diagram showing the electrical circuit of an electric fence, from the energizer through the fence and an animal, back to the ground rod.
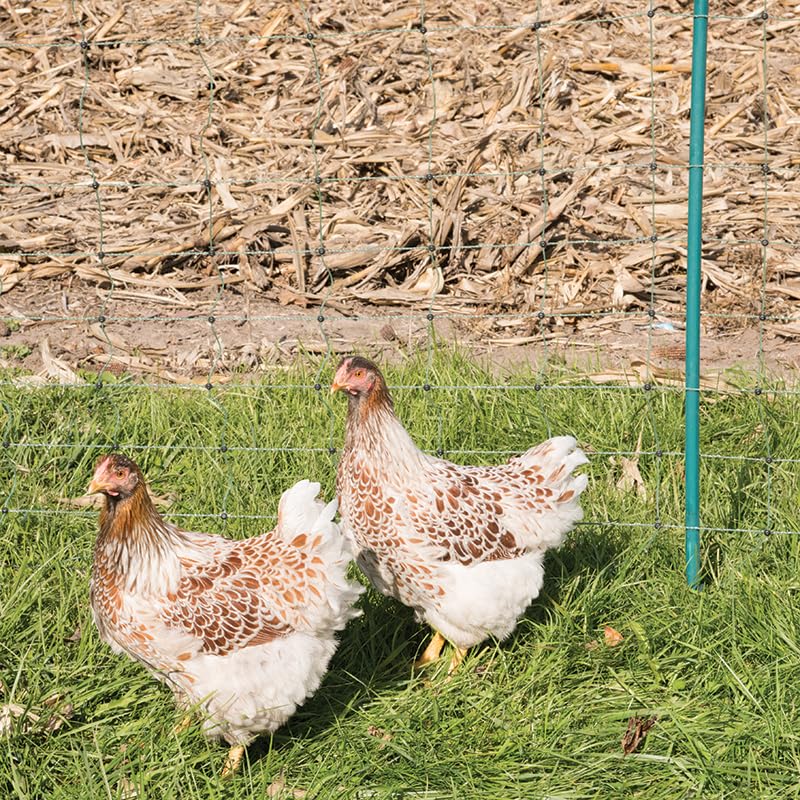
Image: Two chickens near the electric fence, demonstrating its use for poultry containment.

Image: Young ducks safely contained by the electric netting, highlighting its suitability for various poultry.

Image: Various livestock, including sheep, goats, and chickens, coexisting within an electric fence enclosure.
5. Antretyen
- Regular Voltage chèk: Tcheke volim kloti a regilyèmantage using a digital fence tester to ensure it is operating at optimal levels. Low voltage can reduce effectiveness.
- Vejetasyon klè: Keep the fence line clear of tall grass, weeds, and other vegetation that can short out the fence and reduce its effectiveness. Trim or mow around the fence as needed.
- Enspekte pou domaj: Regularly inspect the netting for any cuts, breaks, or loose connections. Repair any damage promptly to maintain the integrity of the electric circuit.
- Check Post Stability: Ensure all integrated posts are securely in the ground. Re-drive any loose posts to prevent sagging and maintain fence height.
- Energizer Maintenance: Follow the manufacturer's guidelines for your specific energizer, including battery checks (if applicable) and cleaning.
NAN. Depanaj
- No Shock or Weak Shock:
- Check energizer power supply and connections.
- Ensure the energizer is properly grounded.
- Inspect the fence line for vegetation touching the wires, causing shorts.
- Look for broken wires or insulators that may be causing a short circuit.
- Fence Sagging:
- Re-drive posts deeper into the ground.
- Consider adding additional support posts or a SagStopper (sold separately) in longer runs or areas with heavy vegetation.
- Bèt k ap kraze kloti:
- Verifye volim adekwa atage with a fence tester.
- Ensure the fence is free of shorts from vegetation or damage.
- Check if animals are jumping over or crawling under the fence; adjust height or add additional deterrents if necessary.
7. Espesifikasyon
| Non pwodwi | Premier 1 PermaNet® Plus Electric Fence |
| Nimewo Modèl (ASIN) | B07L9JNJCG |
| Dimansyon | 48 inches (Height) x 1200 inches (Length) x 0.1 inches (Thickness) |
| Pwa | 32 liv |
| Koulè | Green/Black (This variant) |
| Manifakti | Premye 1 Pwovizyon pou |
| Premye Disponib | 13 desanm 2018 |
8. Garanti ak sipò
Premier 1 Supplies is committed to providing quality products and expert advice. For any questions regarding your PermaNet® Plus electric fence, including setup, operation, or troubleshooting, please contact Premier 1 Supplies customer support. We stand by our products and are available to assist you long after your purchase.
For further assistance, please visit the official Premier 1 Supplies websit la oubyen gade enfòmasyon kontak ki vini ak anbalaj pwodwi a.


