1. Entwodiksyon
This manual provides detailed instructions for the assembly, operation, and maintenance of your Vileda Turbo EasyWring & Clean Complete Set. Please read these instructions carefully before first use to ensure proper function and longevity of the product. Keep this manual for future reference.

Image 1.1: Vileda Turbo EasyWring & Clean Complete Set, showing the mop, bucket, and additional replacement head packaging.
2. Pake kontni
Verifye ke tout konpozan yo prezan nan pake ou a:
- 1x Vileda Turbo EasyWring & Clean Mop with 3-piece telescopic handle.
- 1x 2-in-1 Microfibre Mop Head (pre-attached).
- 1x Easy Wring & Clean Bucket with power spinner and spout opening.
- 1x Additional Vileda Turbo Replacement Mop Head.

Image 2.1: The Vileda Turbo EasyWring & Clean product box, illustrating the contents and key features.
3. Enstriksyon Enstalasyon
3.1 Assembling the Mop Handle
- Unpack the three sections of the telescopic mop handle.
- Screw the sections together clockwise until securely fastened.
- Attach the assembled handle to the mop head base by screwing it clockwise.
3.2 Preparing the Bucket
- Place the bucket on a flat, stable surface.
- Ensure the power spinner mechanism is clear of any obstructions.

Image 3.1: The Vileda Turbo EasyWring & Clean mop and bucket fully assembled and ready for use.
4. Operasyon Enstriksyon
4.1 Ranpli bokit la
- Fill the bucket with water and your preferred floor cleaning solution. Do not exceed the maximum fill line indicated inside the bucket.
4.2 Mopping
- Dip the mop head into the water in the bucket, ensuring it is fully saturated.
- Place the mop head into the power spinner.
- Press the foot pedal repeatedly to spin the mop head and wring out excess water. Adjust the number of presses to achieve the desired mop dampness for your floor type.
- Mop the floor using a gentle back-and-forth motion. The triangular mop head design allows for effective cleaning in corners and along edges.
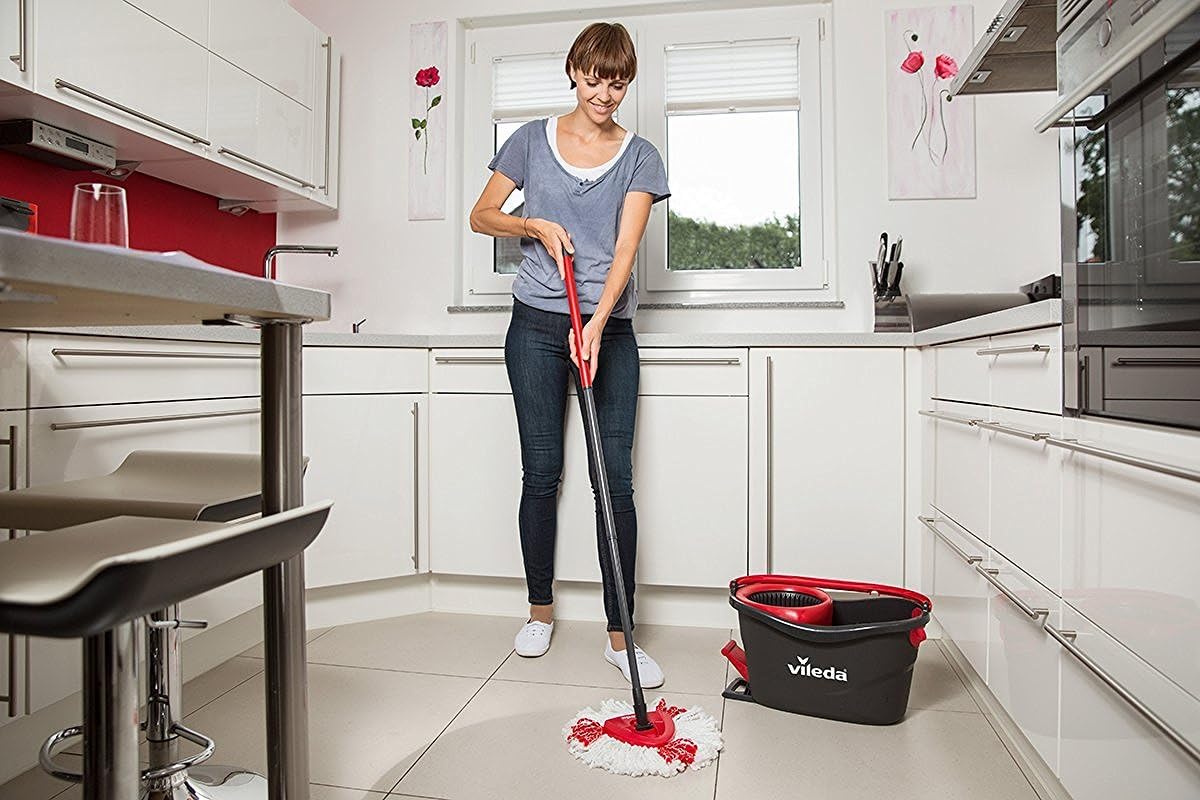
Image 4.1: A user demonstrating the mopping process on a kitchen floor.

Image 4.2: The triangular mop head effectively reaching into corners and along baseboards.

Image 4.3: A user demonstrating the foot pedal operation for wringing the mop head.
5. Antretyen
5.1 Netwaye tèt mop la
- The 2-in-1 microfibre mop head can be machine washed at up to 60°C (140°F). Do not use fabric softener or bleach.
- To remove the mop head, gently pull it off the red base. To attach a new mop head, align it with the base and press firmly until it clicks into place.

Image 5.1: Illustrating the ease of detaching and attaching mop heads for cleaning or replacement.
5.2 Cleaning the Bucket
- After each use, empty the dirty water from the bucket using the integrated spout.
- Rinse the bucket thoroughly with clean water.
- Allow the bucket to air dry before storing.

Image 5.2: A user emptying the Vileda mop bucket, highlighting the convenient spout.
5.3 Depo
- Store the mop and bucket in a dry place, away from direct sunlight and extreme temperatures.
- Ensure the mop head is dry before storage to prevent mildew.
NAN. Depanaj
| Pwoblèm | Kòz posib | Solisyon |
|---|---|---|
| Mop head not spinning effectively. | Mop head not properly seated in spinner; spinner mechanism obstructed; insufficient foot pedal pressure. | Ensure mop head is correctly placed. Check for debris in the spinner. Apply firm, consistent pressure to the foot pedal. |
| Mop head leaves too much water on the floor. | Not enough wringing cycles. | Increase the number of times you press the foot pedal to wring out more water. |
| Mop head detaches during use. | Mop head not securely attached to the base. | Re-attach the mop head, ensuring it clicks firmly into place. |
7. Espesifikasyon
| Karakteristik | Detay |
|---|---|
| Mak | Vileda |
| Modèl | Turbo EasyWring & Clean Complete Set |
| Mop Head Material | 2-in-1 Microfiber (White microfibre for cleaning, Red power fibres for particle retention) |
| Kalite manch | Teleskopik |
| Karakteristik espesyal | Power Spinner for optimal moisture control |
| Mop Head Shape | Triangular for corner access |
| ASIN | B06XJGVX4D |
8. Garanti ak sipò
For warranty information and customer support, please refer to the documentation provided with your purchase or visit the official Vileda websit la. Kenbe prèv acha ou a pou nenpòt reklamasyon garanti.
For additional assistance or to purchase replacement parts, please contact Vileda customer service through their official channels.


