1. Enstriksyon Sekirite Enpòtan
Toujou li epi konprann tout avètisman sekirite, enstriksyon, ilistrasyon, ak espesifikasyon ki vini ak zouti elektrik sa a. Si ou pa swiv tout enstriksyon ki anba yo, sa ka lakòz chòk elektrik, dife, ak/oswa blesi grav.
Avètisman jeneral sou sekirite zouti elektrik
- Sekirite Zòn Travay: Kenbe zòn travay la pwòp epi byen limen. Zòn ki dezòdone oswa ki fè nwa yo ka lakòz aksidan. Pa sèvi ak zouti elektrik nan atmosfè eksplozif, tankou lè gen likid, gaz oswa pousyè ki ka pran dife.
- Sekirite elektrik: Priz zouti elektrik yo dwe koresponn ak priz la. Pa janm modifye priz la nan okenn fason. Pa sèvi ak okenn adaptè pou priz ak zouti elektrik ki gen tè. Evite kontak kò ak sifas ki gen tè.
- Sekirite Pèsonèl: Always wear eye protection, hearing protection, and a dust mask. Dress properly. Do not wear loose clothing or jewelry. Keep hair and clothing away from moving parts.
- Itilizasyon ak swen zouti elektrik: Pa fòse zouti elektrik la. Sèvi ak zouti elektrik ki kòrèk la pou aplikasyon w lan. Dekonekte ploge a nan sous kouran an epi/oswa retire pake pil la, si li detachab, nan zouti elektrik la anvan ou fè nenpòt ajisteman, chanje akseswa, oswa sere zouti elektrik yo.
- Sèvis: Fè reparasyon zouti elektrik ou a pa yon moun ki kalifye ki sèvi ak pati ranplasman ki idantik sèlman. Sa a pral asire ke sekirite zouti elektrik la konsève.
Table Saw Specific Safety Warnings
- Keep hands and fingers away from the saw blade.
- Always use the blade guard and splitter.
- Ensure the workpiece is firmly supported and guided.
- Never reach over or behind the rotating saw blade.
- Sèvi ak yon baton pouse oswa yon blòk pouse lè w ap fè koupe etwat.
- Do not perform freehand cuts. Always use the fence or miter gauge.
- Before starting the saw, ensure the blade is clear of the workpiece and all adjustments are secure.
- Regularly check the saw blade for damage or dullness. Replace as necessary.
2. Pwodwi souview
The Scheppach HS105 Table Saw is a powerful and versatile tool designed for precise cutting of wood and similar materials. It features a robust 2000W motor, a 255mm saw blade, and a stable chassis for reliable operation.

Figi 2.1: An jeneral view of the Scheppach HS105 Table Saw with its integrated stand.
Karakteristik kle:
- Pwisan motè: 2000W for efficient cutting.
- Large Saw Blade: 255mm diameter for various cutting tasks.
- Wotè Koupe Reglabl: Up to 80mm at 90° and 55mm at 45°.
- Pivoting Blade: Blade can be tilted up to 45° for bevel cuts.
- Table Extension: Expandable table surface for larger workpieces.
- Precision Guides: Includes a miter gauge and parallel stop for accurate cuts.
- Integrated Chassis: Provides stability and an ergonomic working height of 910mm.
- Mobilite: Equipped with wheels for easy transport.
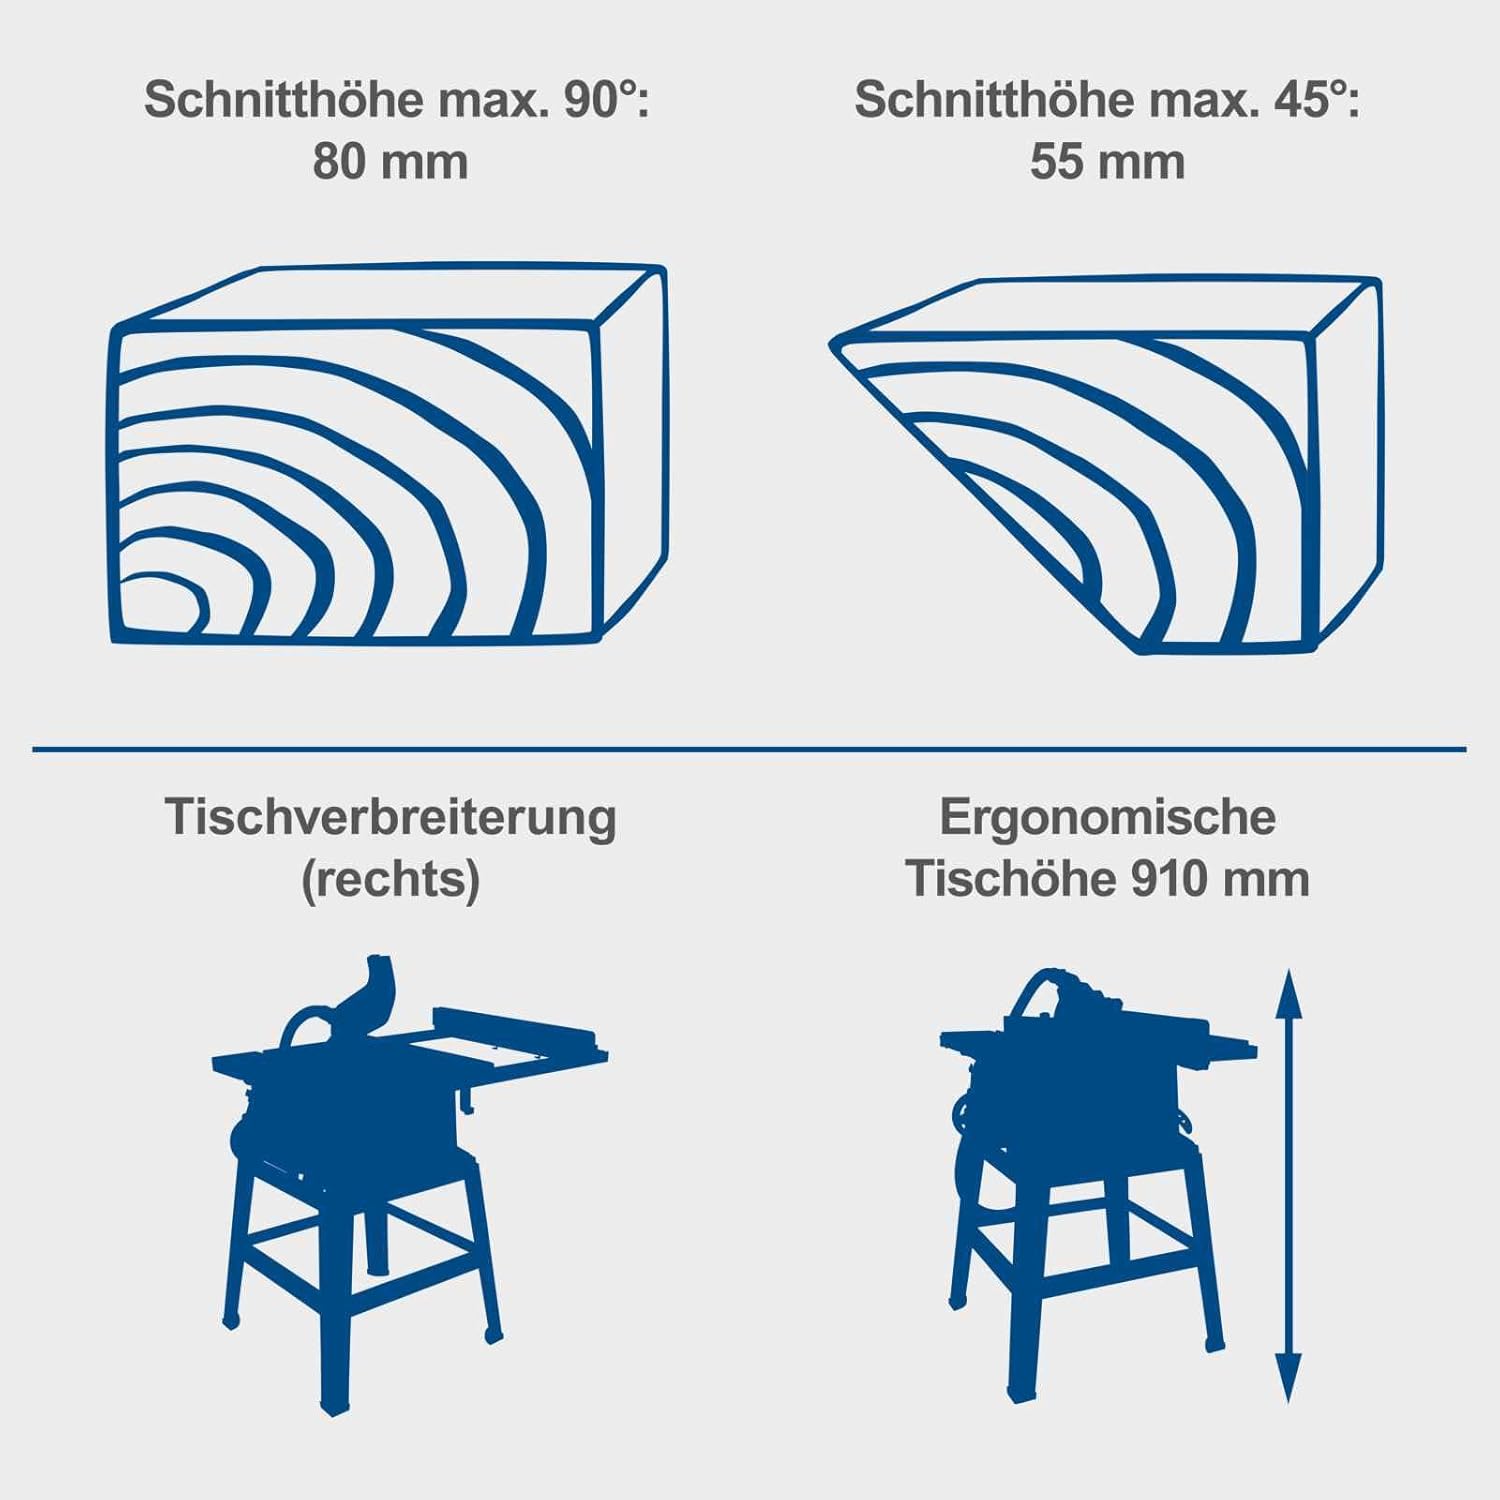
Figi 2.2: Diagram illustrating maximum cutting heights (80mm at 90°, 55mm at 45°), right table extension, and ergonomic table height (910mm).

Figi 2.3: Diagram showing saw blade specifications (255mm x 30mm x 2.8mm) and the blade's pivot range (0-45°).
3. Enstalasyon ak Asanble
Before operating the Scheppach HS105 Table Saw, ensure it is properly assembled and all components are securely fastened.
3.1 Debalaj ak enspeksyon
- Ak anpil atansyon retire tout eleman nan anbalaj la.
- Inspect for any shipping damage. Do not operate the tool if damage is found.
- Verifye tout pyès ki nan lis anbalaj la prezan.
3.2 Asanblaj Sipò a
Assemble the stand according to the diagrams provided in the separate assembly guide. Ensure all bolts and nuts are tightened securely to provide a stable base for the saw. The stand provides an ergonomic working height of 910mm.

Figi 3.1: The table saw positioned at an ergonomic working height, facilitating comfortable operation.
3.3 Installing the Saw Blade
- Asire w ke si a debranche nan sous kouran an.
- Retire plak gòj la.
- Use the provided wrenches to loosen the arbor nut and remove the outer flange.
- Place the new 255mm saw blade onto the arbor, ensuring the teeth are pointing towards the front of the saw.
- Reinstall the outer flange and arbor nut, tightening securely.
- Ranplase plak gòj la.
3.4 Attaching the Blade Guard and Splitter
The blade guard and splitter are crucial safety components. Ensure they are correctly installed and aligned with the saw blade. The splitter helps prevent kickback, and the guard protects against accidental contact with the blade.
3.5 Table Extensions
The table saw features a right-side table extension that can be pulled out to accommodate larger workpieces, extending the table width up to 1045mm.
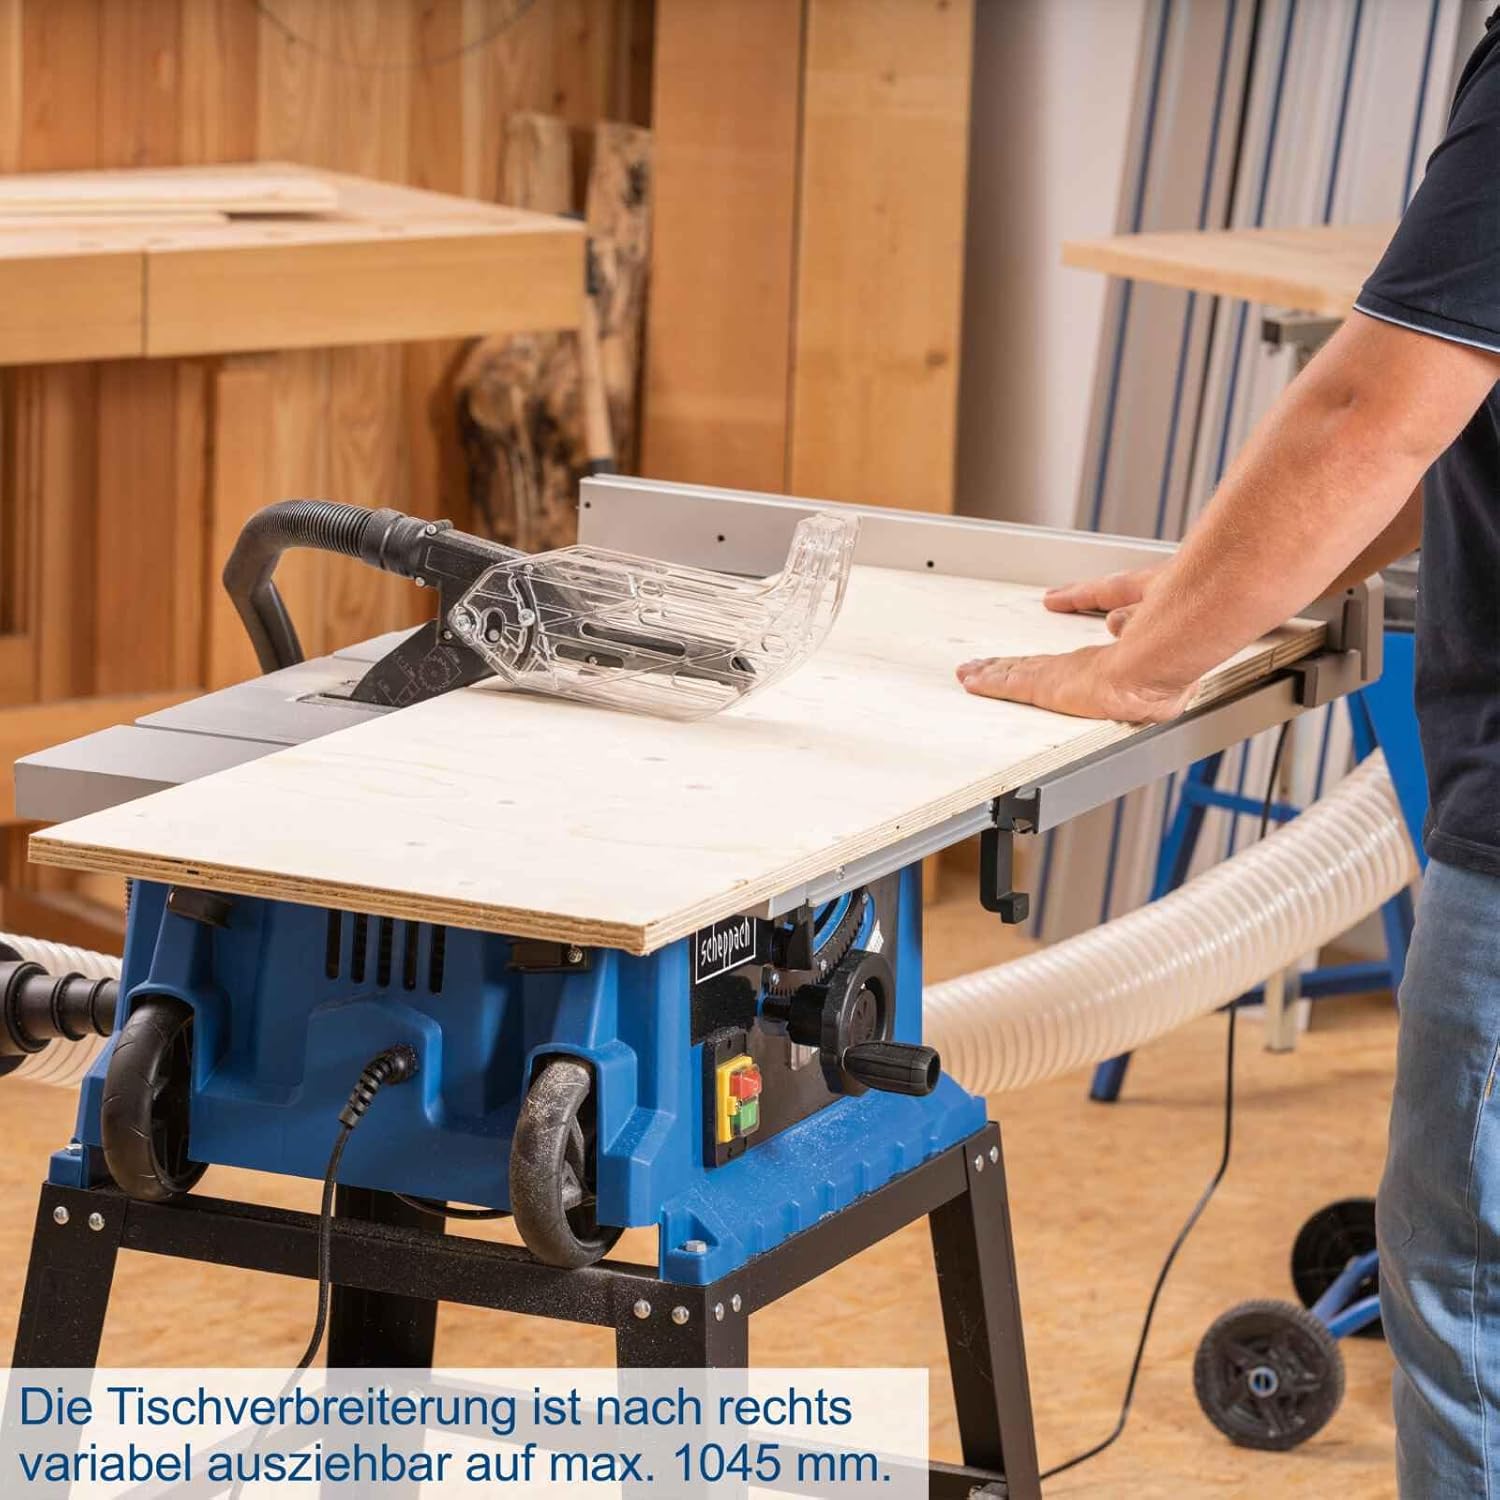
Figi 3.2: The right table extension pulled out, providing additional support for wider materials.
3.6 Konekte Ekstraksyon Pousyè
For a cleaner and safer working environment, connect a dust extraction system to the saw's dust port. This machine allows for direct dust extraction from the housing or the saw blade guard.

Figi 3.3: The table saw with a dust extraction system connected, demonstrating dust management capability.
4. Operasyon Enstriksyon
Always ensure all safety precautions are followed before operating the table saw.
4.1 Power On/Off
- To turn on the saw, press the green "ON" button.
- To turn off the saw, press the red "OFF" button.
- In case of emergency, press the large red emergency stop button if available.
4.2 Ajisteman wotè koupe a
The cutting height can be adjusted using the handwheel located on the front of the saw. Rotate the handwheel to raise or lower the saw blade. For optimal safety and cut quality, the blade should extend approximately 3-6mm above the workpiece. The maximum cutting height is 80mm.

Figi 4.1: Demonstrating the maximum cutting height of 80mm for the HS105.
4.3 Ajiste Ang Bizote a
To make bevel cuts, the saw blade can be tilted from 0° to 45°. Loosen the bevel locking knob, adjust the blade to the desired angle using the angle scale, and then securely tighten the locking knob.
4.4 Using the Parallel Stop (Rip Fence)
The parallel stop is used for making accurate rip cuts (cutting along the grain). Position the fence to the desired width of cut and lock it securely. The dual-clamped parallel stop ensures precise and repeatable cuts.

Figi 4.2: Detail of the dual-clamped parallel stop, designed for precise and repeatable rip cuts.
4.5 Itilizasyon kalib onglet la
The miter gauge is used for making accurate cross-cuts and miter cuts (angled cuts across the grain). Insert the miter gauge into the T-slot on the table, adjust to the desired angle, and secure it.
4.6 Fè yon Koupe
- Ensure the workpiece is free of nails, screws, or other foreign objects.
- Position the workpiece against the parallel stop or miter gauge.
- Limen wè a epi pèmèt lam la rive nan vitès plen.
- Slowly and steadily feed the workpiece into the blade. Use a push stick for narrow pieces.
- Once the cut is complete, turn off the saw and wait for the blade to stop before removing the workpiece or off-cuts.
5. Antretyen
Regular maintenance ensures the longevity and safe operation of your Scheppach HS105 Table Saw. Always disconnect the saw from the power supply before performing any maintenance.
5.1 Netwayaj
- After each use, clean sawdust and debris from the table, blade guard, and motor housing.
- Use a brush or compressed air. Do not use solvents that could damage plastic parts.
- Ensure the dust extraction ports are clear of blockages.
5.2 Saw Blade Care
- Regularly inspect the saw blade for sharpness, cracks, or missing teeth.
- A dull blade can cause kickback and poor cut quality. Replace dull or damaged blades immediately.
- Netwaye rezin ak goudwon ki akimile sou lam la avèk yon pwodui netwayaj lam ki apwopriye.
5.3 Lubrification
Periodically lubricate moving parts such as the blade height adjustment mechanism and bevel adjustment mechanism with a dry lubricant or silicone spray to ensure smooth operation.
NAN. Depanaj
Before attempting any repairs, always disconnect the saw from the power supply.
| Pwoblèm | Kòz posib | Solisyon |
|---|---|---|
| Saw pa komanse | No power supply; faulty switch; thermal overload activated. | Check power connection and circuit breaker; inspect switch; allow motor to cool down. |
| Lam la bloke oswa bloke pandan koupe a | Dull blade; improper feed rate; workpiece pinching blade; misaligned fence. | Replace or sharpen blade; reduce feed rate; ensure workpiece is supported; check fence alignment. |
| Twòp Vibration | Loose blade; damaged blade; unstable stand; worn bearings. | Tighten blade arbor nut; replace damaged blade; ensure stand is stable; contact service for bearing issues. |
| Koupe ki pa egzak | Misaligned fence or miter gauge; dull blade; incorrect blade height. | Calibrate fence and miter gauge; replace blade; adjust blade height correctly. |
7. Espesifikasyon teknik
| Spesifikasyon | Valè |
|---|---|
| Nimewo Modèl | 430450 |
| Voltage | 230 Volts |
| Pouvwa (Motè) | 2000 W |
| Dyamèt lam wè | 255 mm |
| Dyamèt Lam Bore | 30 mm |
| Lam Kerf | 2.8 mm |
| Max. Cutting Height (90°) | 80 mm |
| Max. Cutting Height (45°) | 55 mm |
| Plage enklinezon lam | 0 - 45° |
| Dimansyon Tablo (L x W) | 92 x 91 cm |
| Table Extension (Right) | Jiska 1045 mm |
| Ergonomic Table Height | 910 mm |
| Dimansyon pwodwi (L x W x H) | 92 x 91 x 71 cm |
| Pwa atik | 30.6 Kilogram |
| Materyèl lam | Asye gwo vitès |
| Sous pouvwa | Fil elektrik |
| Karakteristik espesyal | Ajisteman pwofondè |
| Konpozan ki enkli | 1 HS105 Professional Table Saw, with stand |
8. Garanti ak sipò
Scheppach products are manufactured to high-quality standards. In the unlikely event of a defect, please refer to your purchase documentation for warranty details. For technical support, spare parts, or service inquiries, please contact your authorized Scheppach dealer or visit the official Scheppach websit.
Keep your proof of purchase (receipt or invoice) for any warranty claims.
9. Mobility and Transport
The Scheppach HS105 Table Saw is designed with integrated wheels for convenient transport and mobile use.
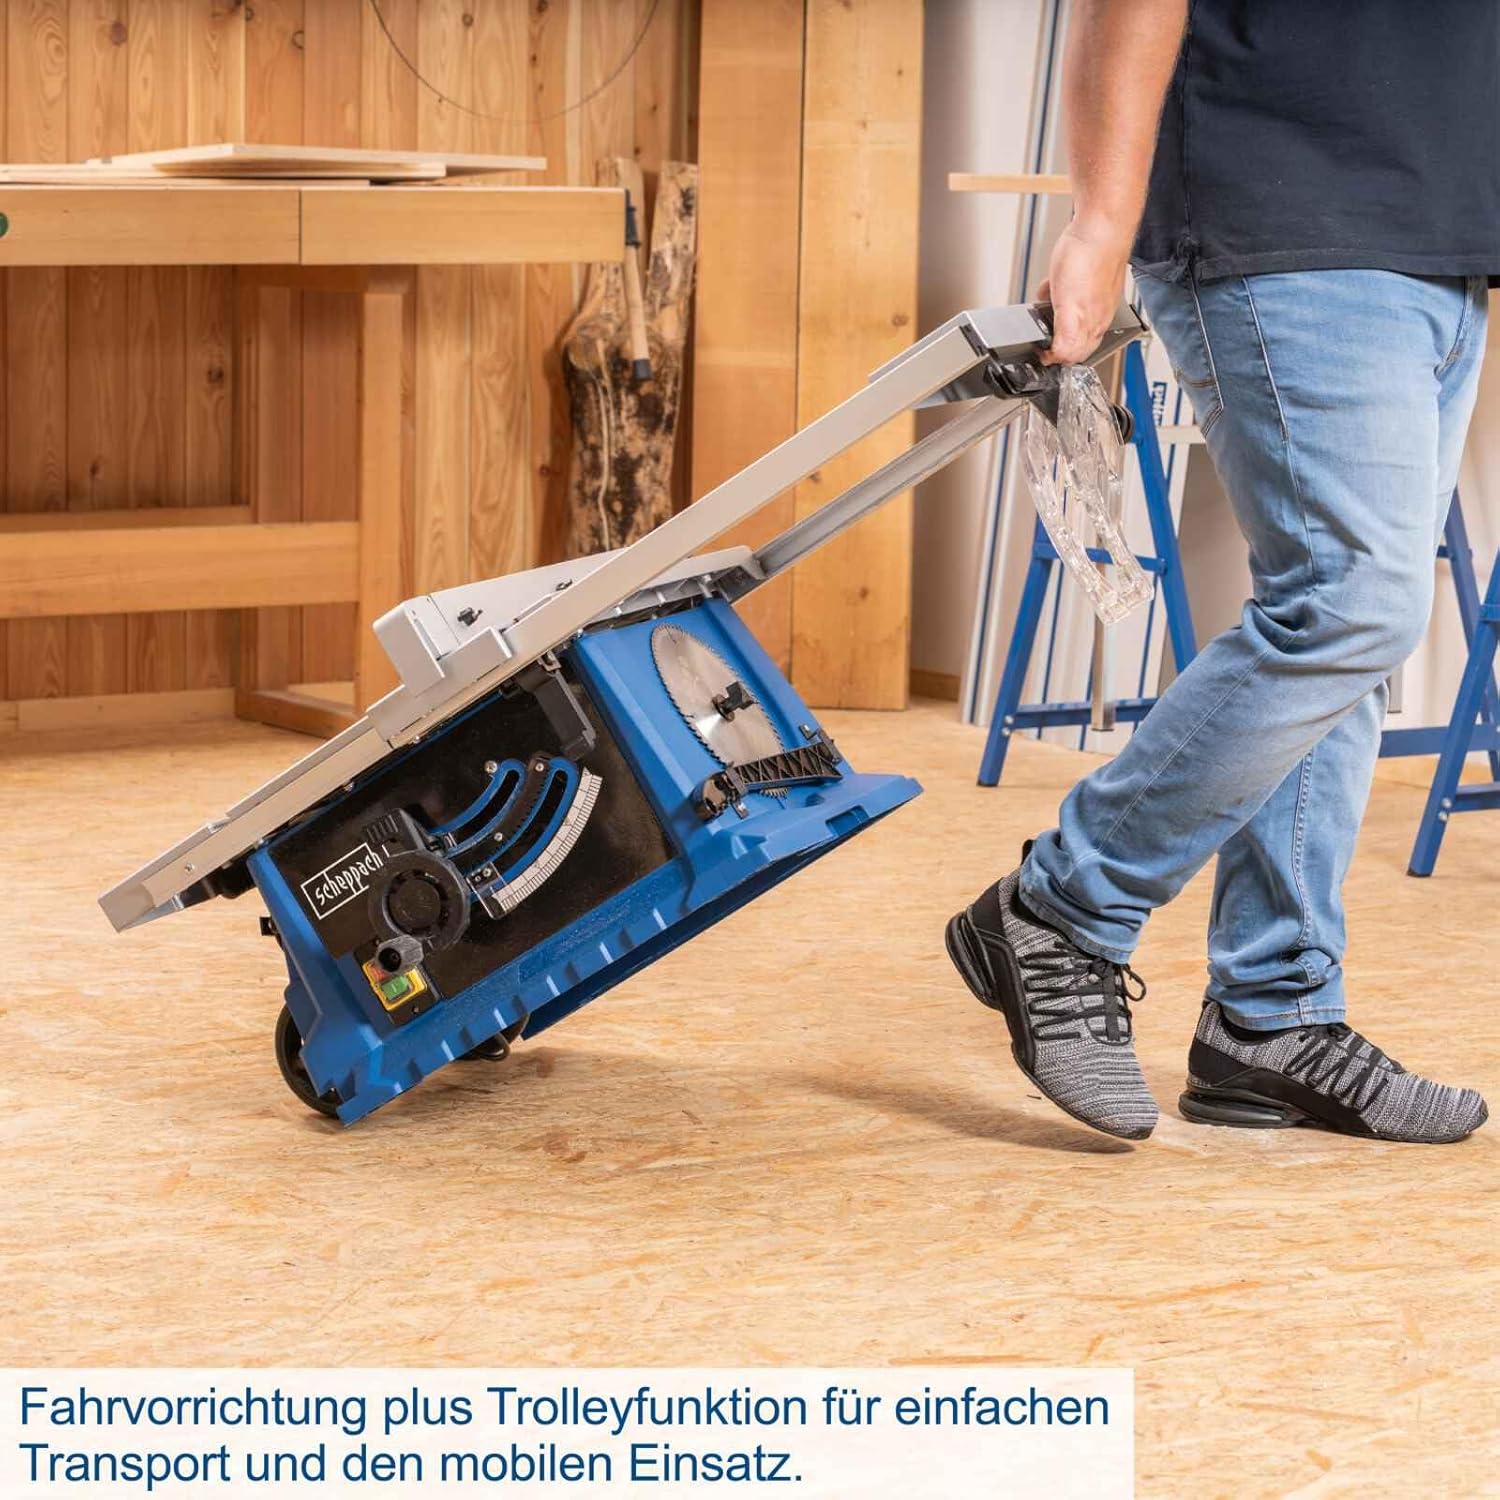
Figi 9.1: The table saw being transported using its integrated wheels, highlighting its portability.
- Before transporting, ensure the saw is unplugged and the blade is fully retracted and secured.
- Use the handles provided to tilt the saw onto its wheels and move it to the desired location.
- Exercise caution when moving the saw over uneven surfaces.


