
1. Entwodiksyon
Thank you for choosing the Keenso Front Rear Dash Cam. This device is designed to provide reliable video recording of your journeys, offering enhanced safety and security for your vehicle. This manual will guide you through the installation, operation, and maintenance of your dash cam to ensure optimal performance.
2. Enfòmasyon sou Sekirite
- Pa sèvi ak kamera tablodbò a pandan w ap kondui. Ajiste paramèt yo sèlman lè machin nan estasyone an sekirite.
- Asire w ke kamera tablodbò a byen monte epi li pa bloke vizyon w. view sou wout la oubyen entèfere ak kontwòl machin nan.
- Evite ekspoze aparèy la nan tanperati ekstrèm, limyè solèy dirèk pou peryòd pwolonje, oswa imidite twòp.
- Use only the provided car charger and data cable to prevent damage to the device.
- Do not attempt to disassemble or repair the dash cam yourself. Contact customer support for assistance.
- Fè kopi videyo enpòtan yo regilyèman files pou anpeche pèt.
3. Pake kontni
Verifye ke tout atik yo prezan nan pakè ou a:
- 1 x Keenso Car DVR Unit
- 1 x Chargeur machin
- 1 x Manyèl Itilizatè (dokiman sa a)
- 1 x Kab Done (USB)
- 2 x Mounts (for installation)
- 1 x doub tep
- 1 x Magic Base
Figi 3.1: All components included in the Keenso Dash Cam package.
4. Pwodwi Features
The Keenso Front Rear Dash Cam offers a range of features for reliable vehicle monitoring:
- Materyèl kalite siperyè: Constructed from durable ABS material for long-lasting performance.
- Batri ityòm entegre: Features a 180mAh lithium-ion battery for continuous recording even when external power is interrupted.
- Ekspozisyon itilizatè-zanmitay: Equipped with a 2.0-inch screen (960x240 resolution) for easy viewanrejistreman ak jesyon anrejistreman yo.
- Enhanced Parking Safety: Motion detection feature automatically records movement around your parked vehicle.
- Anrejistreman bouk: Automatically overwrites older, non-protected files when the memory card is full, ensuring continuous recording without manual deletion.
- Vizyon lannwit enfrawouj: Professional configuration of 4 infrared night lights combined with WDR technology enhances night recording clarity.
- Supercapacitors: Fèt pou fonksyone byen nan tanperati ki varye ant -10 ℃ ak 70 ℃.
- Kamera segondè rezolisyon: 10MP image sensor with a 170-degree wide-angle lens, covering multiple lanes.

Figi 4.1: Front-bò view of the dash cam, highlighting the display screen and control buttons.
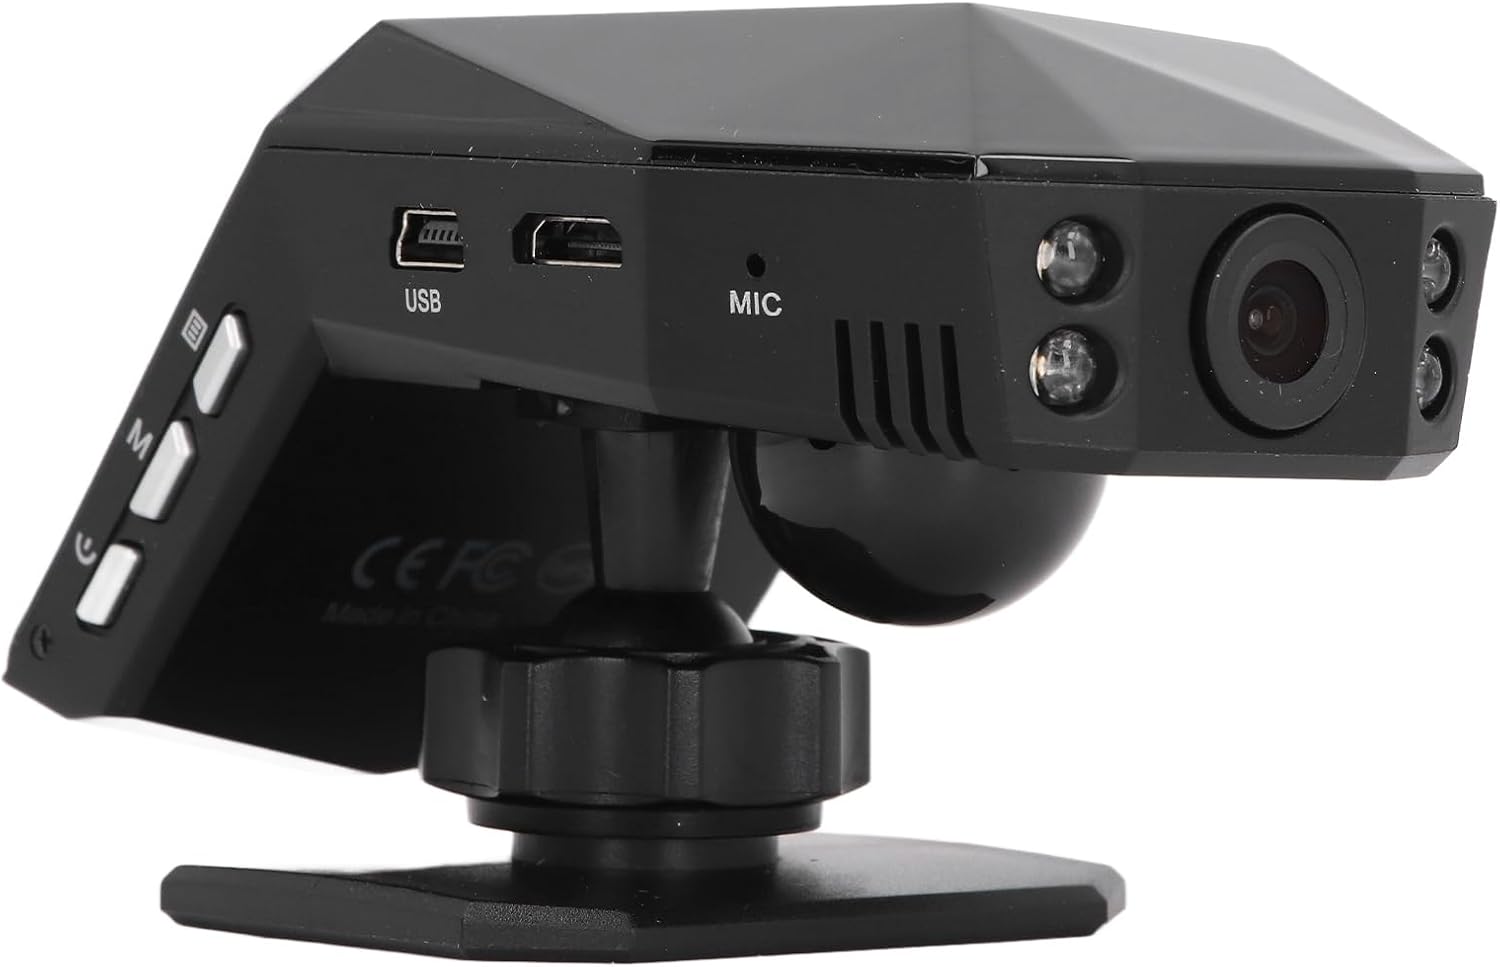
Figi 4.2: Dèyè view of the dash cam, showing the camera lens and four infrared night vision lights.
5. Enstalasyon
5.1 Inserting the Micro Memory Card
- Asire w ke kamera tablodbò a etenn.
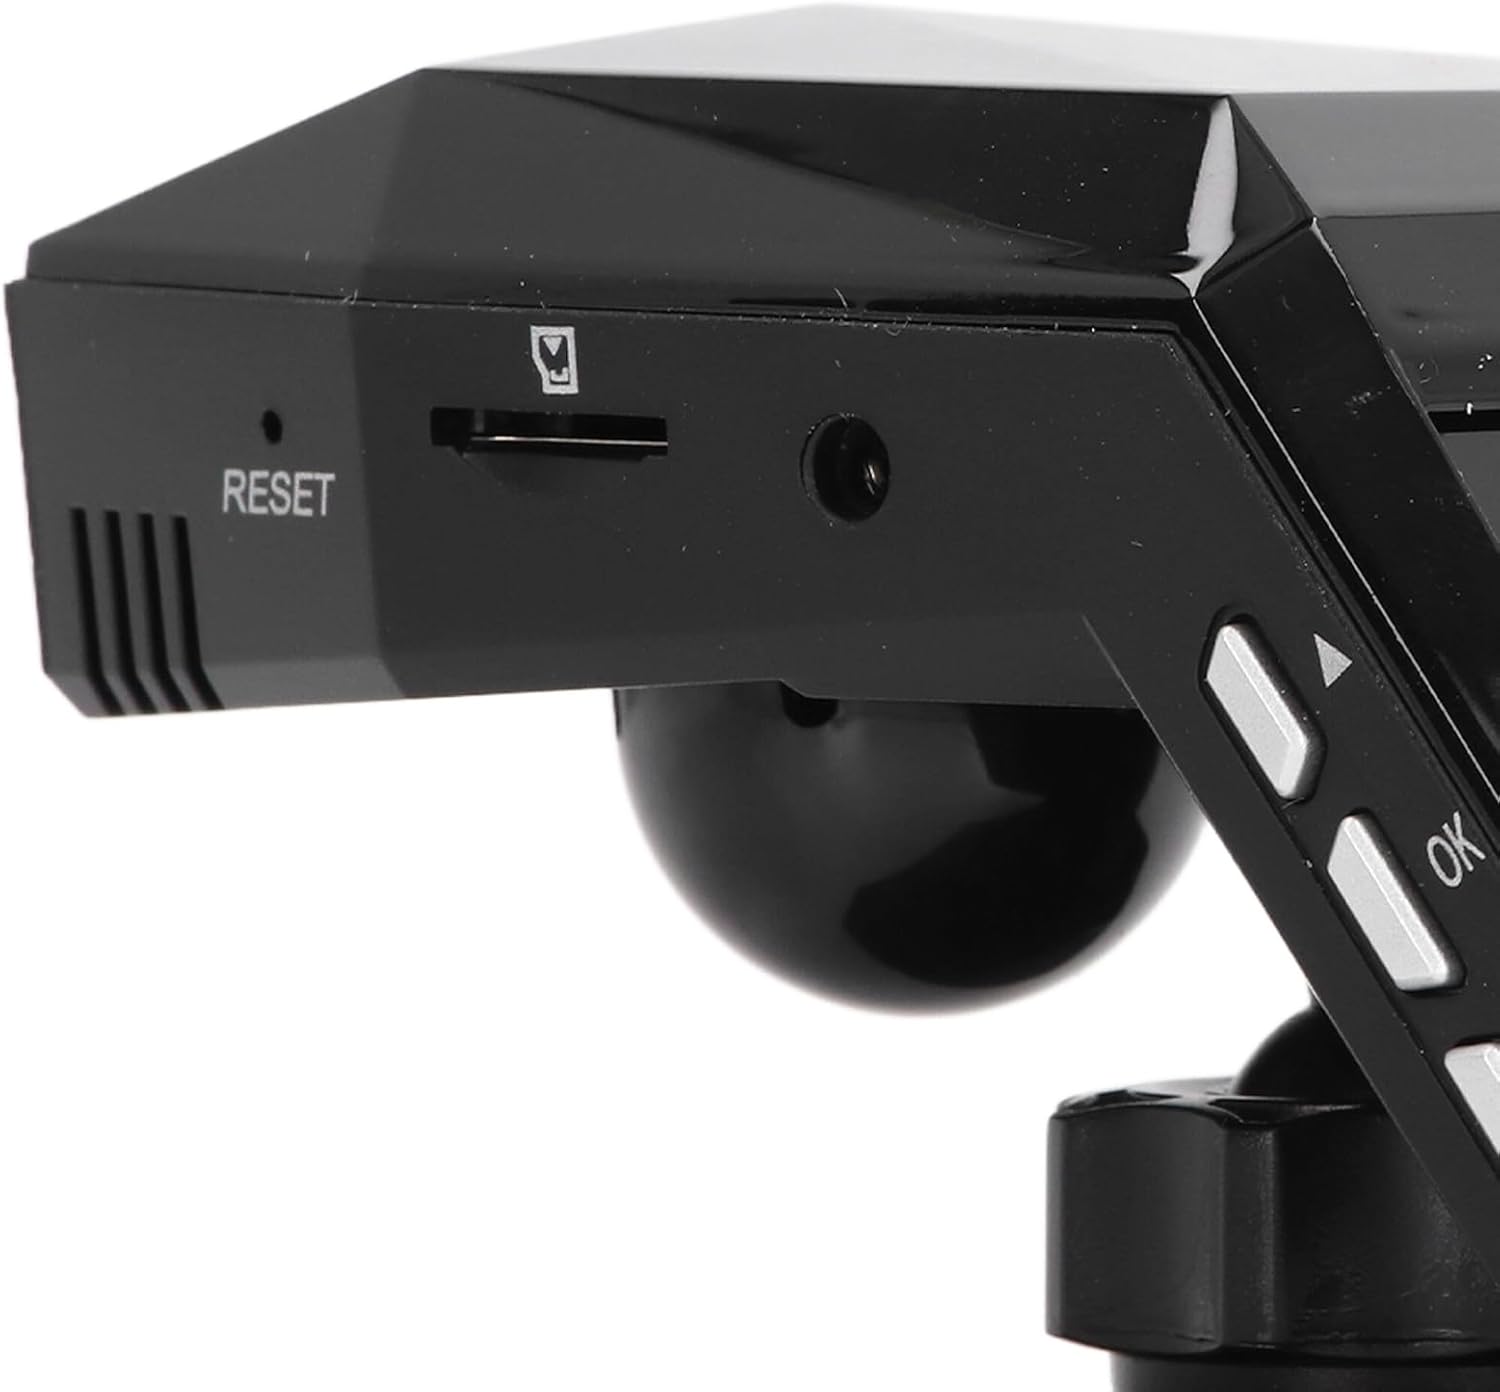
- Locate the Micro Memory Card slot on the side of the device.
- Gently insert a Micro Memory Card (up to 32GB, not included) into the slot until it clicks into place.
- Pou retire li, pouse kat la dousman jouktan li fè yon klik, apresa lage l pou l soti.

Figi 5.1: Side view showing the Micro Memory Card slot and Reset button.
5.2 Enstale Kamera Dash la
- Chwazi yon kote sou vit machin ou an ki pa bloke je ou. view, tipikman dèyè dèyè aview glas.
- Netwaye sifas vit machin nan byen.
- Attach the magic base to the chosen location using the double-sided tape. Ensure it is firmly secured.
- Connect the dash cam to one of the provided mounts.
- Attach the mount with the dash cam to the magic base. Adjust the camera angle for optimal road coverage.
5.3 Konekte pouvwa
- Mete chajè machin nan nan priz alimyè sigarèt machin ou an.
- Connect the other end of the car charger cable to the USB port on the dash cam.
- Route the cable neatly along the windshield trim to avoid interference with driving.
- The dash cam will typically power on automatically when the vehicle starts and power off when the engine is turned off.
6. Operasyon Enstriksyon
6.1 Operasyon debaz
- Limen/Etenyen: The device powers on automatically when connected to vehicle power and off when power is cut. You can also manually power on/off using the power button.
- Anrejistreman: Once powered on, the dash cam will automatically begin continuous loop recording. A recording indicator will be visible on the screen.
- Navigasyon nan meni: Use the 'M' button to access the menu and the up/down arrow buttons to navigate. The 'OK' button confirms selections.
6.2 Anrejistreman bouk
The dash cam features intelligent loop recording. When the Micro Memory Card reaches its capacity, the system will automatically delete the oldest unprotected video files to make space for new recordings. This ensures continuous recording without manual intervention.
6.3 Siveyans Pakin 24 sou 24
To activate 24-hour parking monitoring, ensure the feature is enabled in the settings. When the car encounters a collision while parked, the dash cam will automatically start recording for approximately one minute. For continuous monitoring when the car is off, a voltage reducing cable (purchased separately) is required.
6.4 Deteksyon Mouvman
If enabled in the settings, the motion detection feature will automatically activate and begin recording if a significant object enters the camera's monitoring range while the vehicle is parked. It is recommended to turn off motion detection when driving to avoid unnecessary recordings.
6.5 Viewanrejistreman yo
Ou kapab view recorded videos directly on the 2.0-inch display screen. Navigate to the playback mode in the menu to browse and play files. Alternatively, remove the Micro Memory Card and insert it into a computer to view files.
7. Antretyen
- Netwayaj: Use a soft, dry cloth to clean the dash cam's lens and screen. Do not use abrasive cleaners or solvents.
- Kat memwa: Format the Micro Memory Card regularly (e.g., once a month) within the dash cam's settings to maintain optimal performance and prevent data corruption.
- Mizajou lojisyèl: Tcheke manifakti a website periodically for any available firmware updates. Follow the instructions provided with the update carefully.
- Depo: Lè w pa itilize kamera a pou yon bon bout tan, sere l nan yon kote ki fre epi sèk, lwen limyè solèy dirèk.
NAN. Depanaj
| Pwoblèm | Kòz posib | Solisyon |
|---|---|---|
| Kamera tablodbò a pa limen. | No power supply; faulty car charger; depleted internal battery. | Check car charger connection and vehicle's power outlet. Ensure the car charger is functional. Charge the internal battery. |
| Anrejistreman an sispann sanzatann. | Memory card full; memory card error; power interruption. | Format the memory card. Replace the memory card if errors persist. Check power connection. |
| Kalite videyo a pa bon. | Dirty lens; protective film on lens; incorrect resolution settings. | Clean the lens. Remove any protective film. Adjust video resolution settings to 1080P. |
| Dash cam freezes or crashes. | Software error; memory card issue. | Press the RESET button (refer to Figure 5.1). Format or replace the memory card. |
| Siveyans pakin nan pa fonksyone. | Feature not enabled; no voltage reducing cable for continuous power. | Enable parking monitoring in settings. Consider installing a voltage reducing cable for 24/7 monitoring. |
9. Espesifikasyon
| Karakteristik | Spesifikasyon |
|---|---|
| Materyèl pwodwi | ABS |
| Rezolisyon videyo | 1920x1080P / 30fps |
| Rezolisyon imaj | 10MP |
| Kalite batri | Lityòm Ion batri |
| Kapasite batri | 180mAh |
| Gwosè ekran ekspozisyon | 2.0 pous |
| Rezolisyon ekran ekspozisyon | 960x240 |
| Supported Micro Memory Card | Jiska 32GB (pa enkli) |
| Tanperati Fonksyònman | -10 ℃ pou 70 ℃ |
| Dimansyon pwodwi (D x W x H) | 5.91" x 4.72" x 3.54" |
10. Garanti ak sipò
This Keenso product is covered by a manufacturer warranty for 90 days from the date of purchase. This warranty covers defects in materials and workmanship under normal use.
For technical support, warranty claims, or any questions regarding your Keenso Front Rear Dash Cam, please contact your retailer or visit the official Keenso websit entènèt pou jwenn enfòmasyon sou sèvis kliyan.