
1. Entwodiksyon
Thank you for choosing the KEENSTAR 20Bar Espresso Machine. This manual provides essential information for the safe operation, maintenance, and troubleshooting of your new espresso machine. Please read it thoroughly before first use and keep it for future reference.
2. Enstriksyon Sekirite Enpòtan
- Li tout enstriksyon yo anvan ou sèvi ak aparèy la.
- Pa manyen sifas cho. Sèvi ak manch oswa bouton.
- Pou pwoteje kont dife, chòk elektrik, ak blesi sou moun, pa plonje kòd, ploge, oswa aparèy nan dlo oswa lòt likid.
- Sipèvizyon sere se nesesè lè nenpòt aparèy itilize pa oswa toupre timoun yo.
- Debranche soti nan priz lè yo pa itilize ak anvan netwaye. Kite refwadi anvan ou mete oswa retire pati yo, epi anvan ou netwaye aparèy la.
- Pa opere nenpòt aparèy ki gen yon kòd oswa ploge ki domaje oswa apre aparèy la fonksyone byen, oswa li te domaje nan nenpòt fason.
- Itilizasyon akseswar manifakti aparèy la pa rekòmande pou yo ka lakòz dife, chòk elektrik oswa blesi sou moun.
- Pa sèvi ak deyò.
- Pa kite kòd pandye sou kwen tab oswa kontwa, oswa manyen sifas cho.
- Pa mete sou oswa toupre yon gaz cho oswa recho elektrik, oswa nan yon fou chofe.
- Toujou branche ploge a nan aparèy la an premye, answit branche kòd la nan priz miray la. Pou dekonekte li, vire nenpòt kontwòl sou "off", epi retire ploge a nan priz miray la.
- Pa sèvi ak aparèy pou lòt itilizasyon ki gen entansyon an.
- Fè anpil atansyon lè w ap jete vapè cho a.
- Aparèy sa a se pou itilize nan kay la sèlman.
3. Pake kontni
Tanpri verifye sa ki nan pake a lè w ap debale l pou asire w tout atik yo la epi yo pa domaje.
Imaj: All components included in the KEENSTAR 20Bar Espresso Machine package. This includes the main unit, portafilter with handle, single and double shot filters, coffee spoon with tamper, and a removable drip tray. The water tank and steam nozzle are also visible.
- KEENSTAR 20Bar Espresso Machine Main Unit
- Manch Portafilter
- 1-Shot Filter Basket
- 2-Shot Filter Basket
- Coffee Spoon with Tamper
- Plato degoute detachable
- Manyèl itilizatè
4. Pwodwi souview
Familyarize w ak diferan pati ki nan machin espresso ou a.

Imaj: Devan view of the KEENSTAR 20Bar Espresso Machine, showcasing its sleek stainless steel design and key operational areas.
- Tank dlo: Detachable, 1.1 Liter capacity. Located at the back of the machine.
- Kontwòl Panel: Intuitive touch screen for selecting brew options (Espresso, Americano, Espresso Cool, Steam, ON/OFF, 2X Espresso).
- Pòtafiltè: Kenbe kafe moulu pou preparasyon.
- Baton vapè: For frothing milk for lattes and cappuccinos. Features a 360-degree rotation.
- Degoute Plato: Detachable pou netwaye fasil.
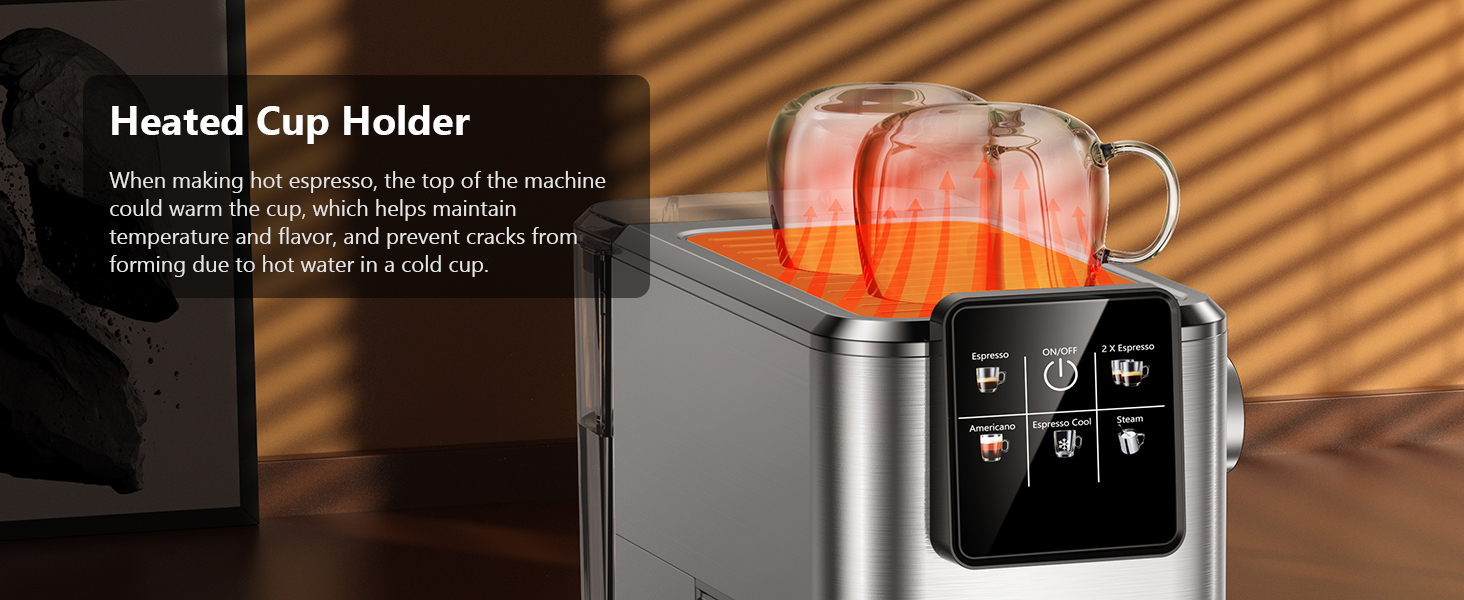
- Heated Cup Holder: Located on top of the machine to warm cups, maintaining coffee temperature.
5. Enstalasyon
5.1 Initial Use and Priming
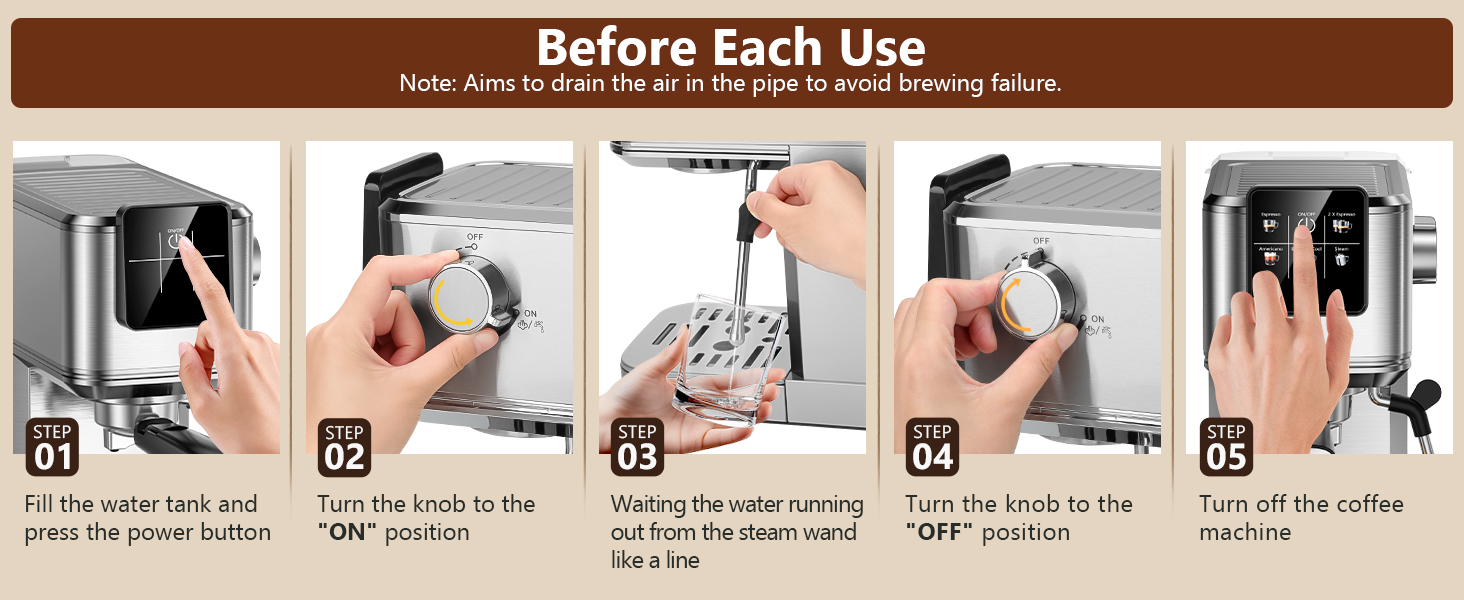
Before first use, or if the machine has not been used for a long time, it is essential to prime the system to ensure proper operation and remove any air from the pipes.
- Fill the water tank with fresh water and place it back into the machine. Ensure the tank cover is properly closed.
- Plug the machine into a power outlet. The ON/OFF button on the touch screen will illuminate.
- Press the ON/OFF button to turn on the machine. The indicator lights will blink as the machine preheats.
- Once the indicator lights are steady, the machine is ready.
- Mete yon tas vid anba ralonj vapè a.
- Turn the steam knob to the "ON" position. Water will run out from the steam wand like a line. Let it run for about 10-15 seconds to purge air.
- Turn the steam knob to the "OFF" position.
- Press the ON/OFF button to turn off the machine. The machine is now primed and ready for use.

Imaj: Visual steps for priming the espresso machine before its first use or after a period of inactivity. This process drains air from the internal pipes.
5.2 ranpli tank dlo
The water tank has a maximum capacity of 1200ml. Do not exceed the maximum fill line to prevent overflow.
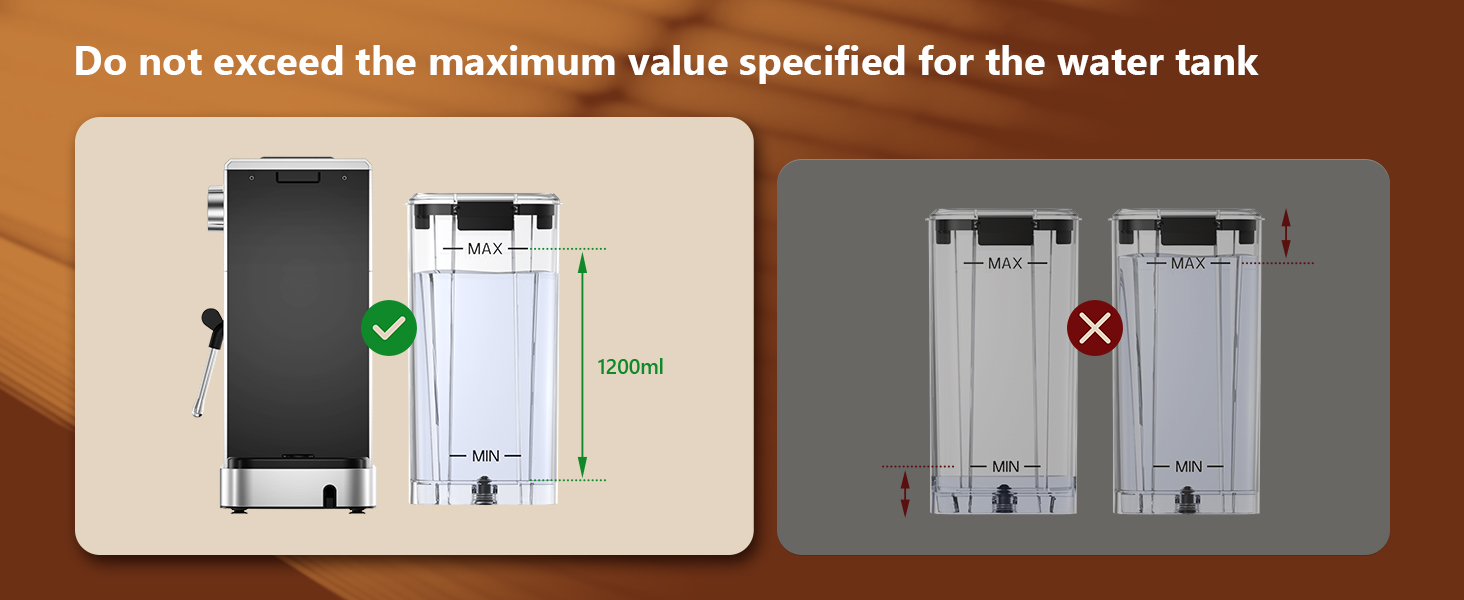
Imaj: Guidance on filling the water tank, indicating the 1200ml maximum fill level to avoid overfilling.
6. Operasyon Enstriksyon
6.1 EnplikasyonJwi Espresso
The machine features a 20-bar pressure system and pre-soak technology for rich espresso extraction.
- Ensure the steam knob is set to the "OFF" position before brewing coffee.
- Fill the water tank with fresh water and press the ON/OFF button to power on. Wait for the indicator to become steady, signifying preheating is complete.
- Select the appropriate filter basket (1-shot or 2-shot) and place it into the portafilter.
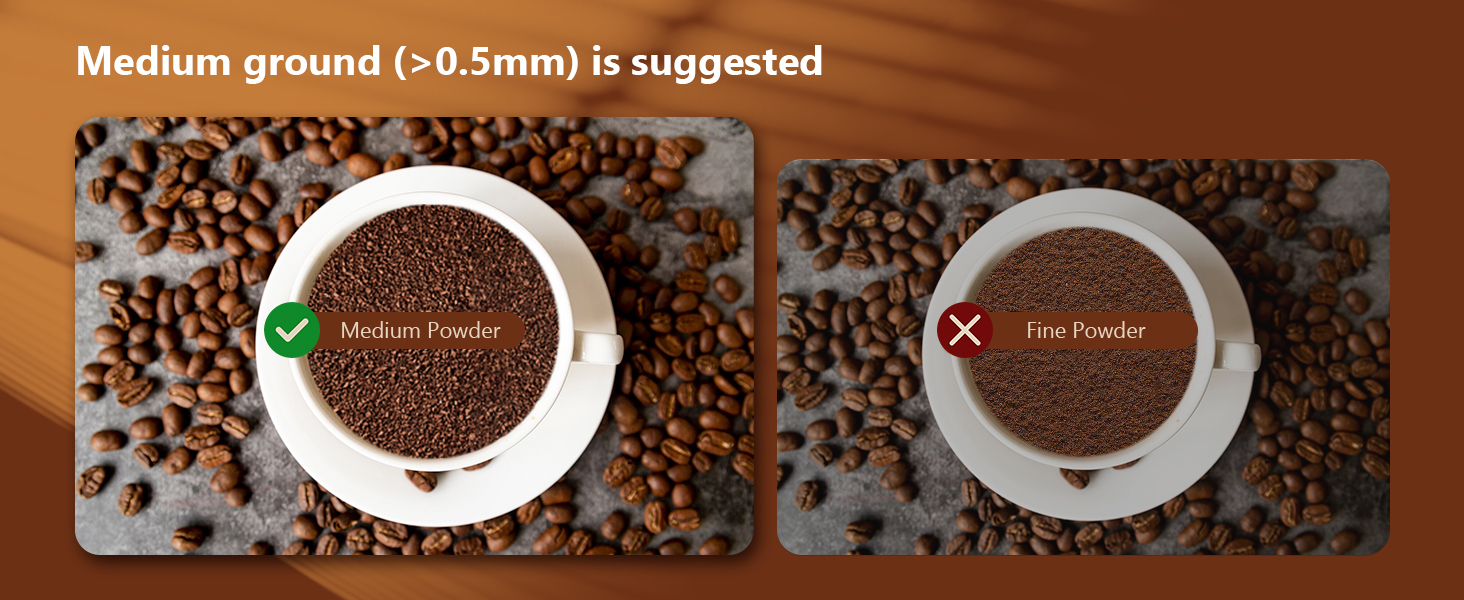
- Add ground coffee to the filter basket. Use medium ground coffee (greater than 0.5mm) for optimal results.
- Tamp the ground coffee firmly and evenly using the coffee tamper.
- Attach the portafilter to the machine, ensuring it is fully locked into place.
- Mete tas ou yo sou plato degoute a ki anba pòtfilt la.
- Select "Espresso" for a single shot or "2 X Espresso" for a double shot on the touch screen. The machine will begin brewing.
- Once brewing is complete, the machine will stop automatically.

Imaj: Step-by-step visual instructions for brewing espresso, from preparing the machine to the final extraction.
Imaj: Illustration demonstrating the correct way to lock the portafilter before brewing to prevent leaks and ensure proper extraction.

Imaj: Recommended coffee grind size (medium, >0.5mm) for optimal espresso extraction, contrasting it with fine ground coffee.
6.2 Making Cold Brew Espresso
This machine offers a rapid cold brew function, producing smooth cold brew in as little as 10 minutes.
- Ensure the water tank is filled with iced water for the cold brew function.
- Prepare the portafilter with ground coffee as described in Section 6.1.
- Attach the portafilter to the machine and place a cup underneath.
- Select "Espresso Cool" on the touch screen. The machine will begin the cold brew process.
- Enjoy your rapid cold brew espresso.

Imaj: The espresso machine preparing cold brew, emphasizing the requirement for iced water in the tank.
6.3 Lèt kimen
Bag vapè pwisan an pèmèt ou kreye mikwomous krèm pou latte ak kapuccino.
- Fill the water tank with fresh water and press the ON/OFF button to power on.
- Press the "Steam" button on the touch screen to preheat the steam function. The indicator will blink during preheating and become steady when ready.
- After preheating, turn the steam knob to the "ON" position to release any remaining water in the pipe before frothing.
- Insert the steam nozzle approximately 1 inch into the surface of your milk.
- Gradually turn the steam knob to increase steam until the desired foam consistency is achieved.
- Once finished, turn the steam knob to the "OFF" position and clean the steam wand immediately.
Imaj: Visual instructions for frothing milk, detailing the steps from preheating to creating microfoam.
7. Antretyen ak netwayaj
Regular cleaning ensures the longevity and optimal performance of your espresso machine.
- Netwayaj jeneral: Siye eksteryè machin lan ak piblisiteamp twal. Pa sèvi ak pwodui netwayaj abrazif oswa épurateur.
- Degoute Plato: The removable drip tray should be emptied and cleaned regularly.
- Pòtafiltè ak Panye Filtè: Apre chak itilizasyon, retire pòtfiltè a epi jete kafe moulu ki itilize a. Rense pòtfiltè a ak panyen filtè a anba dlo k ap koule.
- Baton vapè: Touswit apre ou fin fè mous lèt la, siye baton vapè a ak yon ti dlo.amp cloth to prevent milk residue from drying. Purge steam briefly to clear any internal blockages.
- Tank dlo: Netwaye tank dlo a detanzantan avèk yon savon dou epi rense l byen.
- Detartraj: Depending on water hardness, descale the machine every 2-3 months. Follow the instructions provided with a suitable descaling solution.

Imaj: Important cleaning instruction: All accessories must be washed by hand and are not dishwasher safe.
NAN. Depanaj
Gade seksyon sa a pou pwoblèm komen ak solisyon yo.
| Pwoblèm | Kòz posib | Solisyon |
|---|---|---|
| Pa gen distribisyon kafe / Koule kafe dousman |
|
|
| Dlo ap koule nan kwen pòtafiltè a |
|
|
| Baton vapè a pa pwodui vapè |
|
|
| Kafe pa cho ase |
|
|
9. Espesifikasyon
- Mak: KEENSTAR
- Non modèl: JH-C5210
- Sistèm Presyon: 20 Bar
- Pouvwa: 1350W
- Kapasite tank dlo: 1.1 Liters (37oz)
- Dimansyon pwodwi: 11.8"D x 12.6"W x 5.5"H
- Pwa atik: 4.6 liv
- Materyèl: Nerjaveèi asye
- Karakteristik espesyal: Programmable, Touch Screen, Milk Frother, Hot & Rapid Cold Brew
- Kalite Antre Kafe: Kafe tè
- Kalite filtre: Reusable
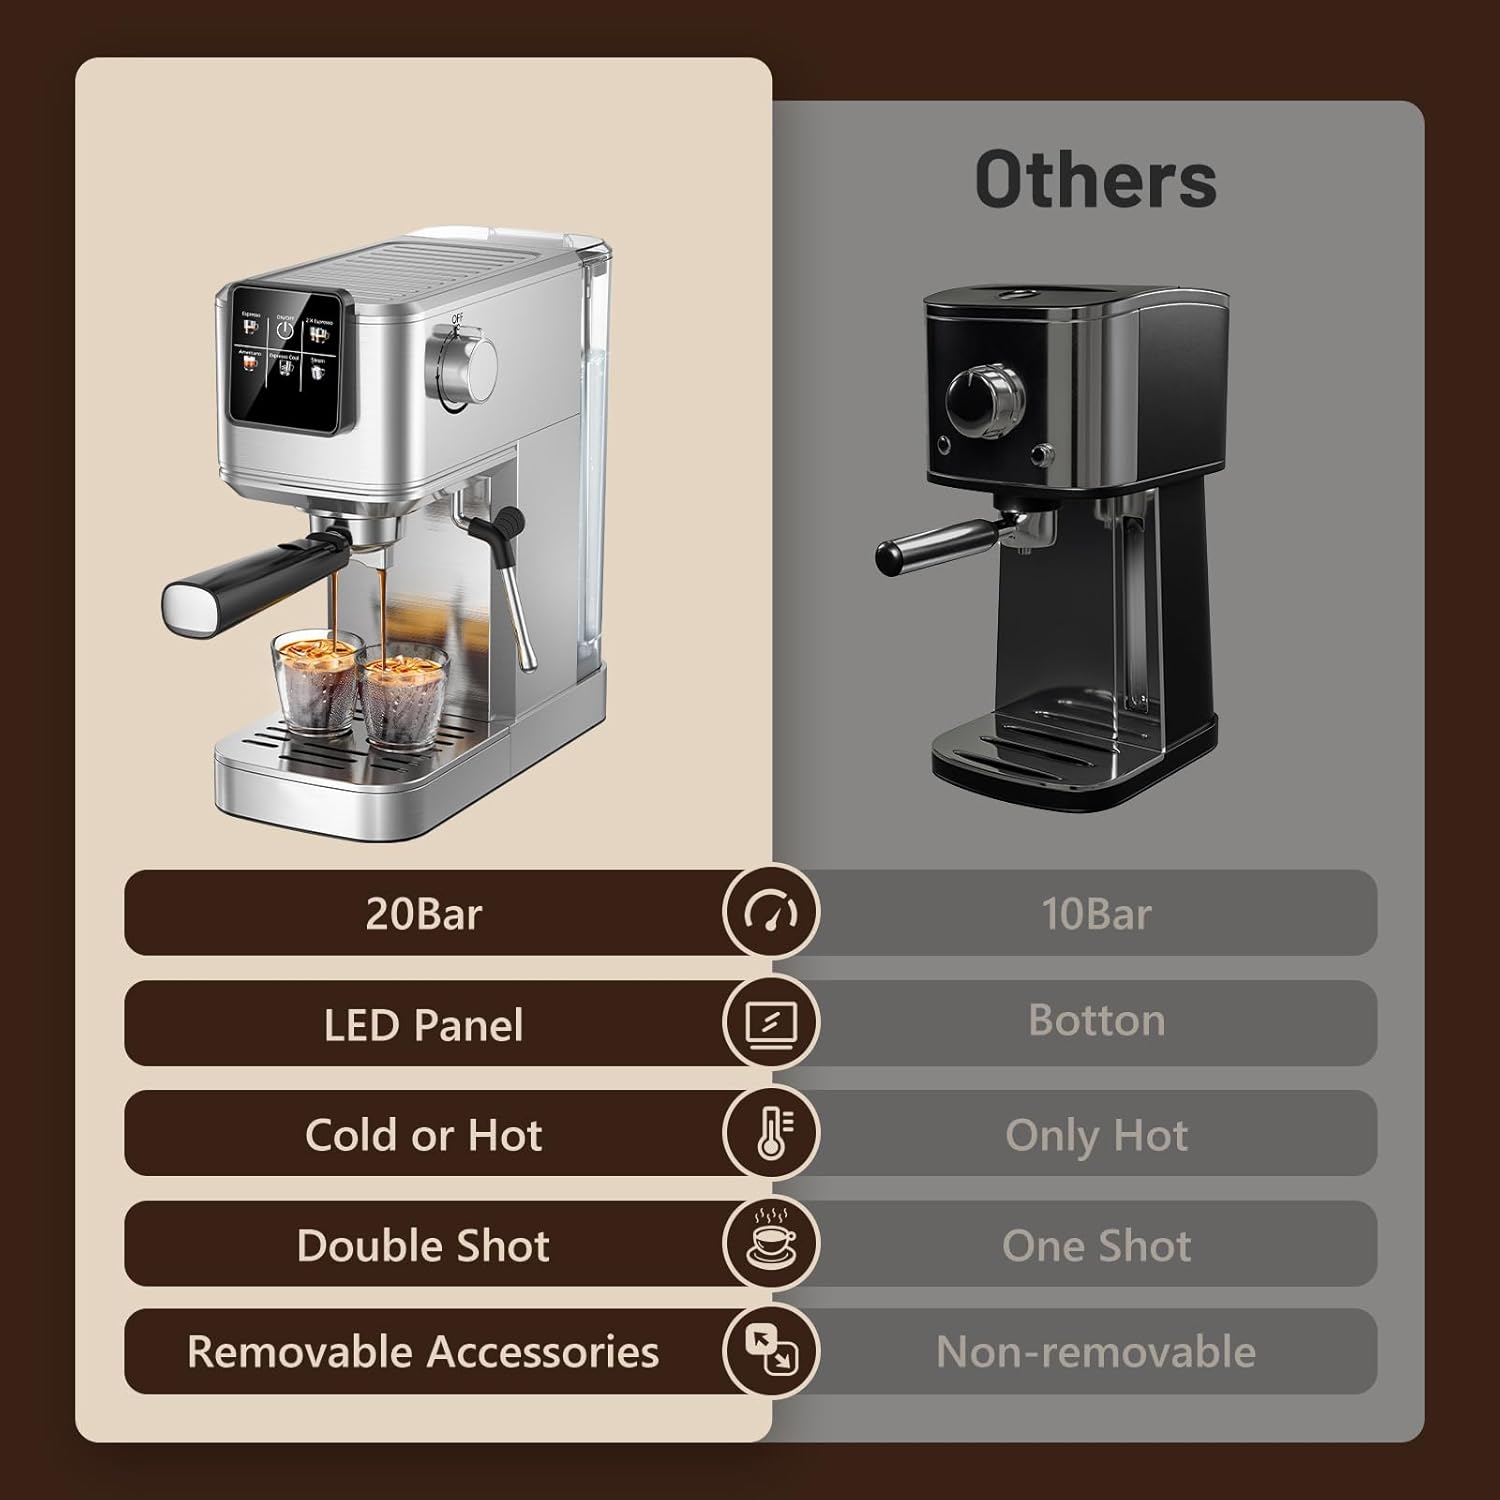
Imaj: Feature comparison of the KEENSTAR machine, emphasizing its 20Bar pressure, LED panel, and versatility for hot and cold beverages.

Imaj: Dimensions of the KEENSTAR espresso machine, indicating its compact size.
10. Garanti ak sipò
For warranty information or technical support, please refer to the contact details provided on the product packaging or visit the official KEENSTAR websit la. Kenbe prèv acha ou a pou nenpòt reklamasyon garanti.