
1. Entwodiksyon
This manual provides essential information for the assembly, operation, and maintenance of your Acekool 8x10 FT Outdoor Metal Storage Shed. Please read these instructions carefully before beginning assembly and retain them for future reference. This shed is designed to provide ample space for organizing tools and other outdoor items, helping to keep your yard tidy and protected.
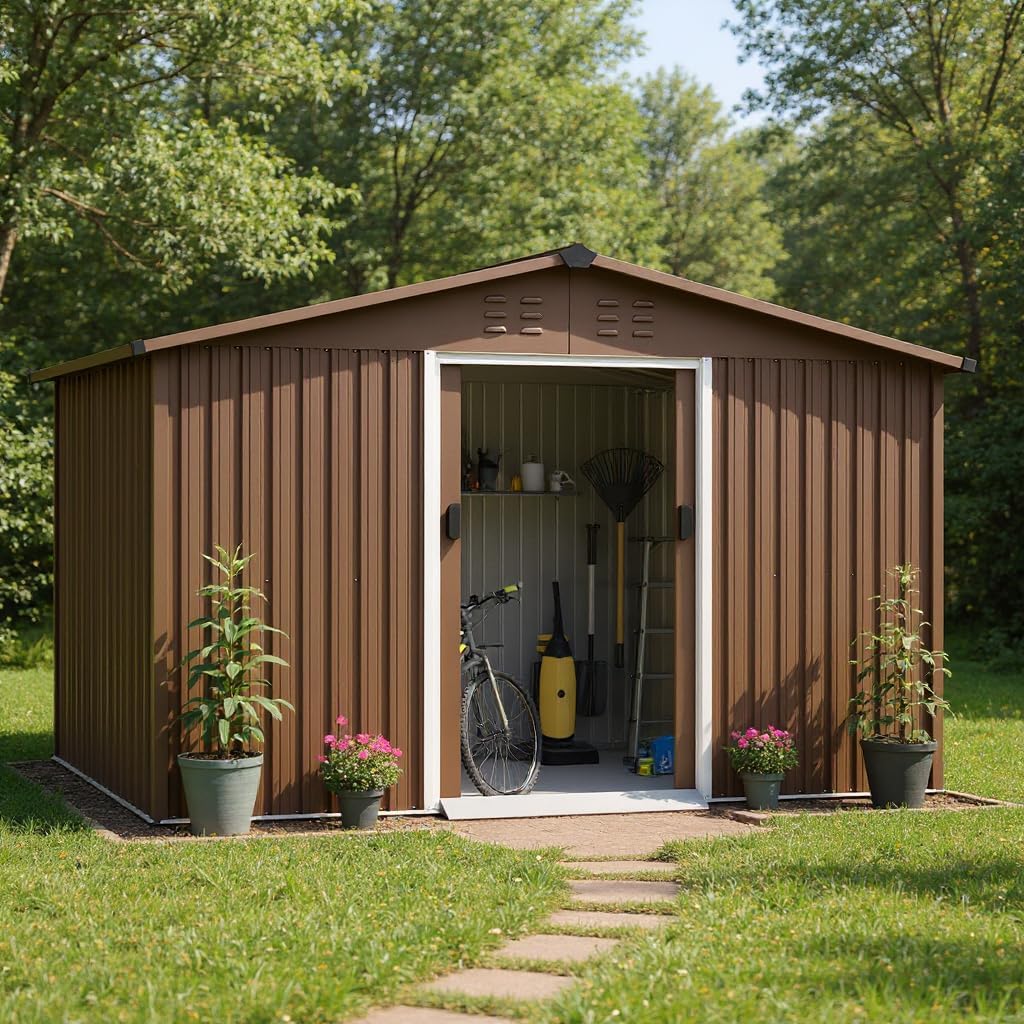
Image 1.1: The Acekool 8x10 FT Outdoor Metal Storage Shed, showcasing its spacious design and brown finish in a natural outdoor environment.
Key features include durable galvanized steel construction, a lockable sliding door for security, and integrated vents for air circulation. Its sloped roof design aids in water drainage and rust prevention.
2. Enfòmasyon sou Sekirite
Li enpòtan anpil pou respekte règleman sekirite yo pandan w ap monte epi itilize abri depo a. Si ou pa swiv enstriksyon sa yo, ou ka blese oswa domaje pwodwi a.
- Preparasyon sit: Ensure the assembly area is flat, level, and clear of obstructions. A solid foundation (e.g., concrete slab, treated timber base) is recommended for stability and longevity.
- Ekipman Pwoteksyon Pèsonèl (PPE): Wear appropriate safety gear, including gloves and eye protection, during assembly to prevent cuts and scrapes from metal edges.
- Asistans pou Asanblaj: Assembly requires multiple people. Do not attempt to assemble the shed alone.
- Kondisyon Meteyo: Do not assemble the shed in strong winds or adverse weather conditions. Ensure the roof is properly cleared of accumulated snow to prevent structural damage.
- Kwen byen file: Be aware of sharp edges on metal panels. Handle all components with care.
- Ancrage: Securely anchor the shed to the ground or foundation to prevent it from being lifted by strong winds. Anchoring hardware may not be included and should be purchased separately based on your foundation type.
- Vantilasyon: The shed includes vents for air circulation. Do not block these vents.
3. Pake kontni
Before beginning assembly, verify that all parts are present and undamaged. All components are pre-cut, pre-drilled, and labeled with part numbers for easy identification.
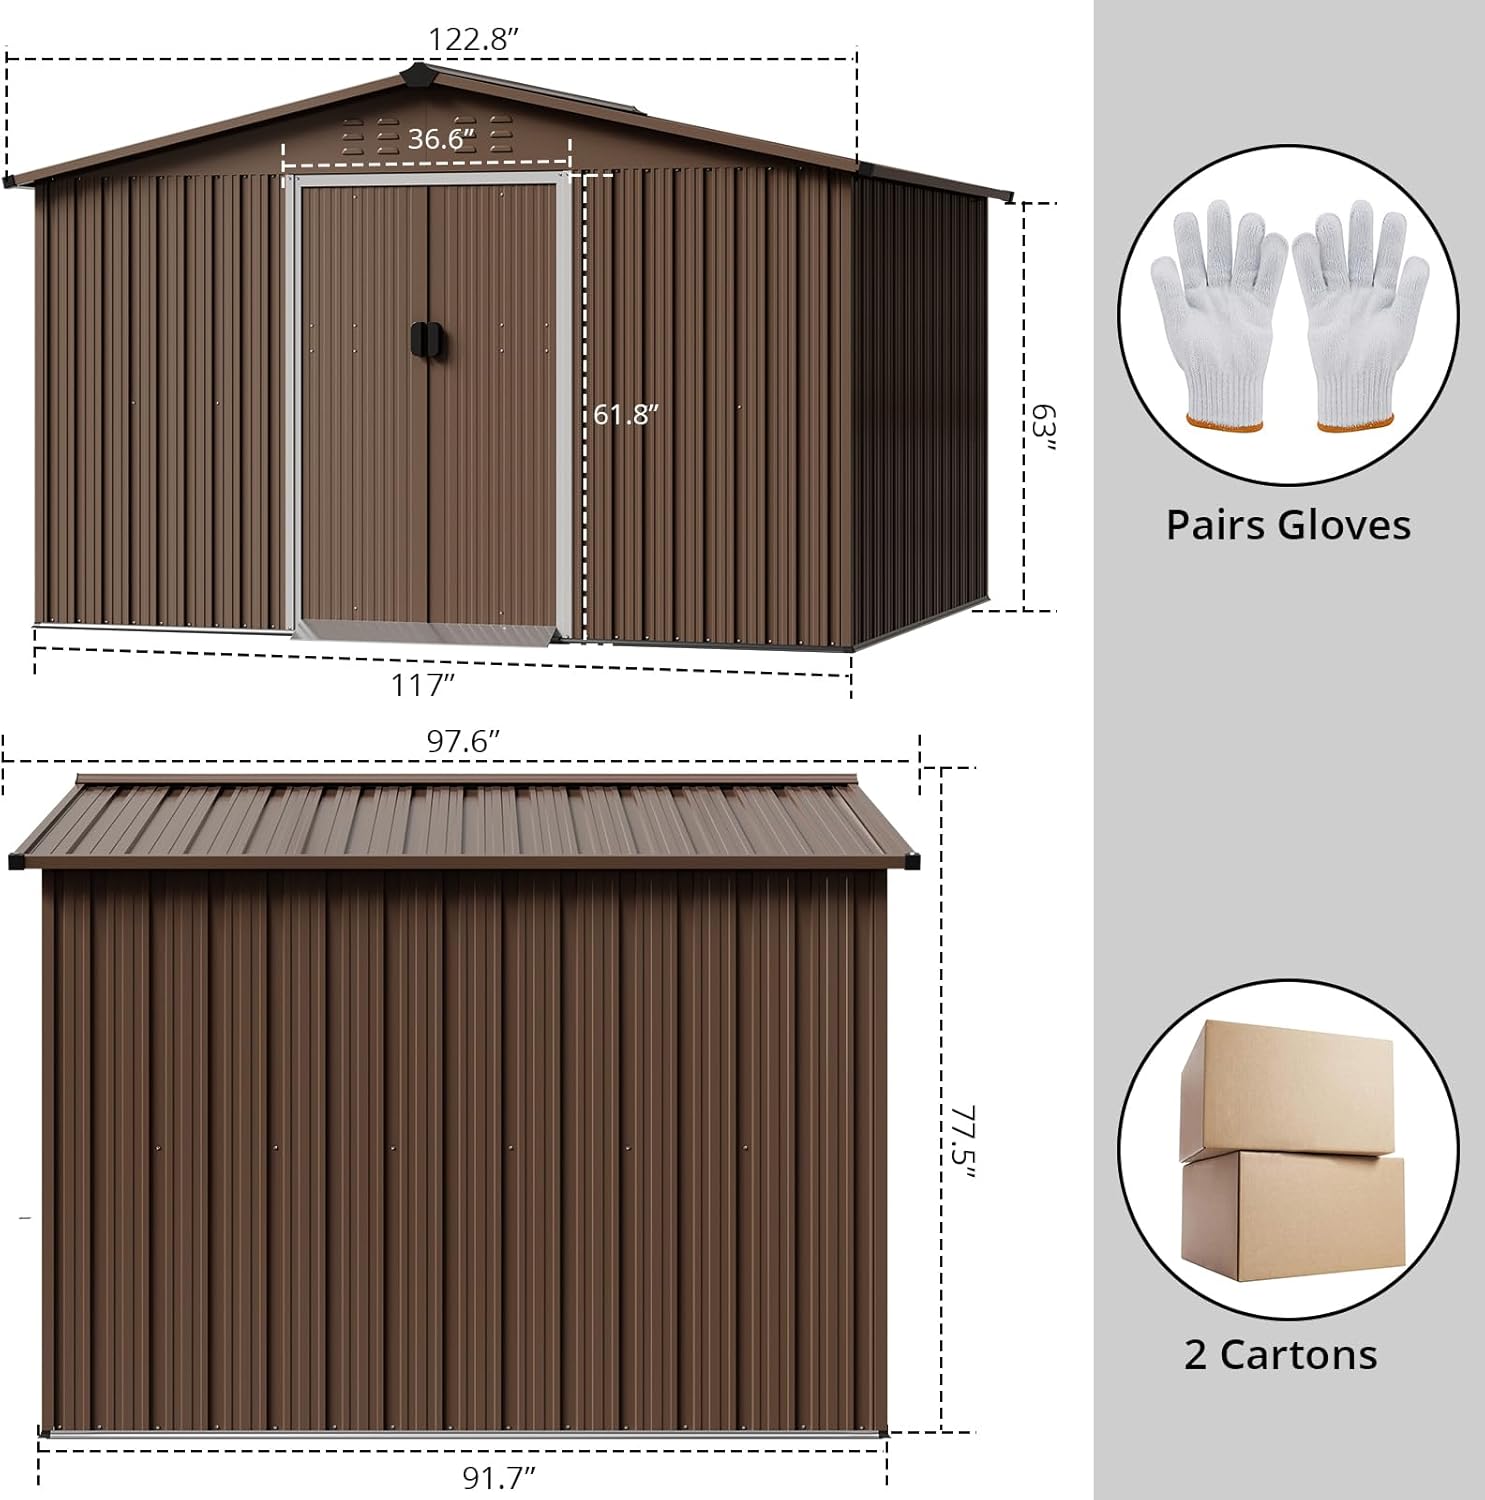
Imaj 3.1: Plis paseview of shed dimensions and typical package contents, including protective gloves and the number of shipping cartons.
Pake ou ta dwe gen ladan:
- Panno asye galvanize (mi, twati)
- Frame components (beams, supports)
- Sliding door assembly
- Hardware kit (screws, nuts, washers)
- Protective gloves (one pair)
- Manyèl enstriksyon
- All parts are distributed across two cartons.
If any parts are missing or damaged, please contact Acekool customer support immediately.
4. Enstalasyon ak Asanble
The Acekool storage shed is designed for straightforward assembly with pre-drilled parts and clear instructions. We highly recommend watching the official installation video prior to starting and assembling with multiple people on a flat, level surface.
- Step 1: Foundation Preparation. Ensure your chosen site is level and stable. A concrete slab or a sturdy timber frame is ideal for long-term stability.
- Step 2: Base Frame Assembly. Assemble the base frame according to the provided diagrams, ensuring all corners are square and secure.
- Step 3: Wall Panel Installation. Attach the wall panels to the base frame, following the numbered labels. Secure each panel firmly before proceeding to the next.
- Step 4: Roof Frame Assembly. Construct the roof frame on the ground, then carefully lift and secure it onto the wall panels.
- Step 5: Roof Panel Installation. Install the roof panels, ensuring they overlap correctly to facilitate water drainage.
- Step 6: Door Assembly and Installation. Assemble the sliding door mechanism and attach the door panels. Ensure smooth operation.
- Step 7: Final Touches. Install vents, corner protection, and any remaining trim pieces. Double-check all fasteners for tightness.

Imaj 4.1: Detaye view of key structural elements including the slanted roof for drainage, protective edge corners, and the robust lockable door mechanism.
For a visual guide, please refer to the official Acekool installation video available on the product page or Acekool's official websit.
5. Operasyon Enstriksyon
Your Acekool storage shed is designed for practical and secure storage of various items.
- Pòt glisman: The shed features dual sliding doors that move horizontally to save space. To open, simply slide the door along its track. Ensure the track is kept clear of debris for smooth operation.
- Konsepsyon ki ka fèmen ak kle: The door is designed to be lockable for enhanced security (lock not included). Use a padlock of appropriate size to secure your stored items.
- Vant lè: Integrated vents near the roofline ensure proper air circulation within the shed, helping to prevent moisture buildup, mold, and mildew on stored items. Do not obstruct these vents.

Image 5.1: The interior of the shed demonstrating its large capacity and versatility for storing garden tools, bicycles, and other equipment.

Image 5.2: Close-up of functional elements including air vents for circulation, the sloping roof design, sturdy door handles, and protective corner guards.
6. Antretyen
Regular maintenance will extend the lifespan and preserve the appearance of your Acekool storage shed.
- Netwayaj: Clean the exterior of the shed periodically with mild soap and water. Avoid abrasive cleaners or harsh chemicals that could damage the galvanized finish.
- Swen twati: The sloped roof is designed for quick water drainage and rust prevention. In snowy regions, it is crucial to properly clear accumulated snow from the roof to prevent excessive weight and potential damage.
- Vantilasyon: Periodically check that the air vents are clear of debris (leaves, dust, insect nests) to ensure continuous airflow.
- Ray Pòt: Keep the sliding door tracks clean and free of dirt or small stones to ensure smooth operation. Lubricate with a silicone-based spray if needed.
- Fastener: Chak ane, enspekte tout vis ak boulon yo pou wè si yo byen sere. Sere nenpòt eleman ki lach pou kenbe entegrite estriktirèl la.
- Prevansyon rouye: While made from galvanized steel for corrosion resistance, minor scratches or prolonged exposure to harsh conditions can lead to surface rust. Address any signs of rust promptly with appropriate rust-inhibiting paint.

Image 6.1: Visual representation of the dual air vents promoting indoor air circulation and the sloped roof's effectiveness in preventing water accumulation and rust.

Image 6.2: The shed's design for all-weather durability, highlighting its UV protection and waterproof construction.
NAN. Depanaj
Seksyon sa a adrese pwoblèm komen ou ka rankontre ak depo kay ou a.
| Pwoblèm | Kòz posib | Solisyon |
|---|---|---|
| Door sticks or is difficult to slide. | Debris in track, misaligned track, or lack of lubrication. | Clean the door track thoroughly. Check for proper alignment and adjust if necessary. Apply a silicone-based lubricant to the track. |
| Akimilasyon dlo andedan abri a. | Improper roof panel overlap, unsealed seams, or uneven foundation. | Ensure roof panels are correctly overlapped and all seams are sealed. Verify the foundation is level. Check for any gaps around the base and seal if found. |
| Kabann nan santi l enstab oswa li ap tranble. | Loose fasteners, uneven foundation, or insufficient anchoring. | Tighten all screws and bolts. Ensure the foundation is level. Securely anchor the shed to the ground using appropriate anchoring hardware. |
| Tach rouye k ap parèt sou panno yo. | Surface scratches, prolonged moisture exposure, or damaged coating. | Clean the affected area, lightly sand if necessary, and apply a rust-inhibiting primer followed by exterior metal paint matching the shed's color. |
8. Espesifikasyon
Detailed technical specifications for the Acekool 8x10 FT Outdoor Metal Storage Shed (Brown).
| Atribi | Detay |
|---|---|
| Mak | Acekool |
| Nimewo Modèl | ACE8X15GR |
| Koulè | Brown |
| Materyèl | Galvanized Steel (Metal) |
| Dimansyon pwodwi (asanble) | Approximately 8 ft x 10 ft (2.44 m x 3.05 m) |
| Packaging Dimensions (D x W x H) | 70.87"D x 24.41"W x 5.52"H |
| Pwa atik | 103.6 liv (apeprè 46.99 kg) |
| Asanble obligatwa | Wi |
| UPC | 199641715159 |
Note: The product dimensions listed in specifications (70.87"D x 24.41"W x 5.52"H) refer to packaging or a component. The shed's assembled dimensions are approximately 8 feet by 10 feet.
9. Garanti ak sipò
Acekool is committed to providing high-quality products and customer satisfaction.
- Règleman retounen: This product is eligible for 30-day easy returns. Please refer to the retailer's return policy for specific terms and conditions.
- Sipò Kliyan: For any questions regarding assembly, missing parts, or product issues, please contact Acekool customer support. You can typically find contact information on the product packaging or the official Acekool websit.
- Resous sou entènèt: Additional support, FAQs, and installation videos may be available on the Acekool brand store or product page.
Thank you for choosing Acekool.