
1. Entwodiksyon
The ZENIKO T1 is a compact 2.4G wireless flash trigger designed to provide reliable and versatile off-camera flash control for various DSLR and mirrorless cameras. This device functions as both a transmitter (TX) and a receiver (RX), allowing for flexible multi-flash setups. Its universal hot shoe ensures broad compatibility with most camera brands and single-contact flash units.
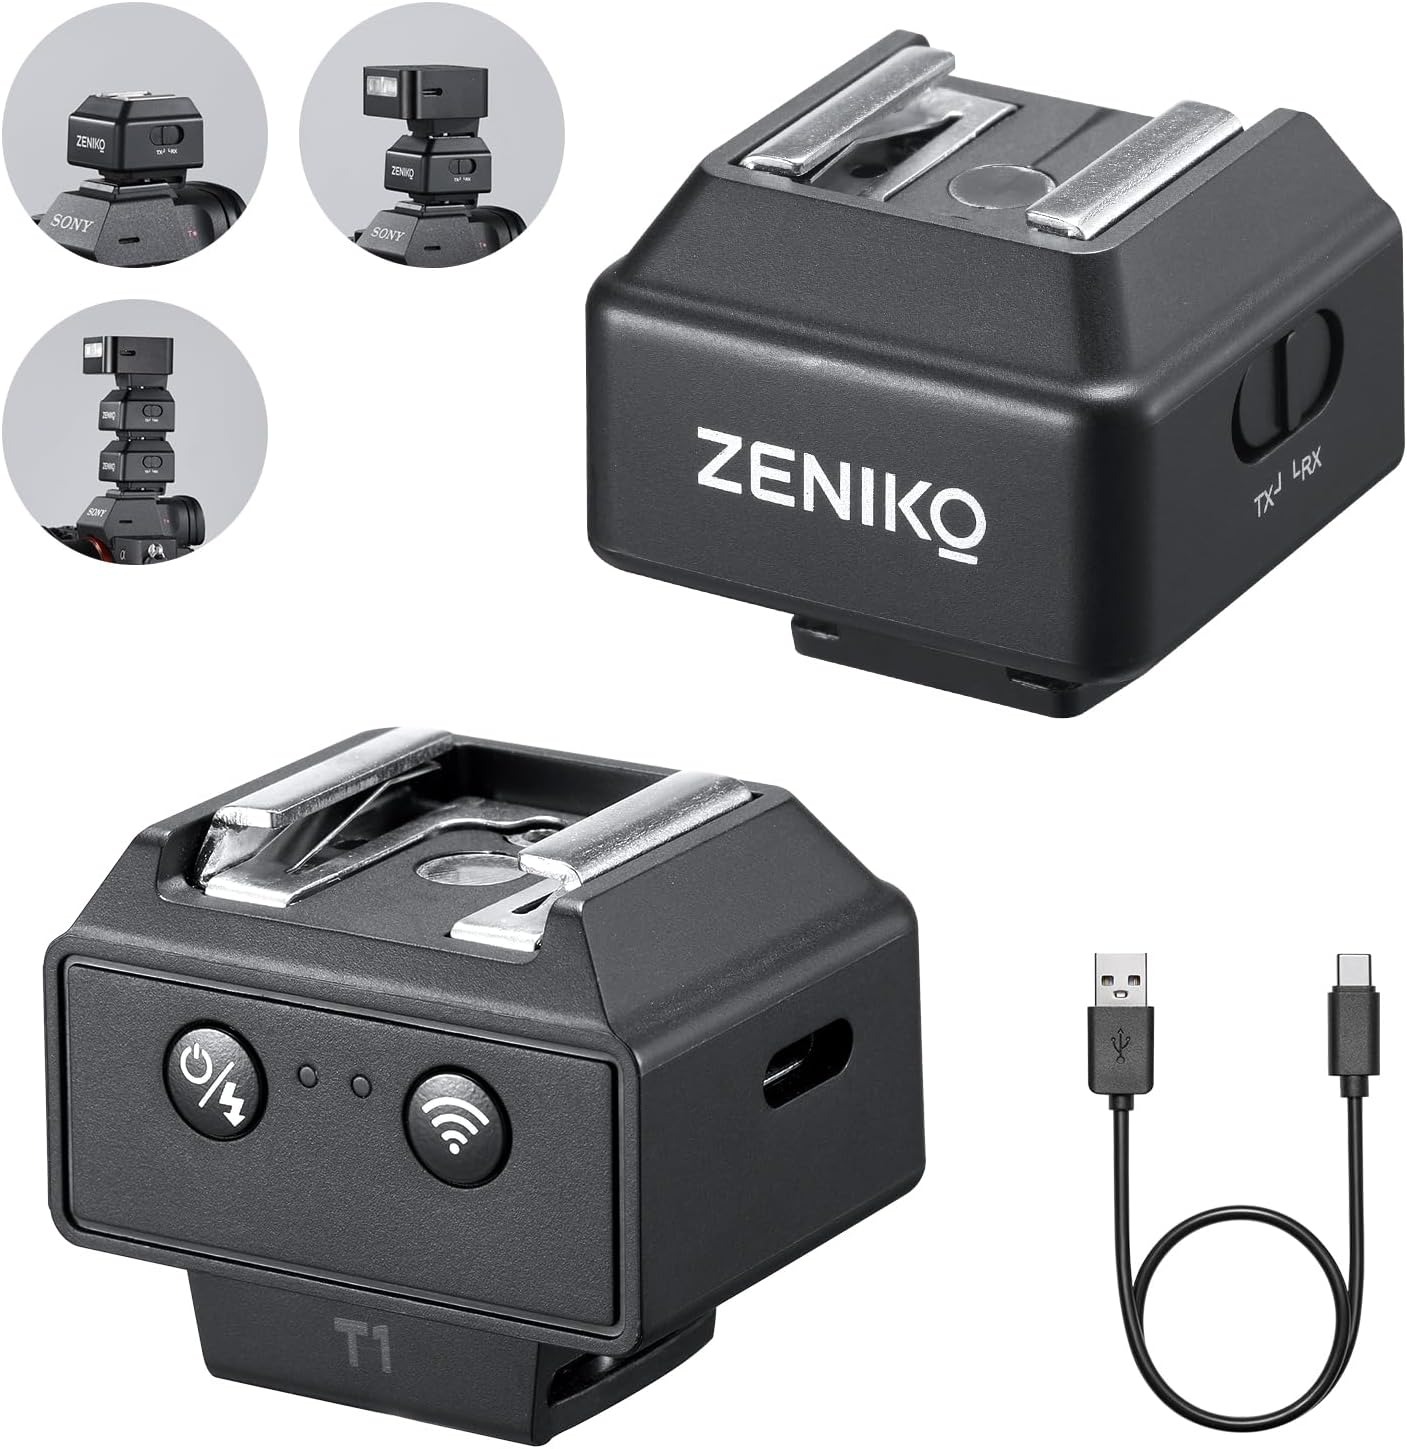
Image 1.1: ZENIKO T1 Wireless Mini Flash Trigger units and USB-C charging cable.
2. Ki sa ki nan bwat la
Tanpri verifye sa ki nan pake a lè w ap debale l pou asire w tout bagay yo la:
- T1 Flash Trigger × 2 units
- USB-C Chaje Kab × 1
- Manyèl Enstriksyon × 1

Image 2.1: Package contents showing two T1 triggers, a USB-C cable, and the instruction manual.
3. Pwodwi souview
The ZENIKO T1 features a robust design and intuitive controls for ease of use.
3.1 Karakteristik kle
- Konsepsyon kontra enfòmèl ant: Small and lightweight for portability.
- Soulye cho inivèsèl: Compatible with most single-contact hot shoe cameras and flashes.
- 2.4GHz san fil: Stable and interference-free triggering up to 50 meters (164 feet).
- Pwolonje lavi batri: Up to 40 hours in transmit mode, 8 hours in receive mode.
- Flash Riser Function: Elevated design helps prevent vignetting with certain lenses.

Imaj 3.1: Plis paseview of ZENIKO T1 key features.
3.2 Eleman
Each T1 unit includes:
- Monte soulye cho: Pou tache ak yon kamera oswa yon flach.
- Chanjman Mòd (TX/RX): Chanje ant mòd Transmetè ak Reseptè.
- Power/Trigger Button: Turns the unit on/off and manually triggers the flash.
- Endikatè Status: LEDs for power, wireless connection, and battery status.
- USB-C pò: Pou chaje batri entèn lan.

Imaj 3.2: Detaye view of the T1 unit's controls and ports.
4. Enstalasyon
4.1 Chaje Aparèy la
- Connect the provided USB-C charging cable to the USB-C port on the T1 unit.
- Connect the other end of the cable to a USB power source (e.g., computer, wall adapter, power bank).
- The charging indicator LED will illuminate during charging and turn off when fully charged. A full charge takes approximately 1 hour.

Image 4.1: T1 unit being charged via USB-C.
4.2 Mounting and Mode Selection
- Transmitter (TX) Setup: Slide one T1 unit onto your camera's hot shoe. Ensure it is securely locked. Set this unit to TX mode using the mode switch.
- Receiver (RX) Setup: Slide your external flash unit onto the hot shoe of the second T1 unit. Set this second T1 unit to RX mode using the mode switch.
- Pouvwa sou: Press and hold the power button on both units until the indicator lights illuminate.

Image 4.2: T1 unit mounted on a camera.
4.3 Konpatibilite
The T1 is designed for universal compatibility with single-contact hot shoe cameras and flashes from brands such as Canon, Nikon, Sony, Fujifilm, Pentax, Olympus, Ricoh, and Panasonic. It is important to note that this flash trigger cannot be used with cameras that lack a single-contact hot shoe.

Image 4.3: Universal hot shoe compatibility with various camera brands.
5. Operasyon Enstriksyon
5.1 Basic Wireless Triggering
- Ensure both the TX and RX units are powered on and set to their respective modes.
- The units should automatically pair within one second. A stable wireless connection indicator will confirm pairing.
- When you press the shutter button on your camera, the TX unit will send a signal, triggering the flash connected to the RX unit.
- You can also manually trigger the flash by pressing the power/trigger button on the TX unit.

Image 5.1: Simple operation and instant flash triggering.
5.2 Multi-Flash Setups
The T1 system supports one master transmitter controlling up to twenty slave receivers. To set up multiple flashes:
- Designate one T1 unit as the transmitter (TX) on your camera.
- Connect additional T1 units to your slave flashes and set them all to receiver (RX) mode.
- All RX units will respond to the signal from the TX unit, allowing for complex multi-angle lighting configurations.

Imaj 5.2: Egzanpamples of multi-light setups using the T1 triggers.
5.3 Flash Riser Function
When a T1 unit is mounted on your camera's hot shoe, it acts as a flash riser. This elevates the flash unit, which can help prevent vignetting or shadows cast by large lenses or lens hoods, especially when using compact flash units like the ZENIKO ZF04 or ZF08.

Image 5.3: Demonstration of the T1's flash riser capability.
6. Antretyen
6.1 Netwayaj
To clean the T1 units, use a soft, dry cloth. Avoid using liquid cleaners or solvents, as these can damage the device's electronics and finish.
6.2 Depo
Store the T1 units in a cool, dry place away from direct sunlight and extreme temperatures. If storing for an extended period, ensure the units are fully charged before storage and periodically recharge them to maintain battery health.
6.3 Jesyon batri
The T1 units feature an auto-sleep function to conserve battery power after 30 minutes of inactivity. They support charging while in use, which is beneficial for prolonged photography sessions.
NAN. Depanaj
- Flash la pa limen:
- Ensure both TX and RX units are powered on and fully charged.
- Verify that the TX unit is set to Transmitter mode and the RX unit(s) are set to Receiver mode.
- Check that the units are securely mounted on the camera and flash, respectively.
- Confirm that the flash unit itself is powered on and functioning correctly.
- Interference issues:
- The T1 uses 2.4GHz adaptive frequency hopping technology to minimize interference. If issues persist in crowded environments, try repositioning the units slightly.
- Ensure no other strong 2.4GHz wireless devices are operating in very close proximity.

Image 7.1: 2.4GHz Wireless Triggering and Adaptive Frequency.
- Ranje limite:
- The effective range is up to 50 meters (164 feet) in open areas. Obstacles or strong electromagnetic interference can reduce this range.
- Ensure a clear line of sight between the TX and RX units if possible.
- Batri pa kenbe chaj:
- Ensure you are using a functional USB-C cable and power source.
- Si pwoblèm nan kontinye, kontakte sipò kliyan.
8. Espesifikasyon
| Nimewo Modèl | T1 |
| Dimansyon pwodwi | 4.33 x 3.15 x 1.38 pous |
| Pwa atik | 2.88 ons |
| Frekans san fil | 2.4GHz |
| Wireless Range | Jiska 50 mèt (164 pye) |
| Kapasite batri | 200mAh (entèn) |
| Tan pou chaje | Approx. 1 hour (via USB-C) |
| Transmit Endurance | Jiska 40 èdtan |
| Receive Endurance | Jiska 8 èdtan |
| Manifakti | Zeniko |

Image 8.1: T1 unit highlighting its compact size and weight.
9. Garanti ak sipò
For warranty information and technical support, please refer to the official ZENIKO websit la oubyen kontakte machann ou an. Kenbe resi acha ou kòm prèv acha pou nenpòt reklamasyon garanti.

