
1. Entwodiksyon
This manual provides detailed instructions for the Tenlamp G9 Podcast Equipment Audio Mixer. Please read this manual thoroughly before using the device to ensure proper operation and to maximize its features. The G9 mixer is designed for podcasting, live streaming, short video recording, and other audio content creation, offering a range of audio control and enhancement functions.
2. Pwodwi souview
The Tenlamp G9 is a versatile audio mixer featuring a 4.5-inch HD screen for real-time audio adjustments. It includes a 3-band EQ, dual reverb, voice changer, and noise reduction capabilities. The device is designed for plug-and-play compatibility with PCs, Macs, and mobile devices.
2.1 Karakteristik kle
- Ploge epi jwe: Quick connection to PC, Mac, or mobile devices without complex setup.
- Visual Audio Mixing: 4.5-inch HD screen displays audio adjustments in real-time.
- Rediksyon bri: Ensures clear voice output for recordings and live broadcasts.
- Kontwòl konplè: Individual controls for microphone, music, headphone, main output, 3-band EQ, dual reverb, and pitch.
- Pèsonalizasyon vwa: Includes voice changer and auto-tune functions.
2.2 Kontni pake a
- 1x Tenlamp G9 Audio Mixer
- 1x USB A-C Cable
- 1x 3.5mm TRRS Audio Cable
- 1x USB-C OTG Cable
- 1x Manyèl Itilizatè (dokiman sa a)
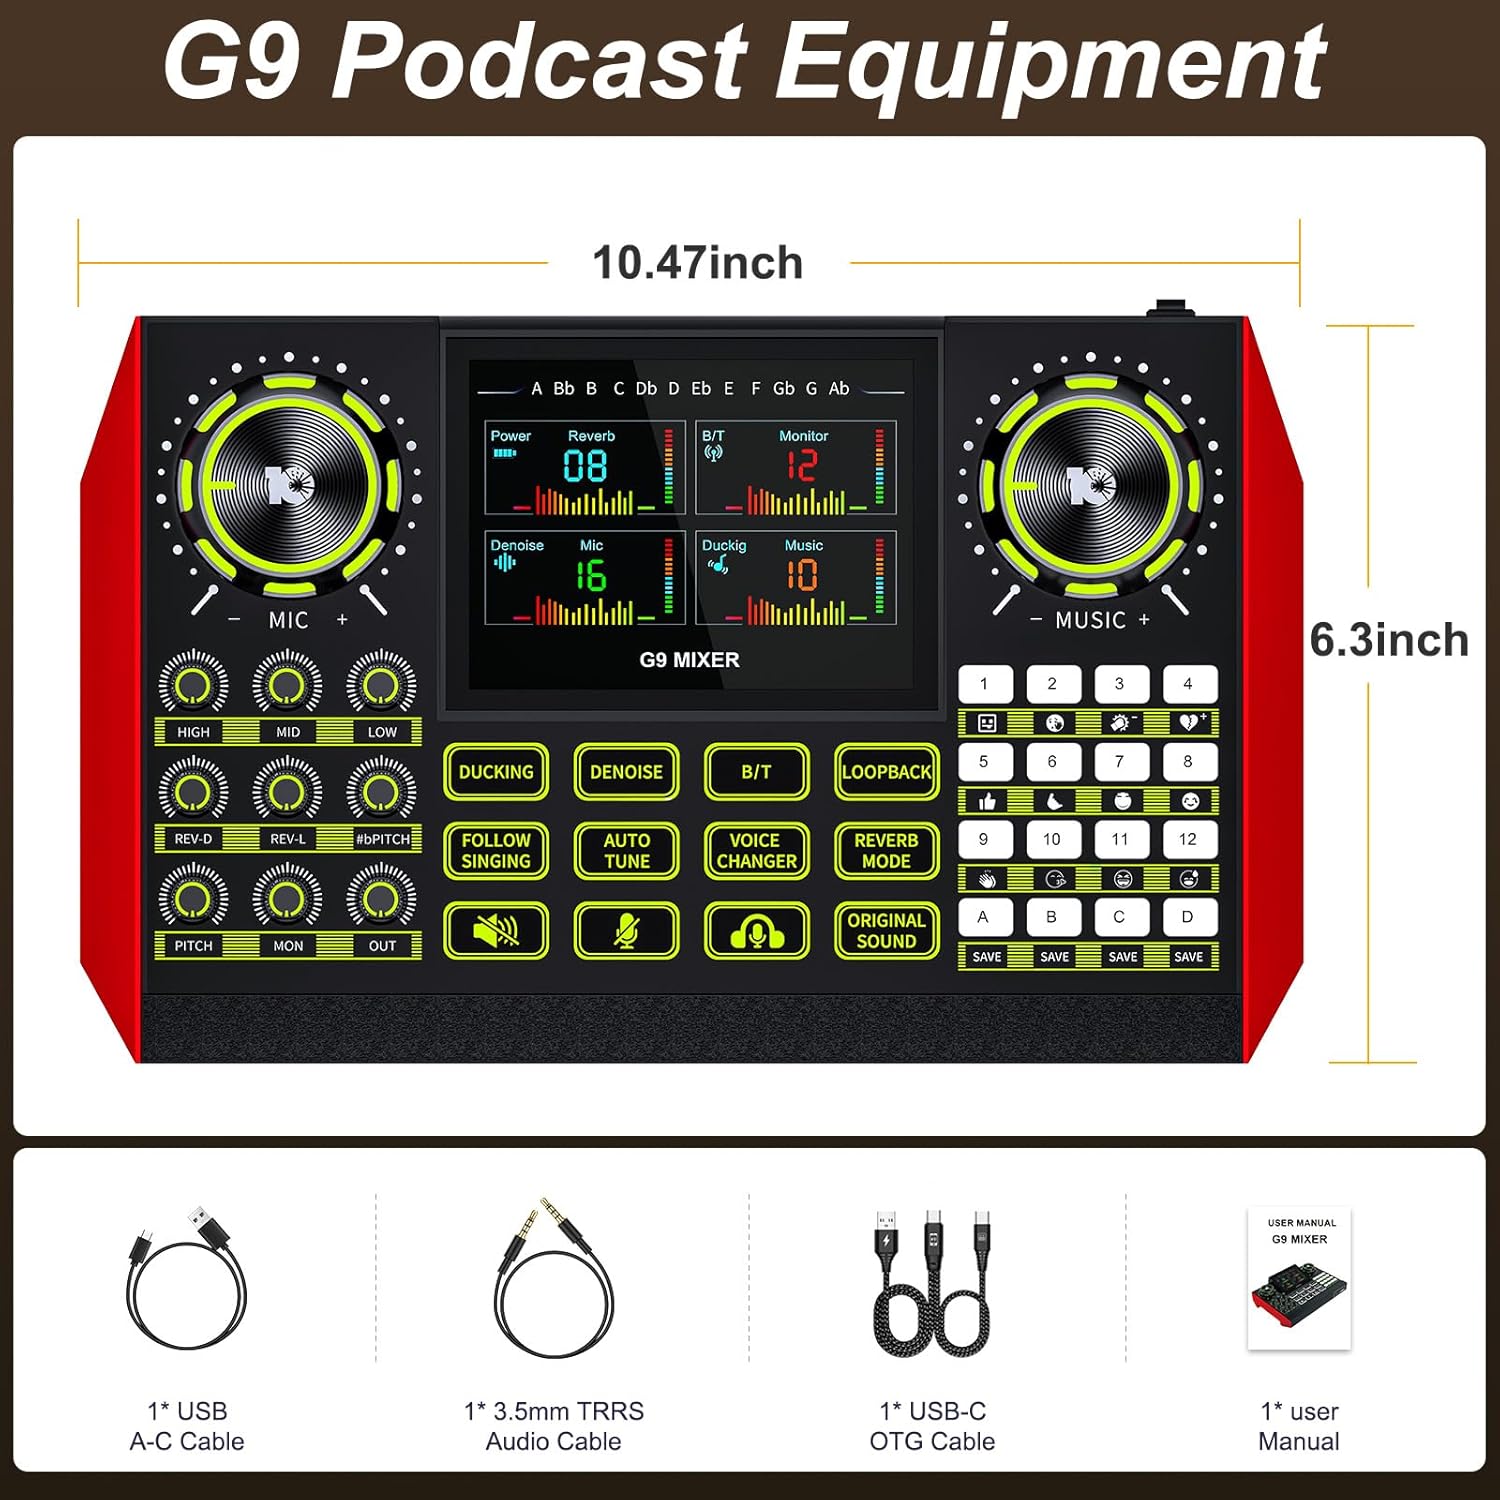
The G9 mixer measures approximately 10.47 inches in width and 6.3 inches in height.
3. Enstalasyon
The Tenlamp G9 mixer is designed for straightforward setup. Follow these steps to connect your device.
3.1 Konekte sou pouvwa
Connect the provided USB A-C cable to the DC 5V port on the mixer and to a power source (e.g., computer USB port, USB wall adapter). The mixer also features a built-in battery for portable use.
3.2 Konekte Mikwofòn ak Enstriman
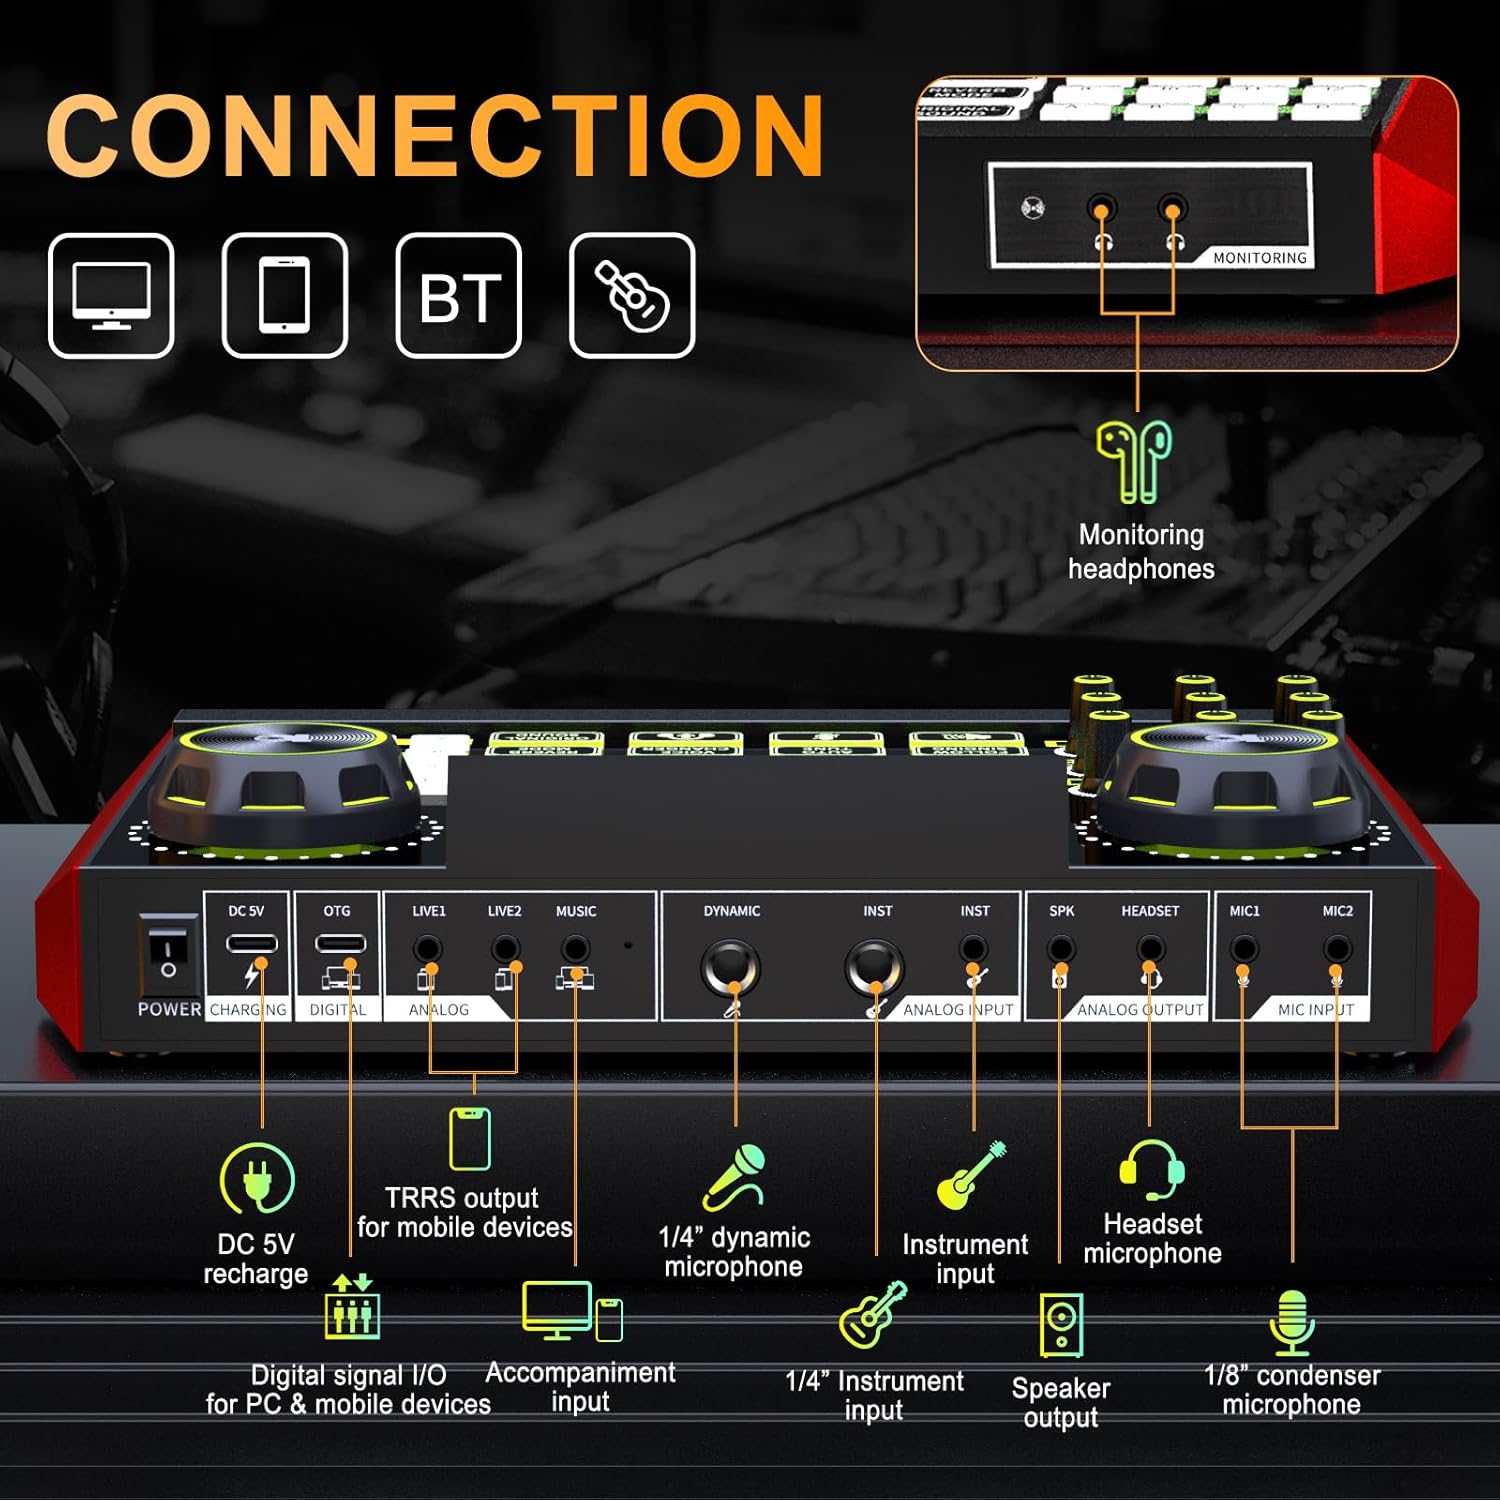
- Microphone Input (MIC1, MIC2): Use 1/8" (3.5mm) condenser microphones.
- Dynamic Microphone Input (DYNAMIC): Use a 1/4" dynamic microphone.
- Instrument Input (INST): Connect instruments via a 1/4" jack.
- Headset Mikwofòn: Connect a headset with a microphone to the dedicated headset port.
3.3 Connecting to Devices (PC, Mac, Mobile)
- Digital Signal I/O (DIGITAL): Use the USB-C OTG cable to connect to a PC, Mac, or compatible mobile device for digital audio input and output.
- Analog Input/Output (LIVE1, LIVE2, MUSIC): Use 3.5mm TRRS audio cables for analog connections to mobile devices or other audio sources.
- Bluetooth (BT): Activate Bluetooth on the mixer and your device to pair wirelessly for music input.
3.4 Monitoring Headphones and Speaker Output
- Monitoring Headphones (MONITORING): Connect headphones to the 3.5mm monitoring jack to hear your mix in real-time.
- Speaker Output (SPK): Connect external speakers for audio playback.
4. Operasyon
The G9 mixer provides intuitive controls for managing your audio. The 4.5-inch HD screen displays current settings and levels, allowing for precise adjustments.
4.1 Power On/Off
Press and hold the Power button to turn the mixer on or off. The screen will illuminate upon activation.
4.2 Adjusting Microphone Settings
Use the dedicated knobs for HIGH, MID, ak BAS to adjust the 3-band equalizer for your microphone. The REV-D epi REV-L knobs control the dual reverb depth and length. The ANPLIKASYON knob adjusts the microphone's pitch.

4.3 Music and Output Volume
La MIZIK knob controls the input volume of background music. The MON knob adjusts the monitoring volume for your headphones, and the SOTI knob controls the main output volume.
4.4 Fonksyon espesyal
- DUCKING: Automatically lowers background music volume when you speak.
- DENOISE: Activates the noise reduction feature for clearer vocals.
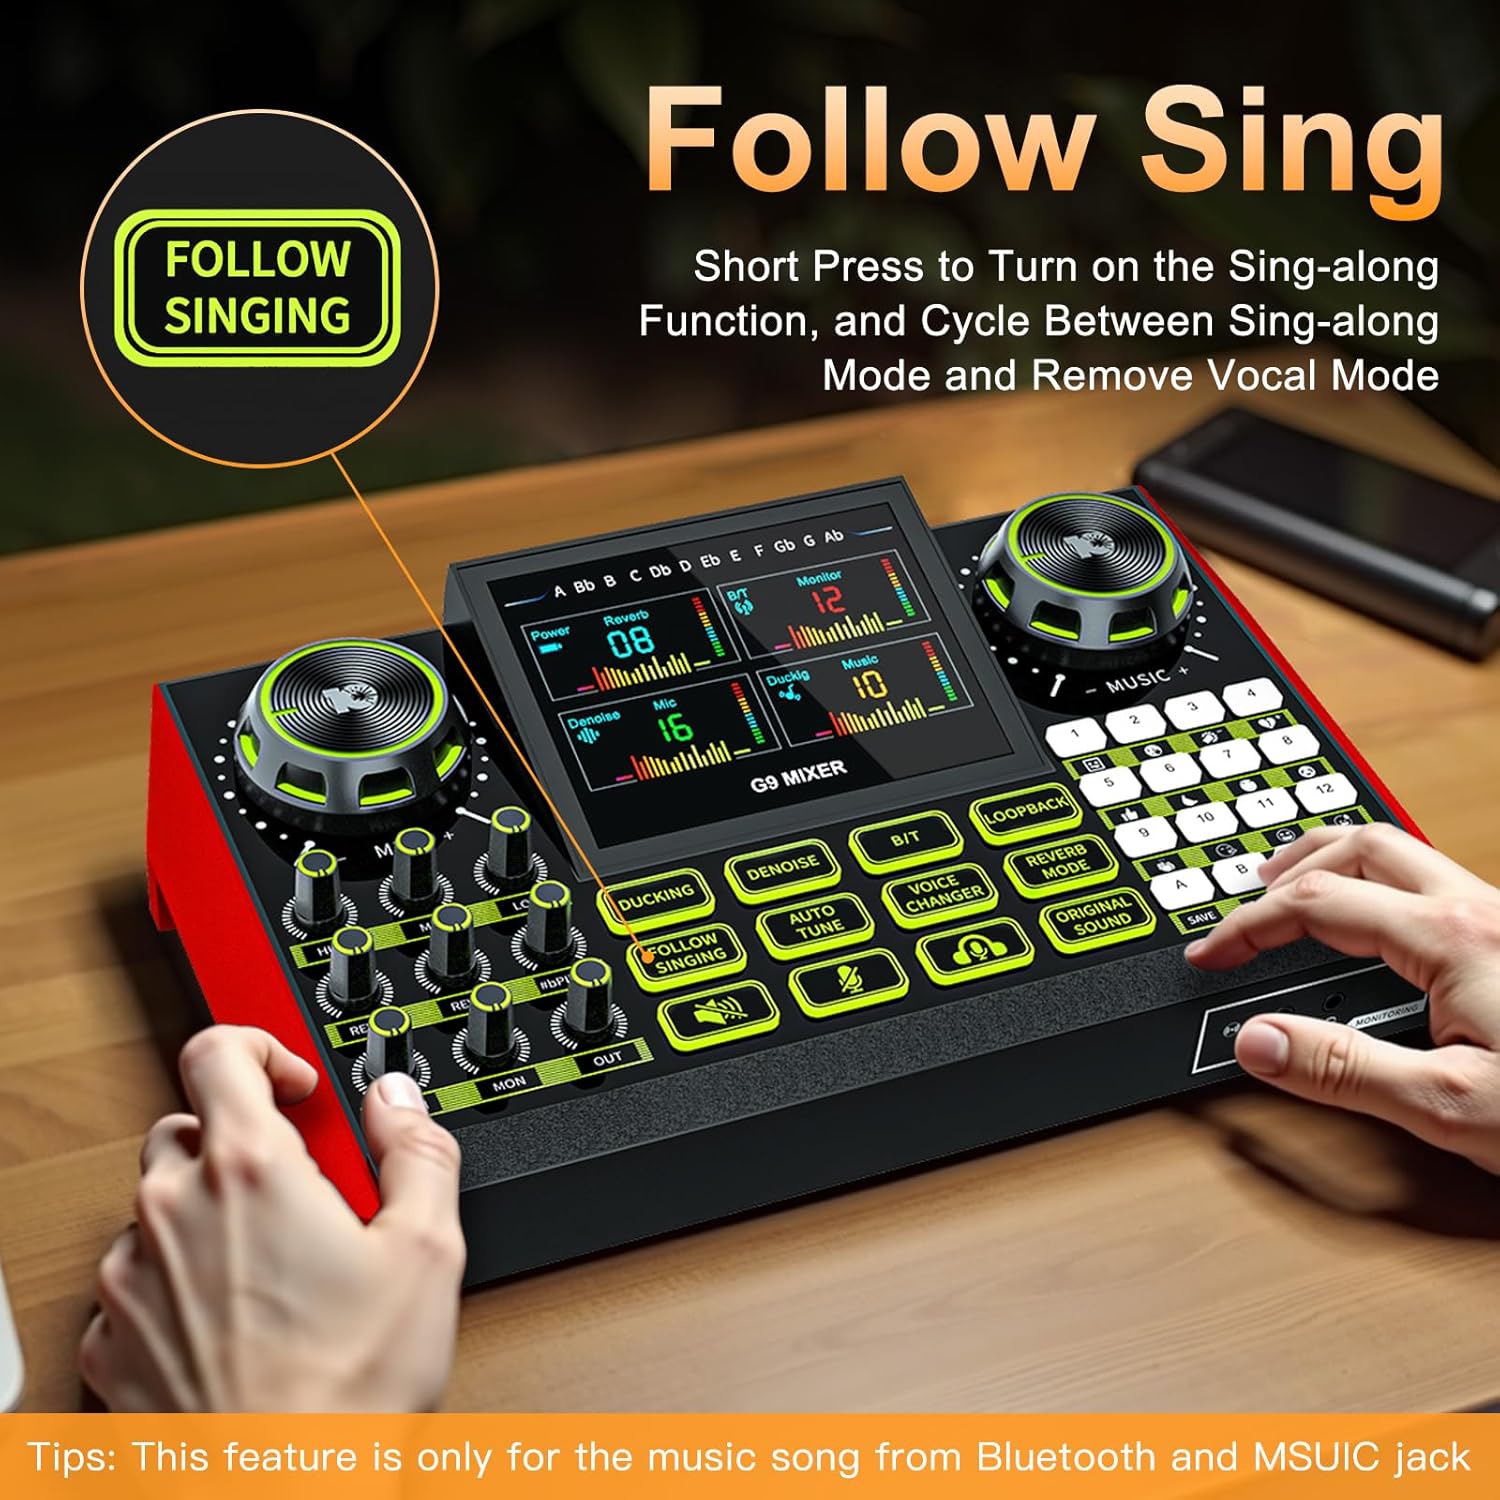
- FOLLOW SINGING: Short press to turn on the sing-along function, which cycles between sing-along mode and vocal removal mode. Note: This feature is primarily for music from Bluetooth and the MUSIC jack.
- AUTO TUNE: Engages the auto-tune effect for vocals.
- VOICE CHANGER: Cycles through four different voice changing modes (female voice, uncle voice, baby voice, magic voice).
- LOOPBACK: Enables or disables the loopback function, which sends the output audio back to the input for recording or streaming.
- MÒD REVERB: Ajiste efè reverb la.
- ORIGINAL SOUND: Restores the original sound without effects.

4.5 Customizable Sound Pads
The G9 mixer features four customizable sound pads (A, B, C, D). You can save your favorite voice modes, including current microphone volume, EQ, reverb, pitch, and auto-tune settings, to these pads for quick recall.

5. Antretyen
To ensure the longevity and optimal performance of your Tenlamp G9 Audio Mixer, follow these maintenance guidelines:
- Netwayaj: Use a soft, dry cloth to clean the surface of the mixer. Avoid using abrasive cleaners, solvents, or harsh chemicals.
- Depo: Sere mixer a nan yon kote ki fre epi sèk, lwen limyè solèy dirèk ak tanperati ekstrèm.
- Manyen: Manyen aparèy la avèk prekosyon. Evite lage l oswa sibi gwo chòk.
- Ekspozisyon likid: Keep the mixer away from liquids. Moisture can damage internal components.
NAN. Depanaj
If you encounter issues with your Tenlamp G9 Audio Mixer, refer to the following common problems and solutions:
6.1 Pa gen Sòti Son
- Tcheke Koneksyon: Ensure all audio cables (microphone, headphones, speakers, device connections) are securely plugged into the correct ports.
- Nivo volim: Verifye ke MIC, MIZIK, MON, ak SOTI volume knobs are not set to minimum or muted.
- Anviwònman aparèy: On your connected PC, Mac, or mobile device, ensure the G9 mixer is selected as the default audio input and output device.
- Pouvwa: Confirm the mixer is powered on and has sufficient battery charge or is connected to a power source.
6.2 Poor Audio Quality / Noise
- Rediksyon bri: Aktive la DEBRI function to reduce background noise.
- Plasman Mikwofòn: Ensure the microphone is positioned correctly and not too far from the sound source.
- Kalite kab: Use high-quality, shielded audio cables to minimize interference.
- Nivo akeri: Adjust microphone gain to prevent clipping or distortion.
6.3 Voice Changer / Effects Not Working
- Aktivasyon Fonksyon: Ensure the specific effect button (e.g., VWA CHANGER, AUTO TUNE) is pressed and active.
- Antre mikwofòn: Confirm that your microphone is properly connected and receiving input.
6.4 Difficulty with Initial Setup
While the G9 is plug-and-play, some users may find initial setup challenging. Double-check all physical connections and ensure the mixer is recognized by your operating system. Refer to the
Ask a question about this manual
Ask about setup, troubleshooting, compatibility, parts, safety, or missing instructions. Manuals+ will review the question and use this page’s manual context to help answer it.