
1. Entwodiksyon
This manual provides detailed instructions for the safe and effective operation, maintenance, and troubleshooting of your Nitecore MH40S rechargeable flashlight and NB10000 power bank. Please read this manual thoroughly before use to ensure optimal performance and longevity of your devices.
2. Pake kontni
Verifye ke tout atik ki nan lis anba a yo prezan nan pakè ou a:
- Nitecore MH40S Flashlight
- 2 x Nitecore NL2150 5,000mAh Li-ion Batteries
- Nitecore NB10000 10,000mAh Power Bank
- Wireless Remote switch
- QC adaptè
- USB-C Chaje Kab
- Pyès O-bag
- Lanyard
- Hook-ak-bouk Fastener
- 2 x Hook-and-loop Straps
- Holster

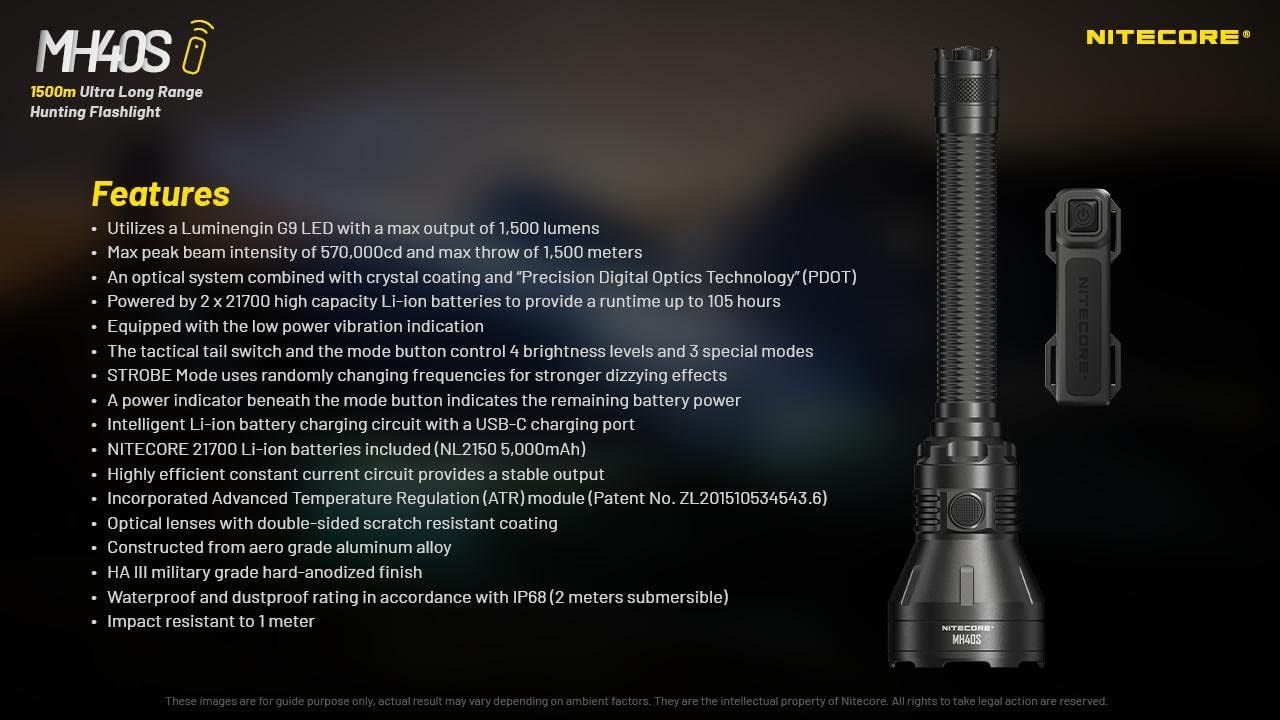
3. Pwodwi Features
- Utilizes a Luminengin G9 LED with a maximum output of 1,500 lumens.
- Maximum peak beam intensity of 570,000cd and a maximum throw of 1,500 meters.
- Optical system combines crystal coating and "Precis Digital Optics Technology" (PDOT).
- Powered by 2x high-capacity Li-ion batteries, providing a runtime of up to 105 hours.
- Equipped with a low power vibration indicator.
- Tactical tail switch and mode button control 4 brightness levels and 3 special modes.
- STROBE mode uses randomly changing frequencies for enhanced disorienting effects.
- Power indicator beneath the mode button displays remaining battery power.
- Intelligent Li-ion battery charging circuit with a USB-C charging port.
- Includes Nitecore NL2150 5,000mAh Li-ion batteries.
- Highly efficient constant current circuit ensures stable output.
- Incorporates Advanced Temperature Regulation (ATR) module.
- Optical lenses feature double-sided scratch-resistant coating.
- Konstwi soti nan alyaj aero-klas aliminyòm ak HA III klas militè difisil-anodize fini.
- Waterproof and dustproof rating in accordance with IP68 (2 meters submersible).
- Enpak rezistan a 1 mèt.

4. Espesifikasyon
4.1 MH40S Flashlight Technical Data
| FL1 estanda | TURBO | HIGH | MID | BAS | STROBE | BEACON | SOS |
|---|---|---|---|---|---|---|---|
| Sòti | 1,500 Lumen | 500 Lumen | 150 Lumen | 18 Lumen | 1,500 Lumen | 1,500 Lumen | 1,500 Lumen |
| Runtime | 3h 15min | 7h 15min | 25h | 105h | — | — | — |
| Distans gwo bout bwa | 1,500m | 860m | 450m | 150m | — | — | — |
| Entansite gwo bout bwa | 570,000cd | 186,000cd | 51,000cd | 5,800cd | — | — | — |
Note: The stated data is measured in accordance with international flashlight testing standards ANSI/PLATO FL 1-2019, using 2x 21700 Li-ion batteries (5,000mAh) under laboratory conditions. Actual data may vary due to different battery types or environmental conditions.

4.2 Espesifikasyon Jeneral
- dirije: Luminengin G9 LED
- Reflektè: SMO
- Batri: 2 x 21700 Li-ion (NL2150 5,000mAh included)
- Mòd espesyal: Location Beacon, SOS, Strobe
- Beam Color: Limyè blan
- Longè: 256 mm (10.08 pous)
- Gwosè tèt: 65 mm (2.56 pous)
- Pwa: 245.8 g (8.67 oz) (san pil)
- Materyèl: Aero-klas alyaj aliminyòm
- Fini: HA III military-grade hard-anodized
- Evalyasyon ki enpèmeyab: IP68 (2 mèt submersible)
- Rezistans enpak: 1 mèt
4.3 NB10000 Power Bank Specifications
- Kapasite: 10,000mAh 3.85V
- Enèji nominale: 6,400mAh 5V
- Antre (USB-C): 5V - 2.4A / 9V - 2A
- Sòti (USB-C): 5V - 3A / 9V - 2A / 12V - 1.5A
- Dual Ports Output: 5V - 3A (MAX)
- Materyèl: Carbon fiber frame and panels
- Dimansyon: 4.8" x 2.32" x 0.42"
- Pwa: 5.29 oz
- Karakteristik: Dual output channels (USB and USB-C), LED remaining power level indicator, one-touch low current mode.
5. Enstalasyon
5.1 Enstalasyon batri
- Unscrew the tail cap of the MH40S flashlight.
- Insert the two Nitecore NL2150 21700 Li-ion batteries with the positive (+) terminals facing the head of the flashlight.
- Vise bouchon dèyè a byen sere pou asire bon kontak ak rezistans dlo.
Avètisman: Ensure batteries are inserted with correct polarity. Incorrect insertion can damage the device.
5.2 Premye chaj
Before first use, fully charge the MH40S flashlight and the NB10000 power bank.
5.2.1 Charging the MH40S Flashlight
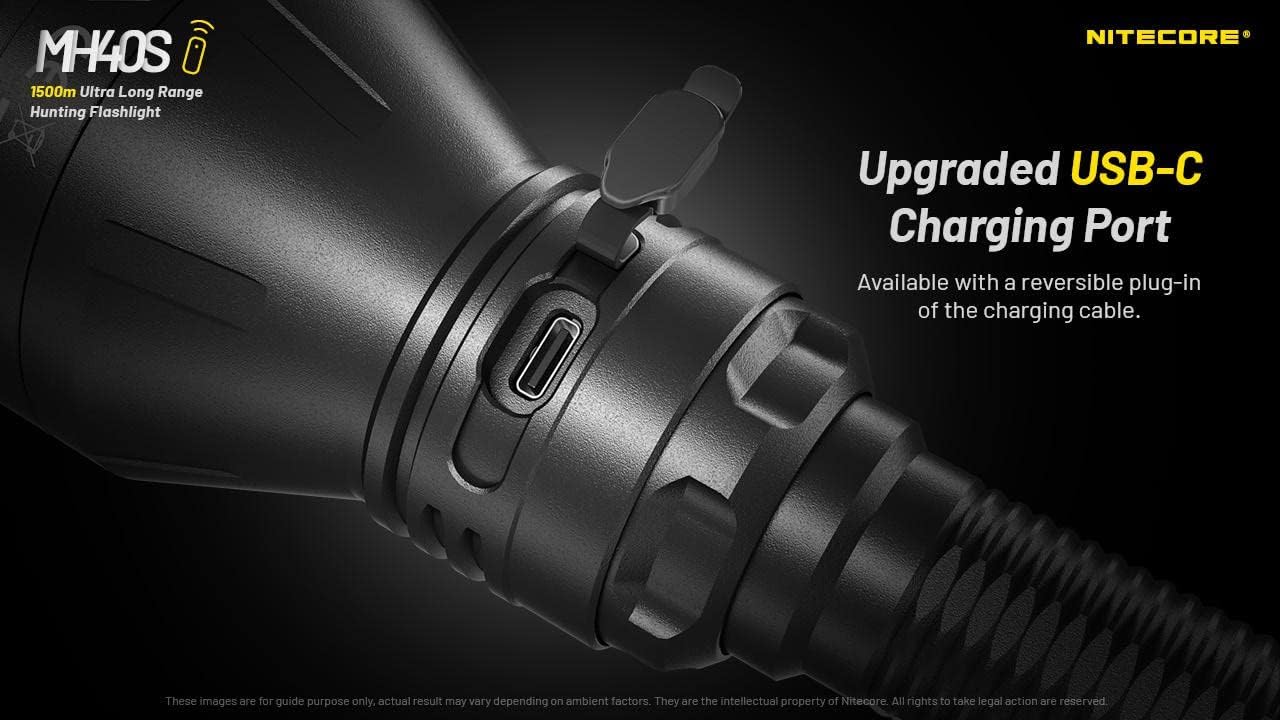
- Locate the USB-C charging port on the flashlight body.
- Open the rubber cover protecting the port.
- Connect the USB-C charging cable to the flashlight and the QC Adapter.
- Plug the QC Adapter into a power outlet.
- The power indicator beneath the mode button will flash during charging and remain solid when fully charged.
- Close the rubber cover after charging to maintain water and dust resistance.
5.2.2 Charging the NB10000 Power Bank
- Connect the USB-C charging cable to the USB-C input port on the NB10000.
- Connect the other end of the cable to a USB power source (e.g., QC Adapter, computer USB port).
- The LED indicators on the power bank will show the charging status.
6. Operasyon Enstriksyon
6.1 Basic Flashlight Operation
The MH40S features a tactical tail switch and a mode button for control.

6.1.1 Limen/Etenyen
- Momantan sou: Half-press and hold the tactical tail switch. Release to turn off.
- Constant On/Off: Fully press the tactical tail switch until a click is heard to turn on. Fully press again to turn off.
6.1.2 Brightness Level Adjustment
- With the flashlight on, press the mode button to cycle through brightness levels: LOW - MID - HIGH - TURBO.
- The flashlight will memorize the last used brightness level (except for special modes) when turned off and on again.
6.1.3 Special Modes (STROBE, BEACON, SOS)
- With the flashlight on, press and hold the mode button to activate STROBE mode.
- While in STROBE mode, press the mode button again to cycle through BEACON and SOS modes.
- To exit special modes, short press the mode button or turn off the flashlight.
6.2 Wireless Remote Switch Operation
The included wireless remote switch allows for convenient control of the MH40S from a distance of up to 1 meter (3.28 feet).

- Momantan sou: Press and hold the designated button on the remote switch. Release to turn off.
- Constant On/Off: Press the designated button on the remote switch to turn on. Press again to turn off.
- STROBE: Press the designated STROBE button on the remote switch to activate. Press again to turn off.
The remote switch is powered by a 3V CR1632 button cell battery and features advanced power cut-off (APC) technology for extended standby time.
6.3 NB10000 Power Bank Usage
- Chaje Aparèy: Connect your device to the USB-A or USB-C output port of the NB10000 using an appropriate charging cable.
- Endikatè Nivo pouvwa: Press the power button on the NB10000 to check the remaining battery level via the LED indicators.
- Low Kouran Mode: For charging delicate electronics (e.g., Bluetooth earphones, smartwatches), activate the low current mode by pressing and holding the power button until a specific indicator lights up.
7. Antretyen
- Netwayaj: Netwaye kò flach la avèk yon twal mou,amp twal. Pa sèvi ak pwodui netwayaj abrazif oswa solvang.
- Threads and O-rings: Lubricate the threads and O-rings regularly with silicone grease to maintain water resistance. Replace worn O-rings as needed.
- Swen batri: Remove batteries if the flashlight will not be used for an extended period. Store batteries in a cool, dry place.
- Pò chaje: Keep the USB-C charging port clean and free of debris. Ensure the rubber cover is securely closed when not charging.
NAN. Depanaj
- Flach pa limen:
- Tcheke polarite batri a.
- Asire w ke pil yo konplètman chaje.
- Sere bouchon dèyè a byen sere.
- Clean battery contacts with an alcohol swab.
- Reduced brightness or short runtime:
- Batteries may be low; recharge them.
- Batteries may be aging; consider replacement.
- Ensure the flashlight head and tail cap are tightly screwed on.
- Remote switch not responding:
- Check the distance between the remote and the flashlight (max 1 meter).
- Replace the CR1632 battery in the remote switch.
- Asire w ke pa gen okenn obstak ki bloke siyal la.
- Pwoblèm chaj:
- Verify the USB-C cable is properly connected.
- Ensure the power source (QC Adapter) is functioning.
- Clean the charging port for any debris.
9. Enfòmasyon sou Sekirite
- Pa klere flach la dirèkteman nan je.
- Kenbe soti nan atenn timoun yo.
- Do not disassemble or modify the flashlight or power bank, as this voids the warranty and may cause damage.
- Avoid exposing the devices to extreme temperatures or direct sunlight for prolonged periods.
- Use only recommended batteries and charging accessories.
- Jete pil yo selon règleman lokal yo.
10. Garanti ak sipò
Nitecore products are covered by a warranty. For detailed warranty information and support, please refer to the official Nitecore websit la oubyen kontakte distribitè lokal ou a. Kenbe resi acha ou a pou reklamasyon garanti.
Pou plis asistans, vizite Nitecore Store on Amazon or the official Nitecore websit.