Entwodiksyon
This manual provides comprehensive instructions for the installation and use of the Zenoruslky Stereo Wiring Harness Kit. This kit is designed to facilitate the connection of an aftermarket Android radio to specific Toyota vehicle models, ensuring proper power, speaker, and accessory connections. Please read this manual thoroughly before beginning installation to ensure correct and safe operation.
Konpatibilite
This wiring harness kit is compatible with select Toyota models that feature a Non-JBL system and are not equipped with a CANBUS system (for models 2012 and above). It is not suitable for vehicles with 6-speaker systems or JBL audio systems.
Compatible Toyota Models and Years:
- Toyota Camry: 2013-2017
- Toyota Corolla: 2014-2017
- Toyota RAV4: 2012-2015
- Toyota Vios: 2008-2017
- Toyota Yaris: 2013-2019
- Toyota Highlander: 2015 and Above
- Toyota Land Cruiser: 2016 and Above
- Toyota Prado: 2014 and Above
- Toyota Reiz: 2013 and Above
Nòt enpòtan: The provided compatibility list is for reference only. Vehicle systems can vary, and it is essential to verify that your vehicle's radio connectors match those provided in this kit. This kit is designed for selected 16-pin Android car radios and may not be compatible with all radio brands. If the wire pins of your aftermarket radio differ from the vehicle's factory radio plug, you may need to adjust the PIN positions.

Figure 1: Compatible Toyota Models and Years.
Kontni pake
Tanpri verifye ke tout atik ki nan lis anba a yo prezan nan pakè ou a:
- 1x Aftermarket Stereo Wire Adapter Kit (16-pin ISO radio connector to 28-pin, 10-pin, and 6-pin adapters)
- 1x Factory Radio USB Cord
- 3x Butt Connectors
- 1x Factory Radio Antenna Adapter
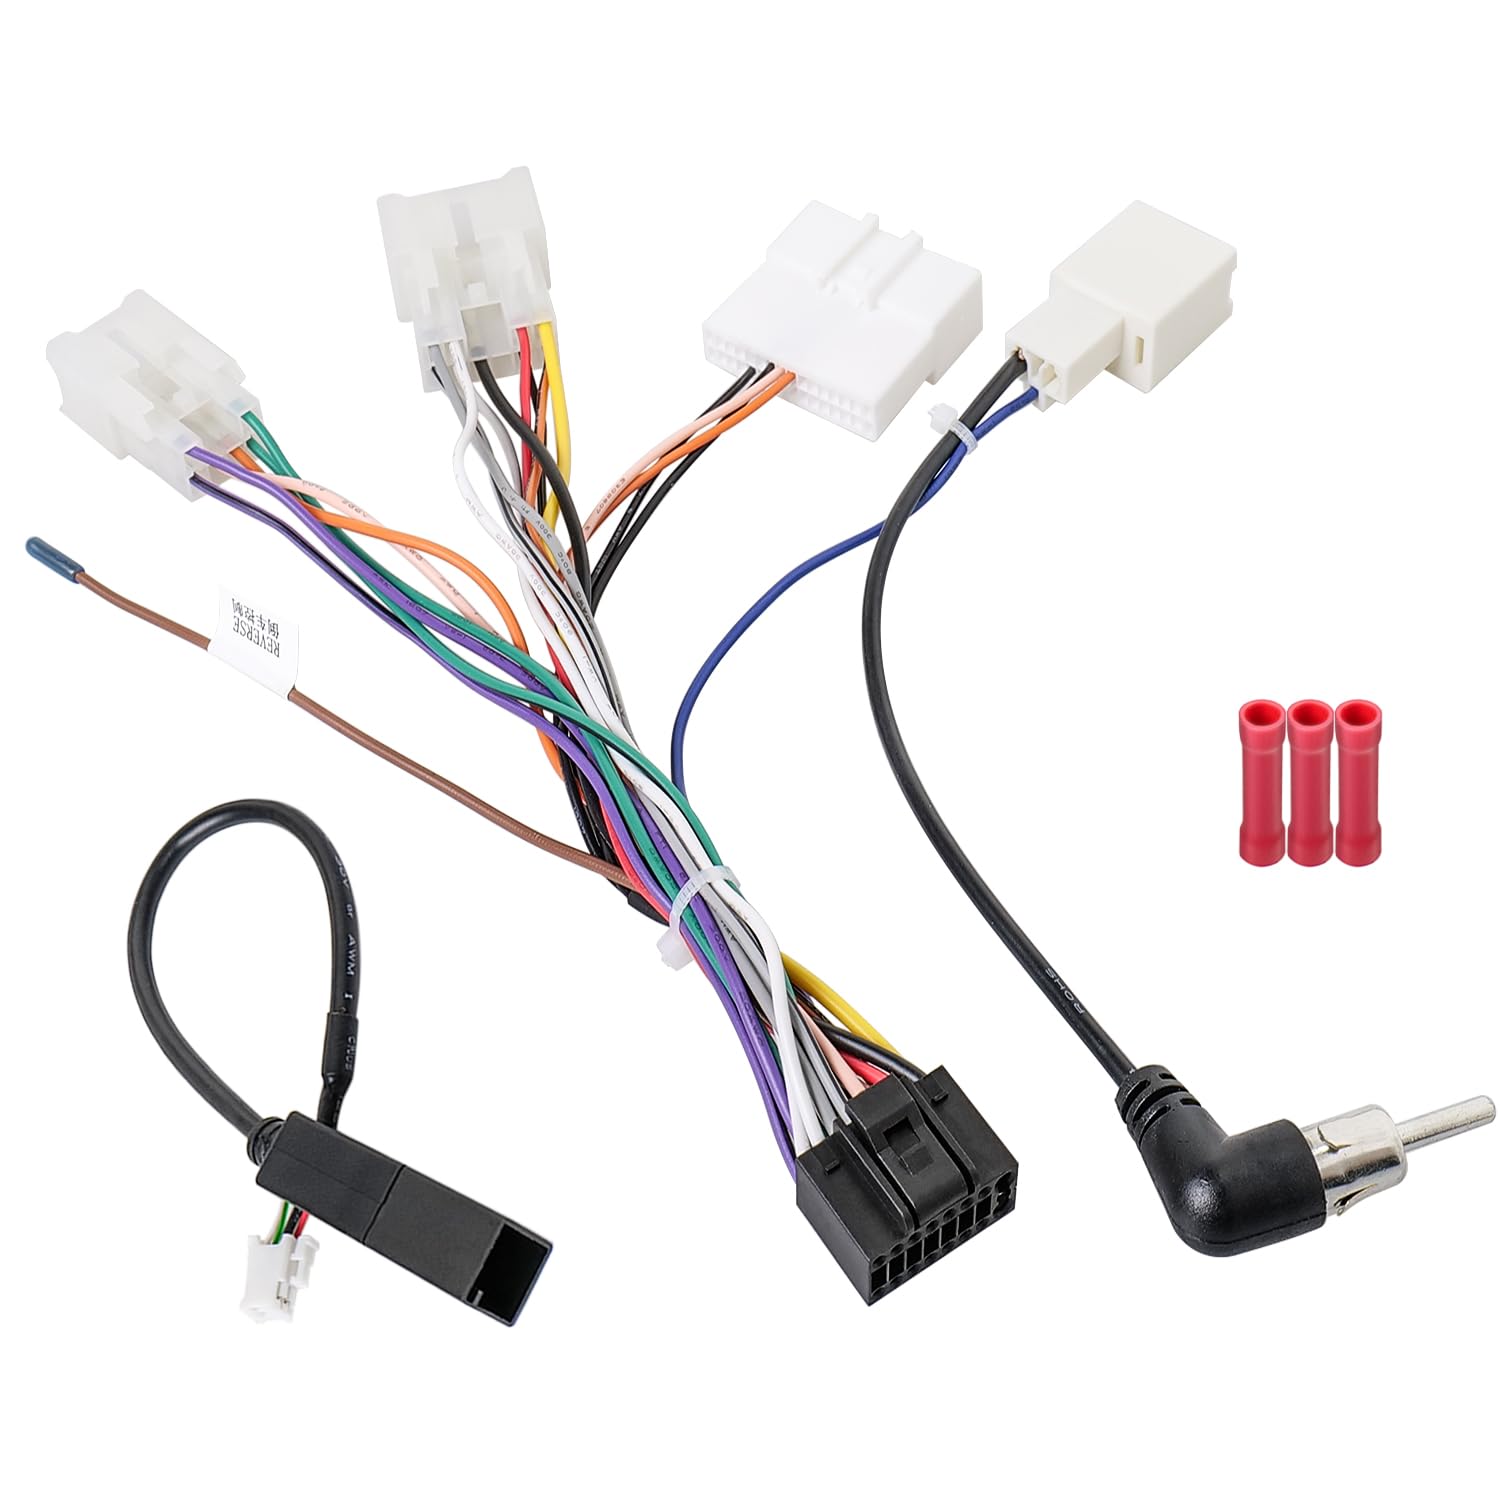
Figure 2: Complete package contents of the wiring harness kit.
Enstalasyon ak Enstalasyon
Follow these steps for proper installation of the wiring harness kit:
1. Disconnect Vehicle Battery
Before starting any electrical work, disconnect the negative terminal of your vehicle's battery to prevent short circuits and electrical damage.
2. Remove Factory Radio
Carefully remove your vehicle's existing factory radio. Refer to your vehicle's service manual for specific instructions on how to safely remove the dashboard trim and radio unit.
3. Identify Connectors
Identify the corresponding connectors on your vehicle's wiring and your new aftermarket Android radio. The Zenoruslky harness includes a 16-pin ISO radio connector for the aftermarket radio and 28-pin, 10-pin, and 6-pin adapters for the vehicle's factory wiring.

Figure 3: Zenoruslky Aftermarket Radio Wire Harness Replacement Diagram.
4. Connect Main Harness
Connect the 16-pin ISO connector of the Zenoruslky harness to your aftermarket Android radio. Then, connect the 28-pin, 10-pin, and 6-pin adapters to the corresponding plugs in your vehicle's factory wiring. This is designed for a plug-and-play installation.

Figure 4: 16PIN Radio Wiring Harness Adapter connections.
5. Connect Antenna Adapter
Connect the included factory radio antenna adapter to your vehicle's antenna cable and then to the aftermarket radio's antenna input.
6. Konekte kab USB
Connect the factory radio USB cord to the appropriate USB port on your aftermarket radio, if applicable.
7. Steering Wheel Control (SWC) Connection
The kit includes a 28-pin steering wheel control connector. Note that the SWC functionality is not applicable for vehicles equipped with a CANBUS system.
8. Using Butt Connectors (If Necessary)
In some cases, you may need to modify the wiring if the pin configuration of your aftermarket radio differs from the vehicle's factory radio plug. The included butt connectors can be used for secure wire connections. Ensure proper stripping and crimping for a reliable connection.

Figure 5: Steps for using butt connectors.
9. Test and Reassemble
Before fully reassembling the dashboard, reconnect the vehicle battery and test the aftermarket radio's functionality, including power, audio, and any connected accessories. Once confirmed, carefully reassemble the dashboard components.
Enstriksyon Operasyon
Once the Zenoruslky Stereo Wiring Harness Kit is correctly installed, the aftermarket Android radio should operate as intended. Refer to your aftermarket radio's specific instruction manual for detailed operating procedures, including power on/off, volume control, station tuning, and navigation of its features.
The wiring harness ensures that the necessary power, ground, speaker, and accessory signals are correctly transmitted between the vehicle and the radio. Any operational issues related to the radio itself should be addressed using the radio's own manual or manufacturer support.
Antretyen
The Zenoruslky Stereo Wiring Harness Kit requires minimal maintenance. Once installed, ensure all connections remain secure. Periodically check for any loose wires or connectors, especially if you experience intermittent issues with your car stereo system. Avoid exposing the wiring to excessive moisture or extreme temperatures, which could degrade the insulation and conductivity of the wires.
If any part of the harness appears damaged, it is recommended to replace the affected component or the entire harness to maintain electrical integrity and safety.
Depanaj
If you encounter issues after installing the wiring harness, consider the following troubleshooting steps:
- Pa gen kouran nan radyo a:
- Ensure the vehicle battery is properly reconnected.
- Check all power and ground connections on the harness and radio.
- Verify vehicle fuses related to the radio are intact.
- Pa gen son ki soti nan oratè yo:
- Confirm all speaker wires are correctly connected to the radio and vehicle harness.
- Check speaker polarity.
- Ensure the radio's volume is up and not muted.
- Radio Not Turning On/Off with Ignition:
- Verify the accessory (ACC) wire connection. This wire provides power when the ignition is on.
- Kontwòl volan an pa fonksyone:
- Confirm your vehicle does not have a CANBUS system, as SWC is not supported with CANBUS.
- Ensure the 28-pin SWC connector is properly seated.
- Check if your aftermarket radio requires additional programming or an interface for SWC.
- Incorrect Pin Configuration:
- As mentioned in compatibility, some aftermarket radios may have different pin layouts. You may need to re-pin or splice wires using the provided butt connectors to match your specific radio's requirements. Refer to your aftermarket radio's wiring diagram.
If problems persist, consult a professional car audio installer or contact Zenoruslky customer support.
Espesifikasyon
| Karakteristik | Detay |
|---|---|
| Mak | Zenoruslky |
| Nimewo Modèl | 003LKYUS |
| Materyèl | Kwiv, Klori polivinil (PVC) |
| Pwa atik | 50 gram |
| Kalite Connector | ISO 16-pin, 28-pin, 10-pin, 6-pin |
| Konpozan ki enkli | Car Stereo Wiring Harness Kit, Factory Stereo USB Cable, Butt Connectors |
| Kalite kab | Pwopriyetè |
Enfòmasyon sou Garanti
Zenoruslky products are manufactured to high-quality standards. This product is covered by a standard manufacturer's warranty against defects in materials and workmanship. For specific warranty terms and conditions, please refer to the warranty card included with your purchase or visit the official Zenoruslky websit la. Kenbe prèv acha ou pou reklamasyon garanti.
Sipò
For technical assistance, installation questions, or warranty inquiries, please contact Zenoruslky customer support. You can typically find contact information on the product packaging, the official Zenoruslky websit entènèt la, oubyen atravè revandè ou a.
When contacting support, please have your product model number (003LKYUS) and proof of purchase readily available.