
VEKOOTO Right
VEKOOTO AHD 10.36-inch BSD Side View Vertical Monitor and Right Car Camera System User Manual
Model: Right
Entwodiksyon
This manual provides detailed instructions for the VEKOOTO AHD 10.36-inch BSD Side View Vertical Monitor and Right Car Camera System. This system is designed to enhance vehicle safety by offering a clear, wide-angle view of the right side of your truck or bus, featuring a touch screen display, loop recording capabilities, and a Blind Spot Detection (BSD) voice alarm. Please read this manual thoroughly before installation and operation to ensure proper use and optimal performance.
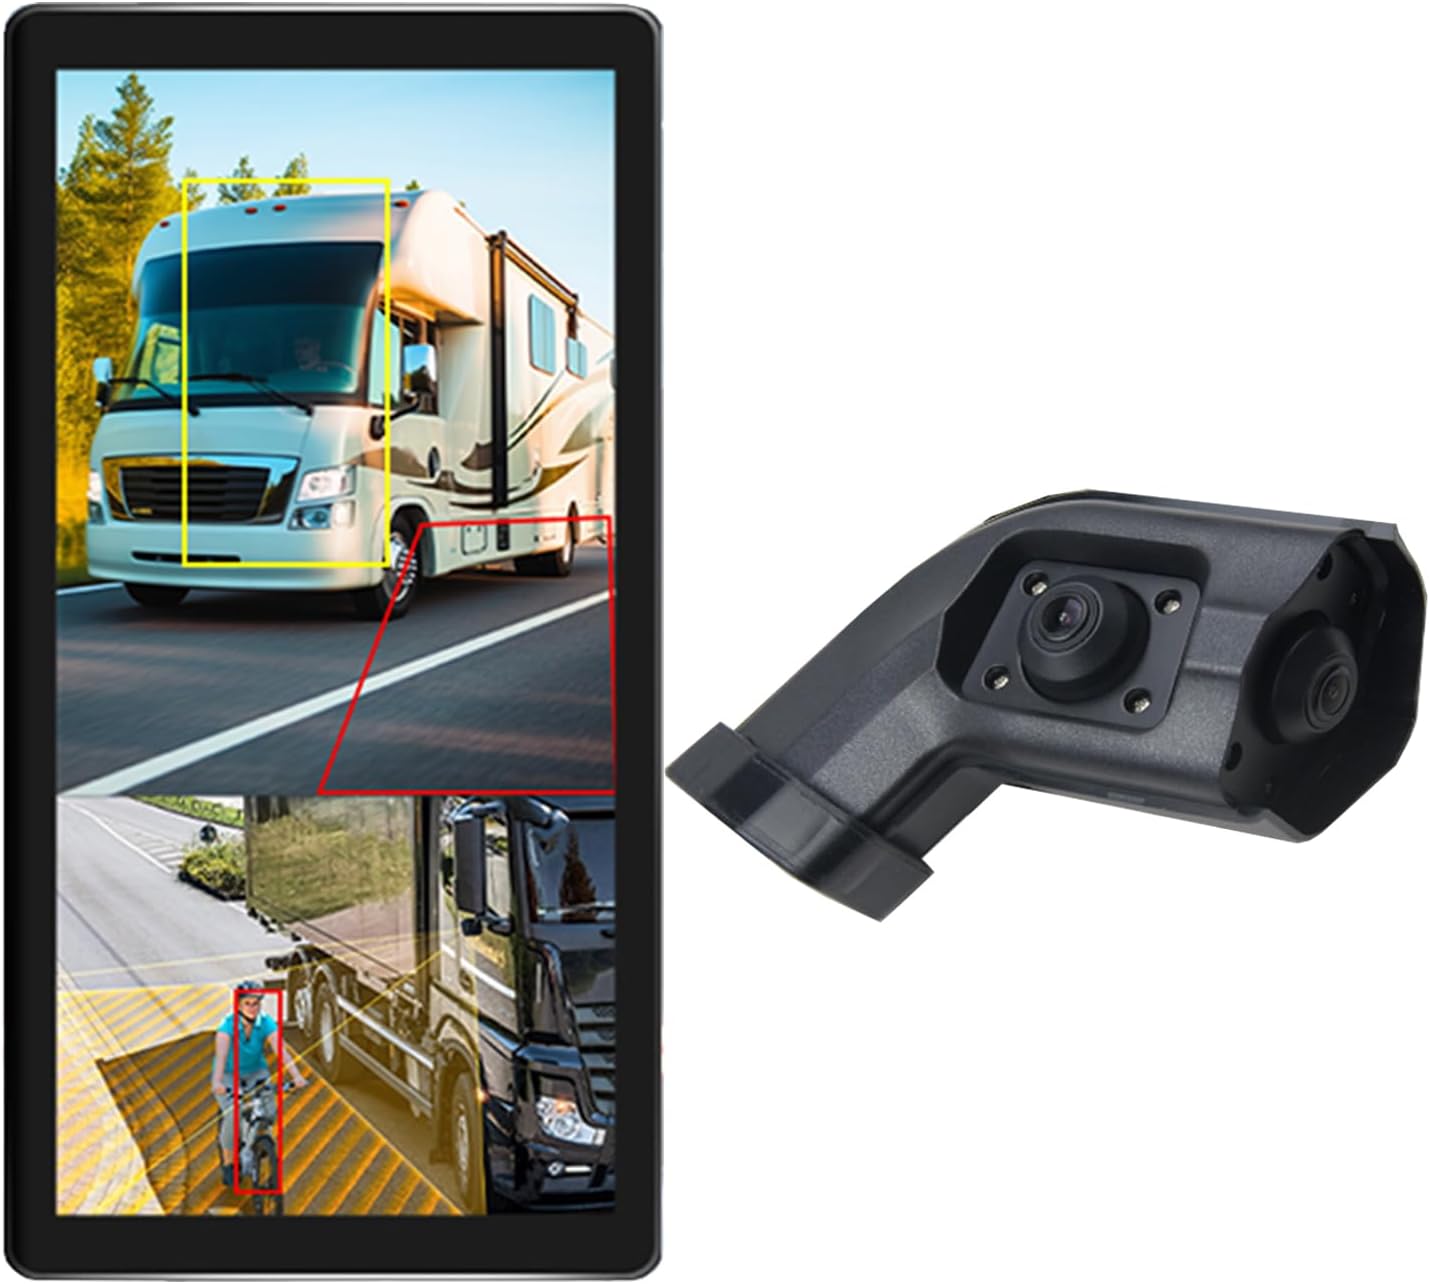
Image: The VEKOOTO 10.36-inch vertical monitor and the right side camera unit, illustrating the primary components of the system.
Ki sa ki nan bwat la
Verifye ke tout konpozan yo prezan epi yo an bon eta lè w ap ouvri pake a:
- 10.36-inch Touch Screen Monitor
- Integrated dual camera (for right side view)
- Pouvwa kab
- Kamera kab
- Support
Karakteristik kle
- Ekspozisyon: 10.36-inch IPS touch screen with 2-channel split screen display capability.
- Sipò pou kamera: Compatible with AHD720P cameras, offering enhanced image clarity, advanced bright color separation, signal filtering, and 3D noise reduction technology.
- Deteksyon Pwen Avèg (BSD): Features a voice alarm system. The alarm area, volume, and sensitivity are adjustable.
- Kontwòl imaj: Supports camera image screen mirroring function for flexible viewing.
- Pèsonalizasyon ekspozisyon: Allows adjustment of display time, date, brightness, and screen color.
- Konpatibilite pouvwa: Sipòte yon lajè voltage seri de 9V-36V.
- Sipò pou plizyè lang: Available in English, Korean, Japanese, and Chinese.
- Enstalasyon: Designed for installation on the right side rearview glas nan veyikil la.

Image: The monitor interface highlighting features such as image adjustment, BSD voice alarm, and customizable detection areas, shown with various driving scenarios including night, rain, and blind spots.
Enstalasyon ak Enstalasyon
Proper installation is crucial for the system's performance. It is recommended to have this system installed by a qualified professional.
1. Plasman Konpozan yo
- Mount the 10.36-inch vertical monitor securely inside the vehicle, ensuring it does not obstruct the driver's view.
- Install the integrated dual camera unit on the right side rearview mirror of your vehicle. Ensure the camera has a clear, unobstructed view.

Image: The vertical monitor installed inside a vehicle, providing a clear view of the right side, simulating a truck's perspective.
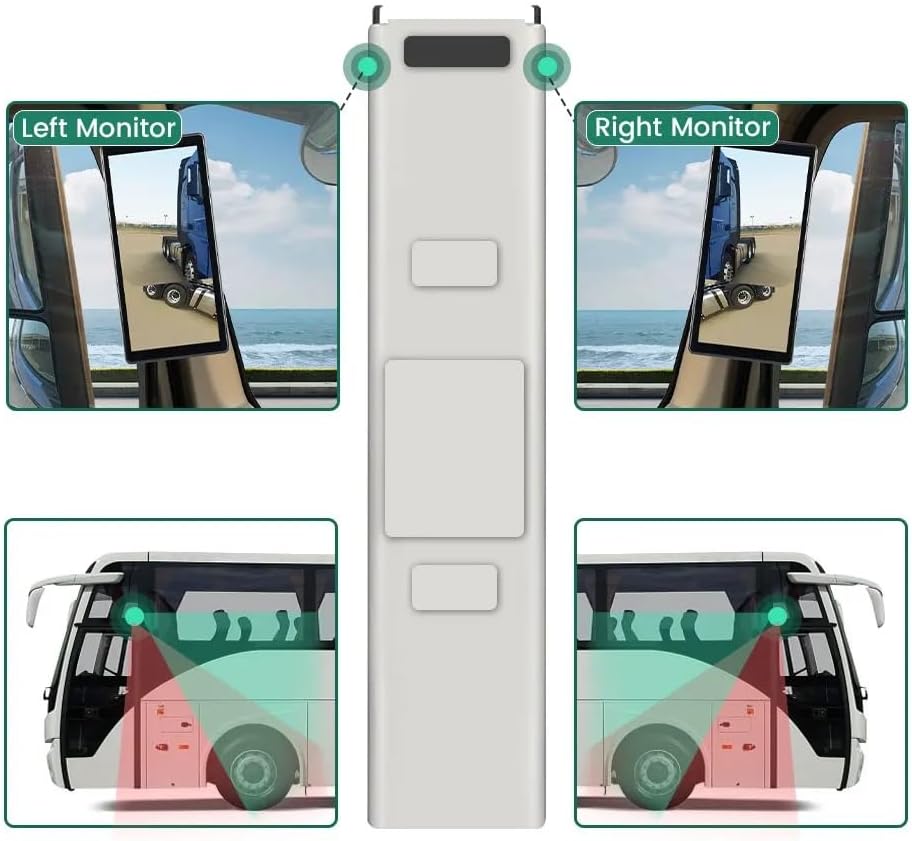
Image: A diagram illustrating the recommended placement of the right monitor and the camera's field of view for comprehensive side coverage on a bus.
2. Koneksyon fil elektrik
Refer to the wiring diagram below for correct connections. The system supports 9V-36V wide voltage opinyon.

Image: Detailed wiring diagram showing connections for the monitor, integrated dual camera, ACC power supply (+), Ground (-), and Battery Power (+3A). Channel 1 (CH1) and Channel 2 (CH2) inputs are indicated for the camera cables.
- Konekte a ACC Power Supply (+) wire (red) to a switched ignition source.
- Konekte a Tè (-) wire (black) to a suitable chassis ground point.
- Konekte a Battery Power (+) (3A) wire (yellow) to a constant 12V/24V power source.
- Connect the camera cable(s) to the corresponding CH1 and CH2 inputs on the monitor.
- Asire w tout koneksyon yo byen fèm epi byen izole pou anpeche kous kout.
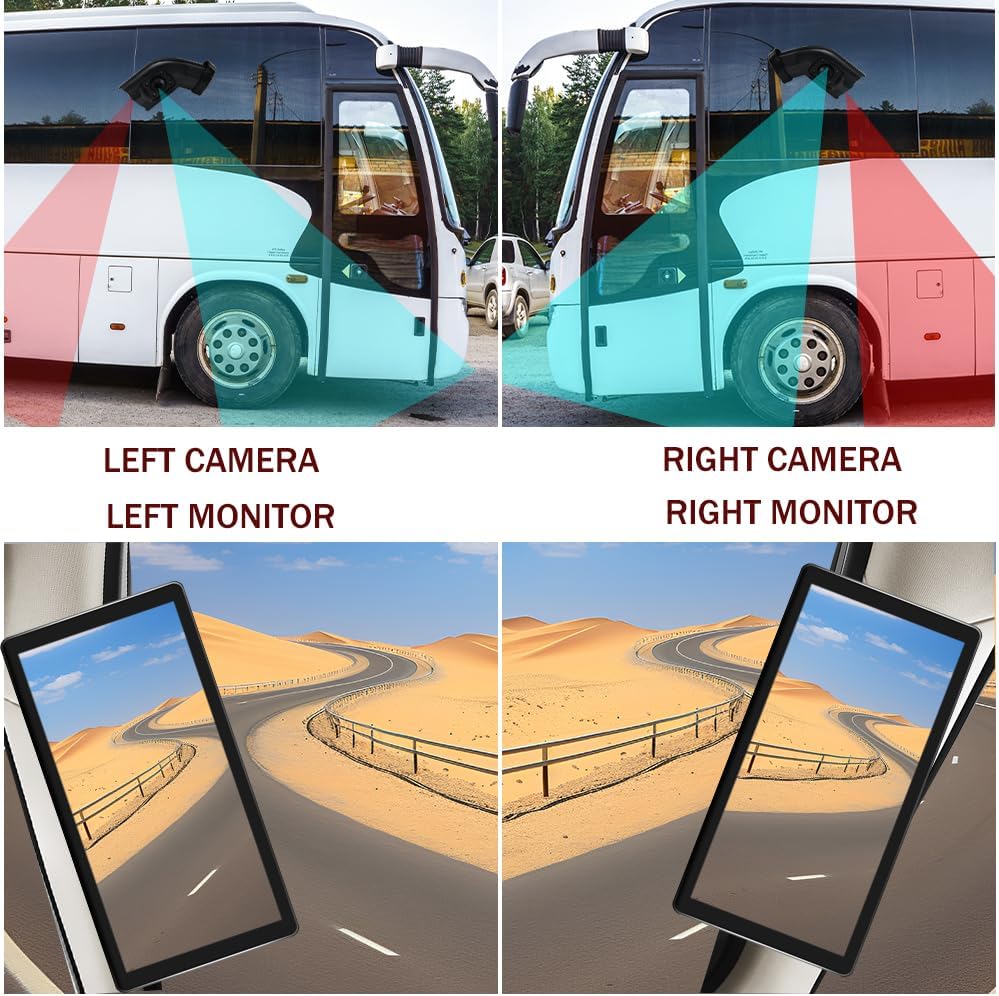
Image: A visual comparison demonstrating the coverage areas for left and right camera installations, along with the corresponding monitor views. This system is for the Right Camera/Monitor.
Enstriksyon Operasyon
1. Power On/Off
The monitor will power on automatically when the vehicle's ignition is turned on (if connected to ACC power) and power off when the ignition is turned off.
2. Navigasyon ekran taktil
Navigate through the monitor's menus and settings using the touch screen interface. Tap icons or options to select them.
3. Split Screen Display
The monitor supports a 2-channel split screen display. Access the display settings to configure how the camera feeds are shown on the screen.
4. BSD Voice Alarm
- Access the BSD settings menu on the touch screen.
- Adjust Alarm Area: Define the specific zones where the BSD system will detect objects and trigger an alarm.
- Control Alarm Volume: Set the desired volume level for the voice alerts.
- Mete Sansiblite: Adjust the sensitivity of the detection system to suit your driving conditions and preferences.
5. Image Mirroring
If needed, enable the camera image mirroring function through the display settings to flip the camera view orizontal.
6. Display Anviwònman
Customize the display by adjusting brightness, screen color, and setting the current time and date through the monitor's settings menu.
7. Anrejistreman bouk
The system supports loop recording. Ensure a compatible memory card is inserted (if required, check product specifications for card type and capacity). The system will continuously record video, overwriting the oldest files lè kat memwa a plen.

Image: The monitor screen showing a video playback interface, indicating support for video recording with a timeline illustrating different recording times throughout the day.
Antretyen
- Netwayaj Monitè a: Use a soft, dry cloth to clean the monitor screen. For stubborn smudges, lightly dampSiye twal la avèk dlo oswa yon pwodui netwayaj ki an sekirite pou ekran. Evite pwodui chimik ki agresif.
- Netwayaj Kamera a: Periodically check and clean the camera lens to ensure a clear view. Use a soft cloth and lens cleaner if necessary.
- Tcheke Koneksyon: Regularly inspect all wiring connections to ensure they are secure and free from corrosion or damage.
- Mizajou lojisyèl: Tcheke manifakti a website for any available firmware or software updates for your system.
Depanaj
| Pwoblèm | Kòz posib | Solisyon |
|---|---|---|
| Pa gen imaj sou monitè kè bebe |
|
|
| Distorted or unclear image |
|
|
| BSD alarm not working |
|
|
| Loop recording not functioning |
|
|
Espesifikasyon
| Karakteristik | Detay |
|---|---|
| Dimansyon pwodwi | 10.3"L x 2"W x 8"H (Monitor) |
| Pwa atik | 4.4 liv |
| Nimewo Modèl | Dwa |
| Teknoloji ekspozisyon | LCD |
| Lòt Karakteristik Display | San fil |
| Manifakti | VEKOOTO |
| Mak | VEKOOTO |
| Gwosè ekran | 10.36 pous |
| Aparèy konpatib | Siveye |
| Kalite enstalasyon | Sifas mòn |
| Voltage | 9-36 Volts (Wide VoltagSipò elektwonik) |
| Teknoloji detèktè optik | CMOS |
| Kalite lantiy | Gran Ang |
| Kalite Connector | San fil |
| Optical Sensor Size | 1/3 pous |

Image: Diagram illustrating the physical dimensions of the 10.36-inch vertical monitor (27cm/10.63inch height, 13cm/5.12inch width) and the camera unit (14.6cm/5.75inch height, 7.8cm/3.07inch width, 6.4cm/2.52inch depth).
Garanti ak sipò
For warranty information, please refer to the documentation included with your purchase or contact VEKOOTO customer support directly. Support contact details can typically be found on the manufacturer's official websit la oubyen atravè pwen acha ou a.
Always ensure you are using genuine VEKOOTO parts and accessories for optimal performance and to maintain warranty validity.
Ask a question about this manual
Ask about setup, troubleshooting, compatibility, parts, safety, or missing instructions. Manuals+ will review the question and use this page’s manual context to help answer it.