
1. Entwodiksyon
This manual provides detailed instructions for the installation, operation, and maintenance of your Kolink Unity Solar ARGB Mesh Midi Tower Case. Please read this manual thoroughly before beginning installation to ensure proper setup and safe usage. This case is designed to house standard PC components, offering efficient cooling and customizable ARGB lighting.
2. Enfòmasyon sou Sekirite
- Toujou dekonekte ekipman pou kouran an nan priz miray la anvan ou enstale oswa retire nenpòt konpozan.
- Handle all components with care to prevent damage from electrostatic discharge (ESD). Consider using an anti-static wrist strap.
- Avoid placing the case in direct sunlight, near heat sources, or in environments with excessive dust or humidity.
- Do not attempt to modify the case or its components. Unauthorized modifications may void your warranty and pose safety risks.
- Keep small parts, such as screws, away from children.
3. Pake kontni
Verifye ke tout atik yo prezan nan pakè a:
- Kolink Unity Solar ARGB Mesh Midi Tower Case
- Accessory Box (containing screws, cable ties, and standoffs)
- Manyèl Itilizatè (dokiman sa a)
4. Pwodwi souview
The Kolink Unity Solar ARGB Mesh Midi Tower Case features a mesh front panel for optimal airflow, pre-installed ARGB fans, and a tempered glass side panel to showcase your build.
4.1 Ekstèn Views

Figi 4.1.1: Front-bò view of the Kolink Unity Solar ARGB Mesh Midi Tower Case, highlighting the mesh front panel and three illuminated ARGB fans.
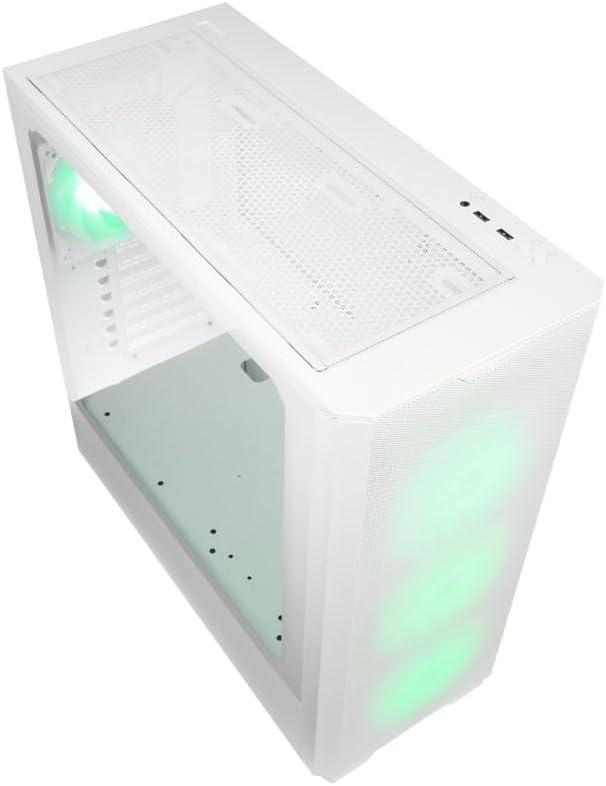
Figi 4.1.2: Top view of the case, showing the top mesh panel and front I/O ports.
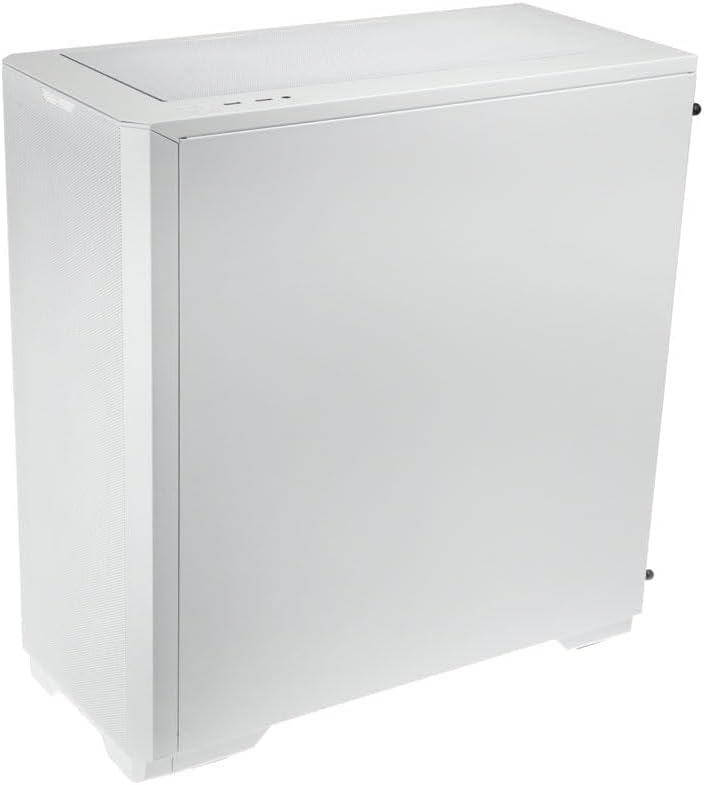
Figi 4.1.3: Dèyè-bò view of the case, illustrating the solid right side panel.

Figi 4.1.4: Composite image showing the front, rear, and tempered glass side panel of the case.
4.2 Pò Antre/Sòti Devan

Figi 4.2.1: Close-up of the top-mounted front I/O panel, featuring audio jacks, USB ports, and control buttons.
The front I/O panel typically includes:
- Bouton pouvwa
- Bouton Reyajiste
- Pò USB 3.0 (x1)
- Pò USB 2.0 (x2)
- HD Audio Jacks (Headphone/Microphone)
- ARGB Control Button (for pre-installed fans)
4.3 Aranjman Entèn

Figi 4.3.1: Enteryè view of the case, showing the motherboard tray, front fan mounts, and PSU shroud.

Figi 4.3.2: Yon lòt enteryè view, highlighting the rear fan mount and the spacious main chamber.

Figi 4.3.3: Close-up of the pre-installed ARGB fans at the front of the case.

Figi 4.3.4: View behind the motherboard tray, showing space for cable management and drive mounts.
5. Gid Enstalasyon ak Konfigirasyon
Follow these steps to install your PC components into the Kolink Unity Solar case.
5.1 Prepare Ka a
- Mete bwat la sou yon sifas plat epi ki estab.
- Remove the tempered glass side panel by unscrewing the thumbscrews at the rear and carefully pulling it away. Set it aside on a soft, non-abrasive surface.
- Remove the solid right side panel by unscrewing its thumbscrews and sliding it off.
5.2 Enstalasyon mèr
- Install the I/O shield (if applicable) into the rear opening of the case.
- Ensure the correct standoffs are installed for your motherboard form factor (ATX, Micro-ATX, Mini-ITX). Adjust or add standoffs as needed using the provided tools.
- Carefully align your motherboard with the standoffs and I/O shield.
- Sere kat manman an byen sere ak vis yo bay yo. Pa sere l twòp.
5.3 Enstalasyon Power Supply Unit (PSU).
- Locate the PSU mounting area at the bottom rear of the case.
- Slide your PSU into the designated bay from the rear of the case.
- Align the PSU with the screw holes and secure it with the provided screws.
5.4 Storage Drive Installation (HDDs/SSDs)
The case supports multiple storage drives. Refer to the accessory box for specific mounting hardware.
- SSD 2.5 pous: Mount directly onto the SSD trays located behind the motherboard tray or on the PSU shroud. Secure with screws.
- Disk Difisil 3.5 pous: Install into the drive cage located under the PSU shroud. Slide the drive into the tray and secure it.
5.5 Graphics Card (GPU) and Expansion Card Installation
- Retire kouvèti fant PCIe ki nesesè yo nan dèyè bwat la.
- Mete kat grafik ou a oswa lòt kat ekspansyon yo nan fant PCIe ki apwopriye yo sou kat manman ou an.
- Secure the cards with the provided screws or retention clips.
5.6 Cable Management and Connections
- Connect all necessary power cables from the PSU to your motherboard, CPU, GPU, and storage drives.
- Connect the front I/O cables (USB, Audio, Power/Reset switches, ARGB control) to their respective headers on the motherboard. Refer to your motherboard manual for header locations.
- Route cables through the cutouts and tie-down points behind the motherboard tray to maintain a clean interior and optimize airflow. Use the included cable ties.
- Ensure the pre-installed ARGB fans are connected to the integrated ARGB controller or directly to an ARGB header on your motherboard (if supported).
6. Operating the ARGB Lighting
The Kolink Unity Solar case comes with pre-installed ARGB fans. You can control their lighting effects in two ways:
- Case ARGB Button: Use the dedicated ARGB control button on the front I/O panel to cycle through various lighting modes and colors.
- Lojisyèl kat manman: If your motherboard has a 3-pin 5V ARGB header and compatible software (e.g., ASUS Aura Sync, MSI Mystic Light, Gigabyte RGB Fusion), you can connect the case's ARGB controller to the motherboard and synchronize lighting effects with other components. Refer to your motherboard manual for instructions on ARGB header connection and software usage.
7. Antretyen
Antretyen regilye ede asire pèfòmans optimal ak lonjevite konpozan PC ou yo.
- Filtè Pousyè: The case features removable dust filters on the front, top, and bottom. Periodically remove and clean these filters with compressed air or by rinsing them with water (ensure they are completely dry before reinstallation).
- Netwayaj enteryè: Use compressed air to remove dust from inside the case, especially from fan blades, heatsinks, and other components. Perform this cleaning in a well-ventilated area.
- Netwayaj eksteryè: Siye sifas eksteryè yo ak yon mou, damp twal. Evite pwodui chimik ki agresif oswa pwodui netwayaj abrazif.
NAN. Depanaj
Si ou rankontre pwoblèm, gade etap depanaj komen sa yo:
- PC not powering on: Double-check all power connections from the PSU to the motherboard, CPU, and GPU. Ensure the front panel power switch cable is correctly connected to the motherboard header. Verify the PSU switch is in the 'ON' position.
- Fans not spinning/ARGB not lighting up: Check fan power connections and ARGB connections. Ensure ARGB cables are connected to the correct 3-pin 5V ARGB headers (not 4-pin 12V RGB headers). If using the case controller, ensure it is powered.
- Pa gen okenn rezilta ekspozisyon: Ensure your graphics card is properly seated in its PCIe slot and all necessary power cables are connected. Verify your monitor cable is connected to the graphics card, not the motherboard's integrated graphics port (unless you are using integrated graphics).
9. Espesifikasyon
Key specifications for the Kolink Unity Solar ARGB Mesh Midi Tower Case:
| Karakteristik | Spesifikasyon |
|---|---|
| Mak | MAP RELE |
| Non modèl | Unity Solar |
| Nimewo Modèl Atik | UNITYSOLARWHT |
| Kalite Ka | Mid Tower |
| Koulè | Blan |
| Mèr konpatibilite | ATX, Mikwo-ATX, Mini-ITX |
| Metòd refwadisman | Air |
| Kalite montaj ekipman pouvwa | Anba mòn |
| Kantite USB 2.0 pò | 2 |
| Total pò USB | 2 (Note: Product description indicates 1x USB 3.0, 2x USB 2.0. Please verify with product packaging.) |
| Total Internal Bays | 4 (Mixed 2.5"/3.5" support) |
| Pwa atik | 2.2 liv |
10. Garanti ak sipò
For warranty information and technical support, please refer to the official KOLINK websit la oubyen kontakte revandè w la. Kenbe prèv acha w la pou reklamasyon garanti a.