beyerdynamic MC 950
Manyèl Itilizatè Mikwofòn Kondansateur Beyerdynamic MC 950 la
Modèl: MC 950
Entwodiksyon
The Beyerdynamic MC 950 is a high-quality true condenser microphone designed for professional audio applications. Featuring a supercardioid polar pattern, it excels at isolating sound sources and minimizing off-axis noise, making it ideal for studio recording, live sound, and broadcast. Its robust construction and advanced features ensure reliable performance and exceptional sound reproduction.
This manual provides detailed instructions for the proper setup, operation, and maintenance of your MC 950 microphone to ensure optimal performance and longevity.
Enfòmasyon sou Sekirite
- Always handle the microphone with care to prevent damage to the capsule or electronics.
- Pa ekspoze mikwofòn nan nan tanperati ekstrèm, imidite, oswa limyè solèy dirèk.
- Ensure proper phantom power (11-52V) is supplied by your audio interface or mixer. Incorrect voltage ka domaje mikwofòn la.
- Evite lage mikwofòn nan oubyen sibi gwo enpak.
- Kenbe mikwofòn la lwen gwo chan mayetik.
- Pa eseye demonte oswa modifye mikwofòn nan. Sa ap anile garanti a.
Kontni pake
Tanpri verifye ke tout atik ki nan lis anba a yo enkli nan pakè ou a:
- Beyerdynamic MC 950 True Condenser Microphone
- Mikwofòn Clamp (MA-CL 21)
- Microphone Case

Image: Contents of the Beyerdynamic MC 950 package, showing the microphone, its clamp, and the protective case.
Enstalasyon
- Attach the Microphone Clamp: Securely attach the provided MA-CL 21 microphone clamp to a standard microphone stand.
- Monte mikwofòn la: Carefully insert the Beyerdynamic MC 950 microphone into the clamp. Ensure it is firmly seated but do not overtighten.
- Konekte kab XLR la: Connect a balanced XLR cable to the microphone's XLR output.
- Konekte ak aparèy odyo a: Connect the other end of the XLR cable to an input on your audio interface, mixer, or preamplifier that provides 11-52V phantom power.
- Aktive Pouvwa Fantom: Turn on the phantom power on your audio device. The MC 950 requires phantom power to operate.
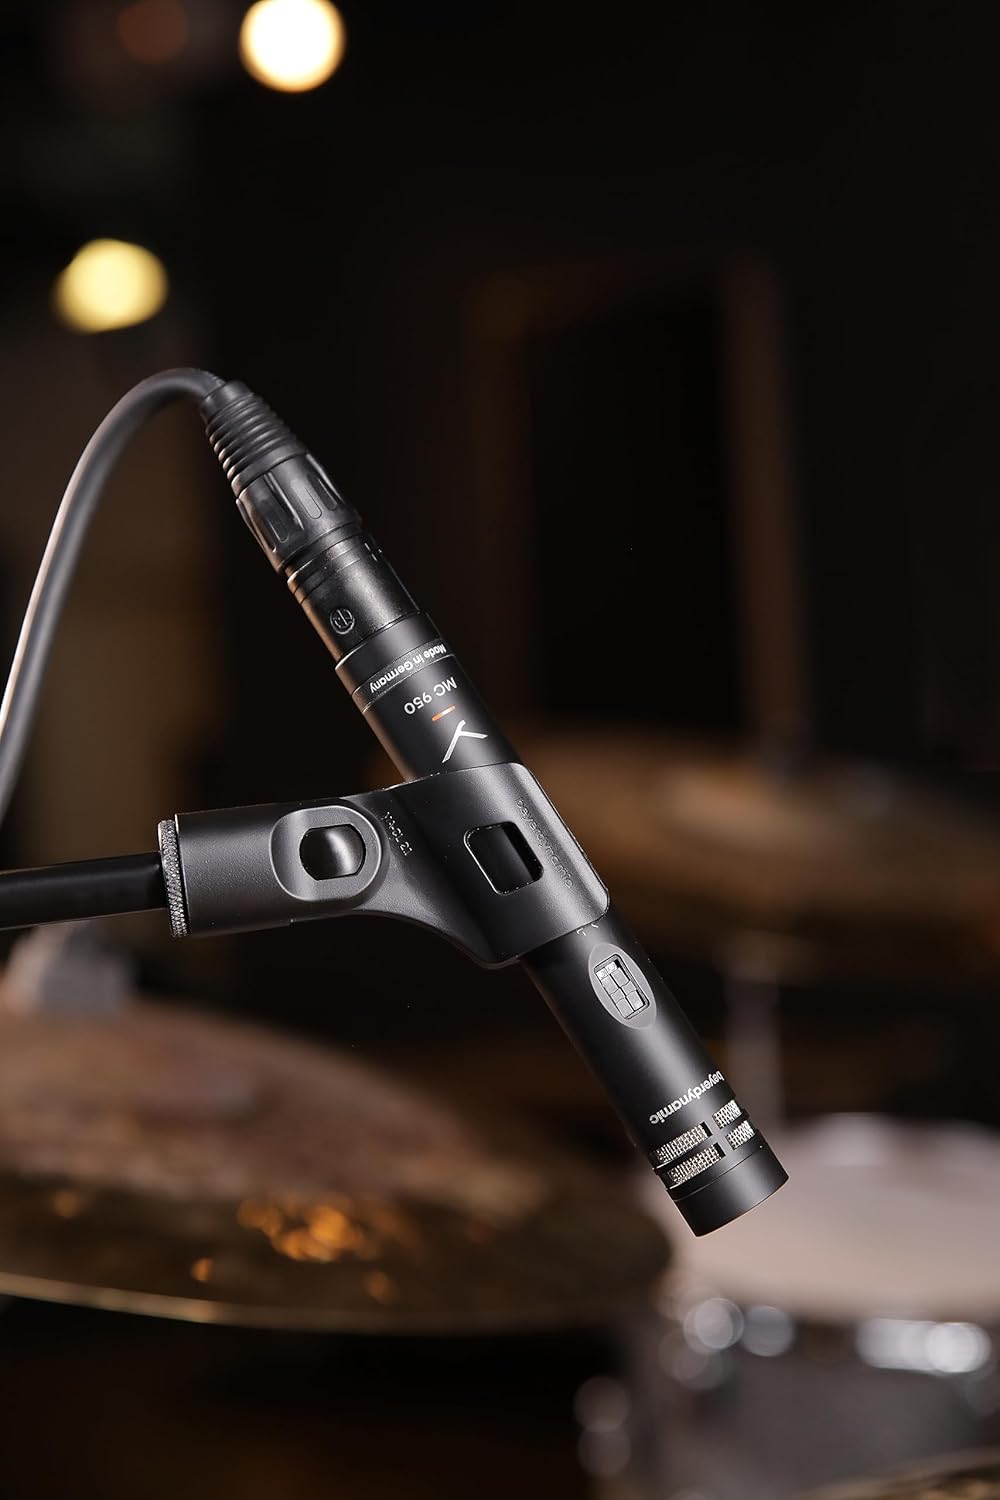
Image: The Beyerdynamic MC 950 microphone properly mounted on a stand and connected via an XLR cable, ready for use.
Operating the MC 950
The MC 950 features a supercardioid polar pattern, which provides excellent off-axis rejection, making it highly effective for isolating sound sources in noisy environments or when multiple instruments are present.
Karakteristik:
- Filtè Low-Cut: The microphone includes a switchable -6dB-per-octave low-cut filter at 250Hz. This filter helps to attenuate unwanted low-frequency rumble, proximity effect, or stage noise. To activate, locate the switch on the microphone body and slide it to the "on" position.
- -15dB Pad: For very loud sound sources, the MC 950 is equipped with a switchable -15dB pad. This pad reduces the input signal level before it reaches the microphone's internal electronics, preventing distortion. To activate, locate the switch on the microphone body and slide it to the "on" position.

Imaj: Yon imaj detaye view of the Beyerdynamic MC 950 microphone, highlighting the switches for the -15dB pad and the low-cut filter.
Konsèy plasman:
- For acoustic instruments like guitars, position the microphone a few inches from the soundhole or bridge for a balanced sound. Experiment with distance and angle to achieve the desired tone.
- When miking drums, the supercardioid pattern helps in isolating individual drums or cymbals, reducing bleed from other sources.
- For vocals, maintain a consistent distance from the microphone to avoid variations in level and tone.

Image: The Beyerdynamic MC 950 microphone positioned to capture the sound of an acoustic guitar, demonstrating typical usage.
Antretyen
- Netwayaj: Sèvi ak yon twal mou epi sèk pou siye kò mikwofòn nan. Pa sèvi ak pwodui netwayaj likid oswa solvan, paske yo ka domaje fini an oswa konpozan entèn yo.
- Depo: When not in use, store the microphone in its protective case to shield it from dust, moisture, and physical damage.
- Manyen: Always handle the microphone by its body, not by the cable or connector.
Depanaj
| Pwoblèm | Kòz posib | Solisyon |
|---|---|---|
| Pa gen Sòti Son | No phantom power; Faulty XLR cable; Incorrect input selection on mixer/interface. | Ensure phantom power is activated (11-52V); Try a different XLR cable; Verify correct input is selected and gain is up. |
| Son defòme | Input signal too hot; Pad not engaged for loud sources. | Engage the -15dB pad switch; Reduce gain on your audio device; Increase distance from sound source. |
| Excessive Bass/Rumble | Proximity effect; Low-frequency noise from stage/environment. | Engage the low-cut filter switch; Increase distance from sound source; Use a shock mount. |
| Son tanzantan | Loose cable connection; Damaged cable. | Check all cable connections; Try a different XLR cable. |
Espesifikasyon
| Karakteristik | Detay |
|---|---|
| Kalite Mikwofòn | Vrè kondansasyon |
| Modèl polè | Supercardioid |
| Repons Frekans | 40Hz - 20kHz |
| Low-Cut Filter | Switchable -6dB/octave at 250Hz |
| Pad | Switchable -15dB |
| Phantom pouvwa | 11-52V DC |
| Koneksyon | XLR |
| Pwa atik | 7 ons (0.2 kilogram) |
| Dimansyon (L x W x H) | 9.4 x 6.45 x 3.45 pous |
| Manifakti | Beyerdynamic |
Garanti ak sipò
Beyerdynamic products are manufactured to the highest quality standards. For information regarding warranty coverage and terms, please refer to the warranty card included with your product or visit the official Beyerdynamic websit.
For technical support, service, or spare parts, please contact Beyerdynamic customer service or an authorized service center in your region. Contact information can typically be found on the Beyerdynamic websit oswa nan anbalaj pwodwi a.
Resous sou entènèt: For additional resources, FAQs, and product registration, please visit: www.beyerdynamic.com
Ask a question about this manual
Ask about setup, troubleshooting, compatibility, parts, safety, or missing instructions. Manuals+ will review the question and use this page’s manual context to help answer it.