1. Entwodiksyon
This manual provides detailed instructions for the installation, operation, and maintenance of your Turing TP-MMD4MV2 Smart Series TwilightVision 4MP IR Zoom Dome IP Camera. This advanced surveillance camera features a 2.7-13.5mm motorized varifocal lens, Smart IR illumination up to 40m (131ft), and TwilightVision technology for optimal image clarity in low-light conditions. It supports up to a 256GB MicroSD card for edge storage and is designed for outdoor use with IP67 weather resistance and IK10 vandal resistance. Please read this manual thoroughly before using the product to ensure proper setup and functionality.
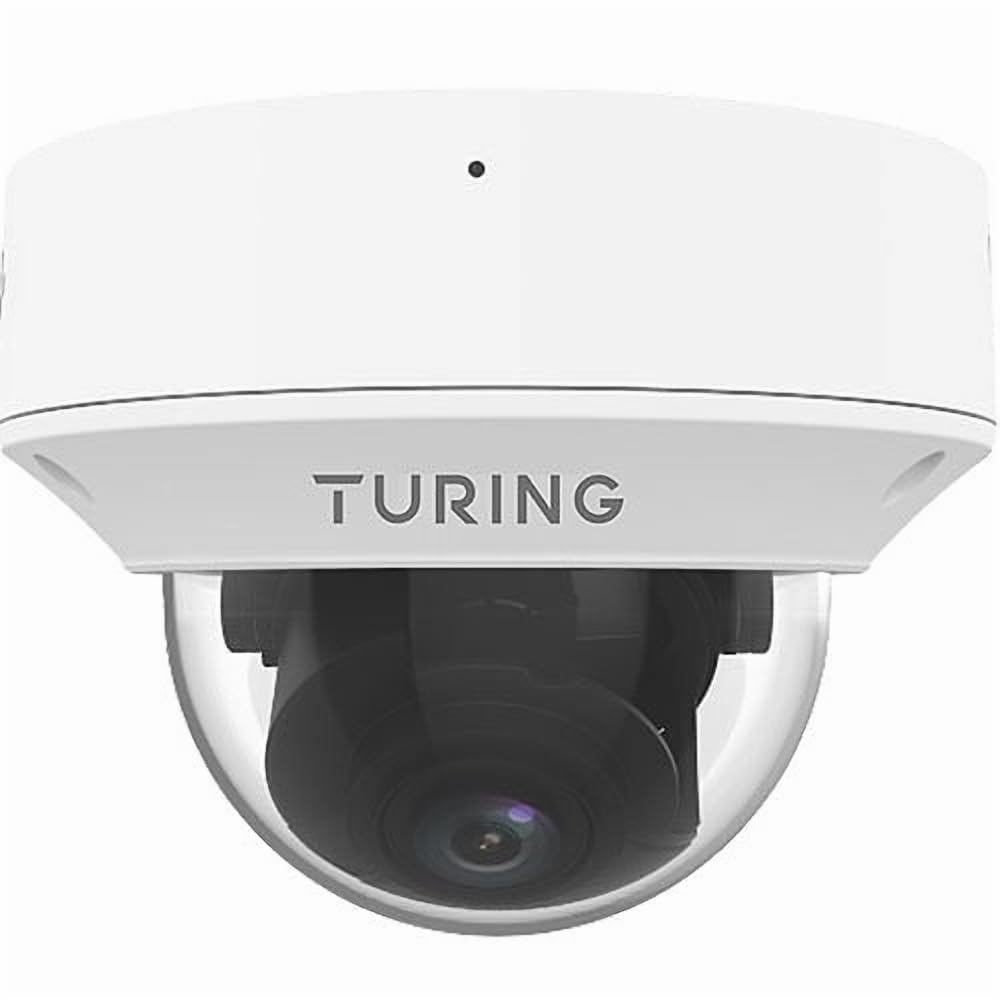
Figure 1: Turing TP-MMD4MV2 Smart Series TwilightVision 4MP IR Zoom Dome IP Camera. This image shows the white dome camera with its protective casing.
2. Enfòmasyon sou Sekirite
Tanpri obsève prekosyon sekirite sa yo pou evite blesi oswa domaj nan pwodwi a:
- Sekirite elektrik: Ensure power supply meets the camera's requirements (DC 12V+/-25% or PoE IEEE 802.3af). Do not overload power outlets.
- Enstalasyon: Installation should be performed by qualified personnel. Mount the camera securely to prevent it from falling.
- Anviwònman: Do not expose the camera to extreme temperatures, humidity, or corrosive environments beyond its specified operating conditions.
- Netwayaj: Sèvi ak yon twal mou epi sèk pou netwaye. Pa sèvi ak savon fò oswa materyèl abrazif.
- Demonte: Pa eseye demonte oswa modifye kamera a. Sa ap anile garanti a epi li ka domaje li.
3. Pake kontni
Verifye ke tout atik yo prezan nan pakè ou a:
- Turing TP-MMD4MV2 IP Dome Camera
- Mounting Screw Kit (screws, wall anchors)
- Konektè ki enpèmeyab pou kab Ethernet
- Modèl egzèsis
- Gid demaraj rapid / Manyèl itilizatè (dokiman sa a)
Note: A MicroSD card and DC 12V power adapter are not included and must be purchased separately if not using Power over Ethernet (PoE).
4. Pwodwi souview
The TP-MMD4MV2 camera is designed for robust outdoor surveillance, offering high-resolution imaging and intelligent features.
4.1 Karakteristik kle
- Rezolisyon 4 Megapiksèl: Captures video at 2688x1520 pixels at 30/25fps.
- Lantiy Varifokal Motorize: 2.7-13.5mm lens with auto-focus for flexible viewang ing.
- TwilightVision Technology: Enhances image clarity in extremely low-light conditions (down to 0.002 Lux).
- Smart IR: Infrared illumination up to 40 meters (131 feet) for clear night vision.
- People and Vehicle Search: Advanced analytics when used with Turing SMART series NVRs and Turing Vision Cloud.
- Mikwofòn entegre: Pou siveyans odyo.
- Edge Storage: Supports up to 256GB MicroSD card (not included).
- Konsepsyon dirab: IP67 weather-rated and IK10 vandal-resistant.
- Opsyon pouvwa: Supports Power over Ethernet (PoE) and DC 12V.
4.2 Konpozan Kamera
The camera consists of the main dome unit, a mounting base, and various ports. While a specific diagram is not provided, typical components include:
- Dome Cover: Protective, vandal-resistant casing.
- Modil kamera: Contains the lens, image sensor, and IR LEDs.
- Ethernet Port (RJ45): For network connection and PoE.
- Antre pouvwa DC: For optional 12V DC power supply.
- Bouton Reyajiste: Pou retabli paramèt faktori yo.
- MicroSD Kat plas: Located internally, accessible by removing the dome cover.
Figure 2: Illustrative diagram of camera components (image not available). This diagram would typically show the external parts of the dome camera, including the lens, IR LEDs, and the location of the cable connections and reset button.
5. Enstalasyon ak Enstalasyon
Follow these steps for proper installation of your camera.
5.1 Monte Kamera a
- Chwazi yon kote: Select a suitable outdoor location for wall mounting, ensuring a clear field of view and within range of your network cable. The camera is IP67 and IK10 rated for outdoor use.
- Prepare sifas la: Use the provided drill template to mark the screw holes on the mounting surface. Drill pilot holes as indicated.
- Sekirize baz la: Attach the camera's mounting base to the surface using the supplied screws and wall anchors.
- Jesyon kab: Route the Ethernet cable through the mounting base or side cable entry point. Use the waterproof connector for outdoor installations to protect the RJ45 connection.
Figure 3: Illustrative diagram of camera mounting (image not available). This diagram would show the steps for securing the camera base to a wall or ceiling, including drilling and cable routing.
5.2 Alimante Kamera a
Kamera a ka mache nan de fason:
- Pouvwa sou Ethernet (PoE): Konekte yon kab Ethernet soti nan yon switch oswa NVR ki gen PoE nan pò RJ45 kamera a. Sa bay ni kouran ni done.
- DC 12V Power Adapter: If PoE is not available, connect a 12V DC power adapter (not included) to the camera's DC power input. Then, connect an Ethernet cable for data transmission.
5.3 Rezo Koneksyon
Connect the camera to your network via an Ethernet cable. The camera supports Ethernet connectivity. While 'Wireless Communication Technology: Wi-Fi' is listed in some specifications, the primary and most robust connection method for this model is wired Ethernet, especially for PoE. For initial setup, a wired connection is recommended.
5.4 Enstalasyon Kat MicroSD
To install a MicroSD card for local storage (up to 256GB):
- Pouvwa Off: Disconnect power from the camera before proceeding.
- Remove Dome Cover: Carefully twist and remove the outer dome cover to access the internal components.
- Mete kat MicroSD: Locate the MicroSD card slot and gently insert the card until it clicks into place.
- Replace Dome Cover: Reattach the dome cover, ensuring it is securely sealed to maintain weather resistance.
Figure 4: Illustrative diagram of MicroSD card slot location (image not available). This diagram would show the internal view of the camera with the dome cover removed, highlighting the MicroSD card slot.
6. Itilizasyon Kamera a
Once installed and powered, the camera can be accessed and configured.
6.1 Aksè Inisyal ak Konfigirasyon
The camera is designed to integrate with Turing SMART NVRs (TR-MR(P) models) and the Turing Vision Cloud for full functionality, including People and Vehicle Search. Refer to your NVR's manual or Turing Vision Cloud documentation for specific integration steps.
- Dekouvèt Rezo: Use Turing's network discovery tool to find the camera's IP address on your network.
- Web Entèfas: Jwenn aksè a kamera a web koòdone atravè a web browser using its IP address. Log in with default credentials (refer to the Quick Start Guide for defaults).
- Chanje modpas: Pou sekirite, chanje modpas defo a imedyatman lè w konekte pou premye fwa.
- Anviwònman rezo: Configure IP address, subnet mask, and gateway if necessary.
6.2 Adjusting the Motorized Lens
The 2.7-13.5mm motorized varifocal lens allows you to remotely adjust the zoom and focus:
- Jwenn aksè a an dirèk kamera a view through the NVR interface or web navigatè.
- Locate the zoom and focus controls.
- Adjust the zoom to achieve the desired field of view. The camera will automatically adjust focus (AF).
6.3 Smart IR and TwilightVision
The camera automatically switches between day and night modes. Smart IR adjusts the intensity of the infrared LEDs to prevent overexposure of close-up objects, ensuring balanced illumination up to 40m (131ft). TwilightVision technology provides enhanced color images in extremely low-light conditions before switching to IR mode.
6.4 Anrejistreman ak Depo
- NVR Recording: Configure recording schedules and motion detection settings on your Turing SMART NVR.
- Anrejistreman sou Kat MicroSD: If a MicroSD card is installed, configure event-triggered or continuous recording via the camera's web koòdone.
- Kodaj videyo: The camera supports Ultra 265, H.265, H.264, and MJPEG video encoding formats.
6.5 Siveyans Odyo
The built-in microphone captures audio. Ensure audio recording is enabled in the camera's settings if desired. Audio compression uses G.711.
7. Antretyen
Antretyen regilye asire pèfòmans optimal ak lonjevite kamera ou.
- Netwayaj: Periodically clean the dome cover with a soft, damp twal pou retire pousyè, salte, oswa tach dlo ki ka afekte kalite imaj la. Pa sèvi ak pwodui chimik ki agresif.
- Mizajou mikrolojisyèl: Check the Turing website for the latest firmware updates. Regularly updating firmware can improve performance, add features, and enhance security. Follow the provided instructions carefully during updates.
- Enspeksyon kab: Periodically inspect all cables and connections for wear, damage, or corrosion, especially for outdoor installations.
- Verifikasyon Anviwònman: Ensure the camera's environment remains within its operating temperature and humidity ranges.
NAN. Depanaj
Gade tablo ki anba a pou pwoblèm komen ak solisyon yo.
| Pwoblèm | Kòz posib | Solisyon |
|---|---|---|
| Pa gen kouran pou kamera a | Incorrect power supply; PoE not active; loose connection | Verify 12V DC power or PoE source. Check all cable connections. |
| Pa gen manje videyo | Network issue; incorrect IP address; camera not configured | Check network cable. Ensure camera is powered. Verify IP address and network settings. Restart camera. |
| Pòv bon jan kalite imaj | Dirty lens/dome; improper focus; low light conditions | Clean the dome cover. Adjust focus via the motorized lens controls. Ensure sufficient lighting or proper IR operation. |
| Pa ka jwenn aksè a kamera a atravè rezo a | IP address conflict; firewall blocking; incorrect network settings | Use network discovery tool. Check network configuration. Temporarily disable firewall for testing. Reset camera to factory defaults if necessary. |
| Kat MicroSD a pa anrejistre | Card full; card not formatted; recording schedule not set | Check card status in settings. Format card if needed. Configure recording schedule. Ensure card is properly inserted. |
9. Espesifikasyon
Detailed technical specifications for the Turing TP-MMD4MV2 camera:
| Karakteristik | Spesifikasyon |
|---|---|
| Nimewo Modèl | TP-MMD4MV2 |
| Capteur Imaj | 1/3-inch, 4.0 megapixel, progressive scan, CMOS |
| Max. Rezolisyon | 4MP (2688x1520) at 30/25fps |
| Lantiy | 2.7-13.5mm motorized varifocal, AF automatic focusing |
| Ang nan View | H: 98.26 - 31.35 degrees; V: 54.76 - 18.55 degrees; D: 127.74 - 36.99 degrees |
| Minimòm ekleraj | Color: 0.002 Lux (F1.2, AGC on); 0 Lux with IR on |
| IR Range | Smart IR up to 40m (131ft) |
| Konpresyon videyo | Ultra 265, H.265, H.264, MJPEG |
| Konpresyon odyo | G.711 |
| Rediksyon bri dijital | 2D and 3D DNR |
| Depo Edge | Kat MicroSD, jiska 256 GB (pa enkli) |
| Pwovizyon pou pouvwa | DC 12V+/-25%, PoE (IEEE 802.3af) |
| Konsomasyon pouvwa | Maksimòm 7.0W |
| Pwoteksyon Ingress | IP67 |
| Rezistans vandal | IK10 |
| Dimansyon (D x H) | 5.88 x 4.4 pous (149.35 x 111.76 mm) |
| Pwa | 2.03 liv (0.92 kg) |
| Tanperati Fonksyònman | Refer to manufacturer's official specifications for exact range |
| Pwotokòl Koneksyon | Ethernet |
| Supported NVR | Turing SMART NVR: modèl TR-MR(P). |
10. Enfòmasyon sou Garanti
Turing products are covered by a limited warranty. For specific warranty terms, conditions, and duration, please refer to the official Turing websit la oswa kat garanti ki vini ak pwodwi ou a. Kenbe prèv acha ou pou reklamasyon garanti.
11. Sipò pou Kliyan
If you encounter any issues or have questions not covered in this manual, please contact Turing customer support:
- Websit: Visit the official Turing websit pou FAQ, resous sipò, ak enfòmasyon pou kontakte yo.
- Sipò teknik: Contact details for technical assistance can typically be found on the manufacturer's websit la oubyen nan anbalaj pwodwi w la.
12. Videyo pwodwi yo
Pa gen okenn videyo ofisyèl pwodwi ki soti nan vandè a ki te bay nan done pwodwi yo pou entegre nan manyèl sa a.