
Aigo ICE 400 CPU Cooler User Manual
Active Cooling System (Heatsink + 120mm Fan)
1. Entwodiksyon
Thank you for choosing the Aigo ICE 400 CPU Cooler. This active cooling system is designed to efficiently dissipate heat from your Central Processing Unit (CPU), ensuring stable performance and longevity for your computer or laptop. This manual provides detailed instructions for installation, operation, maintenance, and troubleshooting to help you get the most out of your product.
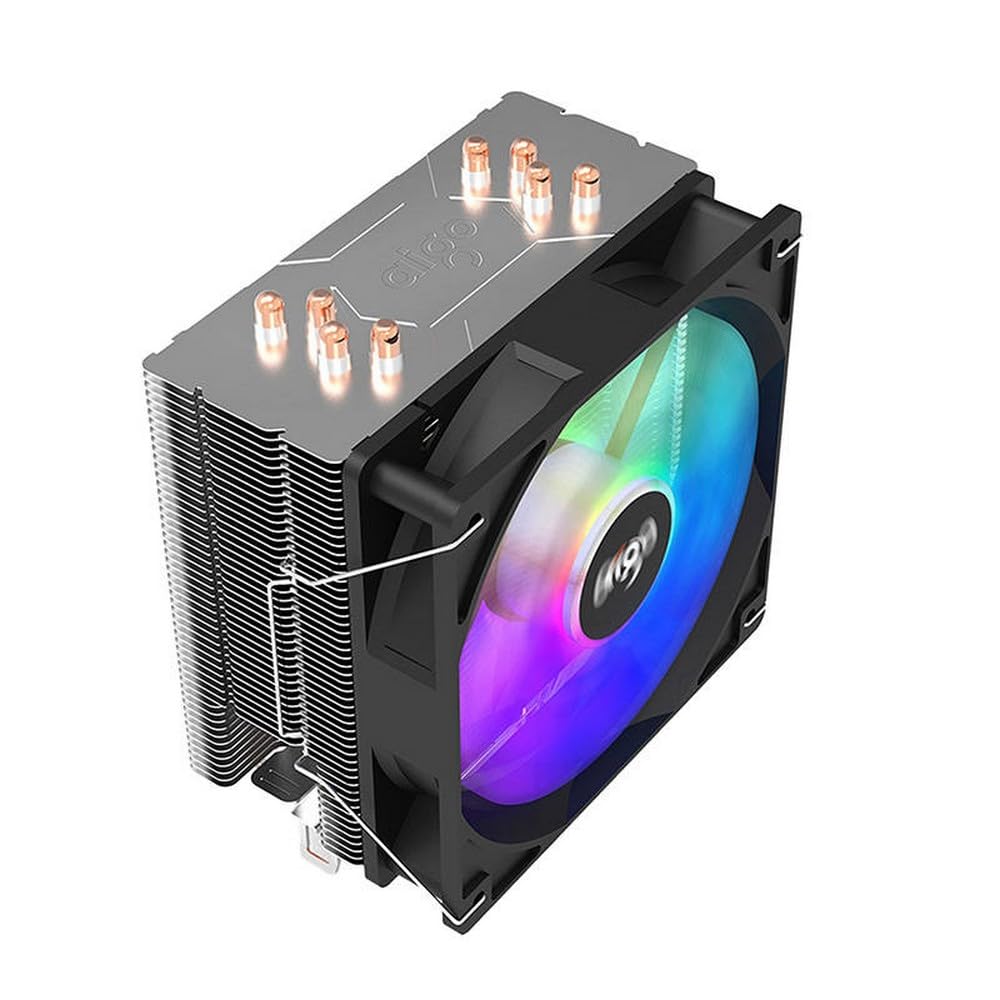
Image 1.1: The Aigo ICE 400 CPU Cooler, showing the heatsink and attached 120mm fan.
2. Enstriksyon Sekirite
Please read and follow these safety instructions carefully before installing or operating the Aigo ICE 400 CPU Cooler:
- Ensure your computer is powered off and unplugged from the wall outlet before installation to prevent electric shock or damage to components.
- Handle the cooler and other components with care to avoid physical damage.
- Kenbe pwodwi a lwen dlo, imidite, ak tanperati ekstrèm.
- Do not attempt to modify or disassemble the cooler. This may void your warranty and pose a safety risk.
- Kenbe soti nan atenn timoun yo.
3. Pake kontni
Verifye ke tout atik yo prezan nan pakè a:
- Aigo ICE 400 CPU Heatsink
- 120mm Refwadisman fanatik
- Mounting Brackets (for various CPU sockets)
- Pat tèmik (pre-aplike oswa nan yon tib)
- Installation Screws and Accessories
- Manyèl Itilizatè (dokiman sa a)
4. Enstalasyon ak Enstalasyon
Follow these steps to properly install your Aigo ICE 400 CPU Cooler. Refer to your motherboard's manual for specific CPU socket details if needed.
4.1. Preparasyon
- Pouvwa Off: Shut down your computer completely and unplug the power cable from the wall outlet.
- Ka Ouvè: Louvri bwat òdinatè w la pou jwenn aksè nan zòn kat manman an ak CPU a.
- Retire ansyen glasyè a: If replacing an existing cooler, carefully remove it. Clean any old thermal paste from the CPU's Integrated Heat Spreader (IHS) using isopropyl alcohol and a lint-free cloth.
- Identify Socket: Determine your CPU socket type (e.g., Intel LGA 1700/1200/115X, AMD AM5/AM4) and select the appropriate mounting brackets from the package.
Image 4.1: Illustration showing the CPU socket and the process of cleaning old thermal paste.
4.2. Mounting Support Enstalasyon
- Plak: For most Intel sockets and some AMD sockets, install the provided backplate behind the motherboard, aligning the holes with the CPU socket mounting holes.
- Stand-offs: Secure the stand-offs (spacers) onto the backplate or directly into the motherboard's mounting holes, depending on your socket type.
- Mounting Bras: Attach the appropriate mounting arms to the stand-offs using the provided screws.
Image 4.2: Diagram illustrating the installation of the backplate and stand-offs for a typical CPU socket.
4.3. Thermal Paste Application
If thermal paste is not pre-applied to the cooler's base:
- Apply a small, pea-sized dot of thermal paste to the center of the CPU's IHS.
- Do not spread the paste manually. The pressure from the heatsink will spread it evenly.
Image 4.3: Visual guide for applying a pea-sized amount of thermal paste to the CPU.
4.4. Enstalasyon Radyatè ak Vantilatè
- Position Heatsink: Carefully place the heatsink onto the CPU, aligning the mounting holes on the heatsink with the mounting arms/screws.
- Radyatè chalè an sekirite: Tighten the screws in a diagonal pattern (e.g., top-left, bottom-right, top-right, bottom-left) until snug. Do not overtighten.
- Tache vantilatè a: If the fan is not pre-attached, use the provided fan clips or screws to secure the 120mm fan to the heatsink. Ensure the fan is oriented to blow air through the heatsink fins towards the rear or top of the case.
- Konekte kab vantilatè a: Plug the fan's 3-pin power connector into the "CPU_FAN" header on your motherboard. Refer to your motherboard manual for the exact location.
Image 4.4: Step-by-step visual of placing the heatsink, securing it, and attaching the fan to the heatsink.
4.5. Final chèk
- Ensure the cooler is firmly seated and does not wobble.
- Verify that the fan cable is securely connected to the CPU_FAN header.
- Check for any obstructions that might prevent the fan from spinning freely.
- Fèmen ka òdinatè w lan.
5. Operasyon Enstriksyon
The Aigo ICE 400 CPU Cooler operates automatically once installed correctly. Its primary function is to maintain optimal CPU temperatures by dissipating heat.
- Pouvwa sou: Plug in your computer's power cable and power on the system.
- Operasyon Fan: The 120mm fan will start spinning as soon as the system powers on. Its speed will typically be controlled by the motherboard's BIOS/UEFI settings based on CPU temperature.
- Siveyans Tanperati: It is recommended to monitor your CPU temperatures using motherboard monitoring software or third-party utilities (e.g., HWMonitor, Core Temp) to ensure the cooler is functioning effectively. Ideal CPU temperatures vary but generally should remain below 80°C under load.
6. Antretyen
Regular maintenance helps ensure the longevity and optimal performance of your Aigo ICE 400 CPU Cooler.
- Dust Cleaning (Every 3-6 Months):
- Power off and unplug your computer.
- Louvri ka òdinatè a.
- Use compressed air to blow dust out of the heatsink fins and fan blades. Hold the fan blades gently to prevent over-spinning while cleaning.
- Alternatively, use a soft brush or microfiber cloth to carefully remove dust.
- Thermal Paste Replacement (Every 2-3 Years or if temperatures rise):
- If CPU temperatures significantly increase over time, the thermal paste may have dried out.
- Carefully remove the heatsink from the CPU.
- Clean off all old thermal paste from both the CPU IHS and the cooler's base using isopropyl alcohol and a lint-free cloth.
- Apply new thermal paste as described in Section 4.3 and re-install the cooler.
Image 6.1: Visual guide on using compressed air to clean dust from the heatsink and fan.
NAN. Depanaj
If you encounter issues with your Aigo ICE 400 CPU Cooler, refer to the following common problems and solutions:
7.1. Tanperati CPU ki wo
- Check Fan Connection: Ensure the fan is securely plugged into the "CPU_FAN" header on the motherboard.
- Verify Fan Spin: Confirm that the fan is spinning when the computer is on. If not, check the connection or consider a faulty fan.
- Kontakte radyatè chalè: Ensure the heatsink is making firm, even contact with the CPU. Re-tighten mounting screws in a diagonal pattern if necessary.
- Pat tèmik: Insufficient or improperly applied thermal paste can cause high temperatures. Reapply thermal paste if needed (refer to Section 4.3).
- Akimilasyon pousyè: Clean any dust from the heatsink fins and fan blades (refer to Section 6).
- Sikilasyon lè nan bwat la: Ensure your computer case has adequate airflow with proper intake and exhaust fans.
7.2. Fan Not Spinning
- Koneksyon pouvwa: Double-check that the fan's 3-pin connector is fully inserted into the motherboard's "CPU_FAN" header.
- Anviwònman BIOS: Enter your motherboard's BIOS/UEFI settings and ensure the CPU fan control is enabled and not set to a "silent" or "off" mode at low temperatures.
- Obstruction: Tcheke pou wè si pa gen okenn fil elektrik oswa debri ki bloke lam vantilatè yo.
- Faulty Fan: If all else fails, the fan itself might be faulty and require replacement.
7.3. Twòp bri vantilatè
- Akimilasyon pousyè: Clean the fan blades and heatsink thoroughly. Dust can cause imbalance and noise.
- Montaj ki lach: Ensure the fan is securely attached to the heatsink and the heatsink is securely mounted to the motherboard. Vibrations from loose components can cause noise.
- Vitès fanatik: Adjust fan speed settings in your motherboard's BIOS/UEFI. A higher fan speed will naturally produce more noise.
- Bearing Noise: If the noise is a grinding or rattling sound, the fan bearings may be failing. Consider replacing the fan.
8. Espesifikasyon
| Karakteristik | Detay |
|---|---|
| Mak | aigo |
| Modèl | ICE 400 |
| Metòd refwadisman | Fòse Air |
| Pouvwa Connector Kalite | 3-pin |
| Aparèy konpatib | Odinatè, Laptop |
| Kantite Atik | 1 (Cooler unit) |
| Gwosè fanatik | 120mm x 120mm (implied from product title) |
| Manifakti | Aigo |
9. Enfòmasyon sou Garanti
Aigo products are manufactured to the highest quality standards. This product is covered by a limited warranty against defects in materials and workmanship from the date of purchase. Please retain your proof of purchase for warranty claims. The warranty does not cover damage caused by improper installation, accident, abuse, misuse, natural disaster, or unauthorized modification.
For specific warranty terms and conditions, please refer to the warranty card included with your product or visit the official Aigo websit.
10. Sipò pou Kliyan
If you have any questions, require technical assistance, or need to report an issue that is not covered in this manual, please contact Aigo customer support:
- Websit: Visit the official Aigo websit pou FAQ, chofè, ak resous sipò.
- Imèl: Gade anbalaj pwodwi a oswa dokiman ofisyèl la websit pou adrès imel pou sèvis kliyan.
- Telefòn: Tcheke Aigo ofisyèl la websit pou nimewo telefòn sèvis kliyan rejyonal yo.
When contacting support, please have your product model (Aigo ICE 400) and proof of purchase ready.