ARNSSIEN X101
ARNSSIEN Kids Digital Camera X101 Instruction Manual
Modèl: X101
1. Entwodiksyon
This manual provides essential information for the safe and effective use of your ARNSSIEN Kids Digital Camera X101. Please read it thoroughly before operating the device and retain it for future reference. This camera is designed to be user-friendly for children, encouraging creativity and exploration through photography.
2. Pake kontni
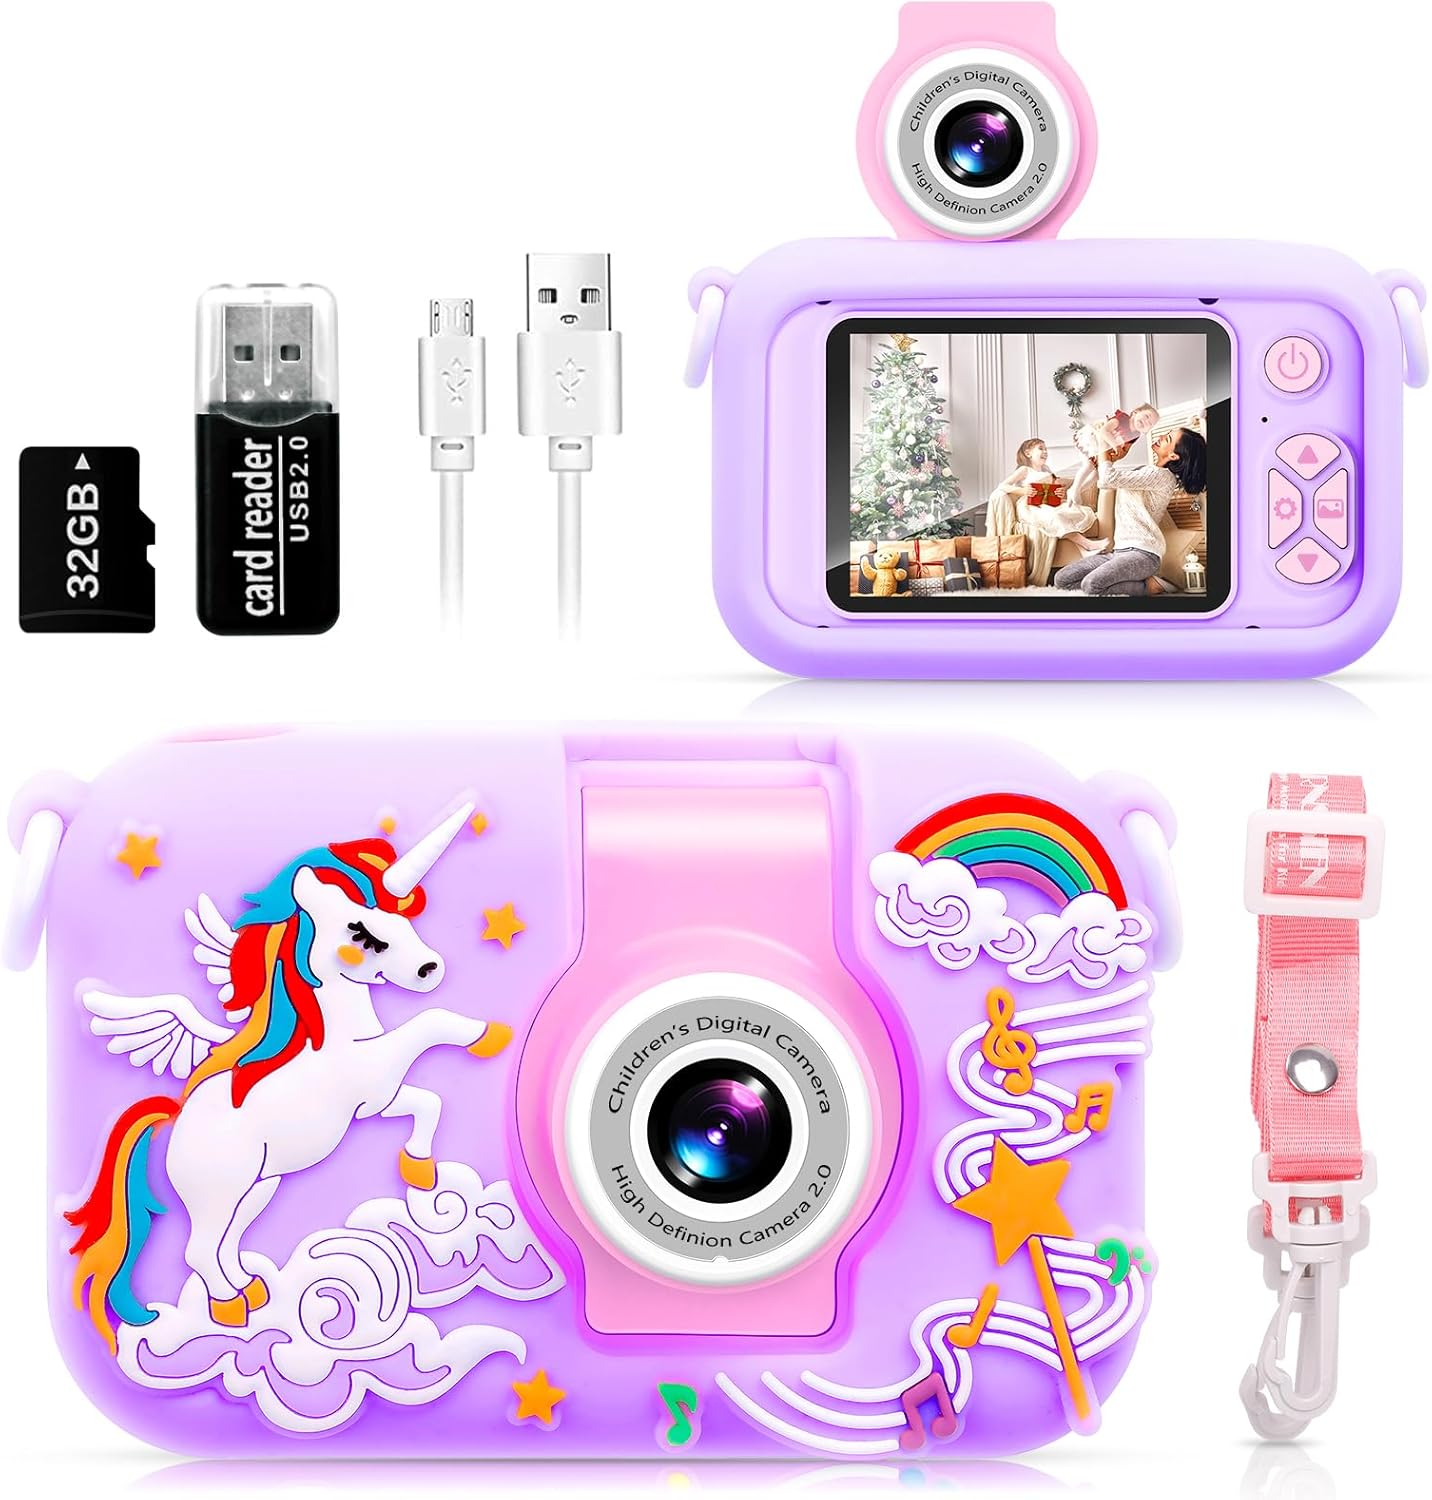
Upon opening your ARNSSIEN Kids Digital Camera X101 package, please verify that all the following items are included:
- ARNSSIEN Kids Digital Camera X101 (Purple Unicorn)
- Ka Pwoteksyon Silikon
- Lanyard
- Kat TF 32GB (pre-antre)
- Lektè kat
- Retrieve Card Pin
- USB kab
- Manyèl Enstriksyon

3. Pwodwi souview
The ARNSSIEN Kids Digital Camera X101 features a durable design and intuitive controls suitable for young users. Key components include:
- 180° Flip Lens: Allows for easy switching between front-facing and rear-facing photography without complex menu navigation.
- 2.4-inch IPS Eye Protection Screen: Provides a clear display for viewing photos and videos, designed with child vision safety in mind.
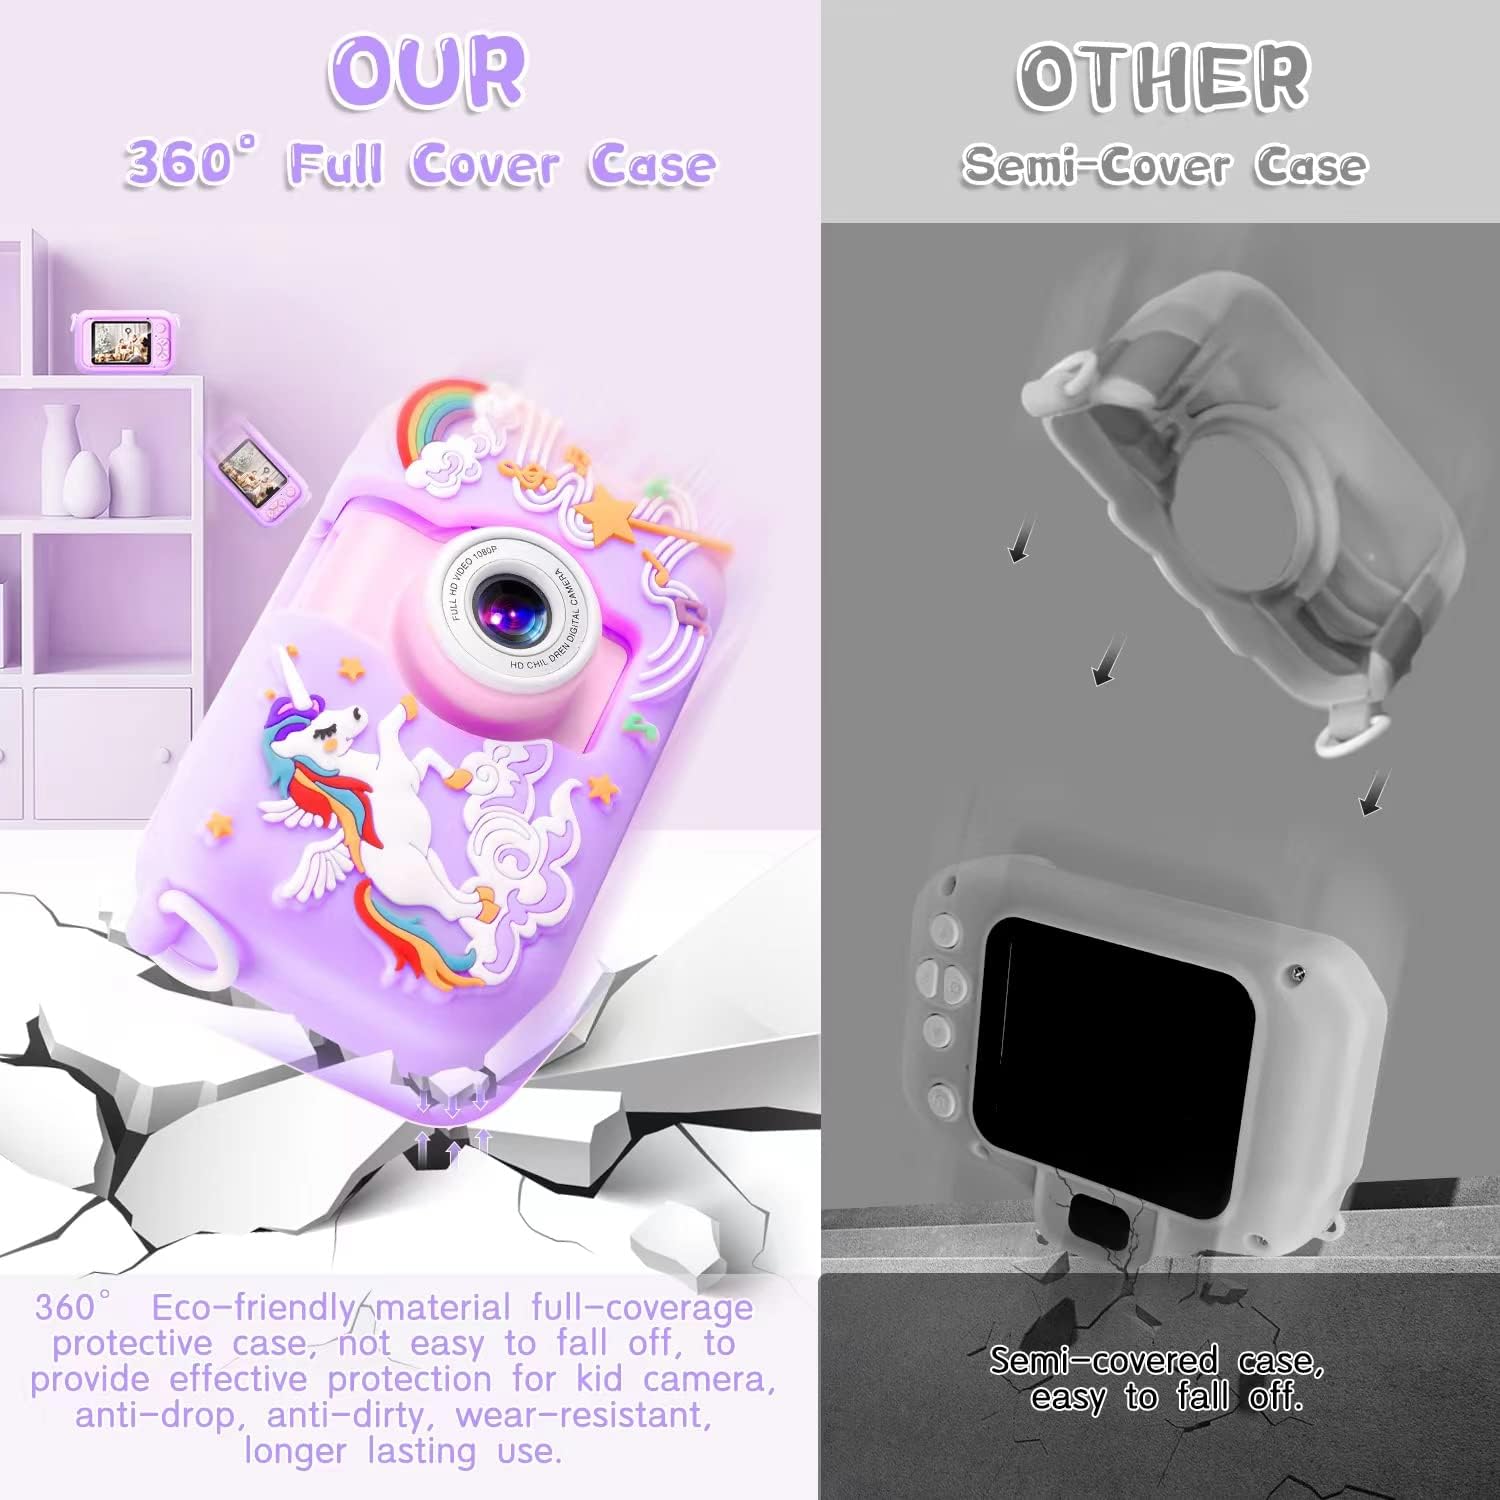
- 360° Environmental Silicone Protective Case: Offers comprehensive protection against drops, dirt, and wear, enhancing the camera's durability.
- Bouton kontwòl: Power, navigation (up, down, left, right), OK/Shutter, and Menu buttons for easy operation.
- Mikwo USB Port: Pou chaje ak transfè done.
- TF Kat plas: For memory expansion (32GB card included).


4. Enstalasyon
4.1. Premye Chaj
Before first use, fully charge the camera. Connect the provided USB cable to the camera's Micro USB port and the other end to a compatible USB power adapter (not included) or a computer USB port. The battery capacity is 1000mAh, and a full charge typically takes 1-2 hours.

4.2. Enstalasyon kat TF
The 32GB TF card is pre-inserted in the camera. If you need to remove or re-insert it, use the provided retrieve card pin to gently press the card until it clicks and ejects. Ensure the camera is powered off before inserting or removing the TF card.
4.3. Mete Dat ak Lè
It is recommended to set the correct date and time for accurate photo and video timestamps. Navigate to the 'Settings' menu using the control buttons, then select 'Date/Time' to adjust. You may also adjust other default parameters as needed.
5. Operasyon Enstriksyon
5.1. Power On/Off
Press and hold the Power button (usually located on the top or side) for a few seconds to turn the camera on or off.
5.2. Pran foto
- Limen kamera a.
- Ensure the camera is in photo mode (indicated by an icon on the screen). If not, use the Mode button (if available) or navigation buttons to switch.
- Kadre foto ou a avèk ekran IPS 2.4 pous la.
- Press the Shutter/OK button to capture the photo.
5.3. Anrejistreman videyo
- Limen kamera a.
- Chanje nan mòd anrejistreman videyo.
- Press the Shutter/OK button once to start recording. A red indicator or timer will appear on the screen.
- Peze bouton Deklanchè/OK a ankò pou sispann anrejistreman an.

5.4. Using the 180° Flip Lens
To take a selfie or record yourself, simply rotate the camera lens 180 degrees upwards. The camera will automatically adjust, making it easy to switch between front and rear views without changing modes in the menu.

5.5. Navigasyon meni
Use the Up/Down/Left/Right navigation buttons to scroll through menu options. Press the OK/Shutter button to select an option or confirm a setting. The Menu button typically returns to the previous screen or exits the menu.
5.6. Auto-Off and LCD Off Settings
To conserve battery life, the camera has adjustable auto-off and LCD off settings. These can be configured in the camera's settings menu. Options typically include 1, 3, or 5 minutes for auto-off, and similar durations for LCD off.

5.7. Transfere Files
To transfer photos and videos to a computer, connect the camera using the provided USB cable. The camera should appear as a removable disk. Alternatively, remove the TF card and use the included card reader to access files directly on your computer.

6. Camera Modes and Features
6.1. Photo Filters and Frames
The camera includes various fun photo filters and frames to enhance pictures. These options can typically be accessed through the photo mode menu. Experiment with different effects to add creativity to your images.

6.2. Time-Lapse Photography
The time-lapse feature allows the camera to capture a series of photos at set intervals, which can then be combined into a video. This is ideal for capturing slow-changing scenes. Settings for time-lapse (e.g., 2s, 5s, 10s intervals) can be found in the camera's menu.

6.3. Digital Zoom
The camera supports up to 4x digital zoom. Use the appropriate navigation buttons (often Up/Down or Left/Right in photo/video mode) to zoom in or out on your subject.

6.4. Built-in Games
The camera includes several simple games for entertainment. These can be accessed through the main menu, providing an additional interactive feature for users.

7. Antretyen
7.1. Netwaye Kamera a
Use a soft, dry cloth to clean the camera body. For the screen, use a microfiber cloth. Avoid using liquid cleaners or abrasive materials, as they may damage the camera's surface or screen.
7.2. Silicone Protective Case Care
The silicone case can be cleaned with mild soap and water if it becomes dirty. Ensure it is completely dry before reattaching it to the camera.
7.3. Swen batri
To prolong battery life, avoid fully discharging the camera frequently. Charge the camera regularly, even if not in use for extended periods. Store the camera in a cool, dry place.
NAN. Depanaj
- Kamera a pa limen: Ensure the battery is charged. Connect the camera to a power source using the USB cable and allow it to charge for at least 30 minutes before attempting to power on again.
- Pa ka pran foto/videyo: Check if the TF card is properly inserted and has sufficient free space. If the card is full, transfer filenan yon òdinatè epi efase yo nan kat la, oubyen ranplase kat la.
- Kamera a bloke oswa li pa reponn ankò: Try resetting the camera. This can often be done by pressing the 'Reset' button (if available, usually a small pinhole) with the retrieve card pin, or by holding down the Power button for an extended period (10-15 seconds).
- Move kalite imaj/videyo: Asire w ke lantiy la pwòp epi li pa gen tach. Tcheke kondisyon ekleraj yo.
- Camera not charging: Verify that the USB cable is securely connected to both the camera and the power source. Try a different USB port or power adapter.
9. Espesifikasyon
| Karakteristik | Spesifikasyon |
|---|---|
| Mak | ARNSSIEN |
| Non modèl | X101 |
| Teknoloji Capteur Foto | CMOS |
| Rezolisyon toujou efikas | 40 MP |
| Rezolisyon videyo | 1080p |
| Gwosè ekran | 2.4 pous |
| Kalite ekspozisyon | LCD |
| Lantiy Kamera | 180° Flip Lens |
| Zoom dijital | 4 x |
| Kapasite Depo memwa | 32 GB (TF Card) |
| Koneksyon Teknoloji | USB |
| Kalite batri | Lityòm Polymère (1000mAh) |
| Lavi Mwayèn Batri | 4 èdtan |
| Pwa atik | 0.2 Kilogram |
| Sipòte File Fòma | JPEG (Foto), MP4 (Videyo) |
| Oto minutri | 3 segonn |
| Estabilizasyon Imaj | Digital |
| Teknoloji Konsantre Auto | Faz Deteksyon |
10. Garanti ak sipò
10.1. Enfòmasyon sou Garanti
This ARNSSIEN Kids Digital Camera X101 comes with a 30-jou garanti apati dat acha a. Garanti sa a kouvri domaj fabrikasyon anba itilizasyon nòmal. Tanpri konsève prèv acha ou pou reklamasyon garanti.
10.2. Sipò pou Kliyan
For any questions, concerns, or technical assistance regarding your camera, please contact ARNSSIEN customer support via email:
Our support team is available to provide assistance and ensure your satisfaction with the product.
Ask a question about this manual
Ask about setup, troubleshooting, compatibility, parts, safety, or missing instructions. Manuals+ will review the question and use this page’s manual context to help answer it.