Entwodiksyon
Thank you for choosing the Simplehuman ST1077 Rechargeable Sensor Soap Dispenser with Caddy. This innovative dispenser provides a non-contact method for dispensing liquid soap, promoting hygiene and efficiency in your kitchen or bathroom. Its integrated caddy offers a convenient space for a sponge, optimizing your dishwashing experience. This manual provides essential information for the proper setup, operation, and maintenance of your new device.
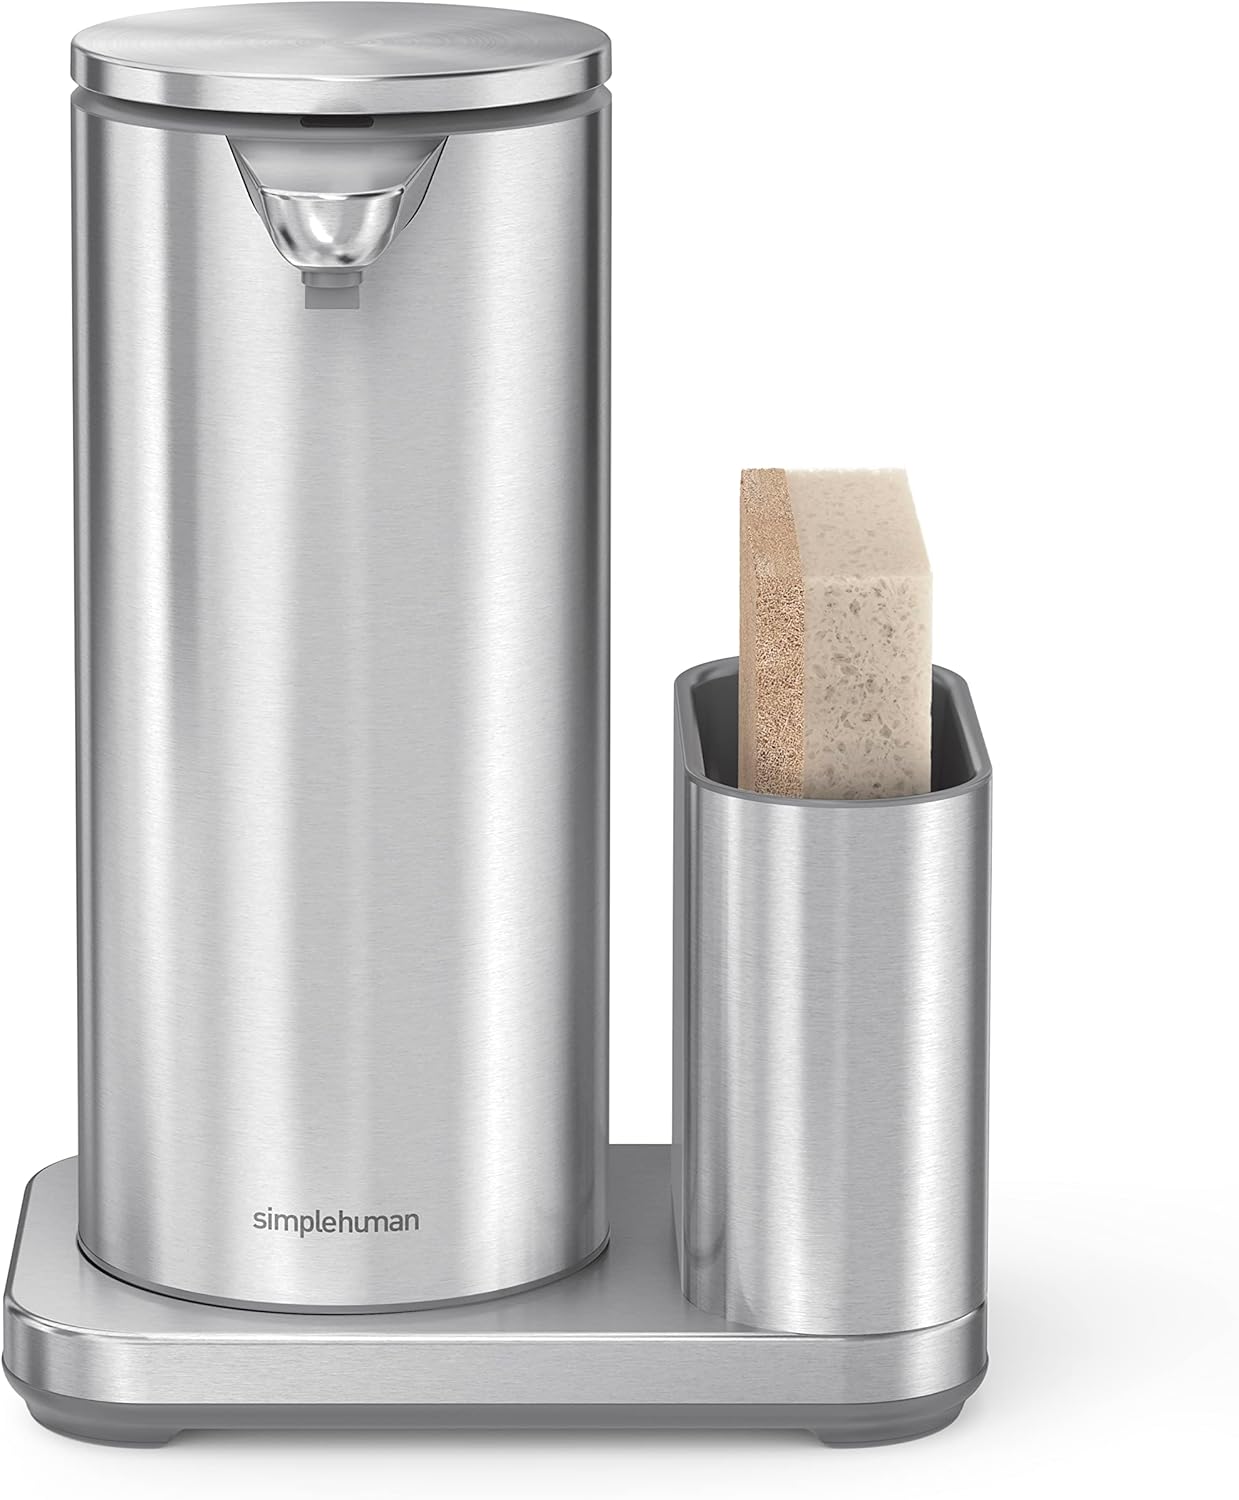
Image: The Simplehuman ST1077 sensor soap dispenser shown with a sponge placed in its accompanying caddy, providing a clear view of the product's design and functionality.
Enfòmasyon sou Sekirite
- Do not immerse the dispenser in water. The unit is waterproof for cleaning, but not designed for submersion.
- Use only liquid soap with appropriate consistency. Thick or foaming soaps may clog the pump.
- Kenbe soti nan atenn timoun yo.
- Use only the provided wireless charger for recharging.
- Evite mete dispansè a anba limyè solèy dirèk oswa toupre sous chalè.
- Pa eseye demonte oswa repare aparèy la tèt ou. Kontakte sèvis kliyan pou jwenn asistans.
Enstalasyon
1. Debake
Carefully remove all components from the packaging. Verify that all parts are present: the sensor soap dispenser, the stainless steel caddy, and the wireless charging pad.
2. Premye Chajman
Before first use, fully charge the dispenser. Place the dispenser onto the wireless charging pad. The indicator light on the dispenser will illuminate to show it is charging. A full charge can last up to 8 months. Ensure the charging pad is connected to a power source.
3. Filling with Soap
- Remove the top lid of the dispenser.
- Pour liquid soap into the reservoir. Do not overfill. The capacity is 414ml.
- Ranplase kouvèti a byen.
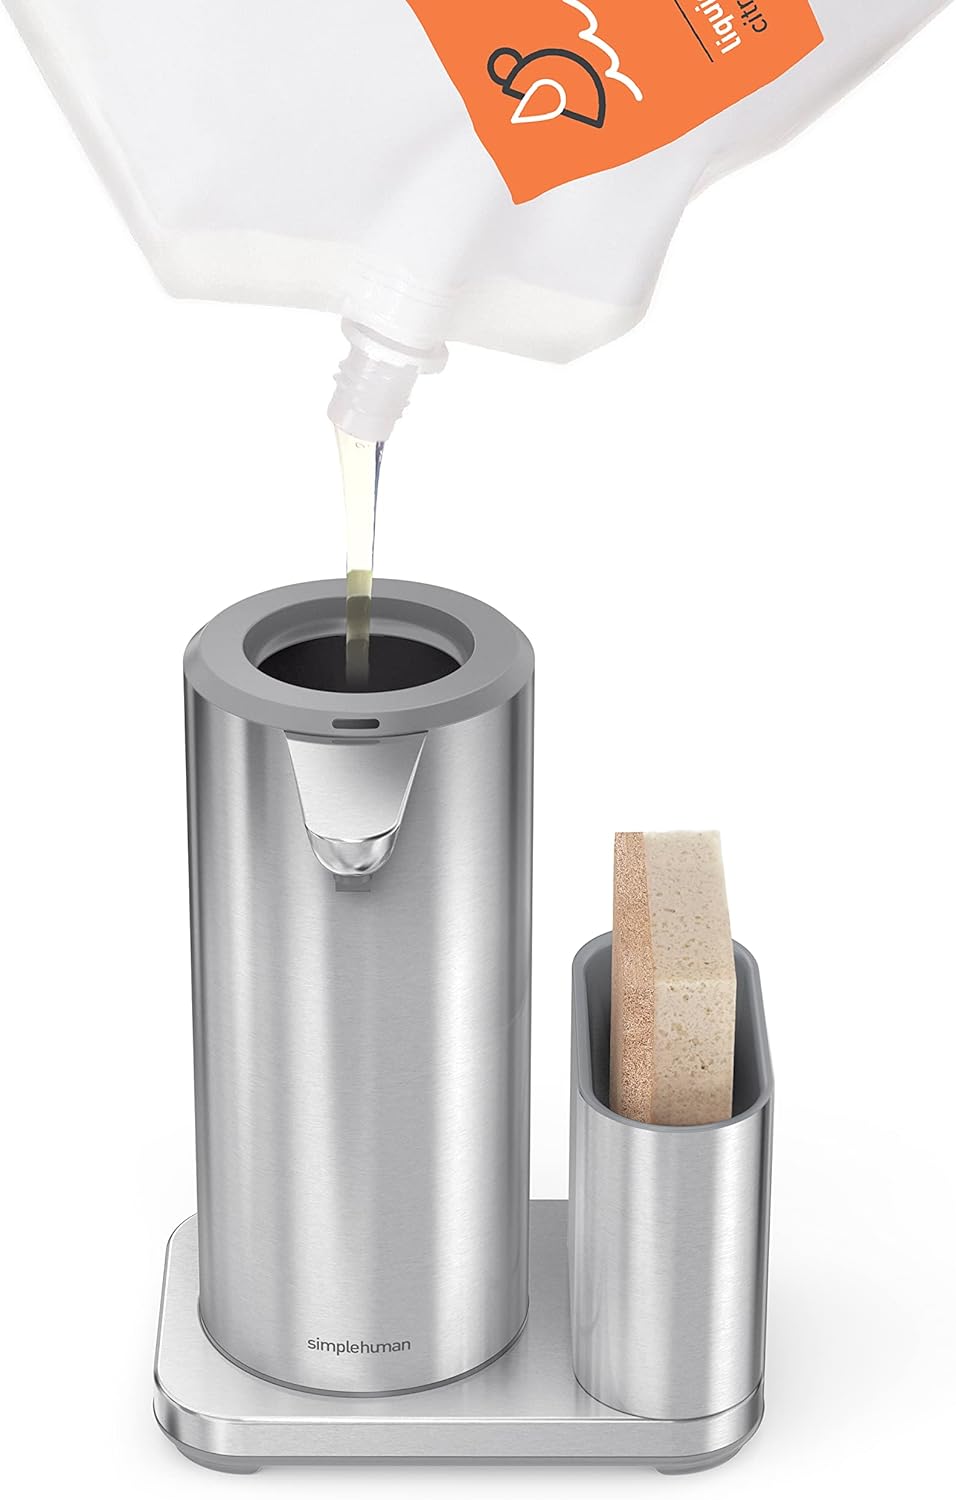
Image: A hand is shown refilling the Simplehuman ST1077 dispenser with liquid soap from a pouch, illustrating the easy refill process.
4. Plasman
Place the dispenser and caddy unit on a flat, stable surface near your sink. Ensure there is enough clearance above the sensor for proper operation and easy access for refilling. The caddy is designed to hold a standard kitchen sponge.

Image: The Simplehuman ST1077 dispenser and caddy are positioned on a kitchen countertop beside a modern sink, demonstrating typical placement.
Enstriksyon Operasyon
1. Dispensing Soap
To dispense soap, simply place your hand or a sponge under the sensor nozzle. The sensor will detect your presence and automatically dispense a measured amount of soap. The clog-proof pump ensures a precise and consistent flow, while the silicone valve prevents messy drips.

Image: Soap is being dispensed from the Simplehuman ST1077 onto a sponge held beneath the sensor, illustrating the hands-free operation.
2. Adjusting Soap Volume
The dispenser allows you to regulate the desired amount of soap. For a smaller amount, keep your hand or sponge closer to the sensor. For a larger amount, position your hand or sponge further away from the sensor.
Antretyen
1. Netwayaj
The dispenser is waterproof for easy cleaning. Wipe the exterior with a damp cloth. Do not use abrasive cleaners or scrubbers. For the caddy, it can be removed from the base for thorough cleaning. Rinse it with water and mild soap, then dry completely.

Imaj: Yon imaj anwo-anba view of the empty caddy component of the Simplehuman ST1077, highlighting its design for holding a sponge.
2. Refilling Soap
When the soap level is low, refill the dispenser following the instructions in the 'Filling with Soap' section under Setup.
3. rechaje
When the battery is low, the indicator light may flash. Place the dispenser on its wireless charging pad to recharge. A full charge typically lasts up to 8 months, depending on usage.
Depanaj
- Dispenser not working: Ensure the unit is charged. Check if the sensor is clean and unobstructed.
- No soap dispensed: Verify that the dispenser is filled with liquid soap. Check for clogs in the nozzle; if clogged, try cleaning the nozzle with warm water.
- Soap dispensing too much/too little: Adjust hand proximity to the sensor as described in the 'Adjusting Soap Volume' section.
- Pwoblèm chaj: Ensure the wireless charging pad is properly connected to a power source and the dispenser is correctly placed on the pad.
- Fuite: Ensure the top lid is securely closed and the soap used is not too thin.
Espesifikasyon
| Karakteristik | Detay |
|---|---|
| Nimewo Modèl | ST1077 |
| Koulè | Ajan |
| Materyèl | Nerjaveèi asye |
| Dimansyon pwodwi (L x W x H) | 11.2L x 7W x 17.2H santimèt |
| Kapasite Volim Likid | 414 Mililit |
| Kalite materyèl gratis | PVC-free, Phthalate-free |
| Rechargeable | Yes, with wireless charger |
| Lavi batri | Jiska 8 mwa sou yon sèl chaj |

Image: The Simplehuman ST1077 dispenser and caddy are displayed with clear labels indicating its dimensions: 11.2cm length, 7cm width, and 17.2cm height.
Enfòmasyon sou Garanti
Simplehuman products are designed for durability and are backed by a manufacturer's warranty. Please refer to the warranty card included with your product or visit the official Simplehuman websit la pou wè kondisyon garanti detaye ki espesifik pou rejyon ou an.
Sipò pou Kliyan
For further assistance, troubleshooting not covered in this manual, or to inquire about replacement parts, please contact Simplehuman customer support. You can find contact information on the Simplehuman official websit entènèt la oubyen atravè anbalaj pwodwi w la.