
RadioMaster TX12 MKII
RadioMaster TX12 MKII 2.4GHz 16 Channel ELRS/OpenTX/EdgeTX Radio Controller User Manual
Model: TX12 MKII (HP157-0006-M2) | Brand: RadioMaster
1. Entwodiksyon
The RadioMaster TX12 MKII is a compact and versatile 2.4GHz 16-channel radio controller designed for various RC applications, including drones. It comes pre-installed with the EdgeTX operating system and supports ExpressLRS (ELRS) and CC2500 RF chips, offering broad compatibility and advanced features. This manual provides essential information for setting up, operating, and maintaining your TX12 MKII radio controller.

Figi 1: Devan view of the RadioMaster TX12 MKII Radio Controller.
2. Enstalasyon
2.1 Debale ak Premye Enspeksyon
Upon receiving your TX12 MKII, carefully unbox all components and inspect for any damage. The package typically includes the TX12 MKII Radio Controller, an antenna, a USB-C cable, a quick start guide, and a sticker. Battery cells are sold separately.
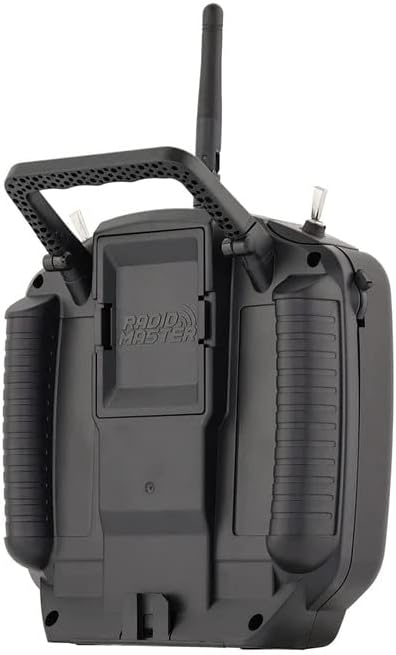
Figure 2: Contents of the RadioMaster TX12 MKII package.
2.2 Enstalasyon ak Chaje Batri
The TX12 MKII requires dual 18650 or 21700 Li-ion cells, or a 2S Lipo battery (up to 74x60x22mm), which are not included. Install the batteries into the designated compartment. The radio supports QC3 USB-C charging. Connect the provided USB-C cable to the USB-C port on the back of the controller and to a compatible power source to charge the batteries.

Figure 3: Battery compartment for dual 18650 or 21700 Li-ion cells, or 2S Lipo.
2.3 Enstalasyon antèn
Ensure the antenna is securely attached to the top of the radio controller before powering on. This is crucial for proper signal transmission and reception.
2.4 Firmware and Software
The TX12 MKII comes with EdgeTX operating system pre-installed. Firmware upgrades can be performed via USB/SD card using EdgeTX Buddy online or EdgeTX Companion PC software. Regular updates are recommended to ensure optimal performance and access to new features.
3. Operasyon Enstriksyon
3.1 Limen/Etenyen
To power on the controller, press and hold the power button until the screen illuminates. To power off, press and hold the power button again until the shutdown sequence completes.
3.2 Basic Controls and Ergonomics
The TX12 MKII features high-precision hall gimbals for smooth and accurate control. The rear case has comfortable grips, and the S1/S2 slider grips have been improved for better tactile feedback. The controller also includes a standard JR module bay for external modules.

Figure 4: Precision hall-effect gimbals, adjustable without disassembly (Min. 38°, Max. 54°).
3.3 Ekspozisyon ak Navigasyon
The 128x64 monochrome LCD display provides clear information. Use the navigation buttons (SYS, RTN, PAGE>, PAGE<, TELE) to move through menus and adjust settings within the EdgeTX operating system.
3.4 Binding and Pairing (ELRS Protocol)
The TX12 MKII supports ExpressLRS (ELRS) and CC2500 RF chips. For ELRS binding, ensure your drone has a compatible ELRS receiver. The power-on pairing method is typically used: power on the drone three consecutive times. Observe the receiver light; it should flash twice continuously, indicating it's in pairing mode. Then, on the remote control, switch to ELRS 2.4G protocol (if not already) and initiate the binding process. The remote control may vibrate, and the receiver light will steady upon successful pairing.
Video 1: Tutorial on how to pair an ELRS drone with a compatible remote control. This demonstrates the power-on pairing method and visual cues for successful binding.
3.5 Simulator Use
The TX12 MKII can be connected to a computer via its USB-C port for use with flight simulators. This allows for practice and skill development without risking actual models. Ensure the simulator software is configured to recognize the controller as a joystick.

Figure 5: USB-C Data Port for simulator connection and charging, alongside the TRS 3.5mm Trainer Socket.
4. Antretyen
4.1 Swen Batri
Always use compatible batteries and follow manufacturer guidelines for charging and storage. Avoid overcharging or fully discharging Li-ion/Lipo batteries to prolong their lifespan. Store batteries in a cool, dry place away from direct sunlight.
4.2 Netwayaj ak Depo
Clean the controller regularly with a soft, dry cloth. Avoid using harsh chemicals or abrasive materials. When not in use, store the controller in a protective case to prevent dust accumulation and physical damage. Ensure the antenna is folded or removed if applicable for compact storage.
NAN. Depanaj
5.1 Pwoblèm komen
- Pa gen pouvwa: Check battery installation and charge level. Ensure batteries are correctly inserted and fully charged.
- Echèk Obligatwa: Verify that both the controller and receiver are set to the correct protocol (e.g., ELRS). Ensure the receiver is in pairing mode (often indicated by a specific light pattern after multiple power cycles).
- Kontwòl ki pa reponn: Calibrate gimbals and switches through the EdgeTX menu. For simulator use, ensure USB drivers are updated and the simulator recognizes the controller.
- Short Range/Signal Loss: Ensure the antenna is securely attached and not obstructed. Check for local interference. Update firmware on both the radio and receiver.
5.2 Mizajou Firmware
Many issues can be resolved by ensuring your TX12 MKII is running the latest firmware. Refer to the official RadioMaster website or EdgeTX documentation for detailed instructions on updating your radio via USB/SD card using EdgeTX Buddy or EdgeTX Companion software.
6. Espesifikasyon
| Atik | TX12 Mark II Radio |
| Gwosè | 170 * 159 * 108mm |
| Pwa | 363g (0.8 lbs) |
| Frekans | 2.400GHZ-2.480GHZ |
| Chip RF | ExpressLRS (ELRS) / CC2500 |
| Travay aktyèl | 320mA@8.4V (ELRS) / 180mA@8.4V (CC2500) |
| Voltage Range | 6.6-8.4v DC |
| Radyo mikrolojisyèl | EdgeTX (Transmitter) / ExpressLRS (RF module) / MPM (RF module) |
| Chanèl | Up to 16 (depending on the receiver) |
| Ekspozisyon | 128 * 64 Monochrome LCD ekspozisyon |
| Gimbal | High precision hall gimbals |
| Modil ekstèn | JR / FrSKY / Crossfire konpatib |
| Metòd ajou | USB/SD card & EdgeTX Buddy online or EdgeTX Companion PC software |
| USB chaje | QC3 USB-C |
| Kat SD | Enkli |
| Dimansyon pwodwi | 7 x 7 x 4 pous |
| Nimewo Modèl Atik | HP157-0006-M2 |
| Manifakti | RadioMaster |
7. Garanti ak sipò
For warranty information, technical support, or service inquiries, please contact RadioMaster directly or refer to their official website. Additional protection plans may be available from your retailer.
Pou plis asistans, vizite RotorLogic Store.
8. Lòt Resous
8.1 Pwodwi souview Videyo
Videyo 2: Yon ti apèsi souview of the RadioMaster TX12 MKII 16CH ELRS EdgeTX Hall Gimbals Radio, highlighting its features and design.
Ask a question about this manual
Ask about setup, troubleshooting, compatibility, parts, safety, or missing instructions. Manuals+ will review the question and use this page’s manual context to help answer it.