
1. Entwodiksyon
This manual provides detailed instructions for the installation, configuration, operation, and maintenance of the GEPRC GEP-F722-45A All-In-One (AIO) Flight Controller. This device integrates a flight controller and electronic speed controllers (ESCs) into a single board, designed for FPV drone applications.

Figi 1: Top view of the GEPRC GEP-F722-45A AIO flight controller, showcasing the integrated electronic speed controllers (ESCs) and main components.
2. Espesifikasyon
The following table outlines the key technical specifications for the GEP-F722-45A AIO Flight Controller:
| Karakteristik | Spesifikasyon |
|---|---|
| Mak | GEPRC |
| Modèl | GEP-F722-45A AIO |
| MCU Kontwolè Vòl la | STM32F722 |
| Integrated ESC Current | 45A |
| Koneksyon Teknoloji | USB |
| Dimansyon | 32mm x 26.5mm |
| Pwa | 8.8 gram |

Figure 2: Diagram illustrating the dimensions of the GEPRC GEP-F722-45A AIO flight controller, measuring 32mm by 26.5mm.

Figure 3: The GEPRC GEP-F722-45A AIO flight controller on a digital scale, displaying a weight of 8.8 grams.
3. Enstalasyon ak Enstalasyon
Proper installation is crucial for the performance and safety of your drone. Always refer to a detailed wiring diagram for your specific drone frame and components.
3.1 Konpozan Plis paseview

Figi 4: Anba view of the GEPRC GEP-F722-45A AIO flight controller, highlighting the STM32F722 microcontroller and USB port for configuration.

Figi 5: Gwo plan anlè view of the GEPRC GEP-F722-45A AIO, showing the individual ESC MOSFETs and capacitors, indicating the power delivery section.
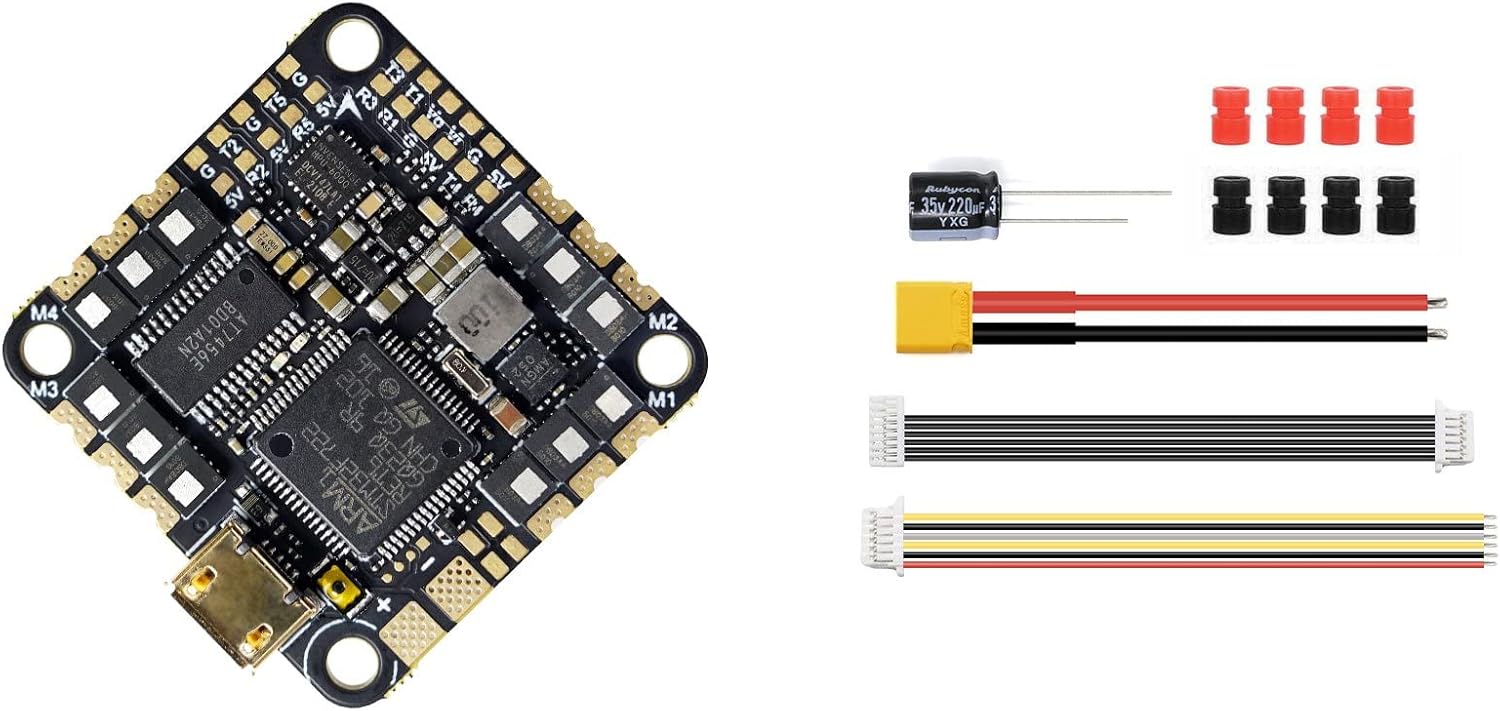
Figure 6: The GEPRC GEP-F722-45A AIO flight controller alongside included accessories such as a capacitor, power cable, and various connection wires, essential for installation.
3.2 fil elektrik
- Koneksyon pouvwa: Connect the main battery lead (XT60/XT30) to the designated BAT+ and BAT- pads on the AIO board. Ensure correct polarity.
- Koneksyon motè: Solder motor wires to the M1, M2, M3, M4 pads. Verify motor order and direction according to your flight controller software configuration.
- Koneksyon reseptè: Connect your receiver (e.g., SBUS, CRSF, ELRS) to the appropriate UART pads (e.g., RX1, TX1).
- Transmetè Videyo (VTX) ak Kamera: Connect your VTX and FPV camera to the designated video in/out and power pads.
- GPS/Lòt periferik: If using, connect GPS modules or other peripherals to available UARTs or I2C pads as required.
3.3 Enstalasyon ak Konfigirasyon Firmwèr
- Enstale chofè yo: Ensure necessary USB drivers (e.g., STM32 Virtual COM Port Driver, Zadig) are installed on your computer.
- Konekte ak PC: Connect the AIO board to your computer using a USB-C cable.
- Open Configurator: Launch the Betaflight Configurator (or INAV Configurator, depending on your firmware choice).
- Firmwèr Flash: Navigate to the 'Firmware Flasher' tab. Select the correct target (e.g., GEP_F722_AIO) and the latest stable firmware version. Click 'Load Firmware [Online]' and then 'Flash Firmware'.
- Premye konfigirasyon: After flashing, connect to the flight controller. Go through the setup wizard or manually configure settings such as accelerometer calibration, receiver protocol, motor output protocol (e.g., DShot600), OSD, and modes.
4. Operasyon Enstriksyon
Once the flight controller is installed and configured, follow these general operating guidelines:
- Tcheke anvan vòl: Before each flight, visually inspect all connections, propeller tightness, and battery charge.
- Arming Procedure: Ensure your drone is on a stable, level surface. Arm the motors using the designated switch on your radio transmitter. The flight controller's status LED will typically change to indicate armed status.
- Disarming Procedure: Disarm the motors immediately after landing or in an emergency by using the designated switch.
- Mòd vòl: Utilize various flight modes (e.g., Angle, Acro, Horizon) configured in your flight controller software to suit your flying style and skill level.
- Jesyon batri: Siveye batri voltage during flight. Land safely before the battery voltage drops below critical levels to prevent damage to the battery and drone.
5. Antretyen
Regular maintenance helps ensure the longevity and reliability of your GEP-F722-45A AIO.
- Netwayaj: Periodically clean the board to remove dust, dirt, or debris. Use a soft brush or compressed air. Avoid using liquids directly on the electronics.
- Mizajou mikrolojisyèl: Check for and install new firmware versions for your flight controller and ESCs regularly. Updates often include performance improvements, bug fixes, and new features.
- Enspeksyon koneksyon: Routinely inspect all solder joints and wire connections for signs of wear, corrosion, or looseness. Re-solder or replace as necessary.
- Physical Damage Check: After any hard landing or crash, inspect the board for cracks, bent pins, or damaged components.
NAN. Depanaj
Seksyon sa a adrese pwoblèm komen ou ka rankontre:
6.1 No Power to Board
- Tcheke Koneksyon Batri: Ensure the main battery is properly connected and charged.
- Enspekte jwenti soude yo: Verify that the main power leads (BAT+ and BAT-) are securely soldered to the board.
- Check for Shorts: Look for any accidental solder bridges or conductive debris that could cause a short circuit.
6.2 Motors Not Spinning
- Arming State: Ensure the flight controller is armed.
- Motor Protocol: Verify that the correct motor output protocol (e.g., DShot600) is selected in the Betaflight/INAV configurator.
- Kalibrasyon ESC: If using analog ESC protocols, ensure ESCs are calibrated. For DShot, calibration is not required.
- Motor/ESC Health: Test individual motors and ESCs using the motor tab in the configurator.
6.3 No Connection to Configurator
- USB kab: Try a different USB-C cable. Some cables are for charging only and do not support data transfer.
- Chofè: Reinstall or update the necessary USB drivers (STM32 Virtual COM Port Driver).
- Mòd DFU: If the board is not recognized, try putting it into DFU (Device Firmware Upgrade) mode by holding the BOOT button (if present) while plugging in USB, then attempt to flash firmware.
7. Garanti ak sipò
Specific warranty information for the GEPRC GEP-F722-45A AIO Flight Controller is not provided in the product details. For warranty claims, technical support, or further assistance, please contact the retailer or GEPRC directly through their official support channels. Always retain your proof of purchase.