
1. Entwodiksyon
This manual provides detailed instructions for the operation and maintenance of your Jensen CR-100 Portable AM/FM Radio Cassette Player/Recorder. Please read this manual thoroughly before using the unit to ensure proper function and to maximize your listening experience. Keep this manual for future reference.
2. Enfòmasyon sou Sekirite
- Pa ekspoze aparèy la nan tanperati ekstrèm, imidite, oswa limyè solèy dirèk.
- Evite lage aparèy la oswa sibi gwo enpak.
- Pa eseye demonte oswa modifye aparèy la. Konfye tout antretyen bay pèsonèl kalifye.
- Netwaye aparèy la avèk yon twal mou epi sèk. Pa sèvi ak pwodui netwayaj abrazif oswa solvan.
- Retire pil yo si ou pa pral itilize aparèy la pou yon peryòd tan pwolonje pou anpeche flit.
- Jete pil yo byen selon règleman lokal yo.
3. Pake kontni
Tanpri verifye si atik sa yo enkli nan pakè ou a:
- Jensen CR-100 Portable AM/FM Radio Cassette Player/Recorder
- Manyèl Pwopriyetè a
4. Pwodwi souview
Familiarize yourself with the various parts and controls of your Jensen CR-100 unit.

Figi 4.1: Devan View. This image displays the front of the Jensen CR-100, featuring the cassette window, built-in speaker, AM/FM frequency dial, and the telescopic antenna extended upwards. The Jensen logo is visible above the cassette window.

Figure 4.2: Side Controls. Sa a view highlights the left side of the unit, showing the volume control dial, microphone input, and the cassette control buttons including REC (Record) and PLAY.

Figure 4.3: Cassette Compartment Open. The image shows the unit with its cassette compartment door open, providing a clear view of the tape playback and recording mechanism inside.

Figure 4.4: Top/Side Ports. This perspective illustrates the top and right side of the unit, displaying the headphone jack, external microphone jack, tuning dial, and the AM/FM band selector switch.
5. Enstalasyon
5.1 Mete aparèy la an fonksyon
The Jensen CR-100 can be powered by either batteries or an AC adapter (not included).
Enstalasyon batri
- Jwenn kouvèti konpatiman batri a sou dèyè aparèy la.
- Glise kouvèti a louvri.
- Insert two (2) 'AA' (UM3) batteries, observing the correct polarity (+ and -) as indicated inside the compartment.
- Fèmen kouvèti lòj batri a byen.
Nòt: Batteries are not included. Remove batteries when the unit is not in use for extended periods to prevent leakage and damage.
AC Adapter (Not Included)
To operate the unit using an AC adapter, plug a compatible AC adapter (DC 3V, 300mA, center positive) into the DC IN jack on the unit. Plug the other end of the adapter into a standard AC wall outlet. Using an AC adapter will conserve battery life.
6. Operasyon Enstriksyon
6.1 Operasyon Radyo AM/FM
- Slide the function switch to the 'RADIO' position.
- Chwazi gwoup frekans ou vle a (AM oubyen FM) avèk bouton seleksyon AM/FM lan.
- Extend the telescopic antenna for optimal FM reception. For AM reception, rotate the unit for best signal.
- Rotate the 'TUNING' dial to select your desired radio station.
- Adjust the 'VOLUME' control to your preferred listening level.
- To turn off the radio, slide the function switch to the 'OFF' position.
6.2 Lekti kasèt
- Slide the function switch to the 'TAPE' position.
- Press the 'STOP/EJECT' button to open the cassette compartment door.
- Mete yon kasèt ak pati ki pa ekspoze a anlè.
- Close the cassette compartment door firmly.
- Press the 'PLAY' button to begin playback.
- Adjust the 'VOLUME' control to your preferred listening level.
- To fast forward, press the 'F.FWD' button. To rewind, press the 'REW' button. Press 'STOP/EJECT' to stop fast forwarding or rewinding.
- To stop playback, press the 'STOP/EJECT' button.
- To listen privately, plug headphones into the headphone jack. The built-in speaker will automatically mute.
6.3 Anrejistreman Kasèt
The unit allows recording from the built-in microphone or from the AM/FM radio.
Recording from Built-in Microphone
- Insert a blank cassette tape into the compartment as described in Section 6.2.
- Slide the function switch to the 'TAPE' position.
- Press the 'REC' (Record) button. The 'PLAY' button will also engage simultaneously.
- Speak clearly into the built-in microphone located on the unit.
- To stop recording, press the 'STOP/EJECT' button.
Recording from AM/FM Radio
- Mete yon kasèt vid nan konpatiman an.
- Tune to your desired AM or FM radio station as described in Section 6.1.
- Slide the function switch to the 'RADIO' position.
- Press the 'REC' (Record) button. The 'PLAY' button will also engage simultaneously, and the radio broadcast will be recorded onto the tape.
- To stop recording, press the 'STOP/EJECT' button.
7. Antretyen
7.1 Netwaye inite a
Siye deyò aparèy la avèk yon twal mou, yon ti kras damp cloth. Do not use harsh chemicals or abrasive cleaners, as they may damage the finish.
7.2 Cleaning the Tape Heads
Periodically clean the tape heads, capstan, and pinch roller to ensure optimal sound quality and prevent tape damage. Use a cotton swab lightly moistened with isopropyl alcohol. Gently wipe the surfaces and allow them to dry completely before inserting a tape.
7.3 Swen Batri
Always use fresh batteries of the recommended type. Do not mix old and new batteries or different types of batteries. Remove batteries if the unit is not used for a long period to prevent corrosion.
NAN. Depanaj
| Pwoblèm | Kòz posib | Solisyon |
|---|---|---|
| Pa gen pouvwa | Pil yo mouri oswa yo mal mete; adaptè kouran altènatif la pa konekte oswa li gen pwoblèm. | Replace batteries, check polarity; ensure AC adapter is securely connected and functional. |
| Resepsyon radyo pòv | Antenna not extended; unit position; interference. | Extend telescopic antenna; rotate unit for better AM reception; move away from electronic devices causing interference. |
| Cassette tape not playing/poor sound | Tape heads are dirty; tape is damaged; incorrect function mode. | Clean tape heads (see Section 7.2); try a different tape; ensure function switch is in 'TAPE' position. |
| Anrejistreman an pa fonksyone | Tape is write-protected; microphone not close enough; incorrect function mode. | Check tape for write-protect tab; speak closer to the microphone; ensure 'REC' button is fully pressed. |
9. Espesifikasyon
| Karakteristik | Spesifikasyon |
|---|---|
| Mak | Jensen |
| Nimewo Modèl | CR-100SB |
| Dimansyon pwodwi (L x W x H) | 4.02 x 1.89 x 5.35 pous |
| Pwa atik | 8.4 ons |
| Sous pouvwa | Battery Powered (2 x 'AA' UM3, not included) or AC Adapter (not included) |
| Bann Radyo Sipòte | AM, FM |
| Karakteristik espesyal | Lightweight, Portable, Built-in Microphone, Built-in Speaker, Headphone Jack |
| Koneksyon Teknoloji | Auxiliary, USB (Note: USB functionality for power only, not data transfer) |
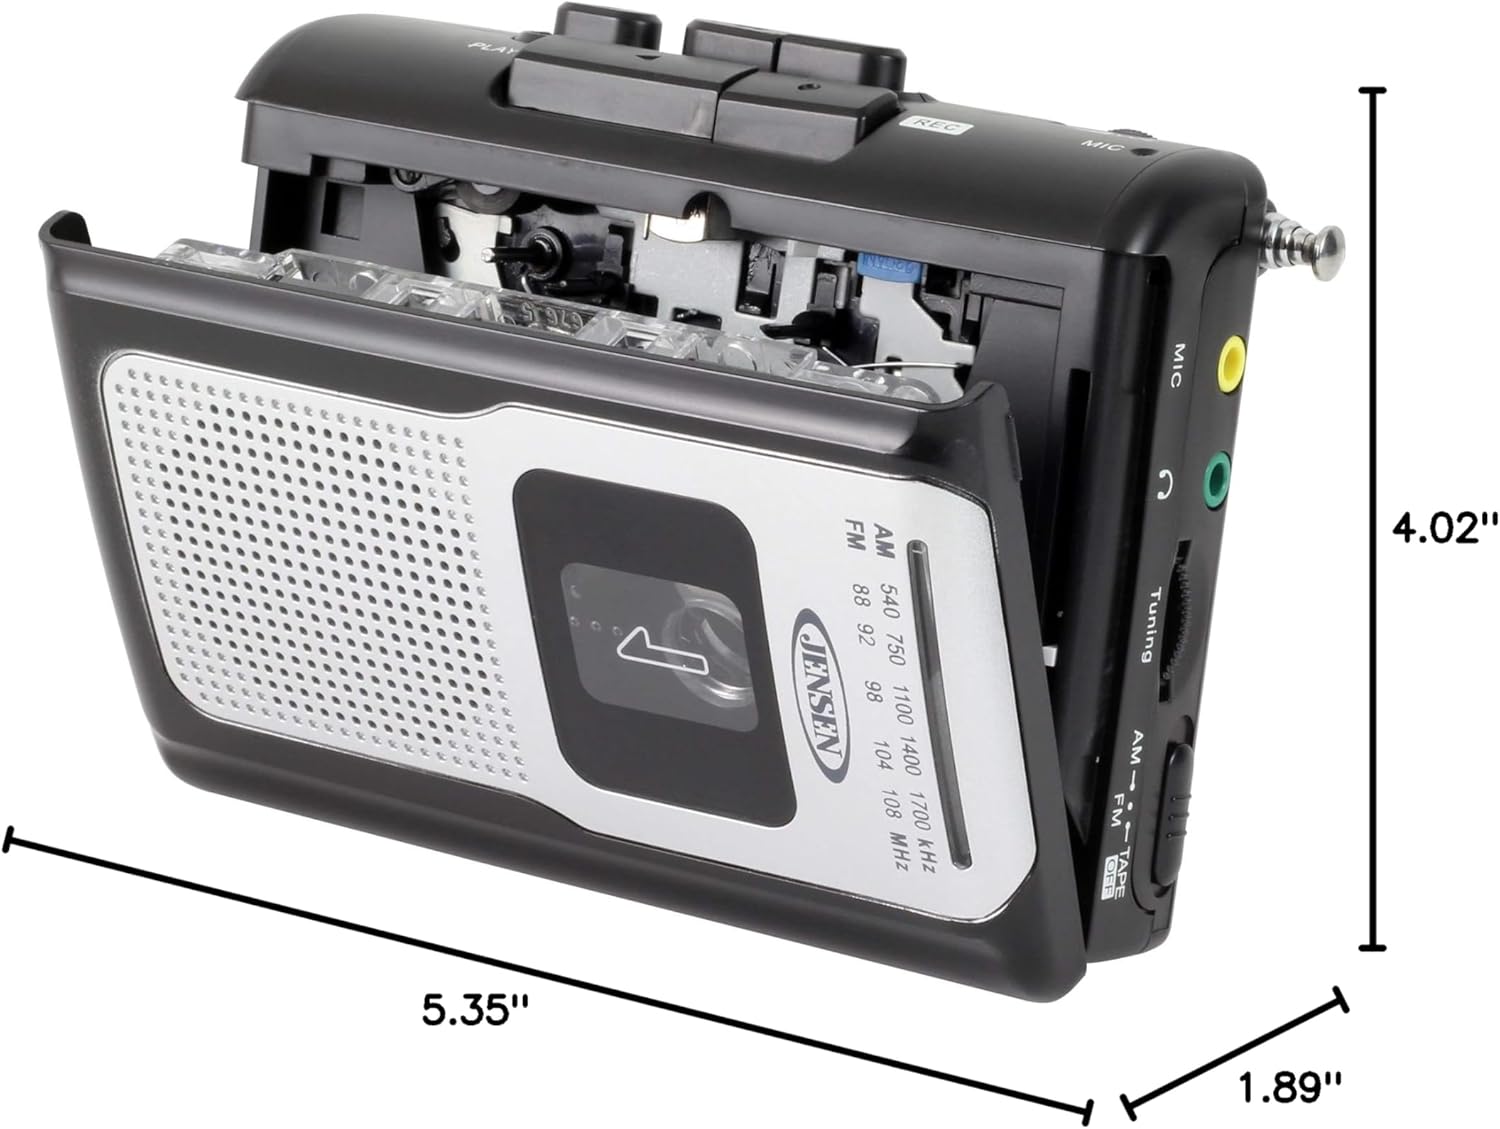
Figi 9.1: Dimansyon pwodwi a. This diagram illustrates the physical dimensions of the Jensen CR-100 unit.
10. Garanti ak sipò
Jensen products are designed and manufactured to the highest quality standards. For specific warranty information and customer support, please refer to the warranty card included with your purchase or visit the official Jensen websit la. Kenbe prèv acha ou pou reklamasyon garanti.
For technical assistance or service inquiries, please contact Jensen customer support through their official channels.