1. Entwodiksyon
Mèsi pou acha aasing the PRIMO PR501SV Cordless 3-in-1 Stick Vacuum Cleaner. This manual provides essential information for the safe and efficient use, maintenance, and troubleshooting of your appliance. Please read it thoroughly before first use and keep it for future reference.
2. Enstriksyon Sekirite
Pou diminye risk dife, chòk elektrik, oswa blesi, toujou swiv prekosyon sekirite debaz yo lè w ap itilize yon aparèy elektrik.
- Li tout enstriksyon yo anvan ou sèvi ak aparèy la.
- Pa itilize deyò oswa sou sifas mouye.
- Pa pèmèt yo itilize kòm yon jwèt. Li nesesè anpil atansyon lè yo itilize pa oswa tou pre timoun yo.
- Itilize sèlman jan sa dekri nan manyèl sa a. Sèvi ak sèlman atachman manifakti a rekòmande.
- Pa sèvi ak li avèk yon kòd oswa yon ploge ki domaje. Si aparèy la pa fonksyone jan li ta dwe, si li tonbe atè, domaje, kite deyò, oswa tonbe nan dlo, retounen li nan yon sant sèvis.
- Pa rale oswa pote pa kòd, sèvi ak kòd kòm yon manch, fèmen yon pòt sou kòd, oswa rale kòd alantou kwen byen file oswa kwen. Pa pase aparèy la sou kòd. Kenbe kòd lwen sifas ki chofe.
- Pa deploge rale sou kòd. Pou deploge, atrab ploge a, pa kòd la.
- Pa okipe ploge oswa aparèy ak men mouye.
- Pa mete okenn objè nan ouvèti yo. Pa sèvi ak nenpòt ouvèti bloke; pa gen pousyè, pèl, cheve, ak nenpòt bagay ki ka diminye koule lè a.
- Kenbe cheve, rad ki lach, dwèt, ak tout pati nan kò a lwen ouvèti ak pati k ap deplase.
- Pa ranmase anyen k ap boule oswa fimen, tankou sigarèt, alimèt, oswa sann cho.
- Pa itilize pou ranmase likid ki ka pran dife oswa ki ka pran dife, tankou gazolin, oswa itilize nan zòn kote yo ka prezan.
- Pa ranmase materyèl toksik (pa egzanp, klowòks, netwayaj amonyak, netwayaj drenaj).
- Pa itilize san gode pousyè tè ak/oswa filtè an plas.
- Fèmen tout kontwòl anvan debranche.
- Sèvi ak plis atansyon lè w ap netwaye sou eskalye.
- Pa sèvi avè l pou ranmase objè di oswa byen file tankou vè, klou, vis, pyès monnen, elatriye.
- Anpeche kòmanse envolontè. Asire w ke switch la nan pozisyon koupe anvan ou konekte ak pake batri, ranmase oswa pote aparèy la.
- Rechaje sèlman ak plato a espesifye pa manifakti a. Yon plato ki apwopriye pou yon kalite pake batri ka kreye yon risk dife lè yo itilize ak yon lòt pake batri.
- Nan kondisyon abizif, likid ka soti nan batri a; evite kontak. Si kontak aksidan rive, lave dlo. Si likid an kontak ak je, anplis chèche èd medikal. Likid ki soti nan batri a ka lakòz iritasyon oswa boule.
3. Pake kontni
Carefully unpack your PRIMO PR501SV and ensure all components are present and in good condition. Refer to the image below for identification.

Figi 3.1: Konpozan ki enkli
This image displays the main components of the PRIMO PR501SV vacuum cleaner: the motor unit with integrated dust reservoir, the long lightweight metallic tube, the motorized floor brush, a crevice tool for narrow spaces, a dusting brush for delicate surfaces, the power adapter for charging, and a wall mount for convenient storage.
- Motor Unit with Dust Reservoir (0.6 L capacity)
- Lightweight Metallic Tube
- Motè etaj bwòs
- Zouti Crevice
- Bwòs pousye
- Adaptè pouvwa
- Monte miray ak vis
4. Pwodwi souview
The PRIMO PR501SV is a versatile 3-in-1 cordless vacuum cleaner designed for various cleaning tasks. It can be configured as a stick vacuum, a handheld vacuum, or a crumb collector.

Figure 4.1: 3-in-1 Configurations
This image illustrates the three primary modes of the PR501SV: as a complete stick vacuum for floor cleaning, as a handheld unit equipped with the crevice tool for tight spots, and as a handheld unit with the dusting brush for upholstery or delicate surfaces. The wall mount is also visible, indicating a storage solution.
5. Enstalasyon ak Asanble
Swiv etap sa yo pou rasanble aspiratè ou a:
- Assemble the Stick Vacuum: Insert the metallic tube into the main motor unit until it clicks into place. Then, attach the motorized floor brush to the other end of the metallic tube, ensuring it is securely fastened.
- Konfigirasyon pòtab: To use as a handheld vacuum, detach the metallic tube and motorized floor brush from the motor unit. Attach either the crevice tool or the dusting brush directly to the motor unit's suction opening.
- Enstalasyon mòn miray la: Choose a suitable location near a power outlet. Use the provided screws to securely attach the wall mount to the wall. Ensure it is at a height that allows the vacuum to hang freely.

Figure 5.1: Wall Mount Storage
This image shows a user placing the assembled stick vacuum onto the wall mount, demonstrating how the appliance can be conveniently stored and charged when not in use.
6. Chaje batri a
The PRIMO PR501SV is powered by an 18.5V Lithium-ion battery. Before first use, fully charge the battery.
- Connect the power adapter to the charging port on the motor unit.
- Ploge adaptè a nan yon priz miray la.
- The battery indicator lights will illuminate during charging. A full charge typically takes 4-5 hours.
- Once fully charged, the indicator lights will show a full battery level. Disconnect the charger.

Figure 6.1: Battery Indicator and Runtime
This close-up image displays the battery charge indicator on the vacuum cleaner. It shows two modes: 'MAX-R' (Max Power) offering approximately 20 minutes of runtime, and 'ECO-G' (Eco Mode) providing around 40 minutes of runtime, indicating the battery's endurance based on the selected power setting.
7. Operasyon Enstriksyon
Your vacuum cleaner offers two speed settings and multiple configurations for versatile cleaning.
7.1. Power On/Off and Speed Settings
- Press the power button once to turn on the vacuum in ECO mode.
- Press the power button a second time to switch to MAX power mode.
- Peze bouton pouvwa a yon twazyèm fwa pou fèmen vakyòm lan.
7.2. Stick Vacuum Mode
Use this mode for cleaning floors, carpets, and larger areas.
- Ensure the metallic tube and motorized floor brush are securely attached to the motor unit.
- Select the desired power mode (ECO or MAX).
- Guide the vacuum over the surface to be cleaned. The motorized brush helps agitate dirt for effective cleaning.

Figure 7.1: Agile and Flexible Cleaning
This image highlights the vacuum's maneuverability, showing it easily reaching under furniture like a sofa. The design allows for a 180-degree swivel, making it agile and flexible for cleaning hard-to-reach areas.
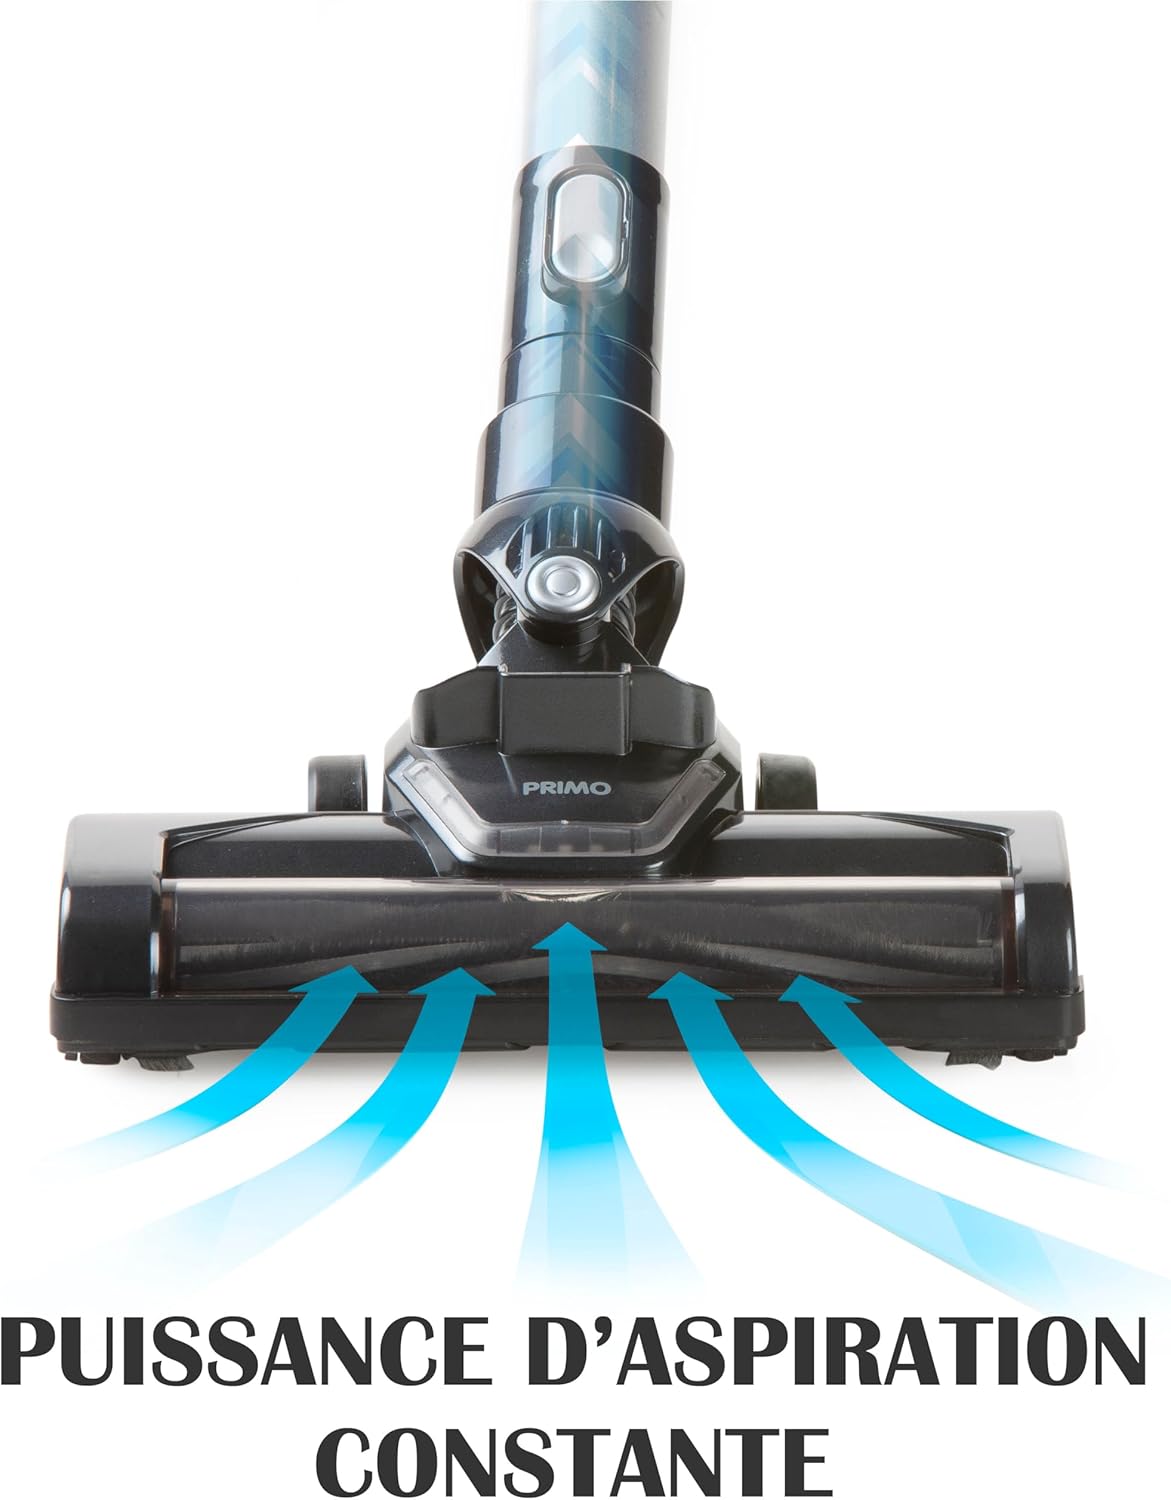
Figure 7.2: Constant Suction Power
This graphic illustrates the consistent and powerful suction generated by the vacuum's floor brush. Blue arrows depict the airflow, demonstrating how dirt and debris are effectively drawn into the vacuum head for thorough cleaning.
7.3. Handheld Vacuum Mode
Ideal for cleaning upholstery, car interiors, stairs, and small spills.
- Detach the metallic tube and motorized floor brush from the motor unit.
- Attach the crevice tool for narrow gaps or the dusting brush for surfaces like curtains or keyboards.
- Turn on the vacuum and clean the desired area.

Figure 7.3: Handheld Cleaning on Upholstery
This image shows the PRIMO PR501SV being used as a handheld vacuum to clean a sofa. It highlights the convenience and effectiveness of this mode for cleaning furniture and other elevated surfaces.
8. Antretyen
Antretyen regilye asire pèfòmans optimal epi pwolonje lavi aspiratè ou a.
8.1. Vide Rezèvwa Pousyè a
Empty the 0.6 L dust reservoir regularly, especially when it reaches the 'MAX' line.
- Asire w ke aspiratè a etenn.
- Press the release button on the dust reservoir to detach it from the motor unit.
- Hold the dust reservoir over a trash bin and open the bottom flap to empty the contents.
- Close the flap and reattach the dust reservoir to the motor unit until it clicks securely.

Figure 8.1: Easy Dust Reservoir Emptying
This image illustrates the simple process of detaching the 0.6-liter dust reservoir from the main unit for emptying. The design allows for quick and hygienic disposal of collected debris.
8.2. Netwaye Filtè HEPA a
The HEPA 13 filter retains 99.95% of dust particles. Clean it regularly to maintain suction power.
- Remove the dust reservoir as described above.
- Carefully remove the HEPA filter from inside the dust reservoir.
- Tape filtè a dousman sou yon bwat fatra pou retire pousyè ki lach la.
- If heavily soiled, rinse the filter under running water. Ensure it is completely dry before reinserting. Do not use detergents or hot water.
- Reinsert the dry HEPA filter into the dust reservoir and reattach the reservoir to the motor unit.
8.3. Cleaning the Motorized Floor Brush
Hair and debris can get tangled in the brush roll, affecting performance.
- Ensure the vacuum is turned off and disconnected from the metallic tube.
- Locate the release mechanism on the side of the motorized brush head.
- Remove the brush roll from the housing.
- Use scissors or a brush to remove any tangled hair or debris from the brush roll.
- Reinsert the clean brush roll and secure it in place.
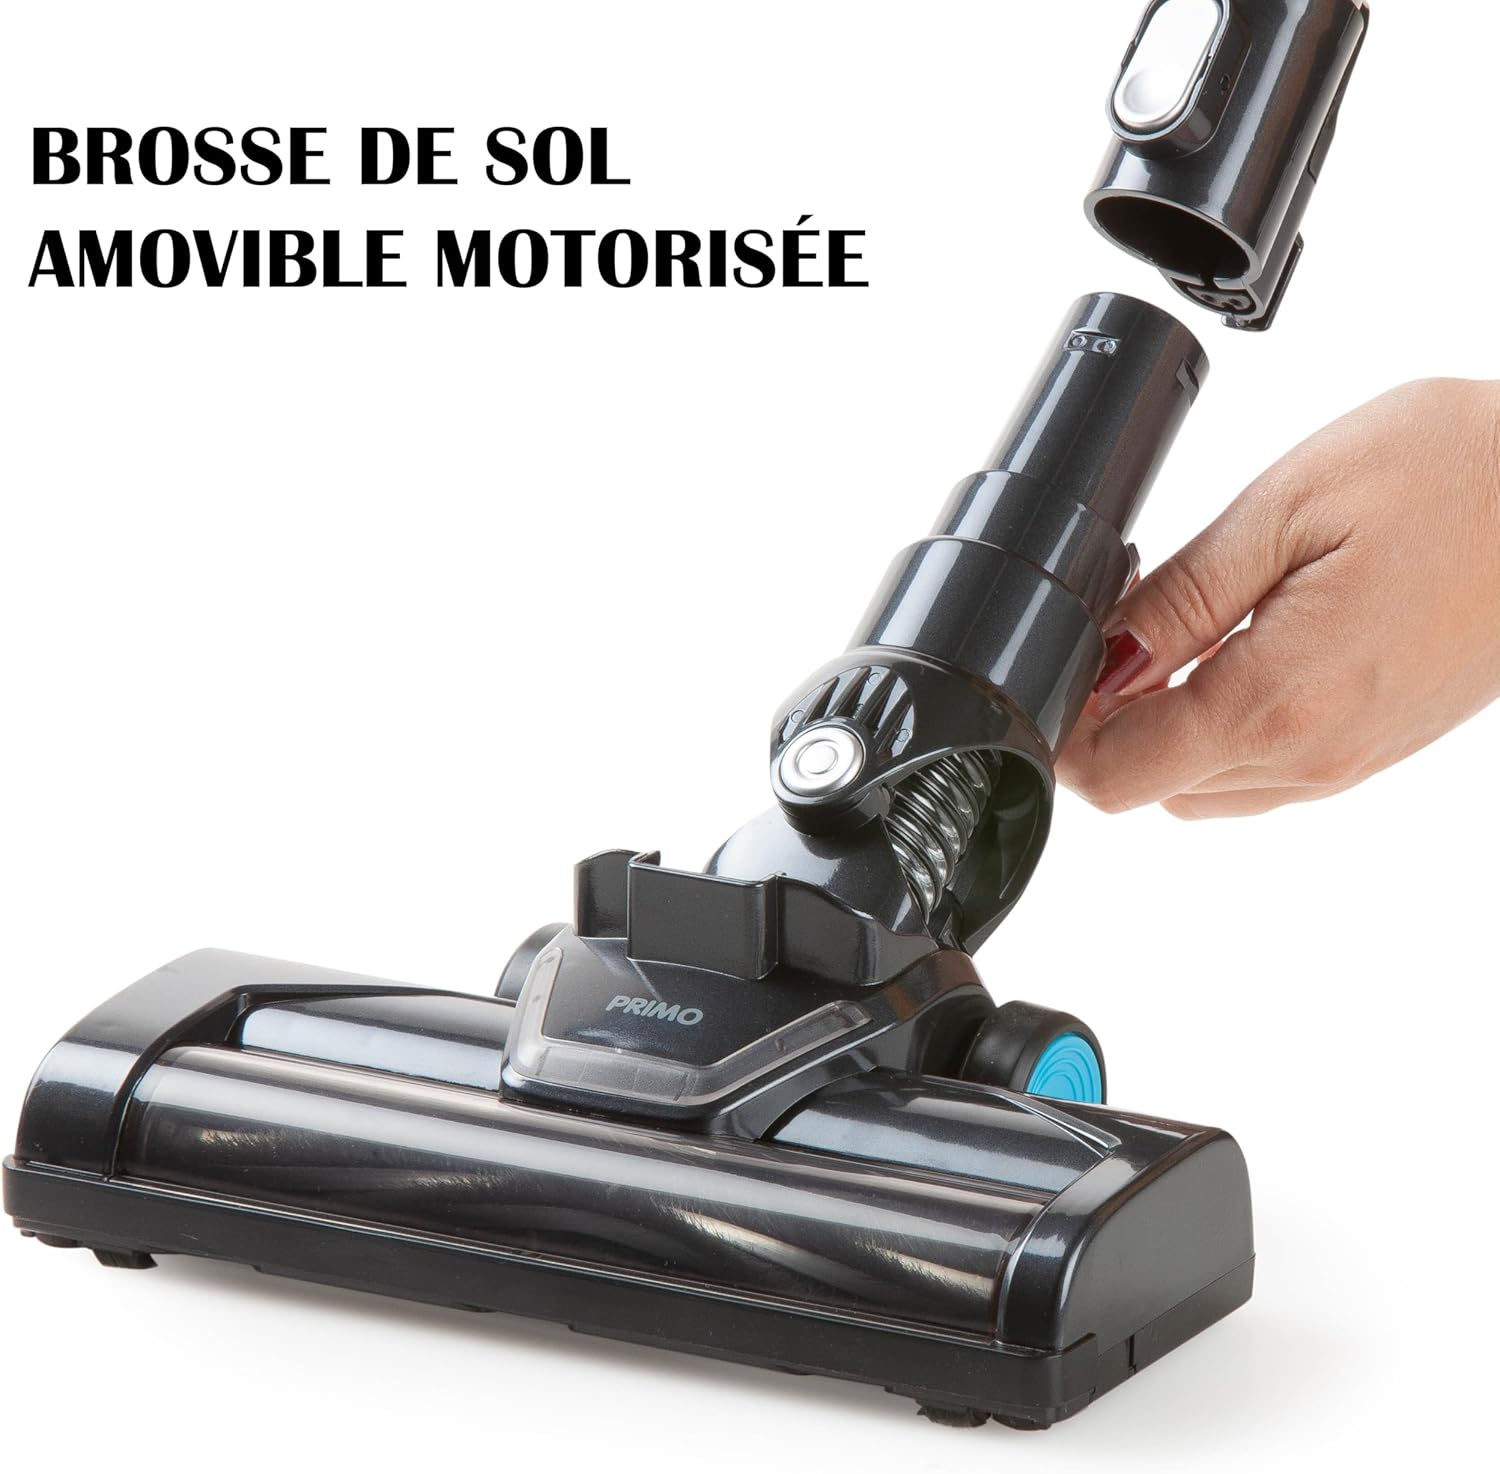
Figure 8.2: Removable Motorized Floor Brush
This image shows the motorized floor brush being detached from the vacuum's main body. This feature allows for easy access to the brush roll for cleaning tangled hair and debris, ensuring consistent performance.
NAN. Depanaj
If you encounter issues with your PRIMO PR501SV, refer to the following common problems and solutions:
| Pwoblèm | Kòz posib | Solisyon |
|---|---|---|
| Vacuum pa limen | Batri egzeyate Bouton pouvwa a pa peze kòrèkteman | Chaje batri a konplètman Peze bouton pouvwa a byen fèm |
| Ba pouvwa pou aspirasyon | Dust reservoir is full Filtè a bouche Woulo bwòs la mele Nozzle/tube is blocked | Empty the dust reservoir Netwaye filtè HEPA a Clean the motorized brush roll Check and clear any blockages in the nozzle or tube |
| Bwòs motè a pa vire | Woulo bwòs la mele Connection to main unit is loose | Netwaye woulo bwòs la Ensure the brush head is securely attached to the tube or motor unit |
| Kout tan batri | Batri pa konplètman chaje Using MAX power mode continuously Degradasyon batri | Asire w ke batri a byen chaje (4-5 èdtan) Use ECO mode for longer runtime Contact customer support if battery life significantly decreases over time |
Si pwoblèm nan pèsiste apre ou fin eseye solisyon sa yo, tanpri kontakte sèvis kliyan.
10. Espesifikasyon
| Karakteristik | Spesifikasyon |
|---|---|
| Nimewo Modèl | PR501SV |
| Mak | PRIMO |
| Kalite | Aspiratè baton san fil 3-an-1 |
| Batri | 18.5V Lityòm-ion |
| Tan pou chaje | 4-5 èdtan |
| Runtime (ECO mode) | Apeprè. 40 minit |
| Runtime (MAX power) | Apeprè. 20 minit |
| Kapasite Rezèvwa Pousyè | 0.6 lit |
| Kalite filtre | HEPA 13 |
| Kantite vitès | 2 |
| Nivo bri | 75 dB |
| Pwa | 2 Kilogram |
| Dimansyon (L x W x H) | 16 x 23 x 113 cm |
| Sifas rekòmande | Planche difisil |
| Konpozan ki enkli | Motor unit, metallic tube, motorized floor brush, crevice tool, dusting brush, power adapter, wall mount |
11. Garanti ak sipò
For warranty information and customer support, please refer to the warranty card included with your purchase or visit the official PRIMO websit la. Kenbe prèv acha ou a pou nenpòt reklamasyon garanti.