1. Entwodiksyon
Thank you for choosing the Sharkoon CA300T ATX PC Case. This full tower case is designed for high-performance gaming systems, offering extensive compatibility, efficient cooling, and advanced cable management features. This manual provides essential information for the proper setup, operation, and maintenance of your new PC case.
2. Enfòmasyon sou Sekirite
- Always disconnect the power supply from the wall outlet before installing or removing any components inside the PC case.
- Handle components with care to avoid damage from electrostatic discharge. Consider using an anti-static wrist strap.
- Kenbe ti pyès ak materyèl anbalaj lwen timoun yo.
- Avoid placing the PC case in direct sunlight, near heat sources, or in environments with high humidity.
- Do not attempt to modify the case structure, as this may void your warranty and cause damage.
3. Pake kontni
Tanpri verifye sa ki nan pake a pou asire w tout atik yo la:
- Sharkoon CA300T ATX PC ka
- Accessory box (screws, cable ties, standoffs, etc.)
- RGB lighting controller (if applicable)
- Manyèl Enstriksyon (dokiman sa a)
4. Pwodwi souview ak Karakteristik
The Sharkoon CA300T is a premium full tower ATX PC case designed for enthusiasts. It features a modern design with robust construction, tempered glass panels, and advanced cooling options.
Karakteristik kle:
- Full Tower Design: Ample space for high-end components and custom liquid cooling solutions.
- Panno an vè apeze: Side panels made of tempered glass for a clear view nan konpozan entèn yo.
- Ekleraj RGB: Integrated RGB lighting for customizable aesthetics.
- Sikilasyon lè optimize: Includes three 120mm fans and supports multiple radiators for superior cooling.
- Advanced Cable Management: Features an openable cable pocket/channel and ample routing options for a clean build.
- Filtè Pousyè: Three-layer top plate with a dust filter to maintain system cleanliness.
- Koneksyon anpil: Front panel includes 2x USB 3.0 ports and additional USB ports.
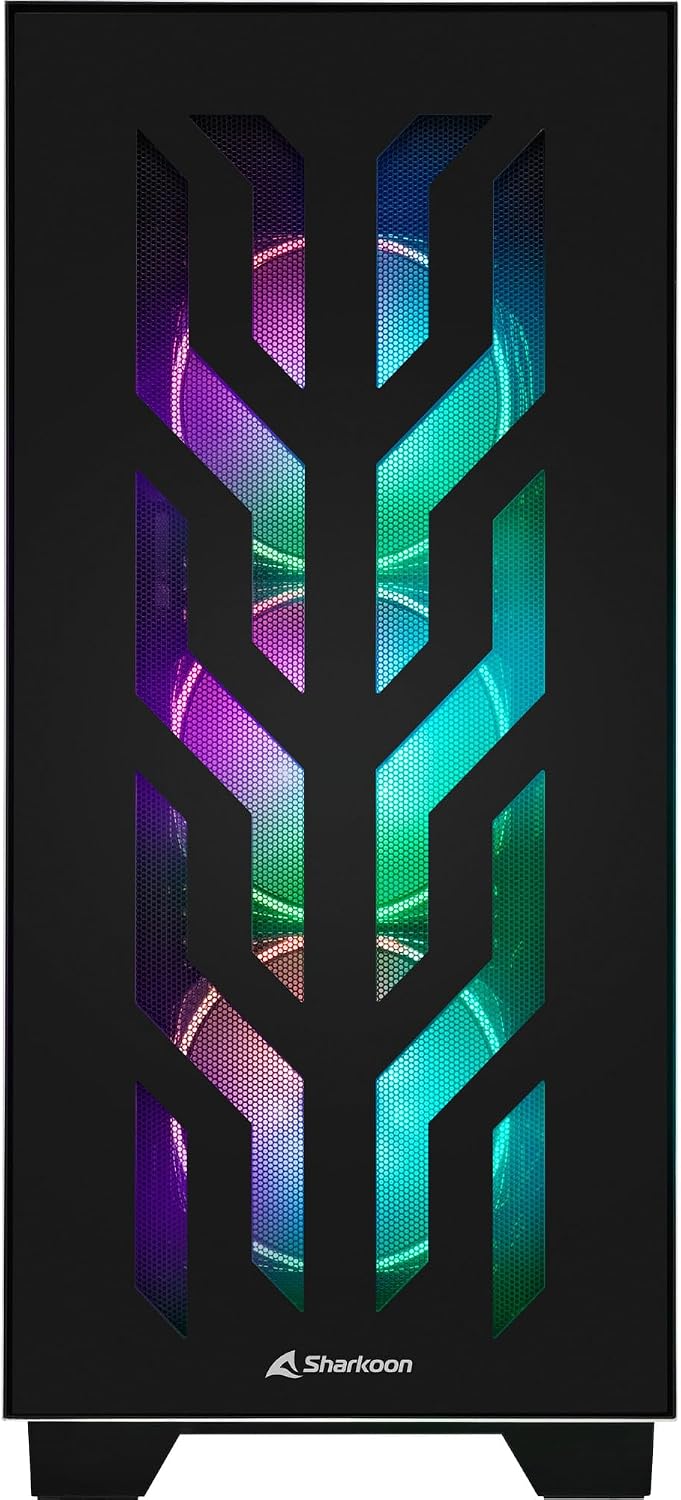
Figi 4.1: Devan view of the Sharkoon CA300T PC case, showcasing the illuminated RGB fans behind the mesh panel.
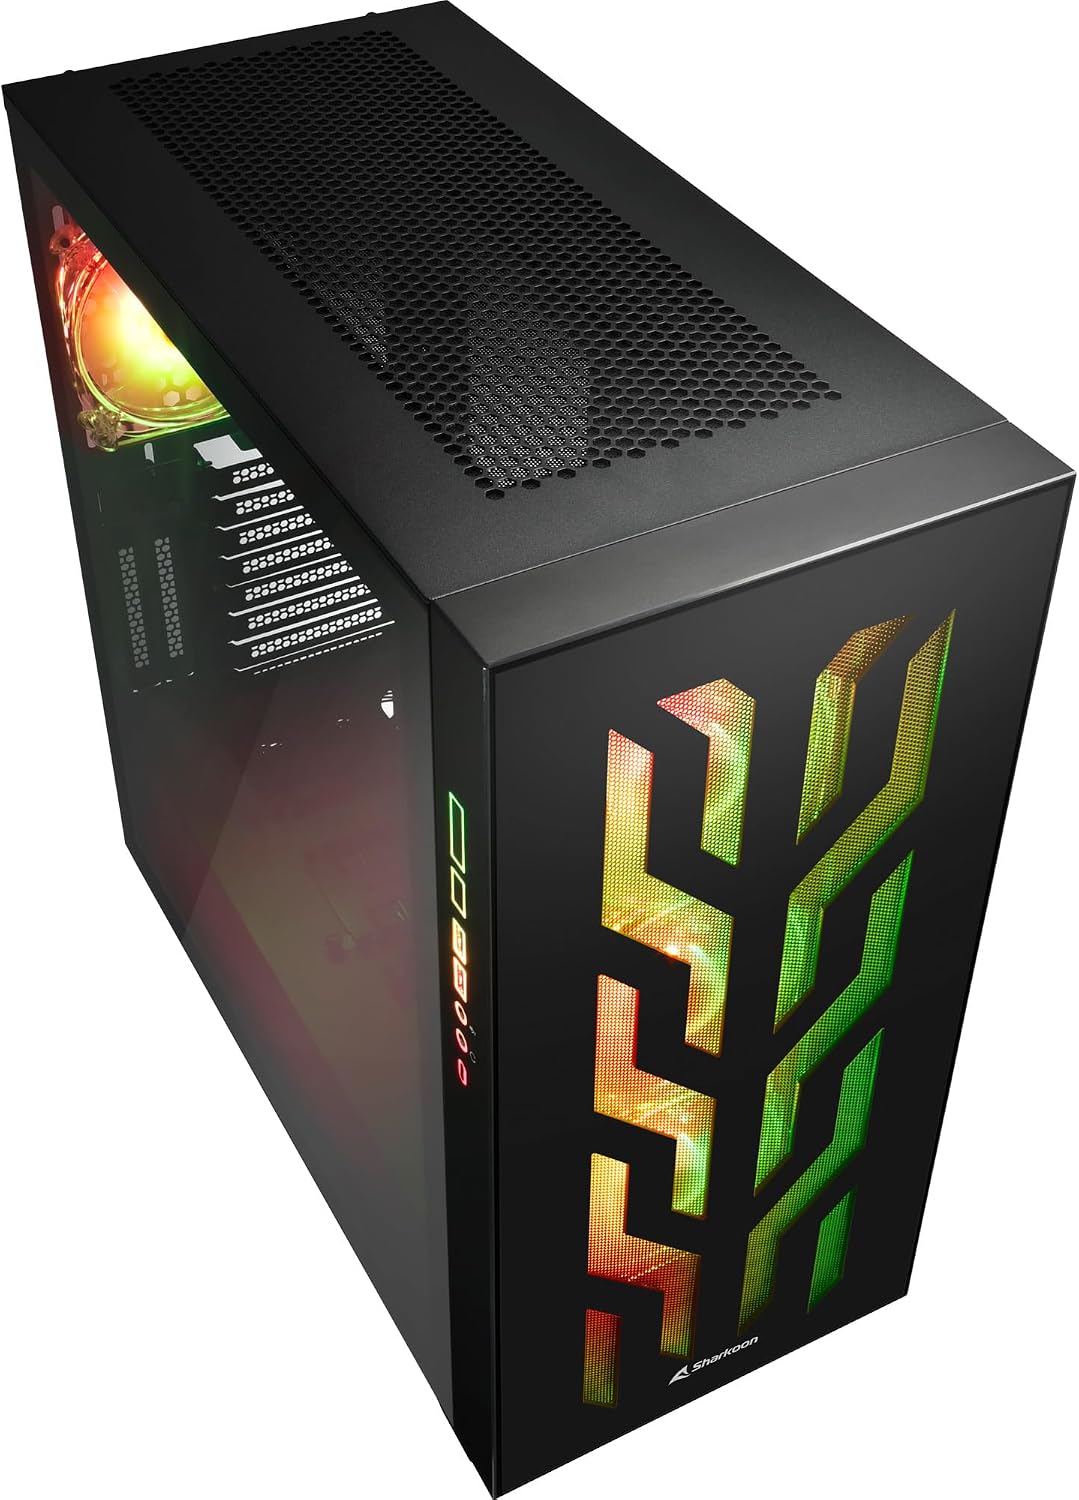
Figi 4.2: Angle view of the Sharkoon CA300T PC case, showing the tempered glass side panel and the vibrant RGB lighting from the interior.
5. Enstalasyon
5.1 Debake
- Retire bwat òdinatè a nan anbalaj li avèk prekosyon.
- Inspect the case for any signs of damage during transit. Contact your retailer if any damage is found.
- Locate the accessory box inside the case, which contains screws and other installation hardware.
5.2 Retire Panno Lateral yo
The Sharkoon CA300T features tempered glass side panels for easy access to components.
- Locate the two screws on the rear of the case securing the side panel.
- Devise de vis sa yo.
- Gently pull the panel upwards and away from the case to remove it. Repeat for the other side if necessary.

Figi 5.1: Enteryè view of the Sharkoon CA300T PC case, showing the main compartment with the left tempered glass panel removed, ready for component installation.

Figi 5.2: Enteryè view of the Sharkoon CA300T PC case with the left side panel completely removed, exposing the motherboard tray and various mounting points.
5.3 Enstalasyon mèr
- Install the necessary standoffs onto the motherboard tray according to your ATX motherboard's screw holes.
- Carefully place your ATX motherboard onto the standoffs, aligning the screw holes.
- Sere kat manman an byen sere ak vis yo bay yo.
5.4 Enstalasyon Power Supply Unit (PSU).
The CA300T supports bottom-mounted power supplies.
- Glise PSU a nan konpatiman ki fèt pou li a, anba dèyè bwat la.
- Secure the PSU to the case with screws from the rear.
5.5 Enstalasyon kondwi
The case provides internal bays for 3.5-inch and 2.5-inch drives.
- Locate the drive cages or mounting points for your 3.5-inch or 2.5-inch drives.
- Mount your drives using the appropriate screws or tool-less mechanisms.
5.6 Enstalasyon Kat Grafik ak Kat Ekspansyon
The case offers multiple expansion slots and supports vertical GPU mounting.
- Retire kouvèti fant ekspansyon ki nesesè yo nan dèyè bwat la.
- Insert your graphics card or other expansion cards into the PCIe slots on your motherboard.
- Secure the cards with screws. For vertical GPU mounting, an additional riser cable (not included) is required.
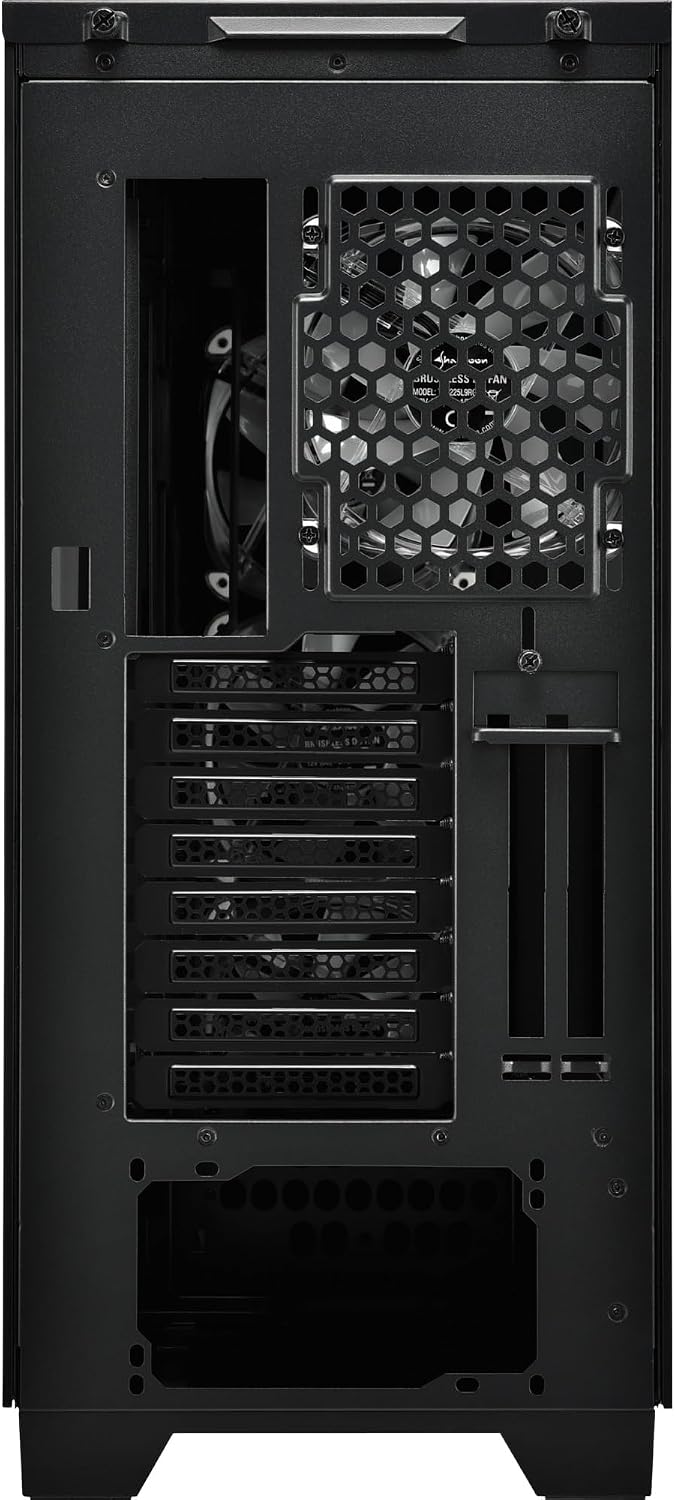
Figi 5.3: Dèyè view of the Sharkoon CA300T PC case, illustrating the expansion slots, rear fan mount, and PSU opening.
5.7 Jesyon kab
Utilize the cable routing channels and tie-down points behind the motherboard tray to organize cables for improved airflow and aesthetics.

Figi 5.4: Enteryè dèyè view of the Sharkoon CA300T PC case, highlighting the dedicated cable management area behind the motherboard tray.
6. Opere
6.1 Power On/Off
After all components are installed and cables are connected, press the power button on the front panel to turn on your system. Press it again to turn off, or use your operating system's shutdown function.
6.2 Kontwòl ekleraj RGB
The integrated RGB lighting can be controlled via the dedicated RGB controller (if included) or through compatible motherboard software, depending on how the RGB components are connected. Refer to your motherboard manual for software control options.
7. Antretyen
7.1 Netwayaj Filtè Pousyè yo
The Sharkoon CA300T features a three-layer top plate with a dust filter. Regularly clean all dust filters to maintain optimal airflow and cooling performance.
- Turn off and unplug your PC.
- Carefully remove the dust filters (e.g., from the top, front, and bottom).
- Clean the filters using compressed air or by gently washing them with water. Ensure they are completely dry before reinstallation.
7.2 Swen Jeneral
- Siye deyò bwat la ak yon twal mou, damp twal. Evite pwodui netwayaj abrazif.
- Ensure all cables are securely connected and not obstructing airflow.
NAN. Depanaj
Si ou rankontre pwoblèm ak konfigirasyon PC ou a, konsidere etap depanaj komen sa yo:
- Pa gen pouvwa: Ensure the power supply is properly connected to the wall outlet and the motherboard. Check all power cables (24-pin, CPU, GPU).
- Vantilatè yo pa vire: Verify that all fan headers are correctly connected to the motherboard or fan controller. Check BIOS settings for fan control.
- Pa gen ekspozisyon: Confirm that your monitor is connected to the graphics card (not the motherboard's integrated graphics, unless intended). Reseat the graphics card and RAM modules.
- RGB Not Working: Check RGB cable connections to the motherboard or controller. Ensure any necessary software is installed and configured.
- Surchof: Ensure all fans are spinning correctly and dust filters are clean. Verify proper thermal paste application on the CPU cooler.
For more complex issues, consult the manuals for your individual components (motherboard, GPU, PSU) or seek professional assistance.
9. Espesifikasyon
| Karakteristik | Spesifikasyon |
|---|---|
| Mak | Sharkoon |
| Non modèl | CA300T |
| Kalite Ka | Full Tower |
| Mèr konpatibilite | ATX |
| Itilizasyon Rekòmande | Gaming |
| Koulè | Nwa |
| Materyèl | Metal |
| Power Supply Mount Type | Anba mòn |
| Metòd refwadisman | Air |
| Gwosè fanatik | 120 mm |
| Kantite Fanatik | 3 |
| Total Expansion Slots | 4 |
| Total USB 3.0 Ports | 2 |
| Total pò USB | 3 |
| Karakteristik espesyal | RGB Lighting, Openable Cable Pocket, Three-layer Top Plate with Dust Filter |
| HDD Bay Size | 3.5 pous |
| Number of Internal Bays | 4 |
| Aparèy konpatib | ATX Motherboards, 3.5-inch Hard Drives |
| Koulè limyè | RGB |
| Pwa atik | 14.7 Kilogram |
10. Garanti
The Sharkoon CA300T PC Case comes with a Garanti manifakti 2 zan. Please retain your proof of purchase for warranty claims. The warranty covers defects in materials and workmanship under normal use. It does not cover damage caused by misuse, accidents, unauthorized modifications, or improper installation.
11. Sipò
For technical support, warranty inquiries, or further assistance, please visit the official Sharkoon website or contact their customer service department. You may find contact information and FAQs on their support pages.
Ofisyèl Websit: www.sharkoon.com