
1. Entwodiksyon
The GameMax Expedition is a compact Micro ATX PC gaming case designed for efficient cooling and component compatibility. This manual provides instructions for the proper installation, operation, and maintenance of your PC case.

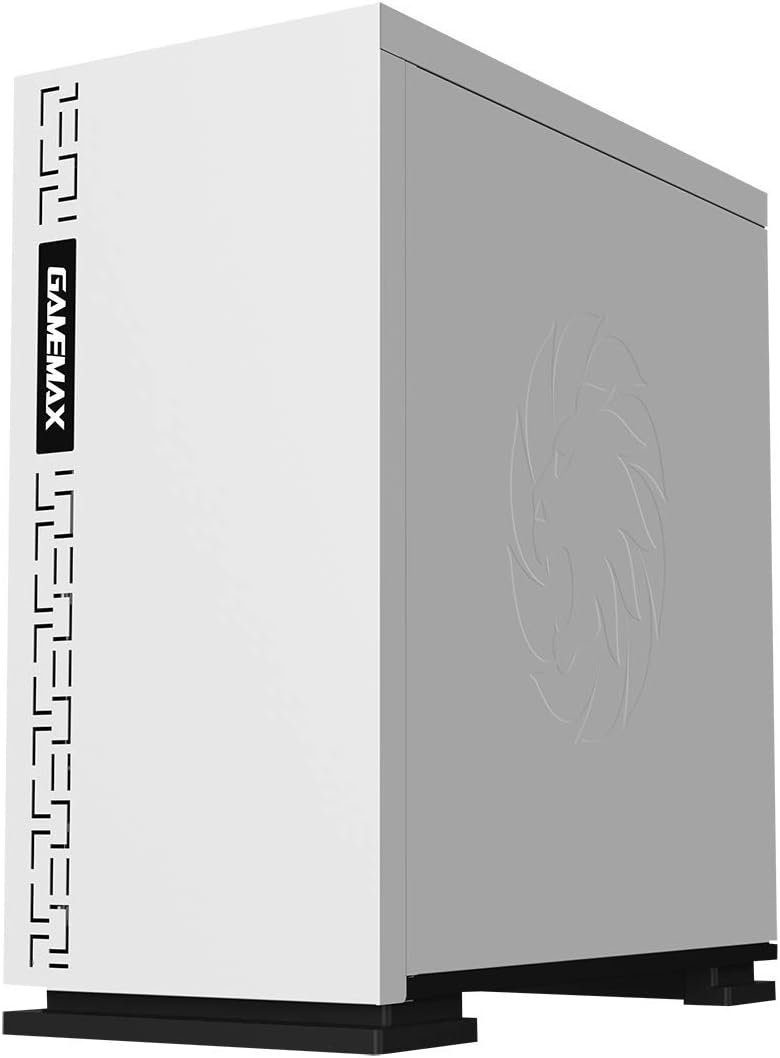
Figure 1.1: GameMax Expedition MATX PC Gaming Case, White.
2. Enfòmasyon sou Sekirite
- Toujou dekonekte kouran an nan tout konpozan anvan enstalasyon oswa antretyen.
- Mete yon braslè ponyèt anti-estatik pou anpeche domaj akòz dechaj elektwostatik (ESD) sou konpozan yo.
- Be cautious of sharp edges inside the chassis.
- Kenbe ti pyès ak vis lwen timoun yo.
- Ensure proper ventilation around the case during operation.
3. Pake kontni
Verifye ke tout atik yo prezan nan pakè a:
- GameMax Expedition MATX PC Gaming Case
- Bwat akseswa (vis, distansè, lyen kab)
- 1 x 120mm Blue LED Fan (pre-installed at rear)
- Manyèl Itilizatè (dokiman sa a)
4. Pwodwi Features
- Micro Gaming Chassis: Compact design optimized for gaming components.
- Pò I/O: 1 x USB 3.0, 2 x USB 2.0, and HD Audio ports located on the top panel.
- Refwadisman: Includes 1 x 120mm Blue LED fan. Supports additional fans for enhanced airflow.
- Side Window: Full side window panel allows visibility of internal components.
- Magnetic Dust Filter: Removable dust filter on the top panel for easy cleaning and improved system longevity.
- GPU Bracket: Integrated bracket provides support for graphics cards, preventing sag and accommodating larger cards.
5. Konpozan souview
5.1 Ekstèn Views

Figure 5.1: Front panel design with air intake and included 120mm fan illustration.

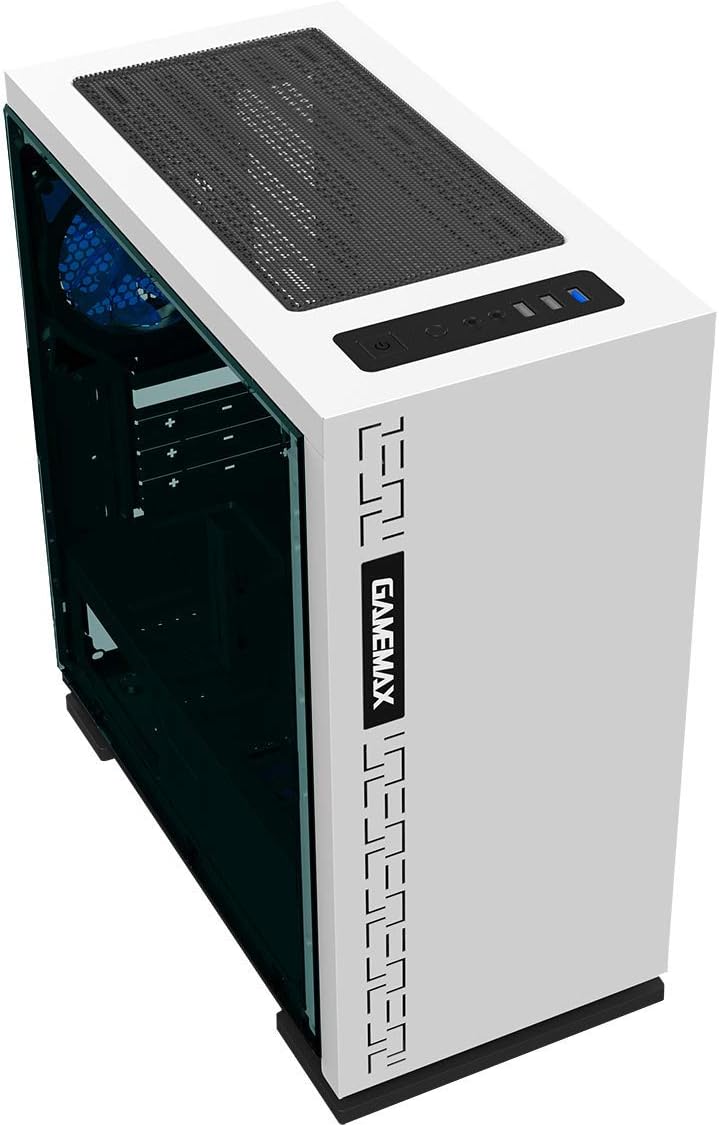
Figure 5.2: Top I/O panel featuring USB 3.0, USB 2.0, and audio ports.
Figi 5.3: Top view showing the magnetic dust filter for fan ventilation.
Figi 5.4: Dèyè view displaying expansion slots and the pre-installed 120mm fan.
5.2 Aranjman Entèn

Figi 5.5: Entèn view with the side panel removed, showing the motherboard tray and cable routing options.

Figure 5.6: Illustration of fan and radiator mounting points within the chassis.
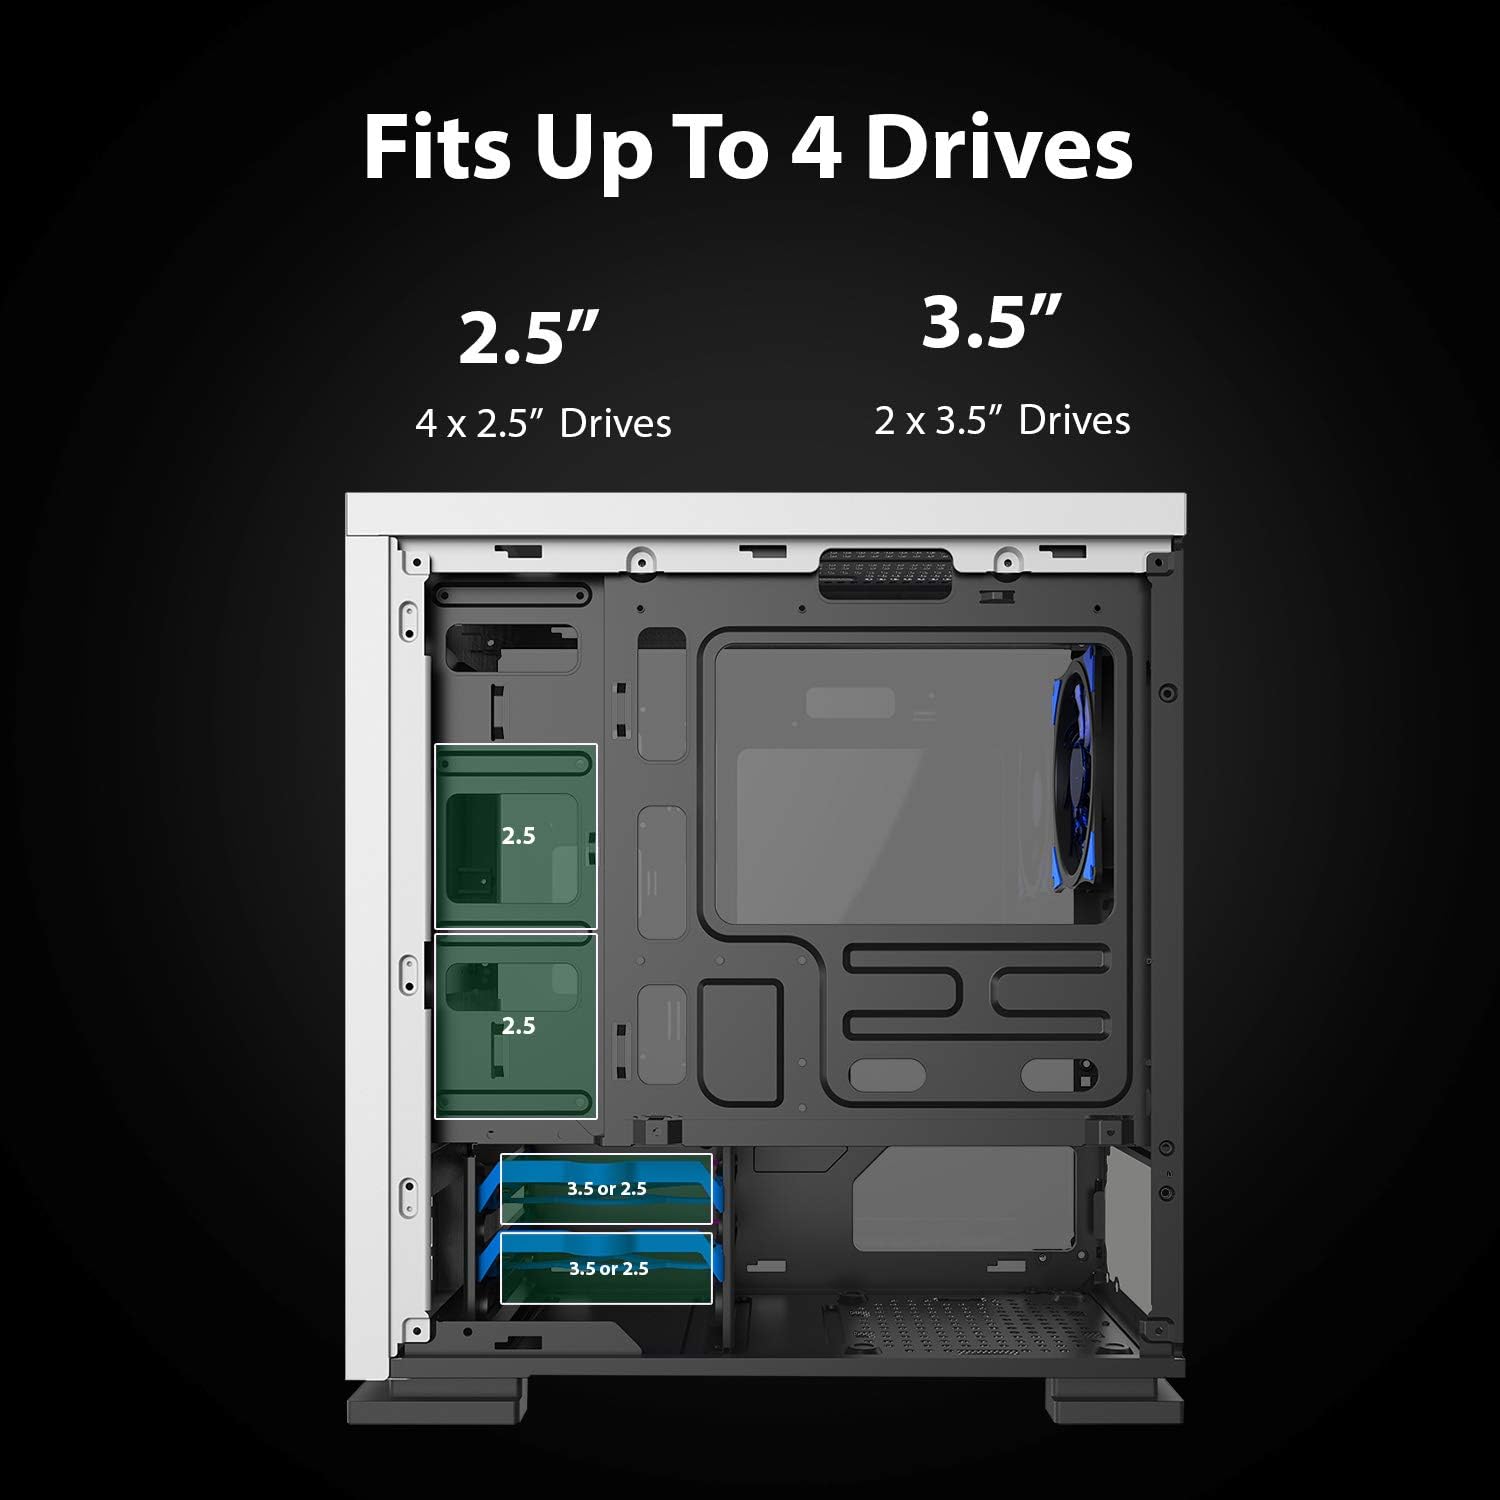
Figure 5.7: Drive bay locations supporting 2.5" and 3.5" storage devices.
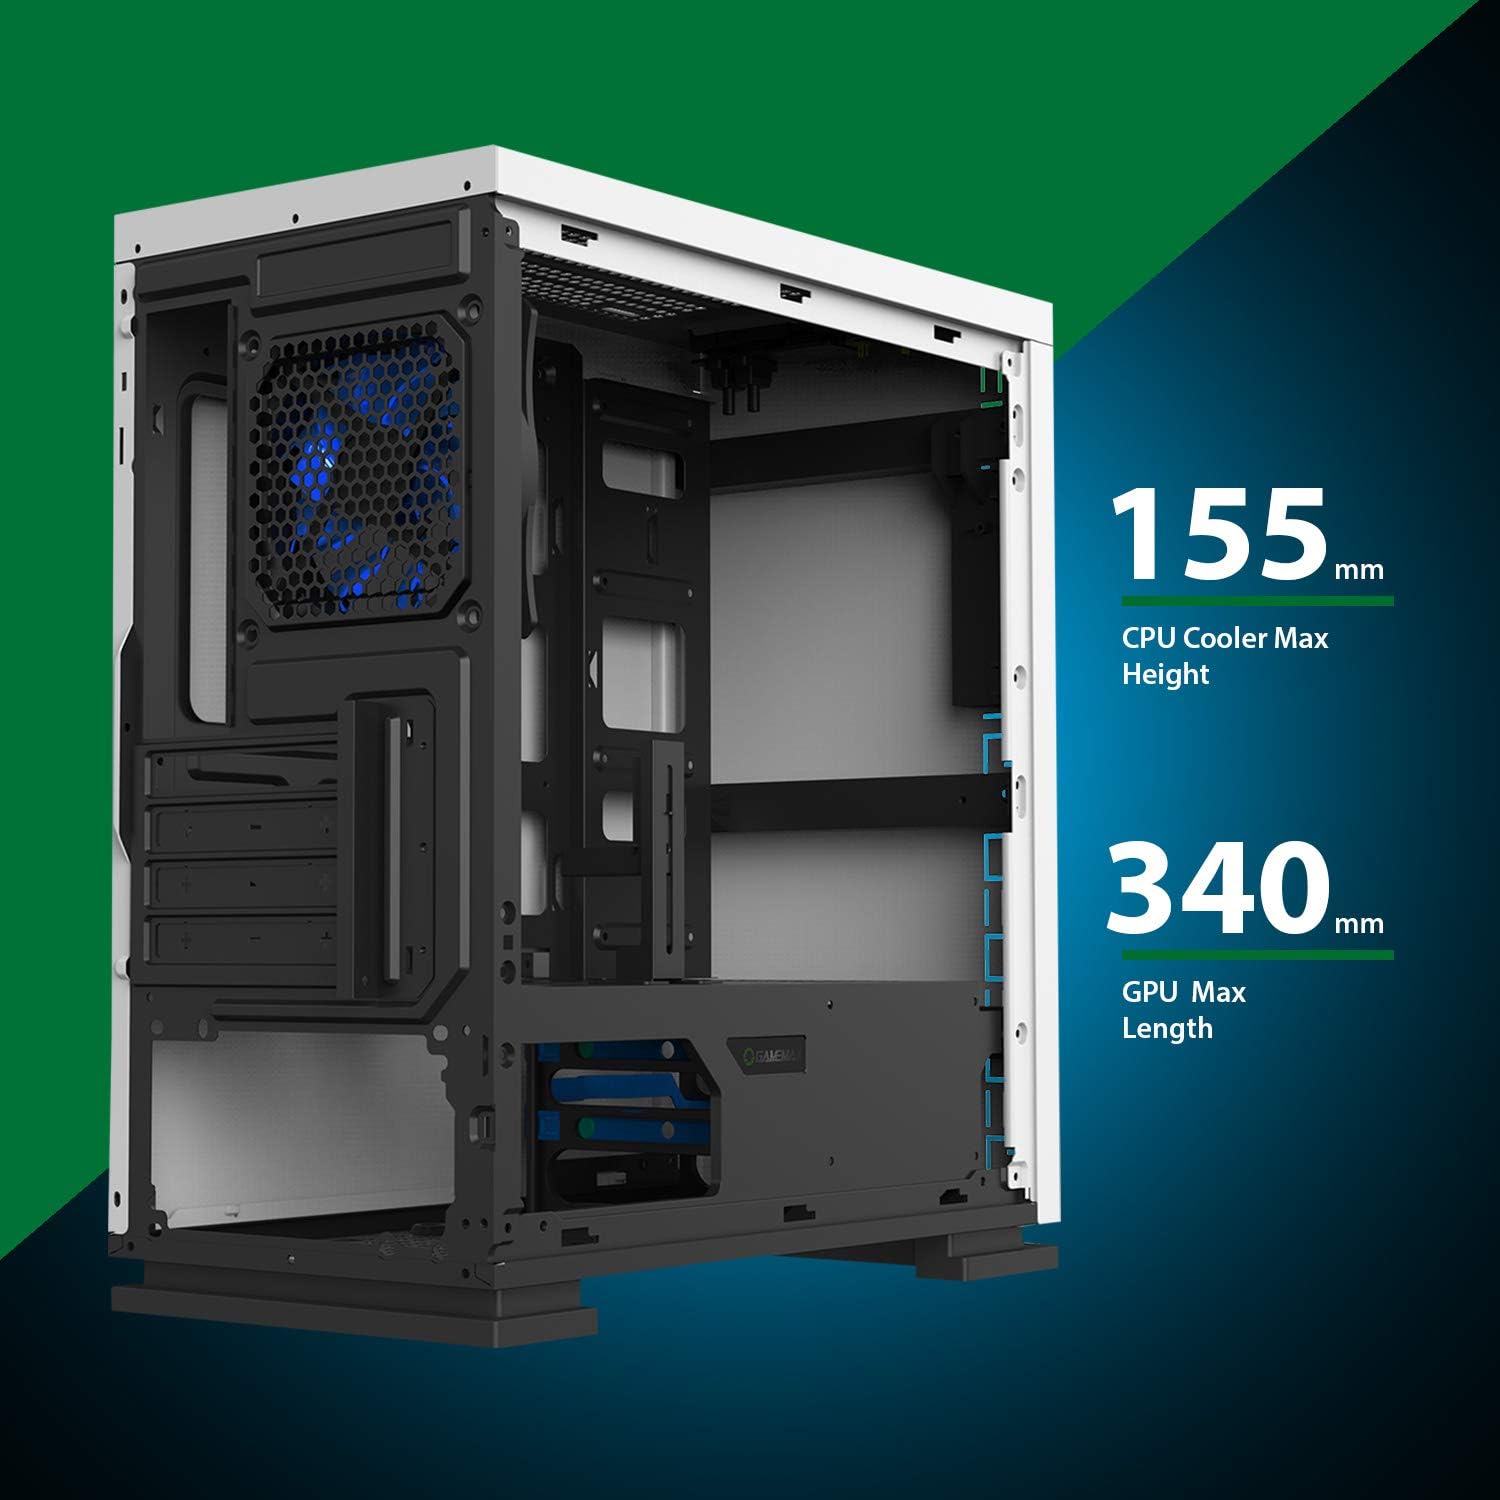
Figure 5.8: Maximum clearance for CPU coolers (155mm) and GPUs (340mm).
6. Enstalasyon ak Enstalasyon
6.1 Preparasyon
- Unpack the chassis and remove all packaging materials.
- Remove the side panels by unscrewing the thumbscrews at the rear.
- Gather necessary tools: Phillips head screwdriver, cable ties.
6.2 Enstalasyon mèr
- Install the I/O shield into the rear opening of the chassis.
- Align the motherboard with the pre-installed standoffs. Ensure the standoffs match your Micro ATX motherboard's mounting holes.
- Sere kat manman an byen sere ak vis yo bay yo.
6.3 Enstalasyon ekipman pou pouvwa a
- Place the power supply unit (PSU) into the dedicated compartment at the bottom rear of the case.
- Align the PSU with the screw holes on the rear of the chassis.
- Secure the PSU with the provided screws.
6.4 Enstalasyon Disk Depo
- Disques 2.5" yo: Mount 2.5" SSDs/HDDs to the dedicated mounting points on the motherboard tray or within the drive cage using the provided screws.
- Disques 3.5" yo: Install 3.5" HDDs into the drive cage located beneath the PSU shroud. Slide the drive into the tray and secure it.
6.5 Expansion Card (GPU) Installation
- Retire kouvèti fant ekspansyon ki nesesè yo nan dèyè chasi a.
- Insert your graphics card or other expansion card into the appropriate PCIe slot on the motherboard.
- Secure the card with a screw.
- Utilize the adjustable GPU bracket to provide additional support for heavier graphics cards.
6.6 Fan and Cooling Installation
- The case comes with one 120mm Blue LED fan pre-installed at the rear.
- Additional 120mm fans can be installed at the top and front positions as needed.
- Ensure fans are oriented correctly for optimal airflow (intake or exhaust).
6.7 Front Panel Connector Installation
Connect the front panel cables (USB 3.0, USB 2.0, HD Audio, Power SW, Reset SW, Power LED, HDD LED) to their corresponding headers on your motherboard. Refer to your motherboard manual for exact pin layouts.
7. Opere
Once all components are installed and cables are connected, replace the side panels. Connect your monitor, keyboard, mouse, and power cable. Press the power button on the top panel to start your system. The pre-installed LED fan will illuminate upon power-on.
8. Antretyen
- Netwayaj Filtè Pousyè: Regularly remove and clean the magnetic dust filter located on the top panel to maintain optimal airflow and prevent dust buildup inside the case.
- Netwayaj jeneral: Sèvi ak yon mou, damp cloth to clean the exterior surfaces of the case. Avoid abrasive cleaners.
- Retire pousyè entèn: Periodically use compressed air to clear dust from internal components and fans. Ensure the system is powered off and unplugged before performing internal cleaning.
NAN. Depanaj
- Sistèm nan pa limen: Check all power connections, including the PSU to the wall outlet, PSU to motherboard, and front panel power switch cable to the motherboard.
- Vantilatè yo pa vire: Verify fan cables are securely connected to the motherboard or fan controller.
- Pò USB pa travay: Ensure the front panel USB cables are correctly connected to the motherboard's USB headers.
- Pa gen okenn rezilta ekspozisyon: Confirm the graphics card is properly seated and connected to power, and the monitor cable is connected to the graphics card, not the motherboard's integrated graphics port (unless using integrated graphics).
10. Espesifikasyon
| Karakteristik | Spesifikasyon |
|---|---|
| Non modèl | GMX EXPEDITION |
| Mak | GAMEMAX |
| Kalite Ka | Micro Tower (MATX) |
| Mèr konpatibilite | Mikwo ATX |
| Koulè | Expedition White |
| Materyèl | Polikarbonat (PC) |
| Dimansyon pwodwi (LxWxH) | 14.96 x 7.4 x 13.78 pous (380 x 188 x 350 mm) |
| Pwa atik | 8.58 liv (3.9 kg) |
| Pò USB 3.0 | 1 |
| Pò USB 2.0 | 2 |
| Metòd refwadisman | Lè, Dlo |
| Enkli Fan | 1 x 120mm Blue LED (Rear) |
| Max CPU Cooler Wotè | 155mm |
| Max GPU Longè | 340mm |
11. Garanti ak sipò
For warranty information and technical support, please visit the official GameMax websit la oubyen kontakte détayan lokal ou a.
Ofisyèl Websit: gamemaxpc.com