
DieHard 71341
Manyèl Itilizatè Chajè Batri DieHard 71341 6/12V Gold Smart Wheel ak Antretyen 50/250A
Modèl: 71341
Entwodiksyon
This user manual provides essential information for the safe and effective operation, maintenance, and troubleshooting of your DieHard 71341 6/12V Gold Smart Wheel Battery Charger and 50/250A Maintainer. This unit is designed to charge or jump start your battery with intelligent charge technology, offering precision, safety, and extended battery life. Please read this manual thoroughly before using the product.

Image: The DieHard 71341 Gold Smart Wheel Battery Charger, a black unit with a handle and wheels, featuring a control panel on top and battery clamps stored on the handle.
Enfòmasyon enpòtan sou sekirite
Toujou obsève prekosyon sekirite sa yo pou evite blesi oswa domaj nan plato a oswa batri a:
- Li tout enstriksyon yo: Anvan ou itilize chajè a, li tout enstriksyon ak mak avètisman ki sou chajè a, sou batri a, ak sou pwodwi k ap itilize batri a.
- Vantilasyon: Ensure adequate ventilation when charging batteries. Batteries can produce explosive gases.
- Pwoteksyon je: Toujou mete pwoteksyon pou je ak rad pwoteksyon lè w ap travay ak pil.
- Evite etensèl: Pa fimen epi pa kite yon etensèl oswa flanm dife toupre batri a oswa motè a.
- Koneksyon apwopriye: Konekte epi dekonekte klou batri aamps only when the charger's AC cord is disconnected from the electrical outlet.
- Ranvèse polarite: Avoid reverse polarity connections. The charger is designed with protection against incorrect connections, but always double-check.
- Itilizasyon andedan kay la: This charger is intended for indoor use only. Do not expose to rain or snow.
- Timoun: Kenbe soti nan atenn timoun yo.
Enstalasyon
The DieHard 71341 charger comes largely pre-assembled for ease of use. Follow these steps for initial setup:
- Debake: Carefully remove the charger from its packaging. Inspect for any shipping damage.
- Manch Asanble: Ensure the retractable handle is securely in place. It is designed for easy transport.
- Jesyon kab: Uncoil the 6-gauge power cord and the 6-foot cold weather flexible output cables with color-coded clamps. The unit features integrated storage for these cables.
- Plasman: Position the charger on a stable, level surface near the battery to be charged, ensuring adequate ventilation. The compact wheel design allows for easy movement around your garage or workspace.

Imaj: Gwo plan view of the red and black color-coded battery clamps, designed for secure connection to battery terminals.
Enstriksyon Operasyon
The DieHard 71341 features intelligent, microprocessor-controlled charging for optimal battery health.
Connecting to a Battery:
- Ensure the charger is unplugged from the AC outlet.
- Konekte wouj pozitif (+) cl laamp nan tèminal pozitif (+) batri a.
- Konekte negatif nwa a (-) clamp to the negative (-) battery terminal. For vehicles, connect the negative clamp nan chasi machin nan lwen batri a ak tiyo gaz la si batri a toujou nan machin nan.
- Plug the charger's AC cord into a standard 120V AC outlet.
Chwazi yon mòd:
The charger automatically senses 6V or 12V battery voltage. Use the "Rate Selection" switch on the control panel to choose your desired operation:
- Charge/Maintain (6A/2A): For standard charging and long-term battery maintenance. The multi-stage charging process prevents overcharging and switches to maintenance mode when fully charged.
- Boost (50A): Provides a quick energy boost to a discharged battery.
- Engine Start (250A): Delivers maximum power to jump start your vehicle. Follow vehicle manufacturer's instructions for jump starting.

Image: Close-up of the DieHard 71341 control panel, showing the rate selection switch for charge/maintain, boost, and engine start modes, along with LED indicators for battery status.
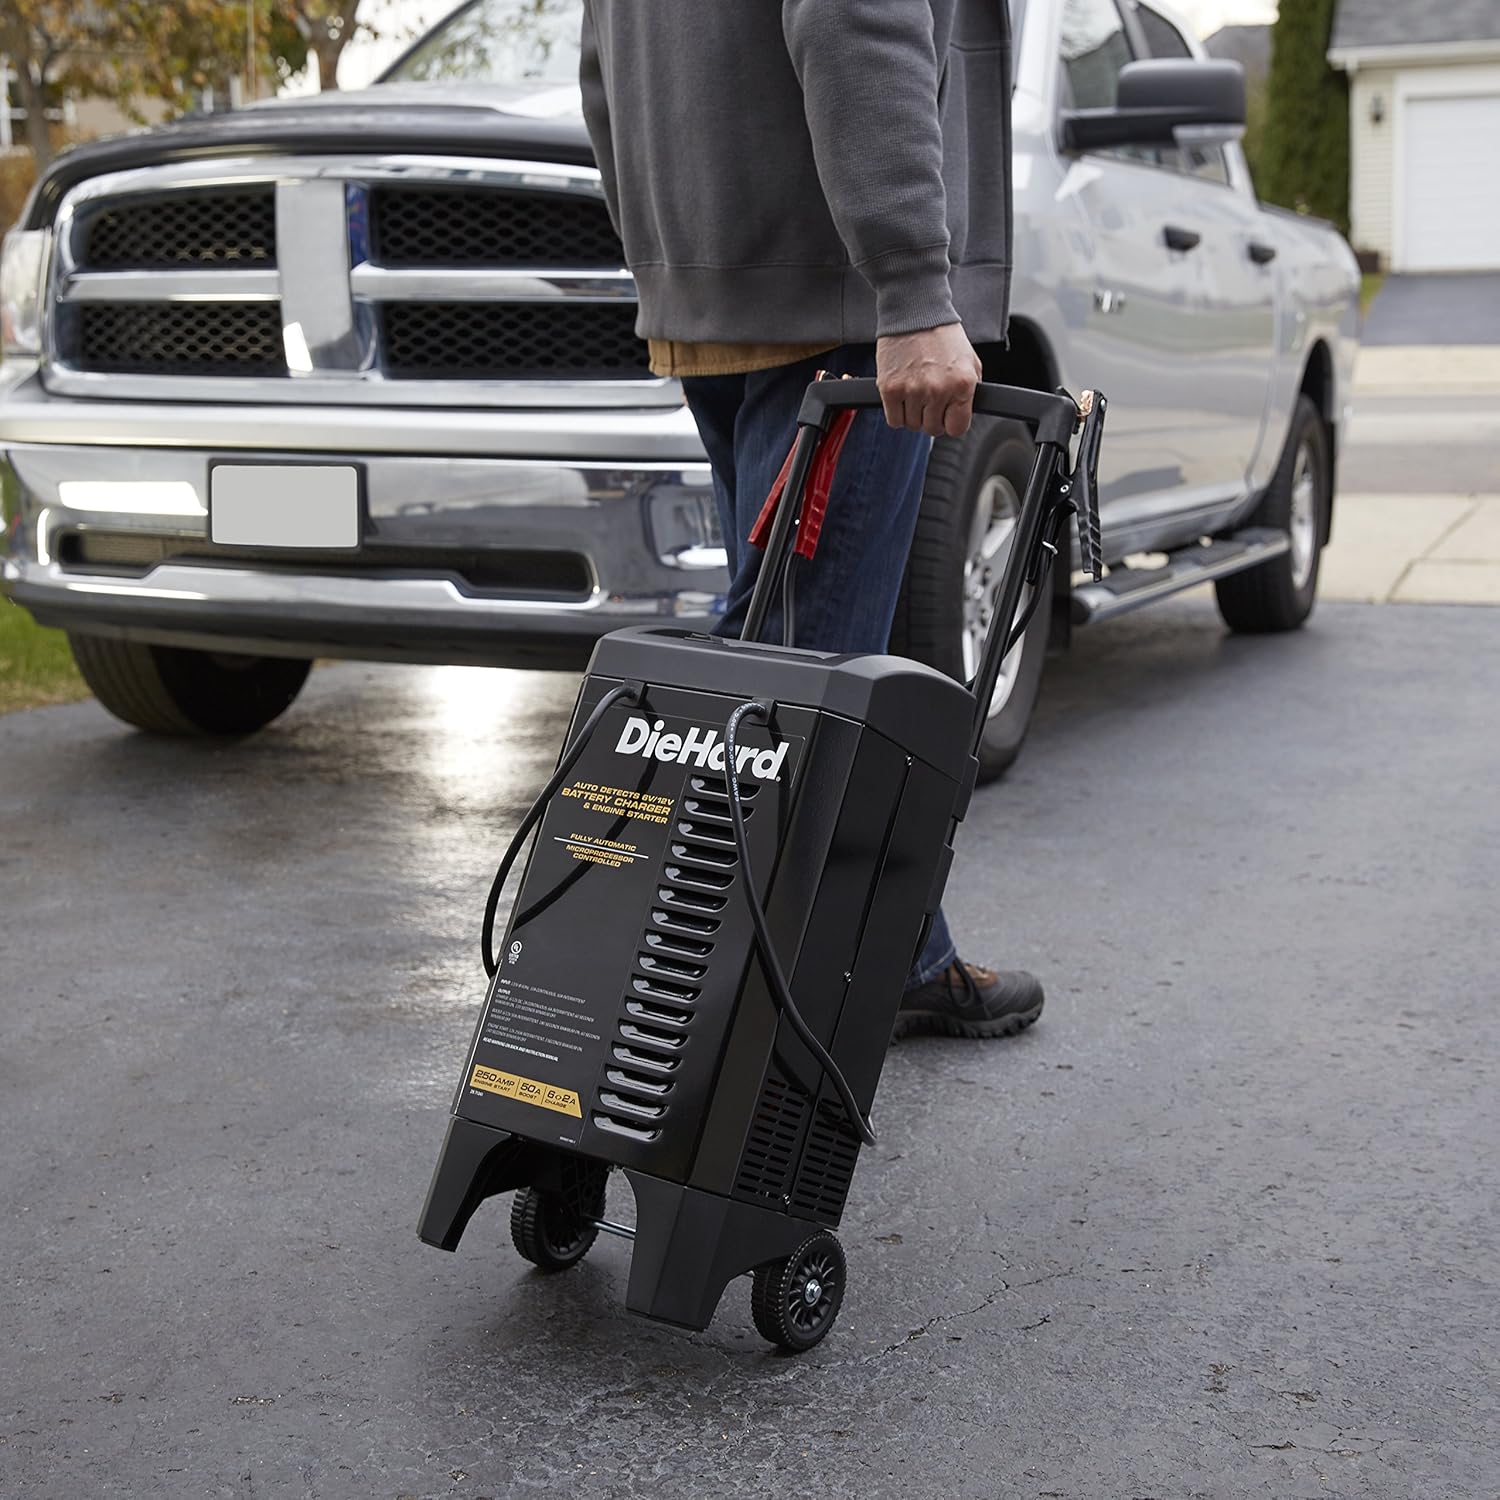
Image: A person's hand adjusting the settings on the DieHard 71341 battery charger's control panel, with the charger positioned near a vehicle.
Antretyen
Proper maintenance ensures the longevity and optimal performance of your DieHard charger:
- Netwayaj: Disconnect the charger from the power outlet and battery before cleaning. Wipe the case and cables with a damp twal. Pa sèvi ak solvants.
- Kab ak Clamp Enspeksyon: Regularly inspect the battery cables and clamps for any damage, fraying, or corrosion. Replace if necessary.
- Depo: Store the charger in a cool, dry place when not in use. Ensure cables are neatly wrapped and clamps are securely stored on the unit's handle to prevent damage.
Depanaj
If you encounter issues with your DieHard 71341 charger, refer to the following common problems and solutions:
| Pwoblèm | Kòz posib | Solisyon |
|---|---|---|
| Charger not turning on/no display. | No AC power; faulty outlet; internal fuse. | Check AC outlet; try a different outlet; consult a qualified technician if fuse is suspected. |
| "Clamps Reversed" indicator lit. | Batri clamps konekte mal. | Disconnect AC power, then correctly connect red clamp pou pozitif (+) ak nwa clamp to negative (-). Reconnect AC power. |
| Batri a pa chaje oswa l ap chaje dousman. | Move koneksyon; batri dechaje nèt; pwoblèm batri. | Asire clamps have good contact; allow more time for deeply discharged batteries; have battery tested by a professional. |
| Engine Start/Boost not working. | Vol batri ensifizantage; incorrect mode selection. | Ensure battery has some residual voltage; select the correct "Engine Start" or "Boost" mode. |
Espesifikasyon
| Karakteristik | Detay |
|---|---|
| Mak | DieHard |
| Nimewo Modèl | 71341 |
| Dimansyon pwodwi | 12.5 x 12 x 23.38 pous |
| Pwa atik | 29.9 liv |
| Voltage | 6V / 12V (Automatic Detection) |
| Amperage (Charge/Maintain) | 2A / 6A |
| Amperage (Boost) | 50A |
| Amperage (Engine Start) | 250A |
| Longè kòd pouvwa | 6 pye |
| Longè kab Sòti | 6 pye |
| Teknoloji | Microprocessor Controlled, Multi-stage Chaje |

Image: Diagram showing the dimensions of the DieHard 71341 battery charger: 23.38 inches high, 12.5 inches wide, and 12 inches deep.
Garanti ak sipò
For warranty information and technical support, please refer to the official documentation included with your product or visit the manufacturer's website. A detailed user manual in PDF format is also available for download for further reference.
For additional support and resources, you may refer to the official user manual document: DieHard 71341 User Manual (PDF).
Ask a question about this manual
Ask about setup, troubleshooting, compatibility, parts, safety, or missing instructions. Manuals+ will review the question and use this page’s manual context to help answer it.