Entwodiksyon
The UNI-T UT151C is a high-reliability handheld digital multimeter designed for precise electrical measurements. It functions as a multimeter, LCR meter, and temperature tester, capable of measuring DC/AC voltage, DC/AC current, resistance, capacitance, and temperature. This manual provides essential information for the safe and effective operation, setup, and maintenance of your UT151C device.
Enfòmasyon sou Sekirite
Avètisman: To avoid electric shock or personal injury, read all safety information before using this product. Use the product only as specified in this manual, or the protection provided by the product may be impaired.
- Always ensure the test leads are in good condition and properly connected.
- Pa aplike plis pase rated voltage, jan yo make sou kontè a, ant tèminal yo oswa ant nenpòt tèminal ak tè tè a.
- Pran anpil prekosyon lè w ap travay ak voltagpi wo pase 30V AC RMS, 42V pik, oswa 60V DC. Volim sa yotages poze yon danje chòk.
- Before measuring current, ensure the circuit is de-energized and the meter is connected in series.
- Anvan w chanje fonksyon, dekonekte fil tès yo nan kous anba tès la.
- Do not operate the meter with the case open or if the battery cover is not securely closed.
- Ranplase pil la le pli vit ke endikatè pil fèb la parèt pou asire lekti egzak.
Pwodwi souview
Familiarize yourself with the components of your UNI-T UT151C Digital Multimeter.
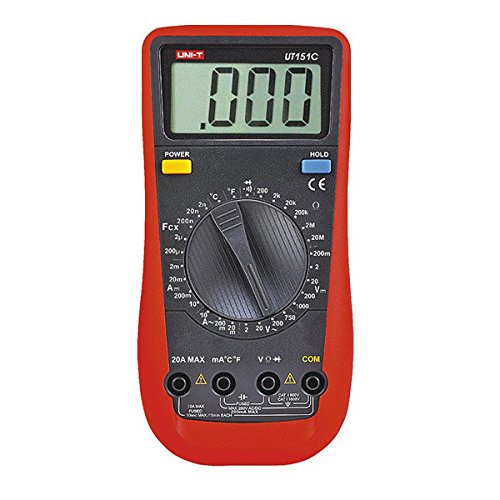
Figi 1: Devan view of the UNI-T UT151C Digital Multimeter. This image displays the LCD screen, the central rotary function switch, and the input terminals at the bottom. The 'HOLD' button is visible on the right side of the display.
- Ekspozisyon LCD: Montre lekti mezi, inite, ak endikatè fonksyon.
- Fonksyon switch Rotary: Used to select the desired measurement function (e.g., V~, V-, A~, A-, Ω, F, °C/°F, Diode, Continuity).
- Jack Antre: Terminals for connecting test leads. Typically include COM (common), VΩmA (voltage, resistance, small current), and 20A (high current).
- Bouton HOLD: Li bloke lekti aktyèl la sou ekran an.
- Bouton pouvwa: Limen oswa etenn aparèy la.
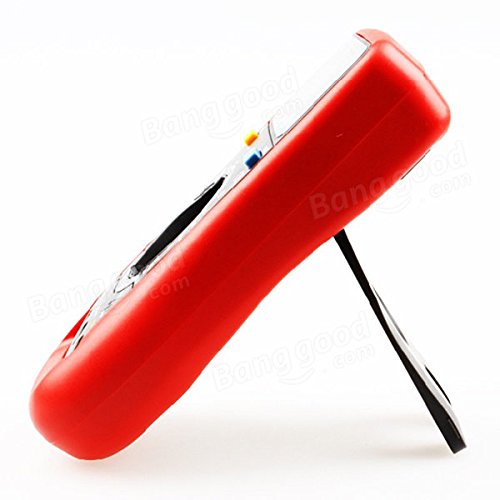
Figi 2: Side view of the UNI-T UT151C Digital Multimeter. This image highlights the integrated kickstand, allowing the meter to be propped up for easier viewing pandan w ap itilize.
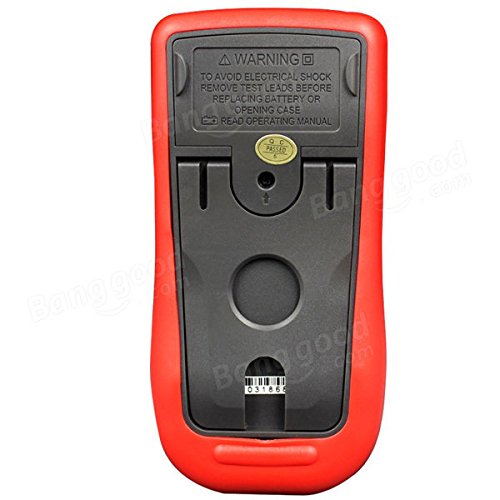
Figi 3: Retounen view of the UNI-T UT151C Digital Multimeter. This image shows the battery compartment cover and important safety warnings regarding electrical shock and battery replacement.
Enstalasyon
1. Enstalasyon batri
The UNI-T UT151C requires a 9V (6F22) battery for operation. The battery is not included.
- Ensure the multimeter is powered off and disconnect any test leads.
- Jwenn konpatiman pil la sou dèyè mèt la (gade Figi 3).
- Devise vis (yo) ki kenbe yo epi retire kouvèti batri a.
- Connect a new 9V battery to the battery clips, observing correct polarity.
- Mete pil la nan konpatiman an epi remete kouvèti a, byen sere l ak vis(yo).
Nòt: Replace the battery immediately when the low battery indicator appears on the display to maintain measurement accuracy.
2. Konekte fil tès yo
Toujou konekte fil tès nwa a nan COM priz (komen). Konekte fil tès wouj la nan priz antre ki apwopriye a selon kalite mezi a:
- Pou voltage, resistance, capacitance, diode, continuity, and temperature measurements, connect the red lead to the VΩmA Jack.
- For current measurements up to 200mA, connect the red lead to the VΩmA Jack.
- Pou mezi kouran jiska 20A, konekte fil wouj la ak 20A Jack.
Atansyon: Incorrect lead connection can damage the meter or the circuit under test.
Enstriksyon Operasyon
Follow these steps for various measurement functions.
1. Power On/Off
Peze a POUVWA button to turn the multimeter on. The meter features an auto power-off function to conserve battery life. To turn it off manually, press the POUVWA bouton ankò.
2. Mezire Volim DCtage (V-)
- Konekte plon nwa a COM and the red lead to VΩmA.
- Set the rotary switch to the desired V- range (e.g., 2V, 20V, 200V, 1000V). If the voltage se enkoni, kòmanse ak entèval ki pi wo a epi diminye jan sa nesesè.
- Connect the test leads in parallel across the component or circuit to be measured.
- Li voltage valè sou ekspozisyon LCD a.
3. Mezire AC Voltage (V~)
- Konekte plon nwa a COM and the red lead to VΩmA.
- Set the rotary switch to the desired V~ range (e.g., 2V, 20V, 200V, 750V).
- Connect the test leads in parallel across the AC source or component.
- Li AC voltage valè sou ekspozisyon LCD a.
4. Measuring DC Current (A-)
- Atansyon: Always connect the meter in series with the circuit. Never connect it in parallel across a voltage source when measuring current.
- Dekonekte pouvwa nan kous la.
- Break the circuit at the point where current is to be measured.
- For currents up to 200mA, connect the black lead to COM and the red lead to VΩmA.
- For currents up to 20A, connect the black lead to COM and the red lead to 20A.
- Set the rotary switch to the appropriate A- ranje.
- Connect the test leads to complete the circuit.
- Apply power to the circuit and read the DC current value.
5. Measuring AC Current (A~)
- Follow the same safety precautions and connection steps as for DC Current measurement.
- Set the rotary switch to the appropriate A~ ranje.
- Apply power to the circuit and read the AC current value.
6. Measuring Resistance (Ω)
- Ensure the circuit or component is completely de-energized before measuring resistance.
- Konekte plon nwa a COM and the red lead to VΩmA.
- Mete switch la Rotary nan la Ω ranje.
- Konekte fil tès yo atravè konpozan an.
- Li valè rezistans nan ekspozisyon an.
7. Measuring Capacitance (F)
- Asire w ke kondansateur a dechaje nèt anvan w pran mezi a pou evite domaje mèt la.
- Konekte plon nwa a COM and the red lead to VΩmA.
- Mete switch la Rotary nan la F (Capacitance) range.
- Connect the test leads across the capacitor terminals.
- Li valè a kapasite sou ekspozisyon an.
8. Measuring Temperature (°C/°F)
- Connect the temperature probe (if included and compatible) to the COM epi VΩmA jacks, obsève polarite.
- Mete switch la Rotary nan la °C or °F pozisyon.
- Mete pwent sond tanperati a sou oswa toupre objè ou vle mezire tanperati a.
- Li valè tanperati a sou ekran an.
9. Dyòd tès
- Asire w ke dyòd la dekonekte nan sikwi a.
- Konekte plon nwa a COM and the red lead to VΩmA.
- Mete switch la Rotary nan la Dyòd senbòl.
- Connect the red lead to the anode and the black lead to the cathode of the diode. A forward voltage drop (e.g., 0.5V to 0.8V for silicon diodes) will be displayed.
- Reverse the leads. The display should show "OL" (Open Loop) for a good diode.
10. Tès kontinwite
- Asire w ke sikwi a oswa konpozan an pa gen enèji.
- Konekte plon nwa a COM and the red lead to VΩmA.
- Mete switch la Rotary nan la Kontinwite symbol (often shared with Diode test).
- Konekte fil tès yo atravè konpozan an oswa chemen sikwi a.
- If there is continuity (low resistance), the buzzer will sound, and a low resistance value will be displayed. "OL" indicates an open circuit.
11. Fonksyon Kenbe Done
Peze a KENBE bouton an pou bloke lekti aktyèl la sou ekran an. Peze l ankò pou libere mezi yo epi rekòmanse mezi an dirèk yo.
Antretyen
Bon antretyen asire lonjevite ak presizyon miltimèt ou a.
- Netwayaj: Siye ka a ak anonsamp twal ak detèjan twò grav. Pa sèvi ak abrazif oswa solvang.
- Ranplasman batri: Replace the 9V battery when the low battery indicator appears. Refer to the "Battery Installation" section for instructions.
- Ranplasman Fuse: If the current measurement function fails, the fuse may need replacement. This typically requires opening the back case. Refer to the safety warnings on the back of the meter (Figure 3) and consult a qualified technician if unsure. Use only fuses of the specified type and rating.
- Depo: If the meter is not used for an extended period, remove the battery to prevent leakage. Store the meter in a cool, dry place, away from direct sunlight and extreme temperatures.
Depanaj
If you encounter issues with your UNI-T UT151C, refer to the following common problems and solutions:
| Pwoblèm | Kòz posib | Solisyon |
|---|---|---|
| Pa gen ekspozisyon oswa ekspozisyon fèb | Batri ki mouri oswa ki ba | Ranplase batri a 9V. |
| "OL" (Surcharge) parèt | Measurement exceeds selected range or open circuit | Select a higher range or check for an open circuit in the component/leads. |
| Lekti ki pa kòrèk | Incorrect function selected, poor lead connection, or low battery | Verify function selection, ensure leads are securely connected, or replace battery. |
| Mezi aktyèl la pa fonksyone | Kònen fuse | Replace the fuse (refer to Maintenance section). |
Espesifikasyon
Technical specifications for the UNI-T UT151C Digital Multimeter.
| Karakteristik | Spesifikasyon |
|---|---|
| Modèl | UT151C (Internal Model: 365BG1060568) |
| DC Voltage (V) | 200mV/2V/20V/200V/1000V; ±(0.5%+1) |
| AC Voltage (V) | 2V/20V/200V/750V; ±(0.8%+3) |
| DC aktyèl (A) | 2mA/20mA/200mA/20A; ±(0.8%+1) |
| AC Kouran (A) | 20mA/200mA/20A; ±(1%+3) |
| Rezistans (Ω) | 200Ω/2KΩ/20KΩ/200KΩ/2MΩ/20MΩ; ±(1%+2) |
| Kapasite (F) | 2nF/20nF/200nF/2µF/100µF; ±(4%+3) |
| Tanperati (°C) | -40°C ~ 1000°C; ±(1%+3) |
| Tanperati (°F) | -40°F ~ 1832°F; ±(1%+4) |
| Montre konte | 1999 |
| Manyèl Range | Wi |
| Tès dyòd | Wi |
| Auto Power Off | Wi |
| Kontinuite Sonèt | Wi |
| Endikasyon batri ki ba | Wi |
| Done kenbe | Wi |
| Input Impedance for DC Voltage | ≥10MΩ |
| Pwovizyon pou pouvwa | 9V (6F22) Battery (not included) |
| LCD Size | 63mm x 29mm |
| Koulè pwodwi | Wouj ak Gri |
| Pwodwi Net Pwa | 300g |
Garanti ak sipò
Enfòmasyon konsènan garanti pwodwi a ak sipò kliyan anjeneral yo bay ak dokiman acha ou a oswa sou paj ofisyèl manifakti a. websit la. Tanpri gade resous sa yo pou plis detay.