
Tecmate TM-251
OptiMATE 7 SELECT TM-251 Battery Charger User Manual
Model: TM-251 | Brand: Tecmate
1. Entwodiksyon
The OptiMATE 7 SELECT, model TM-251, is an advanced 9-step 12V 10A battery charger and maintainer designed for starter and deep cycle batteries, including Odyssey and Optima types. It features a POWER SUPPLY mode for vehicle memory settings and other applications requiring stable power. This manual provides detailed instructions for safe and effective use of your OptiMATE 7 SELECT charger.
Key features include selectable 14.4V/14.7V charging, automatic adjustment for battery size and temperature, and advanced recovery for deeply discharged batteries as low as 0.5V. It is designed for long-term battery maintenance, ensuring more battery power and longer battery life.
2. Enfòmasyon sou Sekirite
Always read and understand all safety warnings and instructions before using the OptiMATE 7 SELECT charger. Failure to do so may result in electric shock, fire, or serious injury.
- Itilize andedan kay la sèlman: This charger is designed for indoor use. Do not expose to rain or moisture.
- Vantilasyon: Ensure adequate ventilation during charging. Do not cover the charger.
- Kalite batri: Use only with 12V lead-acid batteries (AGM, GEL, EFB, STD). Do not attempt to charge non-rechargeable batteries.
- Koneksyon: Connect the charger to the battery before plugging it into the AC power outlet. Disconnect from AC power before disconnecting from the battery.
- Etensèl: Sparks are suppressed during connection and disconnection. However, avoid creating sparks near the battery, as batteries can produce explosive gases.
- Pwoteksyon je: Toujou mete pwoteksyon pou je lè w ap travay ak pil.
- Pwopozisyon 65 Avètisman: Pwodui sa a ka gen ladan pwodwi chimik yo konnen nan Eta Kalifòni pou lakòz kansè ak domaj nesans oswa lòt domaj repwodiksyon.
3. Ki sa ki nan bwat la
Your OptiMATE 7 SELECT package includes the following components:
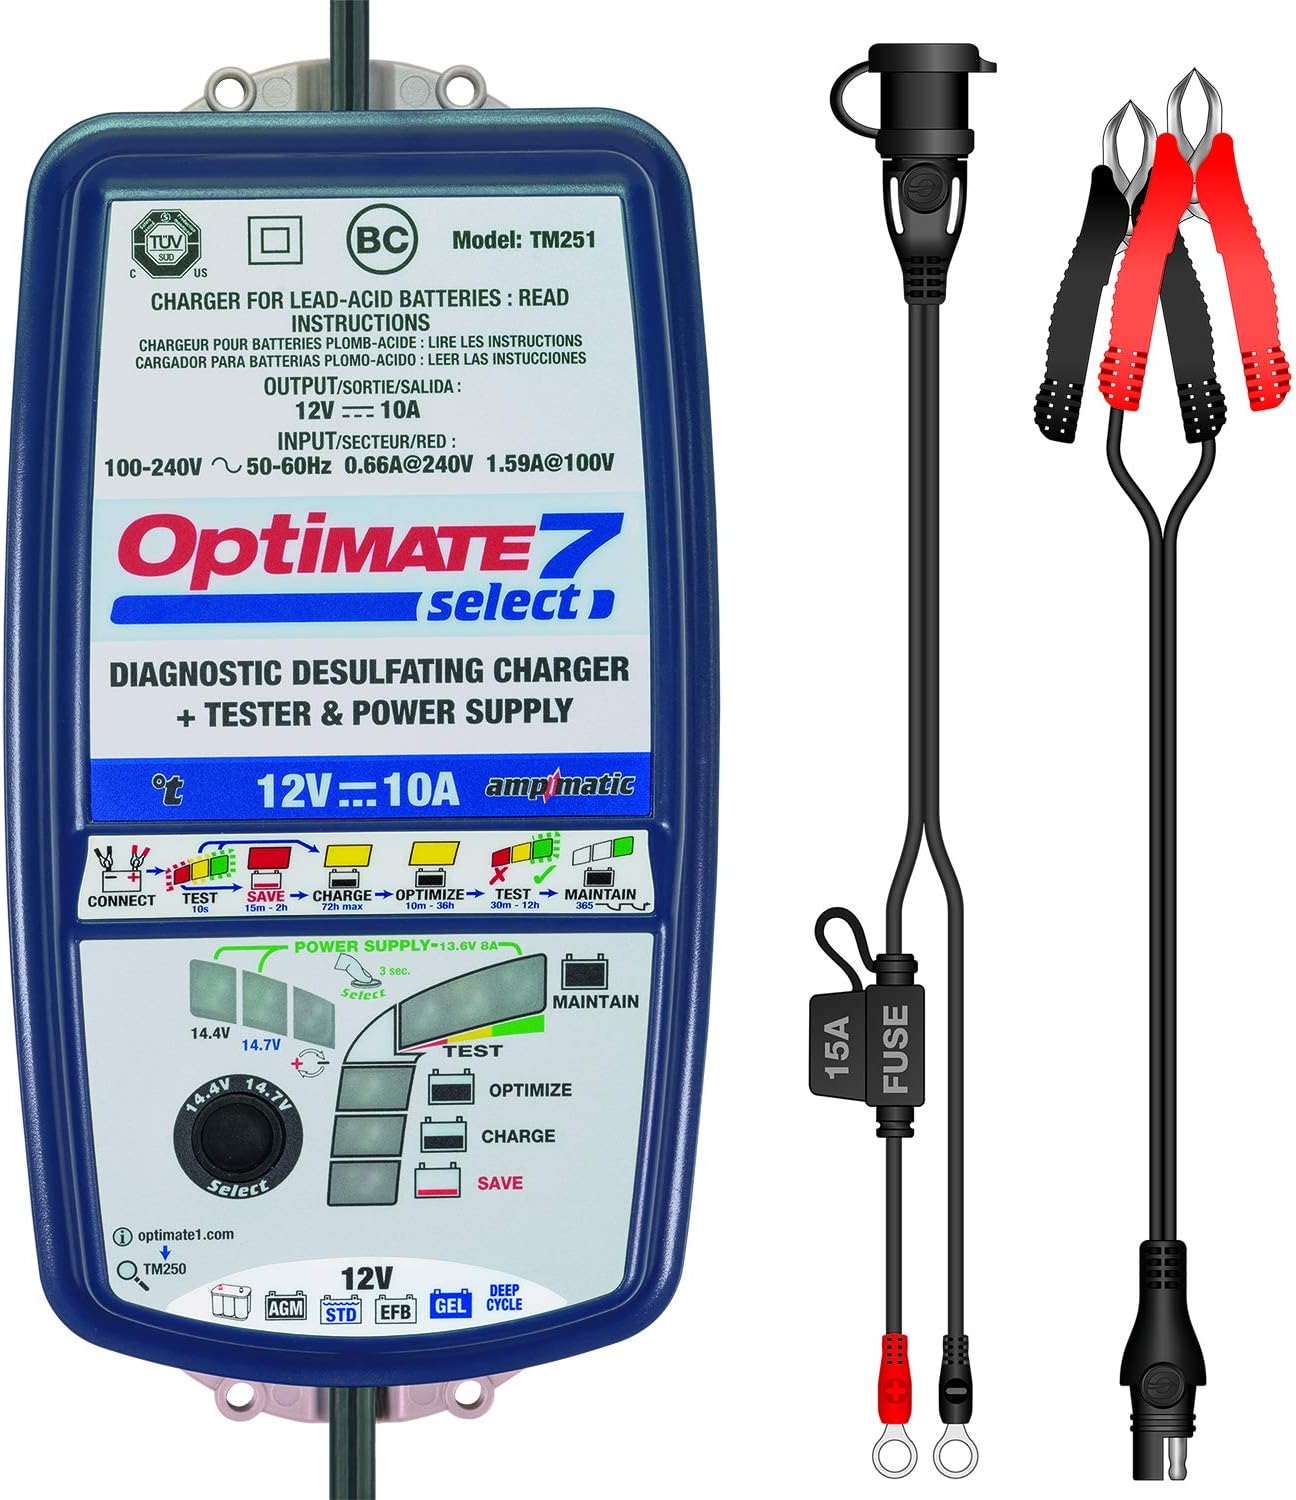
- OptiMATE 7 SELECT Battery Charger (TM-251)
- OptiMATE Cable O-04 (Battery Clamp mete)
- OptiMATE Cable O-11 (Permanent Ring Terminal Connector with Fuse)

Image: OptiMATE 7 SELECT charger with all included accessories, including the battery clamp set and permanent ring terminal connector.
4. Enstalasyon
4.1. Debake
Carefully remove the OptiMATE 7 SELECT charger and all accessories from the packaging. Inspect all components for any signs of damage. If any damage is found, do not use the product and contact customer support.
4.2. Konekte ak pouvwa
Plug the AC power cord of the OptiMATE 7 SELECT charger into a standard 100-240V AC wall outlet. The charger is designed to work with a wide range of input voltages.

Image: The OptiMATE 7 SELECT charger, showing its compact design and input/output labels.
4.3. Connecting to Battery
Choose the appropriate battery connection accessory (battery clamps or ring terminals) for your application.
- Sèvi ak pil Clamps (O-04): Konekte cl wouj laamp nan tèminal pozitif (+) batri a ak cl nwa aamp nan tèminal negatif (-) batri a. Asire w ke koneksyon an byen fèt.
- Using Permanent Ring Terminal Connector (O-11): For long-term or frequent use, attach the ring terminals directly to the battery posts (red to positive, black to negative). This provides a convenient quick-connect point for the charger.

Image: The OptiMATE 7 SELECT charger with its battery clamps connected, ready for use with a battery.
5. Operasyon Enstriksyon
The OptiMATE 7 SELECT operates through a sophisticated 9-step program to optimize battery health and charge.
5.1. Vòltage Selection (14.4V / 14.7V)
Before connecting to the battery, select the appropriate charge voltage (14.4V or 14.7V) using the rotary switch on the charger. Refer to your battery manufacturer's specifications for the recommended charging voltage. The 14.7V setting is typically for AGM batteries requiring a higher charge voltage.
Imaj: Yon imaj detaye view nan vol latage selection dial on the OptiMATE 7 SELECT charger, allowing users to choose between 14.4V and 14.7V.
5.2. Charging Process (9 Steps)
Once connected to the battery and AC power, the OptiMATE 7 SELECT automatically initiates its 9-step program:
- STEP 1: Selection - User selects 14.4V or 14.7V charge voltage.
- STEP 2: Low Volt Start (0.5V) - Initiates charging even from very low battery voltages.
- STEP 3: TEST before charge - Assesses battery condition before commencing the main charge.
- STEP 4: Turbo SAVE - High-voltage desulfation for severely neglected batteries.
- STEP 5: Pulse SAVE - Gentle pulse desulfation for less severe sulfation.
- STEP 6: Controlled CHARGE - Bulk charging phase, delivering current based on battery size (Ampmatic control).
- STEP 7: OPTIMIZE - Absorption charge to ensure full charge and cell equalization.
- STEP 8: TEST after CHARGE - Verifies battery's ability to retain charge.
- STEP 9: OptiMate maintenance - Long-term float maintenance to prevent self-discharge.
5.3. Mode ekipman pou pouvwa
The OptiMATE 7 SELECT includes a POWER SUPPLY mode that delivers stable power (13.6V 8A) for various applications. This mode is ideal for maintaining vehicle memory settings during battery changes, powering showroom vehicle demos, or retaining memorized settings when battery cables are disconnected to fit powered accessories or replace the battery.
6. Antretyen
6.1. Long-Term Battery Maintenance
The OptiMATE 7 SELECT is designed for 24-7 smart maintenance. Once the battery is fully charged, the charger automatically switches to a maintenance mode, delivering small, precise charges as needed to counteract self-discharge, keeping the battery optimally charged without overcharging.
6.2. Antretyen Chargeur
To ensure the longevity of your OptiMATE 7 SELECT charger:
- Kenbe plato a pwòp epi sèk. Siye l avèk yon twal mou.amp twal si sa nesesè.
- Sere plato a nan yon kote ki fre, sèk lè li pa itilize.
- Do not expose the charger to extreme temperatures or direct sunlight for prolonged periods.
NAN. Depanaj
If you encounter issues with your OptiMATE 7 SELECT charger, refer to the table below for common problems and solutions.
| Pwoblèm | Kòz posib | Solisyon |
|---|---|---|
| Charger does not turn on / No lights | No AC power; Faulty outlet; Damaged power cord. | Check AC power connection; Test outlet with another device; Inspect power cord for damage. |
| Charger not charging battery | Koneksyon batri ki pa kòrèk; Volim batri atage too low; Battery is severely sulfated or has a bad cell. | Ensure correct polarity (+ to +, - to -); The charger can recover batteries from 0.5V, but extremely dead or damaged batteries may not respond. |
| Charger stays in SAVE mode | Battery is sulfated or deeply discharged. | Allow the charger more time in SAVE mode. If it doesn't progress after an extended period, the battery may be beyond recovery. |
| Charger indicates 'TEST after CHARGE' but battery is not fully charged | Battery has a weak cell or internal damage. | The charger has detected an issue. The battery may need to be replaced. |
8. Espesifikasyon
| Karakteristik | Spesifikasyon |
|---|---|
| Mak | Tecmate |
| Modèl | TM-251 |
| Pwa atik | 3.16 liv |
| Dimansyon pwodwi | 12 x 8.2 x 3 pous |
| Voltage (Sòti) | 12 Volts (Selectable 14.4V / 14.7V) |
| Rating aktyèl | 10 Amps |
| Antre Voltage | 100-240V AC, 50-60Hz |
| Rating sekirite | Konfòme CE |
| Premye Dat ki disponib | 27 avril 2016 |
9. Garanti ak sipò
9.1. Enfòmasyon sou Garanti
The OptiMATE 7 SELECT TM-251 comes with a 3-year limited replacement warranty. Please retain your proof of purchase for warranty claims. For detailed warranty terms and conditions, refer to the official Tecmate documentation or websit.
9.2. Kontakte Sipò
Pou plis asistans, sipò teknik, oubyen pou view the official user guide in PDF format, please visit the official OptiMATE websit:
http://optimate1.com/optimate7select
You can also access the User Guide PDF directly here: Gid itilizatè (PDF)
Ask a question about this manual
Ask about setup, troubleshooting, compatibility, parts, safety, or missing instructions. Manuals+ will review the question and use this page’s manual context to help answer it.