1. Entwodiksyon
This manual provides detailed instructions for the installation, operation, and maintenance of your Foxconn TSAA725 ATX Tower Case. Please read this manual thoroughly before beginning installation to ensure proper setup and safe use of the product. Keep this manual for future reference.
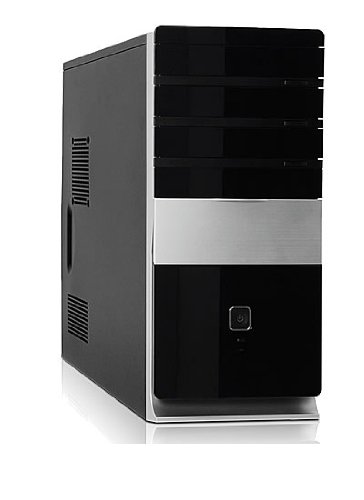
Imaj: Devan view of the Foxconn TSAA725 ATX Tower Case, showcasing its design and front panel ports.
2. Enfòmasyon sou Sekirite
Obsève prekosyon sekirite sa yo pou evite domaje pwodwi a oswa blese tèt ou:
- Always disconnect the power supply from the wall outlet before opening the computer case or performing any installation/maintenance.
- Handle internal components with care to avoid electrostatic discharge (ESD) damage. Use an anti-static wrist strap if available.
- Ensure proper ventilation around the case to prevent overheating.
- Do not expose the case to moisture or extreme temperatures.
- Kenbe ti pati yo lwen timoun yo.
3. Pake kontni
Verifye ke tout atik yo prezan nan pakè a:
- Foxconn TSAA725 ATX Tower Case
- 350W Power Supply (pre-installed)
- Accessory kit (screws, standoffs, cable ties)
- Manyèl enstriksyon sa a
4. Karakteristik kle
The Foxconn TSAA725 ATX Tower Case offers the following features:
- Materyèl: 0.5mm SGCC Alloy Steel construction for durability.
- Sipò pou plak mèr: Compatible with ATX and Micro ATX motherboards.
- Kondwi Bays:
- 3x 5.25" External Bays
- 2x 3.5" External Bays
- 4x 3.5" Internal Bays
- Sistèm refwadisman:
- 1x 80/92/120mm rear fan support (fan not included)
- Optional 1x 80/92/120mm front fan support (fan not included)
- 80mm Air Duct for CPU cooling.
- Panèl I/O devan:
- 2x pò USB 2.0
- 1x Headphone jack
- 1x Microphone jack
- Pwovizyon pou pouvwa: Integrated 350W Power Supply.
5. Enstalasyon ak Konpozan
Follow these steps to install your computer components into the Foxconn TSAA725 case:
- Prepare Ka a:
Place the case on a flat, stable surface. Remove the side panel(s) by unscrewing the thumbscrews at the rear of the case and sliding the panel backward.
- Enstale Carte Mè:
Install the necessary standoffs onto the motherboard tray according to your motherboard's form factor (ATX or Micro ATX). Carefully place the motherboard onto the standoffs, aligning the screw holes. Secure the motherboard with screws provided in the accessory kit.
- Install Drives (HDD/SSD):
For 3.5" internal drives, slide the drive into an available 3.5" internal bay and secure it with screws from the side. For 5.25" external drives (e.g., optical drives), remove the front panel bay cover, slide the drive in from the front, and secure it with screws.
- Enstale kat ekspansyon yo:
Remove the appropriate expansion slot covers at the rear of the case. Insert your graphics card or other expansion cards into the PCIe/PCI slots on the motherboard and secure them with screws.
- Konekte kab:
Connect the power supply cables to the motherboard (24-pin ATX, 4/8-pin CPU), graphics card (if applicable), and drives (SATA power). Connect the front panel cables (USB, audio, power switch, reset switch, LED indicators) to the corresponding headers on the motherboard. Refer to your motherboard manual for header locations.
- Jesyon kab:
Route cables neatly to improve airflow and aesthetics. Use cable ties from the accessory kit if needed.
- Fèmen ka a:
Once all components are installed and cables are connected, reattach the side panel(s) and secure them with the thumbscrews.
6. Operasyon Enstriksyon
After successful assembly, connect your peripherals (monitor, keyboard, mouse) and power cable to the case. Press the power button on the front panel to start your computer.
Pò Antre/Sòti sou Panèl Devan an:
- Pò USB 2.0: For connecting USB devices such as keyboards, mice, and external storage.
- Kas ekoutè Jack: Pou konekte kas ekoutè oswa oratè.
- Mikwofòn Jack: Pou konekte yon mikwofòn.
- Bouton pouvwa: Pou limen oswa etenn òdinatè a.
- Bouton Reyajiste: Pou rekòmanse òdinatè a.
7. Antretyen
Regular maintenance helps ensure optimal performance and longevity of your computer case:
- Netwayaj pousyè: Periodically clean dust from inside the case, especially from fans and heatsinks, using compressed air. Ensure the computer is powered off and unplugged before cleaning.
- Netwayaj ekstèn: Siye deyò bwat la ak yon twal mou, damp twal. Evite pwodui netwayaj abrazif oswa solvan.
- Jesyon kab: Periodically check cable routing to ensure no cables are obstructing airflow or fan operation.
NAN. Depanaj
Si ou rankontre pwoblèm, gade solisyon komen sa yo:
- Odinatè a pa limen:
- Ensure the power cable is securely connected to both the case's power supply and the wall outlet.
- Check if the power supply switch (if present) is in the 'ON' position.
- Verifye ke kab bouton pouvwa ki sou panèl devan an byen konekte ak kat manman an.
- No display on monitor:
- Ensure the monitor is powered on and connected to the correct video output on your graphics card or motherboard.
- Remete kat grafik la ak modil RAM yo.
- Pò USB yo pa fonksyone:
- Verify that the front panel USB cables are correctly connected to the motherboard's USB headers.
- Eseye konekte aparèy la nan yon lòt pò USB.
9. Espesifikasyon
| Karakteristik | Detay |
|---|---|
| Mak | FOXCONN |
| Modèl | TSAA725-ISO450 |
| Materyèl | 0.5mm SGCC Alloy Steel |
| Mèr konpatibilite | ATX, Mikwo ATX |
| Drive Bays (External) | 3x 5.25", 2x 3.5" |
| Drive Bays (Internal) | 4x 3.5" |
| Sipò sistèm refwadisman | 1x 80/92/120mm rear fan, 1x 80/92/120mm front fan (optional), 80mm Air Duct |
| Front I / O pò | 2x USB 2.0, 1x Kas ekoutè, 1x Mikwofòn |
| Pwovizyon pou pouvwa | 350W (Integrated) |
| Dimansyon pwodwi (LxWxH) | 50.17 x 24.13 x 54.61 cm |
| Pwa atik | 6.96 kg |
10. Garanti ak sipò
For warranty information and technical support, please refer to the official Foxconn websit la oubyen kontakte détayan lokal ou a. Kenbe prèv acha ou pou reklamasyon garanti.
Resous sou entènèt: For additional support and updated drivers, visit the official Foxconn support page.
Note: Warranty terms may vary by region.