1. Entwodiksyon
This manual provides essential information for the safe and efficient operation of your Technaxx Wireless CarPlay & Android Car Monitor TX-361. Please read this manual thoroughly before using the device and retain it for future reference. The TX-361 is designed to integrate modern smartphone connectivity, including Apple CarPlay and Android Auto, into your vehicle without requiring a complex car radio replacement. It also features an integrated DAB digital radio for enhanced audio experience.
2. Enfòmasyon sou Sekirite
- Toujou itilize aparèy la yon fason responsab epi an akò ak lwa trafik lokal yo. Distraksyon nan kondwi ka lakòz aksidan.
- Do not attempt to disassemble or modify the device. This may void the warranty and pose safety risks.
- Kenbe aparèy la lwen tanperati ekstrèm, limyè solèy dirèk, ak imidite.
- Asire w ke aparèy la byen monte epi li pa bloke w. view oswa entèfere ak kontwòl machin yo.
- Sèvi sèlman ak kab kouran ak akseswa yo bay la.
- If the device malfunctions, disconnect it from the power source and contact customer support.
3. Pake kontni
Verifye ke tout atik ki nan lis anba a yo enkli nan pakè ou a:
- DAB 7-inch CarPlay with Touch Screen TX-361
- Power Supply (USB-A to USB-C, 1.5m cable)
- AUX Cable (1m)
- DAB Antèn
- Holder (Mounting Bracket)
- Manyèl itilizatè
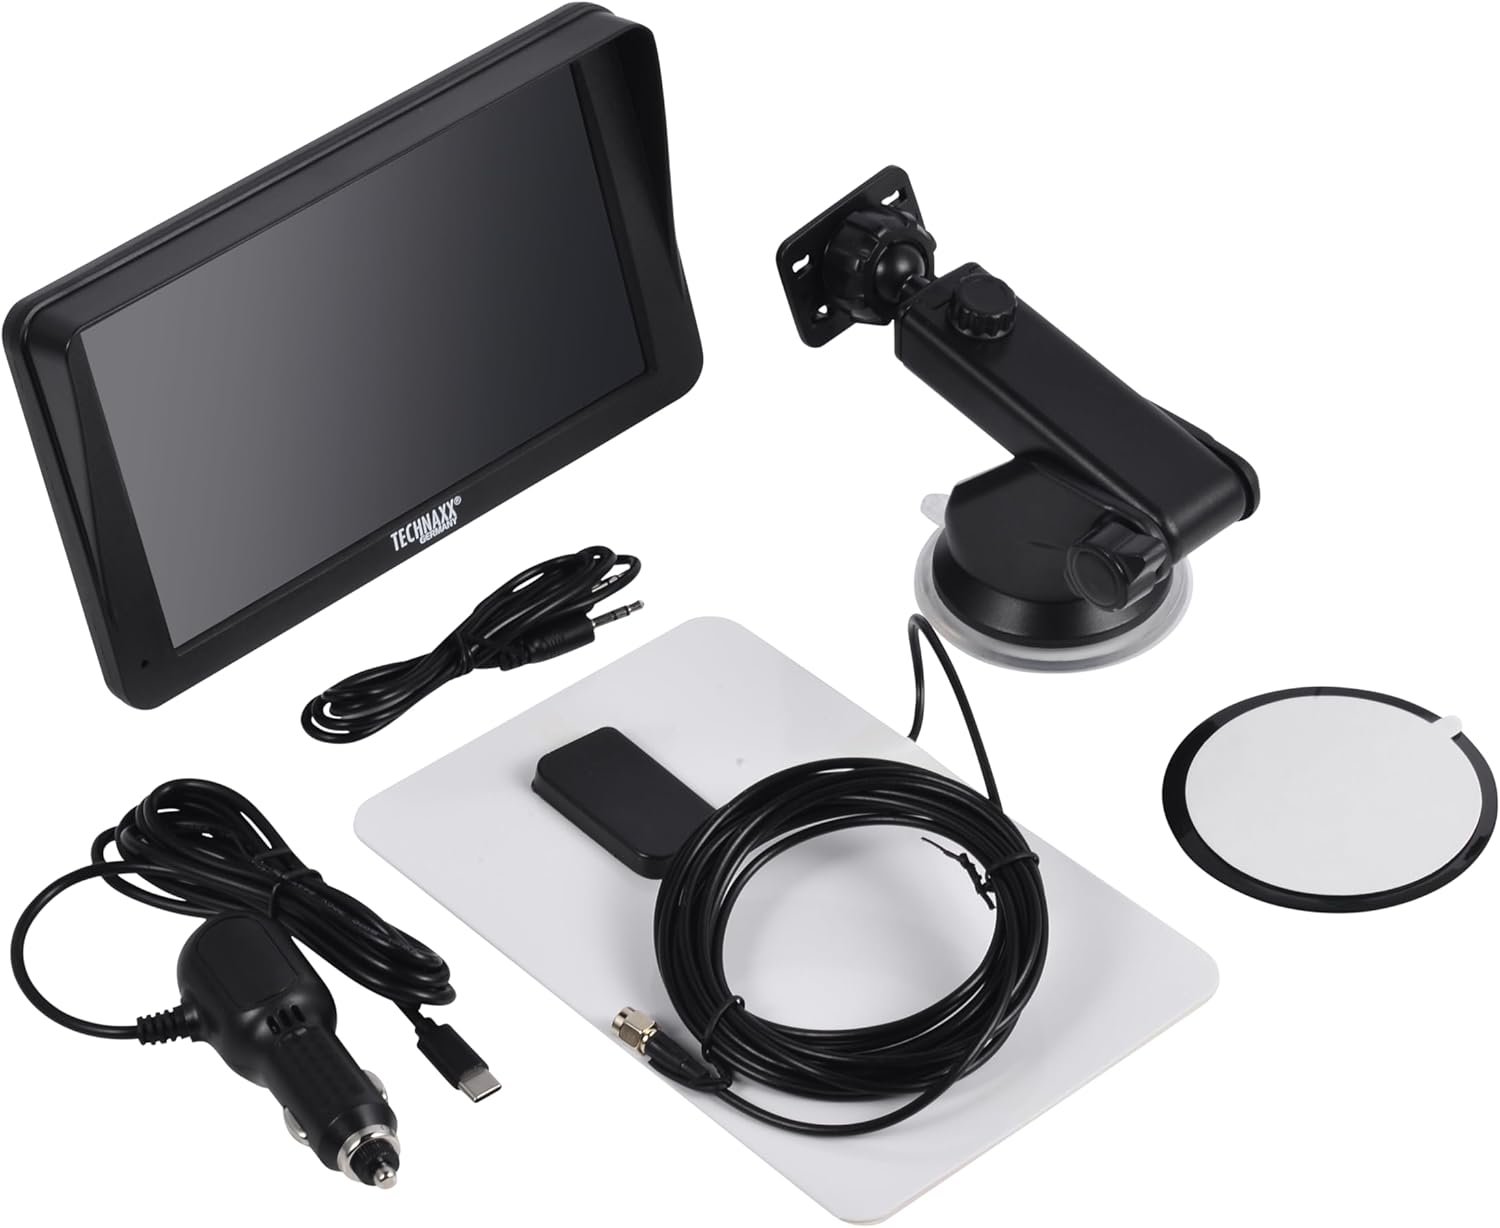
Image: All components included in the Technaxx TX-361 package, neatly laid out.
4. Pwodwi souview
Familiarize yourself with the main components of your TX-361 monitor.
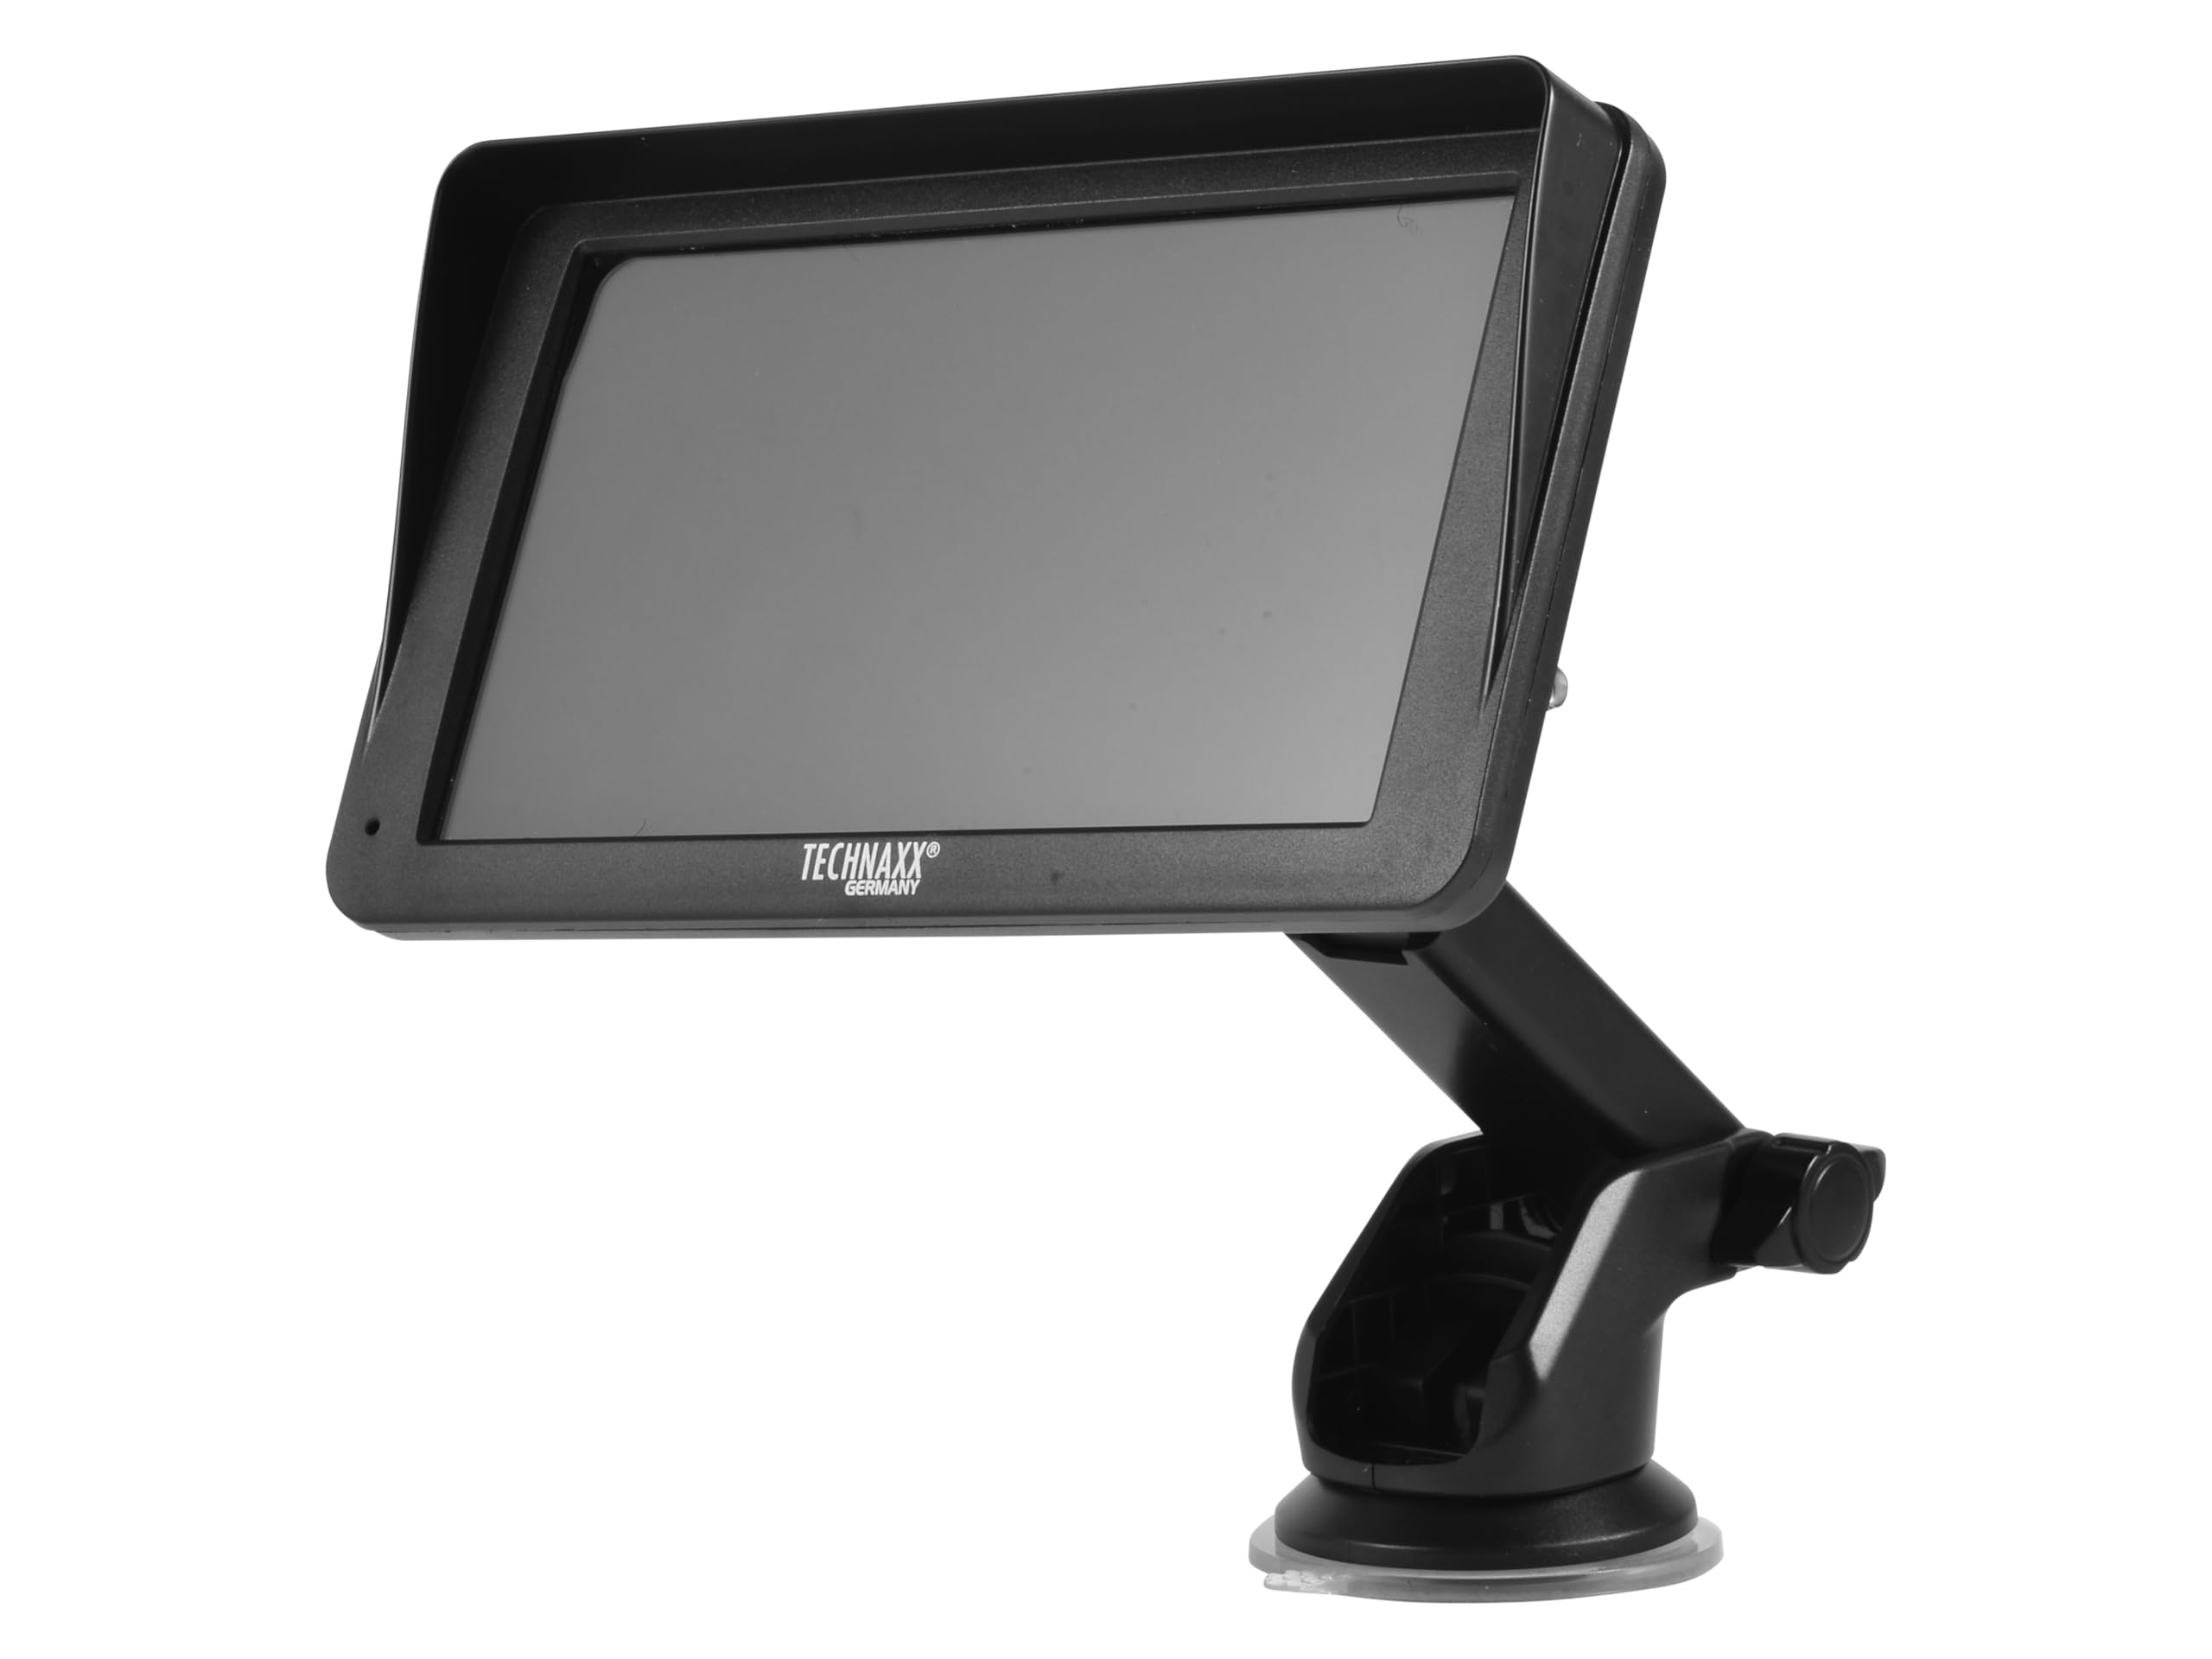
Imaj: Devan view of the TX-361 monitor with its 7-inch display and 'TECHN AXX GERMANY' branding, attached to the adjustable mounting stand.

Imaj: Dèyè view of the TX-361 monitor, highlighting the ventilation grilles and the attachment point for the mounting bracket.

Imaj: Detaye view of the right side of the TX-361 monitor, showing the power button, reset button, USB-C power input, AUX output, and USB-A port.
4.1. Konpozan aparèy
- Ekran taktil kapasitif 7 pous: Main display for all functions.
- Bouton pouvwa: Located on the top right side.
- Bouton Reyajiste: Small pinhole button for system reset.
- USB-C pò: Pou opinyon pouvwa.
- Sòti AUX: 3.5mm jack for wired audio transmission.
- USB-A pò: For media playback or charging external devices.
- DAB Antenna Input: Connector for the external DAB antenna.
- Oratè entegre: Pou lekti odyo dirèk.
5. Enstalasyon
5.1. Monte Aparèy la
The TX-361 can be mounted on your vehicle's windscreen or dashboard using the provided holder.
- Attach the monitor to the mounting bracket.
- For Windscreen Mounting: Clean the desired area on the windscreen. Press the suction cup firmly against the glass and engage the lever to secure it.
- For Dashboard Mounting: Clean the desired area on the dashboard. If necessary, use the adhesive disc provided for a more secure attachment point for the suction cup. Press the suction cup firmly and engage the lever.
- Ajiste ang ki monitè kè bebe a pou pi bon viewsan anpeche w kondwi view.

Image: The TX-361 monitor securely mounted on a car dashboard, showing its position relative to the driver's view.

Image: The TX-361 monitor mounted on a car windscreen, demonstrating an alternative placement option.
5.2. Koneksyon pouvwa
- Connect the USB-C end of the power cable to the USB-C port on the monitor.
- Plug the USB-A end of the power cable into the provided 12V/24V cigarette lighter adapter.
- Insert the cigarette lighter adapter into your vehicle's 12V/24V power socket. The device will power on automatically or can be turned on using the power button.
5.3. DAB Antenna Connection
For optimal DAB radio reception, connect the included DAB antenna:
- Connect the DAB antenna cable to the dedicated DAB antenna input on the monitor.
- Mount the DAB antenna on your windscreen or another suitable location, ensuring it has clear line of sight for best signal reception.
6. Operasyon Enstriksyon
6.1. Powering On / Off
- Pouvwa sou: The device typically powers on automatically when connected to the vehicle's power. If not, press and hold the power button on the top right side.
- Pouvwa Off: Press and hold the power button until the device shuts down. A short press will turn the screen off/on.
6.2. Initial Setup and Smartphone Connection
The TX-361 supports wireless Apple CarPlay and Android Auto via Wi-Fi and Bluetooth 5.0.
- Asire w ke Wi-Fi ak Bluetooth smartphone ou a aktive.
- On the TX-361 monitor, navigate to the CarPlay or Android Auto section.
- The monitor will display a Bluetooth name. On your smartphone, search for and connect to this Bluetooth device.
- Once connected via Bluetooth, the device will prompt you to enable Wi-Fi for CarPlay/Android Auto functionality. Confirm the connection on your phone.
- After successful pairing, Apple CarPlay or Android Auto will launch automatically on the monitor.
6.3. Touchscreen Operasyon
The 7-inch capacitive touchscreen allows for intuitive control:
- Tape: Chwazi atik oswa konfime aksyon yo.
- Glise: Navigate through menus or lists.
- Zoom-pou-Zoom: (Where supported, e.g., in navigation apps) Adjust map zoom levels.
6.4. DAB Digital Radio
To use the integrated DAB digital radio:
- Ensure the DAB antenna is properly connected.
- From the main menu, select the 'DAB Radio' option.
- The device will automatically scan for available DAB stations.
- Select your desired station from the list.
6.5. FM Radyo
For traditional FM radio reception:
- From the main menu, select the 'FM Radio' option.
- Sèvi ak kontwòl ki sou ekran an pou chèche estasyon oubyen pou branche sou yon frekans manyèlman.
6.6. Opsyon Sòti Odyo
The TX-361 offers several ways to transmit audio to your vehicle's sound system:
- Oratè entegre: Audio will play directly from the monitor's built-in speaker.
- AUX Kab: Connect the provided 3.5mm AUX cable from the monitor's AUX output to your car's AUX input. Select 'AUX' as the input source on your car radio.
- Transmisyon FM: Select an unused FM frequency on the TX-361 and tune your car radio to the same frequency. Audio will be transmitted wirelessly to your car's speakers.
7. Antretyen
- Netwayaj: Sèvi ak yon twal mou epi sèk pou netwaye ekran an ak deyò aparèy la. Pa sèvi ak pwodui netwayaj abrazif oswa solvan.
- Depo: Si w ap sere aparèy la pou yon bon bout tan, dekonekte l nan kouran an epi sere l nan yon kote ki fre epi sèk.
- Mizajou lojisyèl: Tcheke manifakti a regilyèman websit la pou nenpòt mizajou firmwèr ki disponib pou asire pèfòmans optimal.
NAN. Depanaj
| Pwoblèm | Solisyon posib |
|---|---|
| Aparèy pa limen. |
|
| Cannot connect to CarPlay/Android Auto. |
|
| Poor DAB/FM radio reception. |
|
| Pa gen pwodiksyon odyo. |
|
9. Espesifikasyon
| Karakteristik | Spesifikasyon |
|---|---|
| Nimewo Modèl | 5361 |
| Ekspozisyon | 7-pous Kapasitif Touch Screen |
| Koneksyon Teknoloji | Wi-Fi (Dual-band 2.4 / 5 GHz), Bluetooth 5.0 |
| Karakteristik espesyal | Wireless CarPlay & Android Auto, DAB Digital Radio, FM Radio, Touchscreen Display |
| Gamme frekans DAB | Band III: 174-240 MHz |
| Sòti odyo | AUX, FM Transmission, Integrated Speaker |
| Pwovizyon pou pouvwa | 12V/24V via Cigarette Lighter |
| Dimansyon pwodwi (D x W x H) | 18.8D x 10.8W x 3.5H santimèt |
| Pwa atik | 0.58 Liv (apeprè 263 gram) |
10. Garanti ak sipò
Technaxx products are covered by a manufacturer's warranty. For detailed warranty information, please refer to the warranty card included with your product or visit the official Technaxx website. For technical support, troubleshooting assistance, or service inquiries, please contact Technaxx customer support through their official channels.
Ou ka souvan jwenn plis resous, FAQ, ak enfòmasyon pou kontakte sou Technaxx official websit.